
Box modeling is the closest to sculpting clay out of all of these methods. It can be especially useful when creating organic shapes. It is exactly how it sounds. You start off with a box (a cube of clay, if you will) and pull it, stretch it, add on to it, and take it away to create your shape. Box modeling can be quite complex, but we'll cover the basics here.
Subdivs (called metanurbs in Lightwave) are a simple way of editing shapes. If you've noticed, all shapes in 3D are essentially made of polygons. Polygons are made of straight lines to create shapes in two dimensions, and these shapes are put together into facets to create a 3D object. subdivs divide up these polygons into sub polygons to allow you to work with very complex shapes while not getting confused seeing every polygon and point in a complex object. Confused yet? You won't be by the end of this section.
Starting off, let's create a subdiv cube in Maya (the other software has this feature, but for this chapter, let's stick to Maya). Use the top menus and navigate to Create | Subdiv Primitives | Cube. You should get something that looks like the top-left image of the following screenshot. Great, we've got a cube, but now we need to learn how to edit it. The easiest way is to use polygon tools in Maya on this subdiv. You can do this by entering into the Polygon proxy mode (upper-right image of the following screenshot). This will draw a polygon cage around our subdiv and give us the ability to control many polygons by using only one subdiv (polygon proxy) at a time.

The polygon proxy mode
Extruding and editing are the keys to box modelling. There are a plethora of tools to use (splitting polygons and so on) in box modelling, but extrusion is the basis. Every time you extrude a polygon, you not only add just another face, but also the sides for that face. It's basically like adding another chunk of clay to manipulate.
If you select the faces on the bottom of the lamp and extrude them (without any movement), you'll notice that the bottom of the lamp flattens out. This is because the curves are calculated by polygon proxy density. You've just created another batch of polygons; therefore, the density is higher and the curve is sharper. So, extrusion can be used to make more defined areas, which are pictured on the top-left section of the following screenshot:
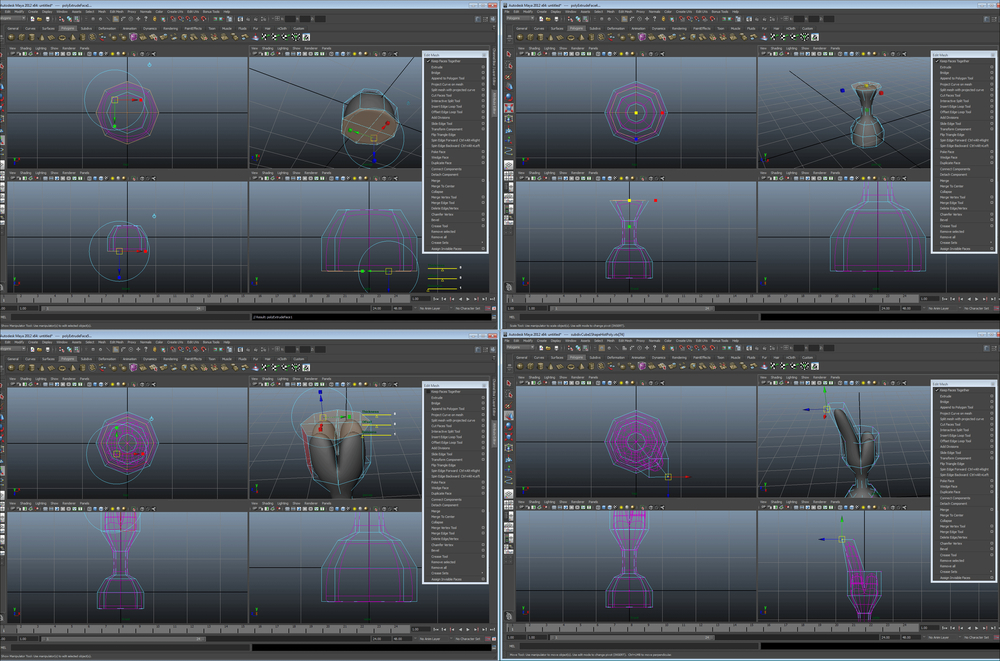
Extruding and editing part 1
If you select the faces on the top of our future lamp and extrude them, you'll see the same flattening effect. Now, move them up. It appears that you've just stretched the top of the lamp. You can size these polygons to create interesting shapes. Move them, rotate them—do anything that your imagination leads you to do (shown in the top-right section of the preceding screenshot).
Now, if you uncheck Keep Faces Together and extrude/move up again, you get a very interesting result. The lamp seems to fork off in four directions (pictured on the bottom-left section of the preceding screenshot). We can alter the points on these forks so that each fork cage has a mostly-square shape, then extrude it again (bottom-right section of the preceding screenshot). Playing around, we can create a lamp with four distinct light posts (top-right section of the following screenshot). Now if we select all four lamp stems again, we can extrude them in unison and finalize the light posts (the top-left and bottom-right sections of the following screenshot). Finally, by editing the points of the cage around the base, we can make it look like the lamp probably won't tip over (bottom-right section of the following screenshot):
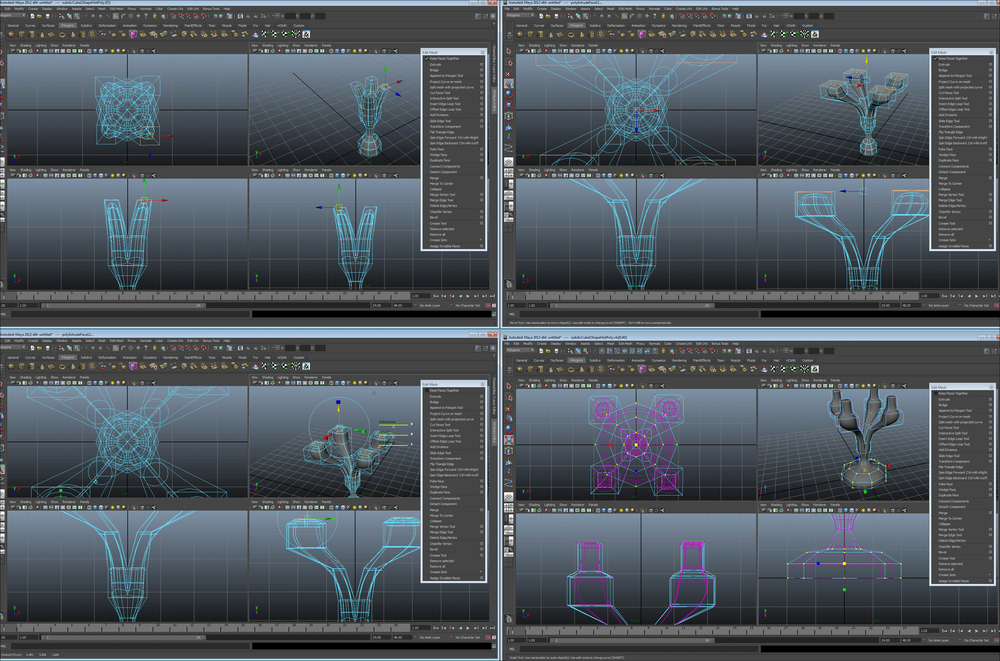
Extruding and editing part 2
We won't need to worry about light bulbs. Element 3D already has plenty of them, plus we'll be able to show you how to incorporate your models with Element 3D models using their bulbs. Congratulations, your first box model geometry is nearly complete! Save this version as Version1; now we move on to version two.
Since we're using Element 3D (not Maya) for the end product, it's important that we avoid as many translation issues as possible. Therefore, let's get this object back into a standard format by freezing all of the subdivs into standard polygons. The first thing to do is get into the Polygon proxy mode (top-left section of the following screenshot), so let's get this object into the standard mode (shown in the top-right of the following screenshot). Perform the following steps (in Maya, this is under Subdiv Surfaces | Standard mode):
- From Modify, we navigate to Convert | Subdivs to Polygons.
- Set the polygon count to
2and convert it (shown at the bottom-left of the following screenshot).
You should end up with something that looks like the bottom-right section of the following screenshot. Now you can see why it's nice to work with subdivs. Can you imagine editing all those polygons? Eek!
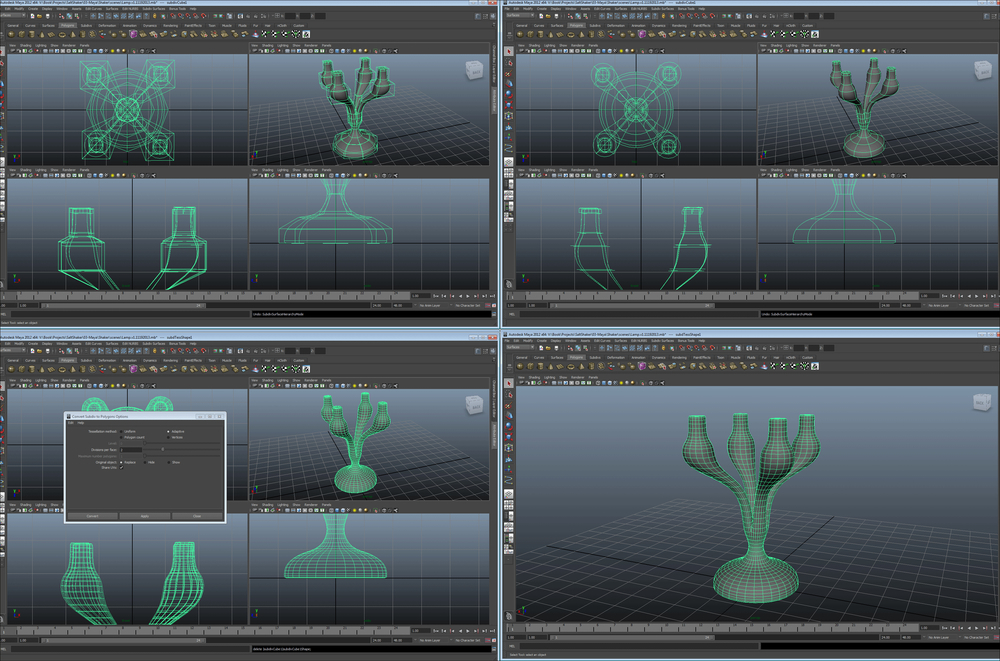
Freezing subdivs to polygons
Now, let's save this as version two of the lamp (just in case we want to edit in polygon proxy mode again later) and move on to the lamp shades. Don't open a new scene; we'll create it here with the lamp.