
We'll set off with quite a simple application, where you can dynamically add tasks to a list and then gradually extend it with more complex functionality, while showing the most common AngularDart features.
We'll keep the HTML code very simple:
<!-- web/index.html -->
<html ng-app>
<body>
  <todo-list></todo-list>

  <script type="application/dart" src="main.dart"></script>
  <script src="packages/browser/dart.js"></script>
</body>
</html>
Note the ng-app directive inside the <html> tag. This tells AngularDart that everything inside this DOM tree is controlled by Angular. In practice, this means that you shouldn't modify the DOM tree by yourself and leave all DOM manipulations to Angular; otherwise, this might cause unpredictable behavior. Also, we're including the Web Components polyfill that we already know from the previous chapter. You can probably guess that AngularDart is going to use Web Components.
Now, we define <todo-list> custom element. Right now, it's going be just a single Dart class:
// lib/component/todo_list.dart
import 'package:angular/angular.dart';

// Mark class as Component with annotation.
@Component(
    selector: 'todo-list', // CSS selector for this component
    template: """
      <h1>{{ title }}</h1>
      <ul>
        <li ng-repeat="task in tasks">{{ task }}</li>
      </ul>
    """ // Multiline string as a template.
)
class TodoListComponent {
  String title = "My Todo list";

  // Default tasks.
  List<String> tasks = [
    "Buy more cat food",
    "Feed the cat",
    "Do the laundry",
  ];
}
There are already a few interesting parts. @Component is an annotation that tells AngularDart that this class has a special meaning. It offers a few possible options:
selector: This tells AngularDart how to find elements that are going to be replaced by this component. Note that the selector is a CSS expression. This means that you can select an element just as in CSS, for example,#my-elementor.my-element: although it's recommended that you use element names as selectors.templateortemplateUrl: As our component is very simple, we can just include the template as a string, which is okay when it's relatively short. With larger HTML templates, it's much easier to read and maintain code in a separate HTML file. We'll do this in a moment.cssUrl: Every component is encapsulated in a Shadow DOM, so the CSS from the parent document doesn't apply to its elements. Therefore, you can provide your component with a custom CSS file. We already saw this in the previous chapter, when we talked about Web Components and polymer.dart.useShadowDom: By default, AngularDart encapsulates each component with the Shadow DOM, which is usually fine, but if you know that this particular component is going to be used many times on your page, you might want to disable creating the Shadow DOM for each of them for performance reasons (encapsulation is then emulated by AngularDart).exportExpressions: More on this will be covered later in this chapter.
Let's take a better look at the template:
<h1>{{ title }}</h1>
<ul>
  <li ng-repeat="task in tasks">{{ task }}</li>
</ul>
AngularDart uses double curly braces, aka mustache syntax {{ expression }} (just like polymer.dart), to interpolate results of expressions in a Dart-like syntax. It has two limitations:
- No flow control statements are allowed. This means that there are no ifs or loops; only ternary operators are allowed:
(boolExpr ? yesExpp : noExpr). Expressions can contain the+sign to concatenate strings. For example,{{ "Hello" + "World" }}will printHelloWorld. - When dereferencing objects such as
my.object.property, any of them in the chain can be null and Dart won't throw any exception.
In our template, we call {{ title }}, which prints the current content of TodoListComponent.title. The {{ title }} expression is automatically watched by Angular for changes, so if you modify title on the run, it will be immediately re-rendered in the template (AngularDart is using two-way data binding similarly to what we've already used in polymer.dart).
Angular built-in ng-* directives allow you to alter the element's behavior in some way. In this template, we have only one:
ng-repeat: This iterates all elements, such as "item in collection" and clones the parent element for each item in the collection. In our example, all items in the task list are instances of Dart's string, so we can just print them. We'll come back to this directive later.
The last thing is main.dart, which just connects all parts together:
// web/main.dart
import 'package:angular/angular.dart';
import 'package:angular/application_factory.dart';
// We're expecting that our component is
// reusable across many applications.
import 'package:todo_list/component/todo_list.dart';

class MyAppModule extends Module {
  MyAppModule() {
    // Enable our component in this app.
    bind(TodoListComponent);
  }
}

void main() {
  // Bootstrap code for AngularDart.
  applicationFactory()
      // Add our module among default AngularDart modules.
      .addModule(new MyAppModule())
      .run();
}
Note that we're importing todo_list.dart like any other package (our app is a package too) because we're expecting that our component is going to be reusable and independent on this application. The same applied to polymer.dart in the previous chapter.
AngularDart uses the dependency injection pattern under the hood, which means that it only instantiates classes that you actually use in your code (thus saving resources), and allows you to reuse components and modules that have dependencies by themselves, without you worrying about the order of imports. Our application is a single module with just one component.
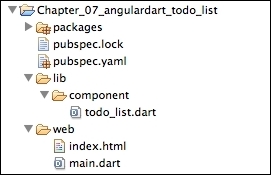
The directory structure for this app should look like this:
When you run this application in the browser, you'll see:
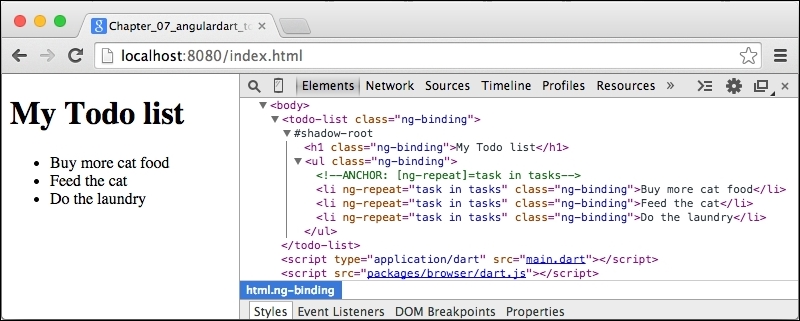
AngularDart created the Shadow DOM for our custom element, filled it with the template, and cloned <li> elements for each item in the TodoListComponent.tasks list.
At the beginning of this chapter, we said that AngularDart is based on MVC. Let's see how each part of MVC is represented in our application:
- Component: As our app is very simple, we have only the
TodoListComponent. But it's a standalone component that has its own template and its own logic independent on the application using it. - View: Our view is our template with interpolated variables from the model.
- Model: We have two model variables in this example,
titleandtasks. In the Angular world, all model variables exist in a scope.
In Angular, a scope is a context that evaluates expressions. You can imagine it as a scope in JavaScript that keeps track of expressions and watches for changes. Scopes can be nested, usually with a similar structure, such as your DOM tree where the root scope is defined by the ng-app directive.
When you trigger an Angular event (such as ng-click or ng-input, which we'll show later), Angular first runs your handler and then checks the current values of all watched expressions with their previous values. If they're different, it automatically interpolates new values in views or triggers another handlers (this can cause an infinite loop when used improperly).
Some Angular directives such as ng-repeat or ng-if create child scopes for their subtrees, which might cause performance bottlenecks when used too much. We will talk about some performance optimization tips at the end of this chapter.
In our app, the scope is filled by AngularDart automatically and watches "title", "task in tasks", and "task" expressions. This means that if you alter the tasks list, it will automatically recreate the DOM structure inside the <ul> element.
Now we'll extend this application with more ng-* directives, put templates into separate HTML files, and add simple routing.