
You can also communicate with the Galileo via Wireless LAN. To do this, you'll need some additional hardware. The first piece of hardware you'll need is a mini PCI wireless device. The basic Galileo Poky operating system supports two devices: the Intel® Centrino® Wireless-N 135 and Intel® Centrino® Advanced-N 6205 adapters. If you don't want to compile your own drivers, you should purchase one of these two devices.
Note
If you wish to purchase a different mini PCI wireless device, see http://www.malinov.com/Home/sergey-s-blog/intelgalileo-addingwifi for how to compile drivers for your device.
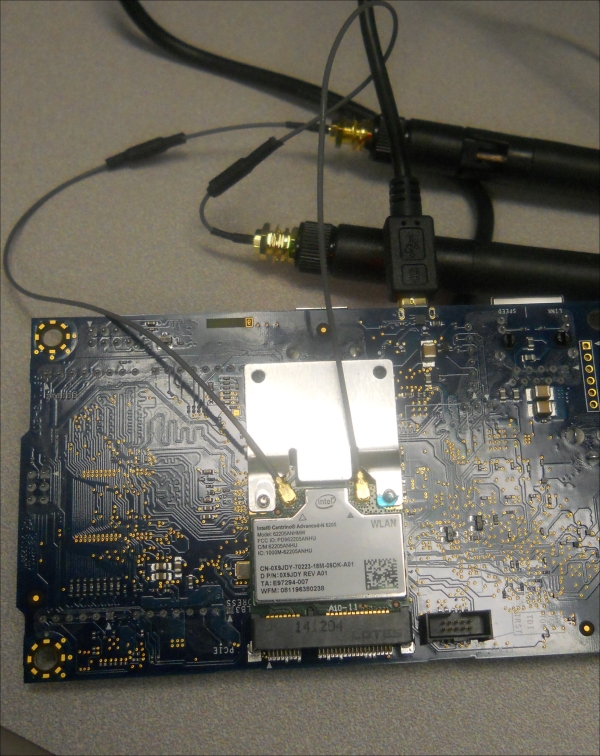
You'll also need some cables and antennas. You'll need two 6dBi RPSMA antennas and two 8-inch UFL cables. There are kits available, for example at http://www.amazon.com/gp/product/B00DP64JRG. Also useful is a Half to Full Height Mini PCI Express (PCI-E) Card Bracket Adapter, this makes the wireless card easier to install. Once you've gathered all the hardware, install the card into the Galileo. It is straightforward but, if you get confused, follow the instructions at http://ionospherics.com/intel-galileo-setting-up-wifi/ to install all the hardware into the Galileo. Here is what it should look like:
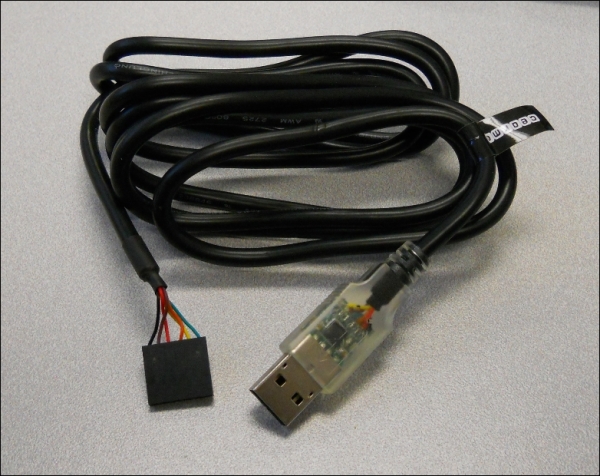
Once you have the wireless hardware setup, you'll also need a cable to establish a terminal connection to the Linux operating system on your device. For the Intel Galileo Gen2 board, the cable you will need is a USB connector on one end and a FDTI 6 pin connector on the other. These are available at most online electronics stores:
If you are using the Galileo Gen1 board, this is 3.5mm to USB cable. Plug this cable into the terminal port on the Galileo, and the USB connector on your host computer.
Now that you have all the hardware, here are the steps to get your Galileo up and connected to Wi-Fi:
- First, you'll need a new version of the Linux operating system for your Galileo. To get this go to http://www.intel.com/content/www/us/en/do-it-yourself/downloads-and-documentation.html#galileo software and select Download SD-Card Linux Image for Intel Galileo (48 MB, .bz2). This will download a
.tarfile (an archived file) with the support for your wireless connection. - You'll need to un-archive this file using an archive utility such as 7-Zip.
- Now copy all the files under the SDCard directory onto a micro SD card.
- You'll need a terminal window to interact with your Galileo. If you are using Windows, you'll need a terminal emulator window to communicate with the Galileo. One popular, free version is called Putty. For more information on Putty and how to download, see http://www.chiark.greenend.org.uk/~sgtatham/putty/. However, any terminal emulator program will do. Both Linux and the Apple OS come with terminal emulator programs.
- Open a terminal window and select the serial port that is connected to the USB to the FTDI connector using a baud rate of 115200. Every time the Galileo boots, it will look for an image on the SD card and boot that image if it is present. If it is not present, it will boot the Poky version that is in the internal memory. The terminal window will allow you to select between the two. You'll now want to boot the unit using the micro SD card and the new version of the Galileo operating system by installing the card and applying power. You should see this boot up screen:
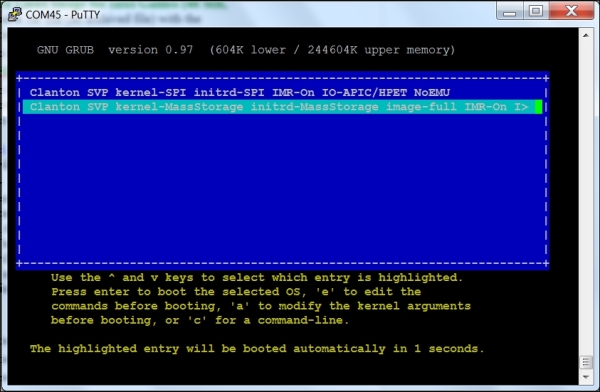
If not already highlighted, select the second choice here to boot from the card.
- Now log in to the system using root as the user.
- Type
ifconfig –a. This should show all LAN interfaces, and should look like this: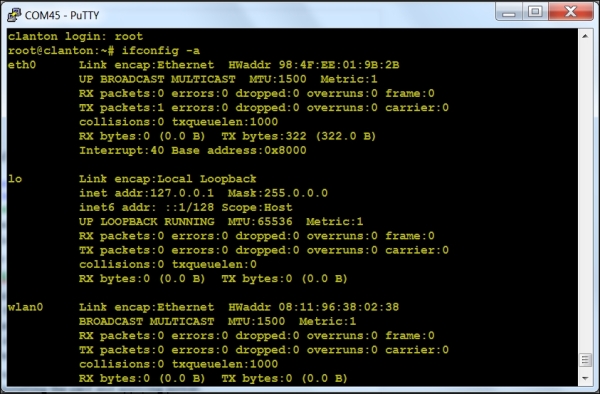
You can see the wlan0 interface that is now available to connect to your Wi-Fi network. However, there is no address assigned; as you can see, there is no
inet addr:line in the wlan0 section. You can use the IDE to connect to your network, this will be shown in the next section. - You will need to edit one more file to ensure access to the Wi-Fi connection each time you boot your Galileo. The file is
/etc/networks/config. Edit this file usingvi(vi is the editor that comes on this Linux release.) Addauto wlan0as the last line. - Reboot your system, as before. Log-in using root as the user.
Now that the hardware is connected, you can access the wireless capabilities inside the IDE.