
Many web applications use third-party authentication for registering and logging in. In particular, using popular social media sites such as Facebook and Twitter to authenticate users has become very popular. Since these sites have already done some work to validate users, sites using them to authenticate users save a some time.
In this chapter, we are going to set up Passport strategies to sign up and authenticate users using their Facebook and Twitter accounts. We're going to be using a popular protocol called OAuth 2.
Additionally, we're going to finish building out the functionality for users to create and share gift lists. In this chapter, we will cover the following:
- Authenticating users with Facebook
- Authenticating users with Twitter
- Handling gift list creation in the dashboard
- Adding share buttons
We are going to begin integration with social media by allowing users to create accounts and log in using their Facebook accounts. The first things we need to do are to set up a Facebook developer account and build a Facebook app.
In order to authenticate users using Facebook, you have to have a Facebook app. Fortunately, Facebook makes setting this up really easy.
If you do not have a Facebook developer account, head over to https://developers.facebook.com/ right now and sign up for a developer account. Just follow the instructions and agree to the terms of service. Next, we need to set up an app. From the developers' dashboard, select Add New App from the My Apps dropdown. You'll get a modal window that looks like the following screenshot:
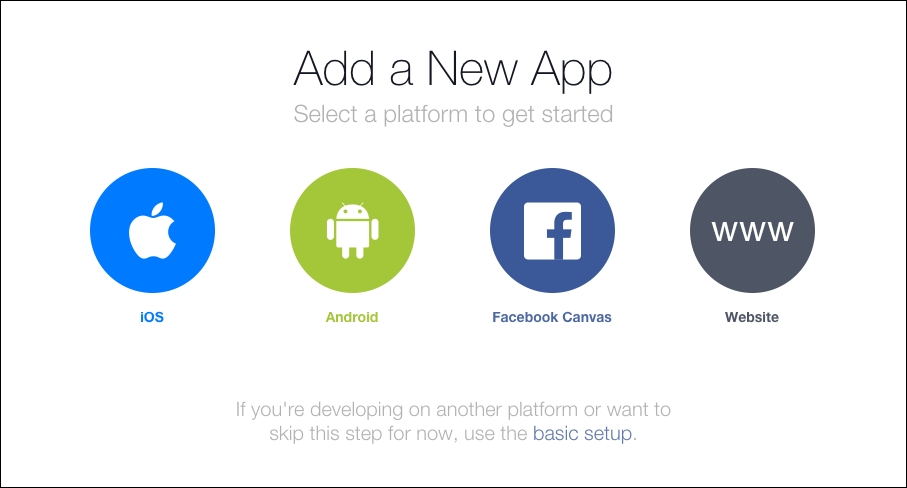
Select Website:

Give your new app a name and select Create New Facebook App ID:

Choose a category for your new app (any one will do, really). Make sure to leave off the selection for Is this a test version of another app? Then click Create App ID:

From here, I suggest you select Skip Quick Start and we'll set up your application manually. On the next screen, select Settings:
You'll need to enter your e-mail address here and click Save Changes. Next, click on App Review:

Select Yes for Do you want to make this app and all its live features available to the general public? Next, go back to your dashboard:

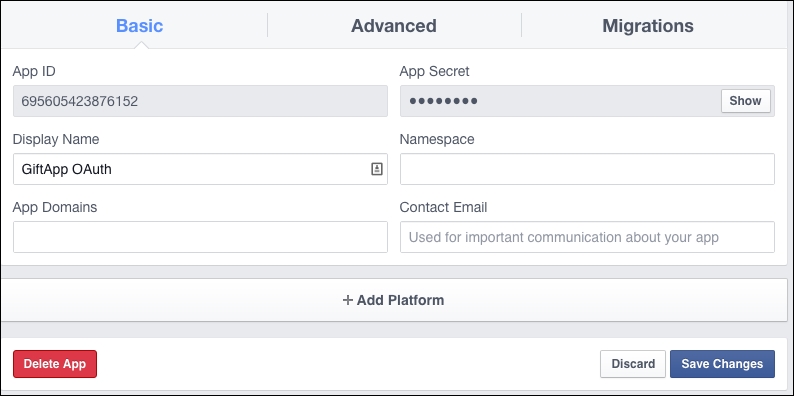
You're going to need your App ID and App Secret values. Facebook will force you to enter your password to show your App Secret.
App Secret is exactly that - secret. You should protect it and not do anything like check it into public source control.
The next thing we need to do is to set up the strategy in Passport. Open up your terminal and navigate to your giftapp root directory:
$ npm install passport-facebook --save
[email protected] node_modules/passport-facebook
    |__ [email protected] ([email protected], [email protected], [email protected])
Here, we've installed the Passport Facebook module, which allows us to log in with Facebook using OAuth 2.
Note
OAuth is an open protocol to allow secure authorization in a simple and standard method from web, mobile and desktop applications. You can find more information about OAuth 2, the latest version of the protocol, at http://oauth.net/2/.
Now we need to set up our strategy. Inside your giftapp directory, make a new directory called config, and add a new file called authorization.js:
module.exports = {
    facebookAuth : {
        clientID: '695605423876152', // App ID
        clientSecret: 'd8591aa38e06a07b040f20569a', // App secret
        callbackURL: 'http://localhost:3000/login/FBcallback'
    }
}
We just stash an object with a few values we're going to need later. The clientID is our App ID. The clientSecret is our App Secret (no, that isn't my real secret). The last value is our callBackURL. This is a URL that Facebook will redirect to on authorization.
If you are using a Git repository to store your source code, it would be a good idea to add this config file to your .gitignore file.
The next thing we need to do is to set up a couple of routes. In your routes directory, open up your routes file, login.js:
var express = require('express');s
var router = express.Router();


module.exports = function(passport){


    router.get('/', function(req, res) {
        res.render('login/login', { message: req.flash('message'), csrfToken:
        req.csrfToken() });
    });


    router.post('/', passport.authenticate('login', {
        successRedirect: '/dash',
        failureRedirect: '/login',
        failureFlash : true
    }));


    router.get('/signup', function(req, res){
        console.log('signing up');
        res.render('login/signup',{message: req.flash('message'), csrfToken:
        req.csrfToken()});
    });


    router.post('/register', passport.authenticate('signup', {
        successRedirect: '/dash',
        failureRedirect: '/login/signup',
        failureFlash : true
    }));

    router.get('/signout', function(req, res) {
        req.logout();
        res.redirect('/login');
    });

    router.get('/facebook', passport.authenticate('facebook', scope:['emails']));

    router.get('/FBcallback',
        passport.authenticate('facebook',
 {
successRedirect: '/dash',
            failureRedirect: '/login' }));

    return router;
}
The first new route is going to be used to log in using Facebook. The callback URL is used after authentication. On failure, the user is redirected to login. On success, the user is sent to the dashboard.
Note that the second argument to the call to passport.authenticate on the facebook route. This object contains a scope property, which takes an array. That array consists of strings for data fields for which Facebook requires extra permissions to access. Facebook requires extra permissions to access a user's e-mail address.
Now we have a few more steps to set up the strategy. In your Passport directory, create a new file called facebook.js:
var FacebookStrategy = require('passport-facebook').Strategy;
var User = require('../models/user');
var auth = require('../config/authorization');

module.exports = function(passport){

    passport.use('facebook', new FacebookStrategy({
            clientID: auth.facebookAuth.clientID,
            clientSecret: auth.facebookAuth.clientSecret,
            callbackURL: auth.facebookAuth.callbackURL,
            profileFields: ['id', 'displayName', 'email']
        },
        function(accessToken, refreshToken, profile, cb) {
            User.findOne({ 'facebook.id': profile.id }, function (err, user) {
                if(err){
                    return cb(err)
                } else if (user) {
                    return cb(null, user);
                } else {
                    var newUser = new User();
                    newUser.facebook.id = profile.id;
                    newUser.facebook.token = accessToken;
                    newUser.facebook.name = profile.displayName;
                    if(profile.emails){
                        newUser.email = profile.emails[0].value;
                    }

                    newUser.save(function(err){
                        if(err){
                            throw err;
                        }else{
                            return cb(null, newUser);
                        }
                    });
                }
            });
        }
    ));
}
We begin by requiring our dependencies, including the Strategy object provided by the passport-facebook module, our User model, and our authorization configuration file containing our Facebook credentials.
We then create a module that defines our Facebook authentication strategy. It receives a configuration object as its first argument, which we define using the facebook authorization values from our configuration file. The final property, profileFields, sets the fields we're expecting to receive in the profile object we get back from Facebook.
The second argument is a function that gets called when the authorization strategy is used. It receives an accessToken, refreshToken, profile, and callback as arguments from Facebook.
We use the User's findOne function to see if the user already exists based on the profile.id returned from Facebook. We first check to see if there's an error. If there is, we return it to the callback. If there's no error and the user exists, the user object is passed back to the callback with a null in the error field. Finally, if the user doesn't already exist, we create a new user, save that user to the database, then pass the new user object back to the callback.
Note that we will not always get e-mails back from Facebook, so we need to test to see if we get that property back on profile before we try to access it.
Remember that if you want to delete your users collection you can use the Mongo console. Enter use giftapp to select the database, then db.users.drop() to drop the collection.
Let's make some changes to our User model. Our Facebook authorization will give us some data that we weren't getting before, and there's some stuff we need to store. Open up your user.js file in your models directory and edit the following:
var mongoose = require('mongoose');

var userSchema = mongoose.Schema({
    id: String,
    email: String,
    username: String,
    password: String,
    firstName: String,
    lastName: String,

    facebook: {

        id: String,
        token: String
    }

});
module.exports = mongoose.model('User',userSchema);
Here, we're going to use the mongoose.Schema function to start to build out our schema. We've added a Facebook object to the user which stores an ID, and a token. Note that this new ID is provided by Facebook and is different from the ID at the top level of the User object.
The token is a unique id that Facebook provides on an application-by-application basis. We need to store this for authentication to work correctly.
We are almost good to go. We have just a couple more steps to do to complete the work for authenticating and signing up with Facebook.
Let's make life a little easier on ourselves and rewrite our index.ejs file inside our views directory:
<!DOCTYPE html>
<html>
  <head>
    <title><%= title %></title>
    <meta name="viewport" content="width=device-width, initial-scale=1">

    <link rel="stylesheet" href="https://maxcdn.bootstrapcdn.com/bootstrap/3.3.6/css/bootstrap.min.css">
    <link rel="stylesheet" href="https://maxcdn.bootstrapcdn.com/bootstrap/3.3.6/css/bootstrap-theme.min.css">

  </head>
  <body>
    <div class="container">
      <div class="jumbotron">
        <h1 class="text-center">Welcome to Giftapp</h1>
        <hr>
        <p class="text-center">
          <a class="btn btn-default btn-lg" href="/login/" role="button">Log in</a>
          <a class="btn btn-default btn-lg" href="/login/signup" role="button">Sign Up</a>
          <a class="btn btn-primary btn-lg" href="/login/facebook" role="button">Log in or sign up with Facebook</a>
        </p>
      </div>
    </div>
  </body>
</html>
Here, we've created a simple welcome page using the Bootstrap jumbotron. We have three buttons, which are actually links styled as buttons: one for login, one for signup, and one for Facebook signup/login.
The page, at http://localhost:3000, will look like the following:

You can test out the buttons. Unfortunately, clicking on our Facebook button gets you an error:
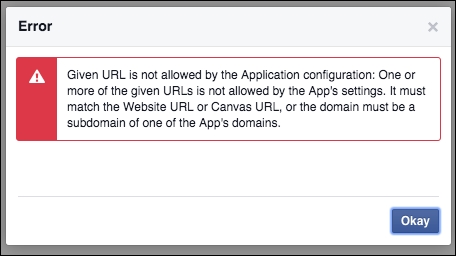
This is because we have to specifically enable URLs inside our Facebook app. Facebook enforces this security measure. Not a problem for us. Go back to Settings on your Facebook app dashboard:

Once in here, click on + Add Platform and select Website. Enter http://localhost in the URL field. Now you should be able to register and authenticate with Facebook.
One thing you may want to implement on your own is checking to see if a user already exists in the database by checking any e-mail address returned by Facebook against user e-mails already in the database. This will help to avoid duplicate accounts.