
Compute capability provides Bluemix users with infrastructure resources with which they can deploy and run their applications. There are different flavors of compute supported on Bluemix. At the time of writing, the different compute options available are:
- Cloud Foundry applications (also referred to as instant runtimes)
- Containers (based on Docker)
- Virtual servers (based on Open Stack APIs)
- OpenWhisk (for event-based applications)
When you log in to Bluemix, and select the Compute option, you will see the different compute options available on Bluemix, as shown in the following screenshot:

In this chapter, we will learn more about these compute options. Let's start with Cloud Foundry applications.
As explained in earlier chapters, Bluemix is a Cloud Foundry-based platform as a service offering, which means that its application infrastructure and automation is enabled by the Cloud Foundry project.
In earlier chapters, we have seen how to work with Cloud Foundry-based applications on Bluemix, we have also seen how we can work with cf cli or Bluemix UI to create Cloud Foundry-based apps and deploy them on Bluemix. In this chapter, we will look at yet another way to work with Cloud Foundry-based applications.
In this section, we will learn to use eclipse IDE for the development of apps and see how the Bluemix plugin for eclipse facilitates for a seamless and easy integration with your public Bluemix account.
The minimum version of eclipse required for the plugin is eclipse Luna (4.4.1) and above.
Tip
Refer to the plugin details at https://marketplace.eclipse.org/content/ibm-eclipse-tools-bluemix .
Perform the following steps for plugin installation:
- Having installed the supported version of Eclipse, open the Eclipse editor.
- Go to Help | Eclipse Marketplace.
- Enter
Bluemixin the Find field and click on Go. - You will see the available plugins, as shown in the following screenshot.
- Click Install on the plugin highlighted in the following screenshot:

- Ensure the default options are left selected, as shown in the following screenshot:
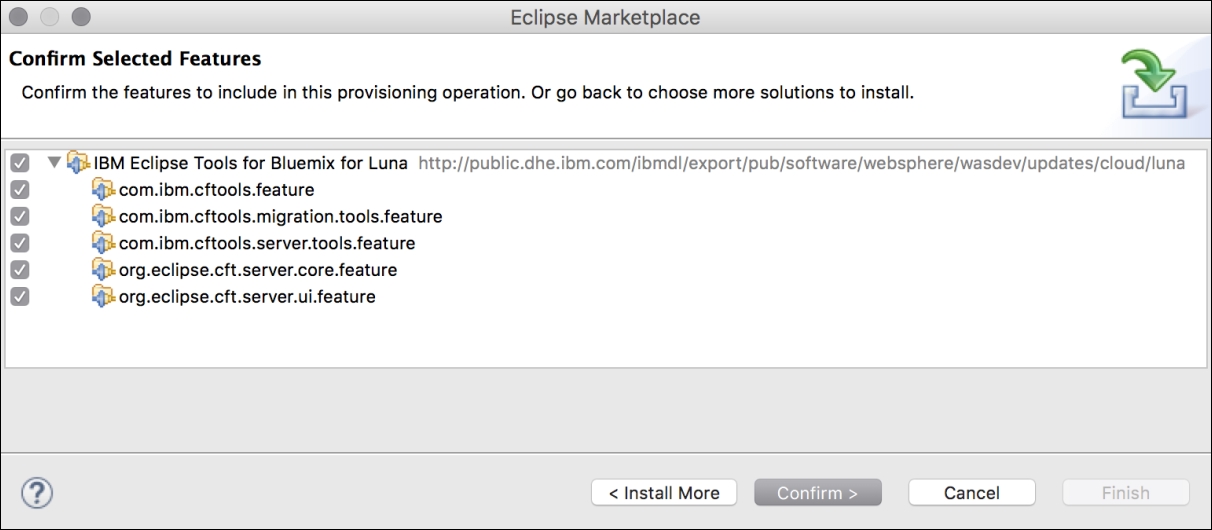
- Review the license terms and select I accept the terms of the license agreements.
- Click Finish to start the plugin installation.
- Once the plugin installation is completed, you will be shown a prompt to restart Eclipse to complete the installation; select Yes to restart Eclipse.
Now let us configure Bluemix as a server that you can use directly from your Eclipse, which is made possible by the plugin that you have just installed:
- In Eclipse, open Servers View.
- To create a new server, right-click in Servers View and select New | Server.
- For the server type, expand IBM and select IBM Bluemix in the server creation wizard, as shown in the following screenshot:

- You will now be prompted to enter the credentials to connect to your public Bluemix account, as shown in the following screenshot:

- Click Validate Account to connect to your Bluemix account using the credentials and information you have provided. Once the account is validated, you will see a list of your spaces and organizations in Bluemix, as shown in the following screenshot. You can select the space you want to configure Eclipse to work with:

You will now see a new server configuration created, which you can use to deploy and manage Cloud Foundry-based apps that you develop on your Eclipse editor locally:

Now let us look at an example application development experience from Eclipse and use the Eclipse plugin to update the application on Bluemix. I will first create a Cloud Foundry app from the Bluemix dashboard as explained in earlier chapters. I will then download this app and show you an example update to the application and its redeployment to Bluemix, using the Bluemix Eclipse plugin:
- Create the Cloud Foundry app from the Bluemix dashboard, using Java Cloudant Web Starter, which is a boilerplate:

- Once the app is created, go to the Getting Started page, as shown in the following screenshot:

- Click Download Starter Code, as shown in the following screenshot:

The application used in this demo is downloaded as B05307-07-01-eclipse.zip, you will get the application archive named based on the name of the application you provide at the time of creating it in Bluemix.
In order to import the Cloud Foundry application, you have to follow these steps:
- Go to Eclipse and click File | Import.
- From the Import wizard, select the option General | Existing Projects into Workspace, as follows:
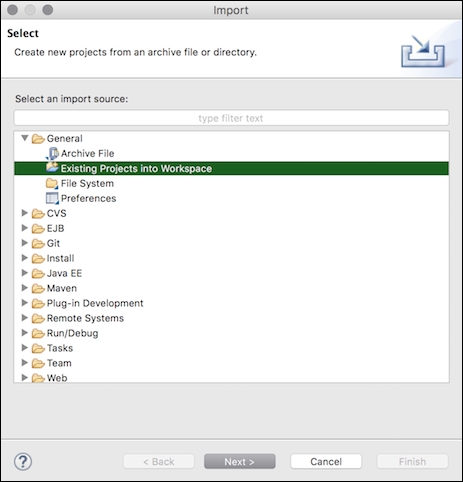
- Click Next.
- In the subsequent screen, select the option Select archive file.
- Click Browse to provide the path of the downloaded app archive location, which is the path to
B05307-07-01-eclipse.zipin this example:
- Click Finish to complete the import of the application files to Eclipse.
In your Java or JEE perspective of Eclipse, you will now see the new project, JavaCloudantApp, created as follows:

This is a sample Java web application that uses Cloudant NoSQL database as its backend. The Cloudant NoSQL database configured in this application is a service on Bluemix. You will see the service instance created in your Bluemix dashboard, when you created the application.
Note
If you are using your own application, then some of the things that would be different from the example used here would be the services or supporting software, such as the databases that your application is designed to use. If your application uses such vendor provided supporting software, then it is recommended that you figure out whether they are supported as a service on Bluemix. If not, then you will need to program your application with their equivalents, before you can use Eclipse to push your local application to deploy on Bluemix.
You will also see a manifest.yml file, which is the one used by Cloud Foundry during deployment.
The content of the manifest.yml file for this application is as follows:

If you intend to use any other services on Bluemix while updating or modifying your application in Eclipse, make sure that you update the services section in your manifest.yml file to add the names of your services that the application uses.
You can modify the application to your liking based on what you would want the application to do. For explaining the process, we will make a minor update to the application UI and carry out a local build, and then we shall redeploy the application to Bluemix, using the plugin so that the update is available on your hosted application.
If you go to the existing application route, which is
http://b05307-07-01-eclipse.mybluemix.net/
in the case of this sample demo, you will see the following UI:

Now let us make a UI update to change the image on the ADD button. We will also change the hover text on that button, which is currently showing Add record, to Add file category:
- Choose an image file that you want to use instead of the ADD button.
- Copy that image file to the
imagesfolder in Eclipse, as shown in the next screenshot. Theadd_file.pngfile is my new image file in this example. - Open
index.htmland make the edits, as shown in the following screenshot:

Now we need to run the build locally for the changes to be built into the deployable archive, which is JavaCloudantApp.war in this case. You can delete the existing file before building the app with changes, so that you will know that your changes are built when this file is recreated:
- Delete the existing
JavaCloudantApp.wararchive, highlighted in the following screenshot:
- Right-click on build.xml, and select Run As | Ant Build to build the application with your changes:

- Once the build is completed, you will see the
JavaCloudantApp.wararchive created, as shown in the following screenshot:
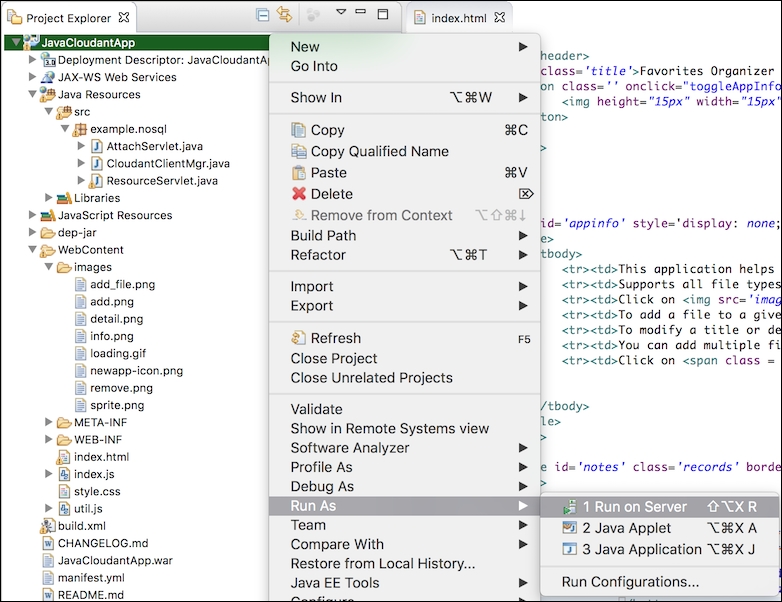
The deployment of updates involves the following steps:
- Right-click on the project in eclipse and click Run As | Run on Server:
- In the wizard dialog, you can choose the existing server configuration, which was created earlier in this chapter for dev space in your Bluemix account.
Tip
If you want to deploy the application in any other space on Bluemix, or another organization or region, you can do so by choosing the Manually define a new server option. You need to ensure that the Bluemix services, your application is dependent on, are configured in the space you are planning to deploy in.
- We will choose the existing server, as we are updating the application that already exists in the Bluemix space. This is the Space on Bluemix where the configured server will deploy your application, using the Bluemix Eclipse plugin:

- Click Next and your application will be selected to be configured on the server, as shown in the following screenshot:

- Click Finish. This will open the application details dialog, which allows you to define how you would like your application to be deployed on Bluemix.
- You can provide a new name to the application here and have it saved to your
manifest.ymlfile locally. In this case, since we are only updating an existing application, we will leave the default values for the Name field:
- Click Next. Deployment details can be changed in the subsequent dialog. However, for this example, we shall retain the defaults for this application deployment:

- Click Next.
- In the subsequent window, you will be able to configure additional Bluemix services that are available in the Bluemix space that you are deploying your application to. By default, the service that is specified in your
manifest.ymlfile is pre-selected, as shown in the following screenshot:
- Click Next.
- If your application uses any environment variables, you can define them in the subsequent dialog. For this example, we do not have any environment variables to define:

- Click Finish to start the deployment process. You can see the deployment logs in the Eclipse console, as shown in the following screenshot:

When the updated application URL is launched directly from the Bluemix dashboard or in the Eclipse web browser, you will see your updates to the application reflected as follows:

So you have now learned how to work with Eclipse as your local IDE and use your Bluemix account to deploy or host your applications, using the Eclipse Bluemix plugin.