
According to a reliable dictionary, a newsletter is a bulletin issued periodically to the members of a society, business, or organization.
In this chapter, we will be building an e-mail newsletter, that allows members to subscribe and unsubscribe, receive updates on certain categories, and also allows a marketer to check how many people visited a certain link.
We'll be building an authentication system for our users to log in and log out of the newsletter management system, which is a social login system for subscribed members to easily check their subscriptions, and simple dashboards for subscribers and administrators.
In this chapter, we will implement a new authentication system in order to allow administrators of the newsletter to be authenticated. Since PHP5, PHP has improved and added a feature that object-oriented developers have used to separate namespaces.
Let's start by defining a namespace named Newsletter as follows:
<?php
namespace Newsletter;
//this must always be in every class that will use namespaces
class Authentication {
}
?>
In the preceding example, our Newsletter namespace will have an Authentication class. When other classes or PHP scripts need to use Newsletter's Authentication class, they can simple declare it using the following code:
Use NewsletterAuthentication;
Inside our Newsletter class, let's create a simple check for the user using bcrypt, which is a popular and secure way of creating and storing hashed passwords.
Our class will be fairly simple-it will have one function used to verify if an e-mail address, and the hashed password that was entered is the same as the one in the database. We have to create a simple class that has only one method, verify(), which accepts the e-mail and the password of the user. We will use bcrypt to verify that the hashed password is the same as the one in our database:
Class Authorization {
     public function verify($email, $password) {
         //check for the $email and password encrypted with bcrypt
         $bcrypt_options = [
            'cost' => 12,
            'salt' => 'secret'
         ];
         $password_hash = password_hash($password, PASSWORD_BCRYPT, $bcrypt_options);
         $q= "SELECT * FROM users WHERE email = '". $email. "' AND password = '".$password_hash. "'";
         if($result = $this->db->query($q)) {
                     while ($obj = results->fetch_object()) {
                           $user_id = $obj->id;
}

         } else {
   $user_id = null;
}
         $result->close();
         $this->db->close();
         return $user_id;

    }
}
We, however, need to get the DB class to be able to do a simple query with our database. For this simple one-off project, we can simply use the concept of dependency injection in our Authentication class.
We should create a fairly trivial IOC container class, which allows us to instantiate the database along with it.
Let's call it DbContainer, which allows us to connect a class, such as Authentication, to the DB class:
Namespace Newsletter;
use DB;
Class DbContainer {
   Public function getDBConnection($dbConnDetails) {
   //connect to database here:
    $DB = new DB($server, $username, $password, $dbname);
       return $DB;
  }
}
However, if you use this function right away, an error will state that the file could not find and will load the DB class.
Previously, we used the use system of requiring classes. In order for this to work, we need to create an autoloader function to load our DB class without having to use require statements.
In PHP, there is the spl_autoload_register function we can create, which will take care of requiring the files needed automatically.
Following is the example implementation based on the example that can be found in the PHP manual:
<?php
/**
 * After registering this autoload function with SPL, the following line
 * would cause the function to attempt to load the NewsletterQux class
 * from /path/to/project/src/Newsletter/Qux.php:
 *
 *      new NewsletterQux;
 *
 * @param string $class The fully-qualified class name.
 * @return void
 */
spl_autoload_register(function ($class) {
    // project-specific namespace prefix
    $prefix = 'Newsletter';
    // base directory for the namespace prefix
    $base_dir = __DIR__ . '/src/';
    // does the class use the namespace prefix?
    $len = strlen($prefix);
    if (strncmp($prefix, $class, $len) !== 0) {
        // no, move to the next registered autoloader
        return;
    }
    // get the relative class name
    $relative_class = substr($class, $len);
    // replace the namespace prefix with the base directory,               //replace namespace
    // separators with directory separators in the relative class      //name, append
    // with .php
    $file = $base_dir . str_replace('', '/', $relative_class) . '.php';
    // if the file exists, require it
    if (file_exists($file)) {
        require $file;
    }
});
With the preceding code, we would now need to create a src directory and use this separator \ convention in separating the folder structure within your application.
Using this example means we'll need to put the database class file DB.class.php inside the src folder and rename the filename to just DB.php.
This was done so that when you specify that you want to use DB class in another PHP script, PHP will simply perform a require src/DB.php behind the scenes automatically.
Continuing with our example DbContainer, we'll need to somehow pass all our configuration information (that is, name of the database, username, and password to the MySQL database) inside the DbContainer.
Let's simply create a file dbconfig.php that has the database details and returns it as an object, and require it:
//sample dbconfig.php
return array('server' => 'localhost',
  'username' => 'root',
  'password => '',
  'dbname' => 'newsletterdb'
);
In our DbContainer class, let's create a loadConfig() function that reads from the dbconfig.php file and instantiates a database connection:
Class DbContainer {
public function  loadConfig ($filePath) {

   if($filePath) {
     $config = require($filePath);
     return $config; //contains the array
   }

}
Now we need to create a connect() method, which will enable us to simply connect to a MySQL database and only return the connection:
Class DB {
 //...
public function connect($server, $username, $password, $dbname) {
   $this->connection = new MySQLI($server, $username, $password, $dbname);
     return $this->connection;
}
}
We made our function flexible by not hard-coding the filename into our function. When calling loadConfig(), we need to put the path to the config file to load.
We also use the $this keyword so that any time we need to refer to other functions within the DB class, we just have to call $DB->nameOfMethod(someParams) after the autoloader loads and instantiates the DB class automatically when you call $DB = new DB().
With this, we now have the flexibility to easily change the config file's path in case we move the config file to other paths, for example, to a folder that is not directly accessible through the Web.
Then, we can easily use this function and generate a database instance in a separate class, for example, in our Newsletter class, we can now make a reference to an instance of the DB class connection and instantiate it within the Newsletter class.
Now that we're done with this, we should simply create a Bootstrap file that loads the spl_autoload_register function and the connection to the database using the dbContainer all together. Let's name the file bootstrap.php, and it should contain the following:
require('spl_autoloader_function.php');

$dbContainer = new DBContainer; //loads our DB from src folder, using the spl_autoload_functionabove.

$dbConfig = $db->getConfig('dbconfig.php');

$dbContainer = getDB($dbConfig); //now contains the array of database configuration details
The next step is to connect to the database with the following code:
$DB = new DB;
$DBConn = $DB->connect($dbContainer['server'],$dbContainer['username'],$dbContainer['password'],$dbContainer['dbname']);
After we've all connected to the database, we need to rewrite our authorization query to use the new initialized classes.
Let's create a simple select_where method in our DB class and then call it from the Authorization class:
public function select_where($table, $where_clause) {
   return $this->db->query("SELECT * FROM ". $table." WHERE " . $where_clause);
}
The Authorization class now looks as follows:
Class Authorization {
    //this is used to get the database class into Authorization
    Public function instantiateDB($dbInstance){
       $this->db = $dbInstance;
    }

    public function verify($email, $password) {
         //check for the $email and password encrypted with bcrypt
         $bcrypt_options = [
            'cost' => 12,
            'salt' => 'secret'
         ];
         $password_hash = password_hash($password, PASSWORD_BCRYPT, $bcrypt_options);
         //select with condition
         $this->db->select_where('users', "email = '$email' AND password = '$password_hash'");
         if($result = $this->db->query($q)) {
                     while ($obj = results->fetch_object()) {
                           $user_id = $obj->id;
}

         } else {
   $user_id = null;
}
         $result->close();
         $this->db->close();
         return $user_id;

    }
}
For us to have more people subscribing easily, we will implement a way for Facebook users to simply log in and subscribe to our newsletter without having to type their e-mail address.
Login via Facebook works through Oauth. The first step is to generate app authentication tokens by going to https://developers.facebook.com/ .
You should see your list of apps or click on the apps to create. You should see something similar to the following screenshot:

You should create an app first and be able to obtain your app ID and app secret by visiting the app creation page, similar to the following screenshot:
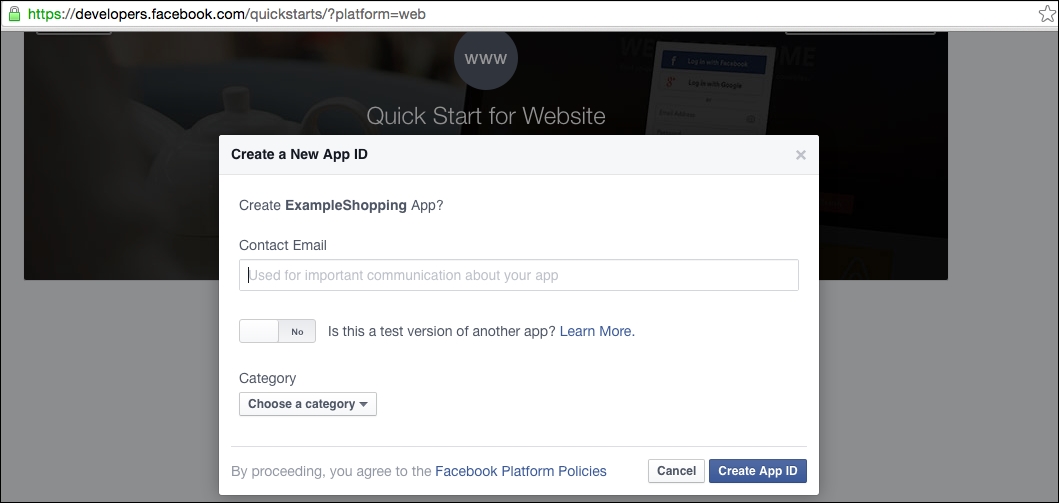
When creating the new app, Facebook now includes a way for you to test that app ID.
This is what it looks like:

This is for you to test that the app ID actually works. It is optional and you may skip that step and just plug in the values for your app ID and app secret into the code shown in the preceding screenshot.
Now let's create the fbconfig.php file, which will contain a way for us to use the Facebook SDK library to enable the session.
The fbconfig.php script will contain the following:
<?php
session_start();
$domain = 'http://www.socialexample.info';
require_once 'autoload.php';

use FacebookFacebookSession;
use FacebookFacebookRedirectLoginHelper;
use FacebookFacebookRequest;
use FacebookFacebookResponse;
use FacebookFacebookSDKException;
use FacebookFacebookRequestException;
use FacebookFacebookAuthorizationException;
use FacebookGraphObject;
use FacebookEntitiesAccessToken;
use FacebookHttpClientsFacebookCurlHttpClient;
use FacebookHttpClientsFacebookHttpable;

// init app with app id and secret (get from creating an app)
$fbAppId = '123456382121312313'; //change this.
$fbAppSecret = '8563798aasdasdasdweqwe84';
FacebookSession::setDefaultApplication($fbAppId, $fbAppSecret);
// login helper with redirect_uri
    $helper = new FacebookRedirectLoginHelper($domain . '/fbconfig.php' );
try {
  $session = $helper->getSessionFromRedirect();
} catch( FacebookRequestException $ex ) {
echo "Hello, sorry but we've encountered an exception and could not log you in right now";
} catch( Exception $ex ) {
  // Tell user something has happened
  echo "Hello, sorry but we could not log you in right now";
}
// see if we have a session
if ( isset( $session ) ) {
  // graph api request for user data
  $request = new FacebookRequest( $session, 'GET', '/me' );
  $response = $request->execute();
  // get response
//start a graph object with the user email
  $graphObject = $response->getGraphObject();
  $id = $graphObject->getProperty('id');
  $fullname = $graphObject->getProperty('name');
  $email = $graphObject->getProperty('email');

     $_SESSION['FB_id'] = $id;
     $_SESSION['FB_fullname'] = $fullname;
     $_SESSION['FB_email'] =  $email;

//save user to session
     $_SESSION['UserName'] = $email; //just for demonstration purposes
//redirect user to index page
    header("Location: index.php");
} else {
  $loginUrl = $helper->getLoginUrl();
 header("Location: ".$loginUrl);
}
?>
Here, we basically start a session with session_start() and set up the domain of our website by saving it into a variable. We then autoload the FB SDK, which will require the files and classes needed by Facebook to access its API for logging in.
We then set up several dependencies on other Facebook SDK classes by using the use keyword. We set up the facebookSession class with our app ID and app secret and then attempt to get a session started by calling the getSessionfromRedirect()method.
If there are any errors that get caught from trying to start the session, we simply let the user know that we could not log him in, but if everything proceeds successfully, we start a graph object with the e-mail of the user.
For our demonstration purposes, we save a username that is actually the e-mail address of the user once we get the e-mail by using the Facebook graph.
We will authenticate everyone by checking their e-mail addresses anyway, and to make it easier for a user to login, let's just store their e-mail as the username.
We'll need to finish up our site with index.php that shows the user what's inside our site. We get there after the login from Facebook page redirects the user to the index.php page.
We'll keep it simple for now and display the full name from the Facebook profile of the user who logged in. We'll add a logout link to give the user an option to logout:
<?php
session_start();
?>
<!doctype html>
<html xmlns:fb="http://www.facebook.com/2008/fbml">
  <head>
    <title>Login to SocialNewsletter.com</title>
<link href=" https://maxcdn.bootstrapcdn.com/bootstrap/3.3.6/css/bootstrap.min.css" rel="stylesheet">
 </head>
  <body>
  <?php if ($_SESSION['FB_id']): ?>      <!--  After user login  -->
<div class="container">
<div class="hero-unit">
  <h1>Hello <?php echo $_SESSION['UserName']; ?></h1>
  <p>How to login with PHP</p>
  </div>
<div class="span4">
 <ul class="nav nav-list">
<li class="nav-header">FB ID: <?php echo $_SESSION['FB_id']; ?></li>
<li> Welcome <?php echo $_SESSION['FB_fullName']; ?></li>
<div><a href="logout.php">Logout</a></div>
</ul></div></div>
    <?php else: ?>     <!-- Before login -->
<div class="container">
<h1>Login with Facebook</h1>
           Not Connected with Facebook.
<div>
      <a href="fbconfig.php">Login with Facebook</a></div>
      </div>
    <?php endif ?>
  </body>
</html>
After logging in, we just have to display the dashboard for the user. We will discuss how to create a basic dashboard for the user in the next section.
Finally, when the member has logged in our app, they can now subscribe to newsletters using the member subscription page. Let's first build out the databases that will be used to store member details and their subscriptions. The member_details table will include the following:
firstnameandlastname: The real name of the useremail: To be able to e-mail the usercanNotify: Boolean (true or false), if they accept being e-mailed notifications about other offers
Tip
Here's something that's interesting about the boolean type in MySQL. When you create a field that uses boolean (true or false), MySQL actually just aliases it to TINYINT(1). Boolean is basically 0 for false and 1 for true. For more info, refer to
http://dev.mysql.com/doc/refman/5.7/en/numeric-type-overview.html
.
The member_details table will handle this and it will be created using the following SQL code:
CREATE TABLE member_details(
  id INT(11) PRIMARY KEY AUTO_INCREMENT,
  firstname VARCHAR(255),
  lastname VARCHAR(255),
  email VARCHAR(255),
  canNotify TINYINT(1),
  member_id INT(11)
);
When logging in, our members will be stored in the users table. Let's create that with the following SQL code:
CREATE TABLE users (
   id INT(11) PRIMARY KEY AUTO_INCREMENT
   username VARCHAR(255),
   password VARCHAR(255),
);
Now, build the view that shows our members all the different subscriptions we have. We do this by checking the table subscriptions. The subscriptions table schema is defined as follows:
`id` Int(11): This is the primary key for thesubscriptionstable and is set withAUTO_INCREMENTnewsletter_id Int(11): This is thenewsletter_idthat they are subscribed toactive BOOLEAN: This indicates whether the user is currently subscribed (default 1)
Using SQL, it will look like the following:
CREATE TABLE subscriptions (
  `id` INT(11) PRIMARY KEY AUTO_INCREMENT,
  `newsletter_id` INT(11) NOT NULL,
  `member_id` INT(11) NOT NULL,
  `active` BOOLEAN DEFAULT true
);
We will also have to create the newsletters table, which will hold all the newsletters, their template, and their content in JSON format. By using JSON as a storage format in our database, it should now make it simple to fetch data from the database and parse JSON into the proper values to insert into our template.
Since our newsletters will be stored in the database, we need to create the proper SQL schema for it. This is how it will be designed:
Id INT(11): To index our newsletters in the databasenewsletter_name (Text): The title of our newsletternewsletter_count INT(11): To record the edition of our particular newsletter
Status (String): To record the status of our newsletter, if it's been published, unpublished, or pending publicationSlug (String): To be able to view the newsletter with the browser on our social newsletter's websiteTemplate (Text): To store the HTML templateContent (Text): To store the data that will go into our HTML templatePublished_at (Date): To record the date of publicationCreated_at (Date): To record the time that the newsletter was first createdUpdated_at (Date): To record when the last time that someone updated the newsletter
The SQL for this is as follows:
CREATE TABLE newsletters (
id INT(11) PRIMARY KEY AUTO_INCREMENT,
newsletter_name (TEXT),
newsletter_count INT(11) NOT NULL DEFAULT '0',
marketer_id INT(11) NOT NULL,
is_active TINYINT(1),
created_at DATETIME,

);
When user unsubscribes, this will help indicate that they were previously subscribed to this newsletter. This is why we'll store an active field so that when they unsubscribe, instead of deleting the record, we just set this to 0.
The marketer_id is going to be used in the future admin portion where we mention the person who will be in charge of the management of the newsletter subscriptions.
Newsletters may also have many publications, which will be the actual newsletters that get sent to each subscription. The following SQL code is to create publications:
CREATE TABLE publications (
  newsleterId INT(11) PRIMARY KEY AUTO_INCREMENT,
  status VARCHAR(25),
  content TEXT,
  template TEXT,
  sent_at DATETIME,
  created_at DATETIME,
);
Now let's build the methods in our Newsletter class to select logged-in members subscriptions for displaying into our dashboard:
Class Dashboard {
  public function getSubscriptions($member_id) {
  $query = $db->query("SELECT * FROM subscriptions, newsletters WHERE subscriptions.member_id ='". $member_id."'");
  if($query->num_rows() > 0) {
      while ($row = $result->fetch_assoc()) {
          $data  = array(
            'name' => $row->newsletter_name,
            'count' => $row->newsletter_count,
            'mem_id' => $row->member_id,
            'active' => $row->active
         );
      }
      return $data;
  }
}
}
From the preceding code, we simply created a function that would get the subscriptions for a given member ID. First, we create the "SELECT * FROM subscriptions, newsletters WHERE subscriptions.member_id ='". $member_id." query. After this, we loop through the query results using the fetch_assoc() method of the MySQLi result object. Now that we've stored it in the $data variable, we return the variable, and in the following code, we display the data in a table by invoking the following function:
 $member_id = $_SESSION['member_id'];
 $dashboard = new Dashboard;
 $member_subscriptions = $dashboard->getSubscriptions($member_id);
 ?>
  <table>
    <tr>
      <td>Member Id</td><td>Newsletter Name</td><td>Newsletter count</td><td>Active</td>
     </tr>
<?php
 foreach($member_subscriptions as $subs) {
    echo '<tr>
     <td>'. $subs['mem_id'] . '</td>' .
     '<td>' . $subs['name'].'</td>' .
     '<td>' . $subs['count'] . '</td>'.
     '<td>' . $subs['active'] . '</td>
     </tr>';
 }
 echo '</table>';
Our marketers, who administer each newsletter that they own, will be able log in to our system and be able to see how many members are subscribed and their e-mail addresses.
It is going to be an admin system that enables a marketer to update a member's record, view recent subscriptions, and allow a marketer to send custom e-mails to any member of their newsletter.
We'll have a table called marketers, which will have the following fields:
id: To store the index- Marketer's name: To store the name of the marketer
- Marketer's e-mail: To store the e-mail address of the marketer
- Marketer's password: To store the marketer's login password
Our SQL for creating the preceding fields is simple:
CREATE TABLE marketers (
id INT(11) AUTO_INCREMENT,
marketer_name VARCHAR(255) NOT NULL,
marketer_email VARCHAR(255) NOT NULL,
marketer_password VARCHAR(255) NOT NULL,

PRIMARY KEY `id`
);
In another table, we'll define the many-to-many relationship of marketers and their newsletters that they manage.
We'll need an id to be the index, the ID of the marketer who owns the newsletter, and the newsletter's ID, which is owned by the marketer.
The SQL to create this table is as follows:
CREATE TABLE newsletter_admins (
  Id INT(11) AUTO_INCREMENT,
  marketer_id INT(11) ,
  newsletter_id INT(11),
  PRIMARY KEY `id`,
);
Now let's build a query for fetching the admins of a newsletter that they own. This is going to be a simple class where we will reference all our database functions:
<?php
class NewsletterDb {
public $db;

function __construct($dbinstance) {
$this->db = $dbinstance;
}

//get admins = marketers
public function get_admins ($newsletter_id) {
$query = "SELECT * FROM newsletter_admins LEFT JOIN marketers ON marketers.id = newsletter_admins.admin_id.WHERE newsletters_admins.newsletter_id = '".$newsletter_id."'";
  $this->db->query($query);
}
}
We need a way for the marketers to log in and be authenticated with a password. We need a way for an admin to create the account and register a marketer and their newsletter.
Let's build that part first.
In our admin view, we'll need to set a default and ask for an authenticated password for every action that is performed. This is something we don't need to store in the database since there will be only one administrator.
In our config/admin.php file, we will define the username and the password as follows:
<?php
$admin_username = 'admin';
$password = 'test1234';
?>
We then just include the file in our login page, login.php.We will simply check for it. The code for the login page is as follows:
<html>
<?php
if(isset($_POST['username']) && isset($_POST['password'])) {
  //check if they match then login
  if($_POST['username'] == $admin_username
    && $_POST['password'] == $password) {
   //create session and login
   $_SESSION['logged_in'] = true;
   $_SESSION['logged_in_user'] = $admin_username;
      header('http://ourwebsite.com/admin/welcome_dashboard.php');
 }
 ?>
}
</html>
Notice that we have to set our website URL correctly, depending on where we're developing it. In the preceding example, the page will redirect to http://ourwebsite.com/admin/welcome_dashboard.php after logging in. We can create variables to store the domain and the URL fragment to redirect to so that this can be dynamic; see the following example:
$domain = 'http://ourwebsite.com';
$redirect_url = '/admin/welcome_dashboard.php';
header($domain . $redirect_url);
Once logged in, we'll need to build a simple CRUD (Create, Read, Update, Delete) system to manage the marketers who will be administering their newsletters.
The following is the code to be able to get the list of marketers and the newsletters they manage:
Function get_neewsletter_marketers() {
  $q = "SELECT * FROM marketers LEFT JOIN newsletters ';
  $q .= "WHERE marketers.id = newsletters.marketer_id";

  $res = $db->query($q);

  while ($row = $res->fetch_assoc()) {
   $marketers = array(
     'name' => $row['marketer_name'],
     'email' => $row['marketer_email'],
     'id' => $row['marketer_id']
    );
  }
  return $marketers;
}
We'll need to add a way to edit, create, and delete marketers. Let's create a dashboard/table_header.php to include at the top of our script.
The following is what the table_header.php code looks like:
<table>
<tr>
 <th>Marketer Email</th>
  <th>Edit</th>
 <th>Delete</th>
</tr>
We will now create a for() loop to loop through each of the marketer. Let's create a way to select through all the marketers in our database. First, let's call our function to get data:
$marketrs = get_newsletter_marketers();
Then let's use a foreach() loop to loop through all the marketers:
foreach($marketers as $marketer) {
  echo '<tr><td>'. $marketer['email'] .'</td>
   <td><a href="edit_marketer.php?id='. $marketer['id'].'">Edit</a></td>
  <td><a href="delete_marketer.php">delete</td>
  </tr>';
}
echo '</table>';
Then we end the code with a closing element for the table with </table>.
Let's create the delete_marketer.php script and the edit_marketer.php scripts. The following will be the delete script:
function delete_marketer($marketer_id) {
  $q = "DELETE FROM marketers WHERE marketers.id = '" .   $marketer_id . "'";
   $this->db->query($q);
}
$marketer_id = $_GET['id'];
delete_marketer($marketer_id);
Here is the edit script composed of a form that will update the data once submitted:
if(empty($_POST['submit'])) {
  $marketer_id = $_GET['id'];
  $q = "SELECT * FROM marketers WHERE id = '" . $marketer_id."'";

 $res = $db->query($q);

  while ($row = $res->fetch_assoc()) {
   $marketer = array(
     'name' => $row['marketer_name'],
     'email' => $row['marketer_email'],
     'id' => $row['id']
    );
  }

  ?>
  <form action="update_marketer.php" method="post">
   <input type="hidden" name="marketer_id" value="<?php echo $marketer['id'] ?>">
   <input type="text" name="marketer_name" value="<?php echo $marketer['name'] ?>">
   <input type="text" name="marketer_email" value="<?php echo $marketer['email'] ?>">
  <input type="submit" name="submit" />
</form>
  <?php

  } else {
     $q = "UPDATE marketers SET marketer_name='" . $_POST['marketer_name'] . ", marketer_email = '". $_POST['marketer_email']."' WHERE id = '".$_POST['marketer_id']."'";
   $this->db->query($q);
   echo "Marketer's details has been updated";
  }
?>
Every marketer needs to lay out their newsletter. In our case, we can allow them to create a simple sidebar newsletter and a simple top-down newsletter. To build a simple sidebar, we can create an HTML template that looks like the following:
<html>
<!doctype html>

<sidebar style="text-align:left">
{{MENU}}
</sidebar>

<main style="text-align:right">
   {{CONTENT}}
</main>
</html>
In the preceding code, we style the HTML e-mail using in-line tags simply because some e-mail clients do not render stylesheets referenced from outside our HTML.
We can use regex to substitute the {{MENU}} and {{CONTENT}} patterns with the data to populate them.
Our database will store the content as JSON, and once we parse the JSON, we'll have the content and menu data to insert into their respective places.
In our database, we need to add the newsletter_templates table. Here is how we will create it:
CREATE TABLE newsletter_templates (
 Id INT(11) PRIMARY KEY AUTO_INCREMENT,
Newsletter_id INT(11) NOT NULL,
   Template TEXT NOT NULL,
   Created_by INT(11) NOT NULL
) ENGINE=InnoDB;
With the template in place, we need a way for marketers to update the template.
From the dashboard, we display a list of templates for the newsletter.
Let's create the form as follows:
$cleanhtml = htmlentities('<html>
<!doctype html>

<sidebar style="text-align:left">
{{MENU}}
</sidebar>

<main style="text-align:right">
   {{CONTENT}}
</main>
</html>
');
<form>
   <h2>Newsletter Custom Template</h2>
  <textarea name="customtemplate">
<?php echo $cleanhtml; ?>
</textarea>
  <input type="submit" value="Save Template" name="submit">
  </form>
We also populated the textarea by adding values to it. Note that in the preceding code, we needed to clean the HTML code for the template using htmlentities first. This is because our HTML might be interpreted as part of the web page and cause problems when rendered by a browser.
We now have everything in place in order for our newsletter to send an actual newsletter. To do the sending, we'll need to create a script that will loop through all the members in a newsletter and then simply use the PHP mail function to send them.
Using the PHP mail function, we just have to loop through all the newsletter members in our database.
This is what that script looks like:
$template = require('template.class.php');
$q = "SELECT * FROM newsletter_members WHERE newsletter_id = 1"; //if we're going to mail newsletter #1
$results = $db->query($q);
While ($rows =$results->fetch_assoc() ) {
  //gather data
  $newsletter_title = $row['title'];
  $member_email = $row['template'];
  $menu = $row['menu']; //this is a new field to contain any menu html
  $content = $row['content'];
  $content_with_menu = $template->replace_menu($menu, $content);
  $emailcontent = $template->         replace_contents($content,$content_with_menu);
  //mail away!
  mail($member_email, '[email protected]', $newsletter_title ,$email_content);
}
We need to complete the replace_menu and replace_contents functions. Let's simply build the text replace function that will replace the content we have already fetched in the preceding code. The data comes from the newsletter table in the database:
class Template {
   public function replace_menu($menu, $content) {
     return  str_replace('{{MENU}}', $menu, $content);
   }
   public function replace_contents ($actualcontent, $content) {
    return str_replace('{{CONTENT}}', $actualcontent,  $content);
   }
}
Note that we modified our table to have a menu in the newsletter. This menu must be created by the user and with HTML markup. It will basically be an HTML list of links. The proper markup for the menu should be like the following:
<ul>
  <li><a href="http://someUrl.com">some URL</a></li>
<li><a href="http://someNewUrl.com">some new URL</a></li>
<li><a href="http://someOtherUrl.com">some other URL</a></li>
</ul>
For our link tracking system, we will need to allow a marketer to embed links, which actually pass through our system for us to keep track of the number of clicks on the link.
What we will do is actually create a service that will automatically shorten the links we enter to a random hash. The URL will look like http://example.com/link/xyz123, and the hash xyz123 will be stored in our database. When a user accesses the link, we'll match the link.
Let's create the links table and create a function that will help us generate the shortened links. At the bare minimum, we need to be able to store the title of the link, the actual link, the shortened link, as well as who created the link so that we can put it on the marketer's dashboard.
The SQL for the links table looks like the following:
CREATE TABLE links (
   id INT(11) PRIMARY KEY AUTO_INCREMENT,
   link_title TEXT NOT NULL,
   actual_link TEXT,
   shortened_link VARCHAR(255),
   created DATETIME,
   created_by INT(11)
);
Now let's create the following function, which will generate a random hash:
public function createShortLink($site_url,$title, $actual_url,$created_by) {
    $created_date = date('Y-m-d H:i:s');
  $new_url = $site_url . "h?=" . md5($actual_url);
  $res = $this->db->query("INSERT INTO links VALUES (null, $title ,'". $actual_url. "', '". $new_url.", '". $created_date."','".$created_by."'"),;
  ));
   return $res;
}
We also need to store the number of hits or clicks to the link. We will use another table that will link link_id to the number of hits, and we'll just update that table every time someone has used a shortened link:
CREATE TABLE link_hits (
   link_id INT(11),
   num_hits INT(11)
);
We won't need to index the preceding SQL table because we won't really need to do fast searches on it. Every time we generate a new URL, we should populate the table already with the num hits defaulting to 0:
Add the following function in the createShortLink function:
$res = $this->db->query("INSERT INTO links VALUES (null, '$actual_url',$title, '$new_url', '$created_date', '$created_by'");

$new_insert_id = $this->db->insert_id;

$dbquery = INSERT INTO link_hits VALUES($new_insert_id,0);

$this->db->query($dbquery);
The insert_id is the ID of the last inserted record of MySQL. It's a function that returns the new ID generated every time a new row is added.
Let's generate the link hit class that contains two functions, one to initialize the database and another that will update the link_hits table every time a user clicks on a link:
Class LinkHit {

     Public function __construct($mysqli) {
          $this->db = $mysqli;
      }

   public function  hitUpdate ($link_id) {

  $query = "UPDATE link_hits SET num_hits++ WHERE link_id='".    $link_id. "'";

   //able to update
     $this->db->query($query)
   }

   Public function checkHit ($shorturl) {
   $arrayUrl = parse_url($shortUrl);
parse_str($parts['query'],$query);
$hash = $query['h'];

   $testQuery = $this->db->query("SELECT id FROM links WHERE shortened_link LIKE '%$hash%'");
   if($this->db->num_rows > 0) {
         while($row = $testQuery->fetch_array() ) {
   return $row['id'];
          }
   } else {
     echo "Could not find shorted link";
     return null;
  }
}

//instantiating the function:
$mysqli = new mysqli('localhost','test_user','test_password','your_database');
$Link = new LinkHit($mysqli);
$short_link_id = $Link->checkHit("http://$_SERVER[HTTP_HOST]$_SERVER[REQUEST_URI]");

if($short_link_id !== null) {
  $link->hitUpdate($isShort);
}
For our marketers to view the links, we will need to display their links on a links page in our portal.
We create the function for checking the links and their hits that is attributed to the admin user who is logged in:
$user_id = $_SESSION['user_id'];
$sql = "SELECT * FROM links LEFT JOIN link_hits ON links.id = link_hits.link_id WHERE links.created_by='" . $user_id. "'";
$query = $mysqli->query($sql);
?>
<table>
<tr>
<td>Link id</td><td>Link hits</td></tr>
<?php
while($obj = $query->fetch_object()) {
  echo '<tr><td>'.$obj->link.'</td>
<td>' . $obj->link_hits.'</td></tr></tr>';
}
?>
</table>
In the preceding code, we just got the logged-in user's ID by checking the variable $_SESSION['user_id']. Then we performed an SQL query by executing the string variable $SQL. After this, we loop through the results and show the results into an HTML table. Note that we exit the PHP code when we display a permanent HTML markup such as start of the table and the headers and the ending of the </table> tag.
PHP performs slightly better without using echo statements, and this is the beauty of PHP scripting, you are really allowed to go into the PHP sections and then into the HTML sections in your code. Your opinion may differ on the beauty of this idea, but we just want to show what PHP can do in this exercise.
This system allows the subscribers to contact the administrator of a particular newsletter group. It will just contain a contact form. Also, we shall need to implement a way to send a notification to the administrator in real time.
We will basically add a socket connection to the administrator so that when ever someone sends an inquiry, it will flash a notification on the marketer's dashboard.
This is pretty simple with socket.io and a browser technology called WebSockets.
With socket.io, we don't need to create the code for checking the server periodically for an event. We'll just pass through the data the user entered by using AJAX and trigger the listeners to the sockets by emitting the events. It offers long polling and communication through WebSockets and is supported by modern web browsers.
Note
WebSockets extends the concept of having socket connections through a browser. To read more on WebSockets, please visit http://www.html5rocks.com/en/tutorials/websockets/basics/ .
A sample code on the socket.io site just includes the socket.io.js script:
<script src="socket.io/socket.io.js"></script>
Our PHP webserver will be using something called Ratchet, which has a website at http://socketo.me. It basically allows us to use WebSockets for PHP.
Here is their website:

Ratchet is just a tool to allow PHP developers "to create real time, bi-directional applications between clients over WebSockets". By creating a bi-directional flow of data, it allows developers to create things such as real-time chat and other real-time applications.
Let's get started by following their tutorial at http://socketo.me/docs/hello-world.
With Ratchet, we have to install Composer and add the following to our composer.json file in our project directory:
{
    "autoload": {
        "psr-0": {
            "MyApp": "src"
        }
    },
    "require": {
        "cboden/ratchet": "0.3.*"
    }
}
If you've had prior experience with Composer, basically what it does is use the psr-0 standard in writing the path to a script that needs autoloading. Then we run composer install in the same directory. After having Ratchet set up, we need to set up the proper components for handling certain events.
We need to create a folder labeled SupportChat and put Chat.php inside. This is because using psr-0 in the preceding composer.json file, it expects a directory structure inside the src directory.
Let's create a class with the stubbed functions that we need to implement:
namespace SupportChat;
use RatchetMessageComponentInterface;
use RatchetConnectionInterface;

class SupportChat implements MessageComponentInterface {
  Protected $clients;
  Public function __construct() {
    $this->clients = new SplObjectStorage;
  }
}
We need to declare the $clients variable to store the clients that will connect to our chat app.
Let's implement the interface for when the client opens a connection:
Public function onOpen(ConnectionInterface $conn) {
  $this->clients->attach($conn);
  echo "A connection has been established";
}
Now let's create the onMessage and onClose methods as follows:
Public function onMessage (ConnectionInterface $from, $msg) {
 foreach ($this->clients as $client) {
        if ($from !== $client) {
            $client->send($msg);
        }
    }
}


public function onClose(ConnectionInterface $conn) {
$this->clients->detach($conn);
}
Let's also create an onError method for handling errors as follows:
public function onError (ConnectionInterface $conn) {
$this->clients->detach($conn);
}
Now we need to implement the client (browser) side of the application.
Create a file called app.js in your htdocs or public folder with the following code:
var messages = [];

// connect to the socket server
var conn = new WebSocket('ws://localhost:8088');
conn.onopen = function(e) {
   console.log('Connected to server:', conn);
}

conn.onerror = function(e) {
   console.log('Error: Could not connect to server.');
}

conn.onclose = function(e) {
   console.log('Connection closed');
}

// handle new message received from the socket server
conn.onmessage = function(e) {
   // message is data property of event object
   var message = JSON.parse(e.data);
   console.log('message', message);

   // add to message list
   var li = '<li>' + message.text + '</li>';
   $('.message-list').append(li);
}

// attach onSubmit handler to the form
$(function() {
   $('.message-form').on('submit', function(e) {
         // prevent form submission which causes page reload
         e.preventDefault();

         // get the input
         var input = $(this).find('input');

         // get message text from the input
         var message = {
               type: 'message',
               text: input.val()
         };

         // clear the input
         input.val('');

         // send message to server
         conn.send(JSON.stringify(message));
   });
});
We need to create the HTML for the preceding code to be used. We should name the file app.js. Now, let's implement a simple input text for the user to enter their messages:
<!DOCTYPE html>
<html>
<head>
   <title>Chat with Support</title>
   <script src="https://cdnjs.cloudflare.com/ajax/libs/jquery/2.2.3/jquery.js"></script>
   <script src="app.js"></script>
</head>
<body>

   <h1>Chat with Support</h1>

   <h2>Messages</h2>
   <ul class="message-list"></ul>
   <form class="message-form">
         <input type="text" size="40" placeholder="Type your message here" />
         <button>Send message</button>
   </form>
</body>
</html>
App.js is where the JavaScript code we wrote earlier should go. We also need to create a WebSocket server to handle the WebSocket on port 8088:
<?php
// import namespaces
use RatchetServerIoServer;
use RatchetWebSocketWsServer;
use SupportChatChat;

// use the autoloader provided by Composer
require dirname(__DIR__) . '/vendor/autoload.php';

// create a websocket server
$server = IoServer::factory(
    new WsServer(
        new Chat()
    )
    , 8088
);

$server->run();
Our chat app is now ready for public use. However, we need to start our chat server, which will handle WebSockets by starting it with php bin/server.php.
Note that on Windows, it will prompt about the network being used:

Simply click on Allow access and then click on OK.
Now when we visit http://localhost/client.html, we should see the following:

However, we need to spiff up the contact form by adding the username and e-mail for support to get back to him via e-mail in case no one from support is available to reply to the user.
Our form now looks as follows:
<form class="message-form" id="chatform">
         <input type="text" name="firstname" size="25" placeholder="Your Name">
         <input type="text" name="email" size="25" placeholder="Email">

         <input type="text" name="message" size="40" placeholder="Type your message here" />
         <button>Send message</button>
   </form>
Since we've added those details, we need to store them in our database. We can do this by having all the data forwarded to another PHP script to do the sending. In JavaScript, the code would add to the handler a way to send to the sendsupportmessage.php the values from the form.
Here is how that JavaScript code, with jQuery, will look:
<script>
$(document).ready(function() {
   $('submit').on('click', function() {
     $.post('sendsupportmessage.php', $("#chatform").serialize())
       .done(function(data) {
         alert('Your message has been sent');
      });
   });
});
</script>
In the script that will receive the messages, sendsupportmessage.php, we'll need to parse the information and create an e-mail to send to the support e-mail, [email protected]; see the following example:
<?php
  if( !empty($_POST['message'])) {
    $message = htmlentities($_POST['message']);
  }

  if( !empty($_POST['email'])) {
    $email = htmlentities($_POST['email']);
  }

  if( !empty($_POST['firstname']) ) {
    $firstname = htmlentities($_POST['firstname']);
  }

  $emailmessage = 'A support message from ' . $firstname . ';
  $emailmessage .=  ' with email address: ' . $email . ';
  $emailmessage .= ' has been received. The message is '. $message;

   mail('[email protected]', 'Support message', $emailmessage);

  echo "success!";
?>
The script just checks if the submitted values are not blank. By experience, using !empty () instead of checking for a set value with the isset() function is better because an empty string ('') may be evaluated by PHP to still be set:
$foo = '';
if(isset($foo)) { print 'But no its empty'; }
else { print 'PHP7 rocks!'; }
We now need to display to the user, as we sent the message to the server using AJAX, and update the AJAX box. In the JavaScript code, we should change the .done() callback code to the following:
.done(function(data) {
   if(data === 'succcess!') {
     var successHtml = '<li>Your message was sent</li>';
     $('.message-list').append(successHtml);

   }
      }
Fantastic! Notice that we changed the alert box call and instead appended the message Your message was sent back into the message list. Our support form now sends who the message is from and our support team can receive the message in their e-mails.