
Now that we've booted an instance on the command line, let's take a look at doing the same thing in the web interface:
- Go ahead and log in to the web interface as the non-administrative user you created in Chapter 2, Identity Management.
- Under the Compute menu, select Instances and then click on the Launch Instance button.
- In the Launch Instance dialog, start by filling in a name for the instance, as shown in the following screenshot. Also, note that there are blue asterisks next to Source, Flavor, and Networks. These are the required sections of the dialog to visit:

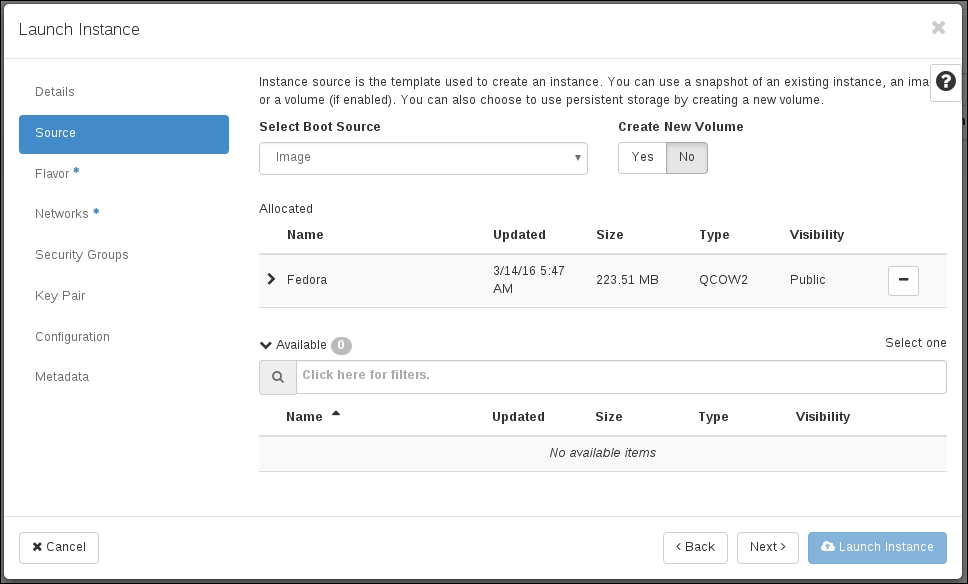
- Click the Next button to get to the Source section of the dialog. There will be a + button next to the Fedora image you uploaded in Chapter 3, Image Management. Click that to select the Fedora image as the boot source for the instance, as shown in the following screenshot:
- Click the Next button to get to the Flavor section of the dialog. There will be a + button next to the available flavors. Select the m1.small flavor, as shown in the following screenshot:

- Click the Next button to get to the Networks section of the dialog. There will be a + button next to the internal network you created in Chapter 4, Network Management. Select the internal network, as shown in the following screenshot:

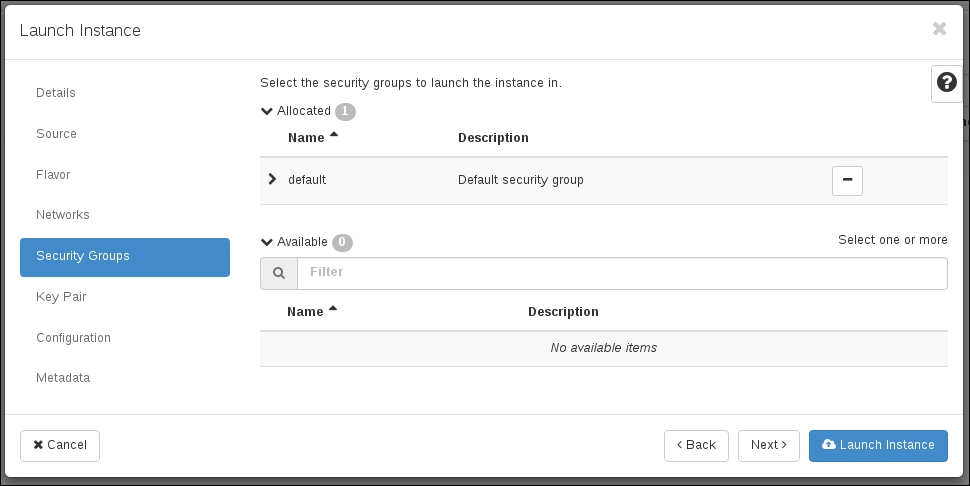
- Click the Next button to get to the Security Groups section of the dialog. There will be a + button next to the default security group. This section was not highlighted with a blue asterisk. This is because the default security will be automatically assigned to your instance if it is the only one that exists. Select the default security group if you would like to, as shown in the following screenshot:
- Click the Next button to get to the Key Pairs section of the dialog. There will be a + button next to the key pair you created or imported. This section was not highlighted with a blue asterisk. This is because a key pair is not a strict requirement to launch an instance. If one is not selected, one will not be installed on the instance and other means of authentication will need to be used to connect to the instance. Select your key pair if you would like to, as shown in the following screenshot:

- Finally, click the Launch Instance button for the instance to be launched, as shown in the following screenshot:

- Click on the instance's name; there is a Log tab and a Console tab. The Log tab will load the system message log from the instance. This is the same content that was displayed by the
openstack console log showcommand executed in the Launching an Instance section earlier. Here's a screenshot of this page:
- The Console tab will provide an in-browser
vncsession to the instance. You must be able to connect to port 6080 to see this console. OpenStack exposes a service on6080that handles proxying the VNC sessions into the instances. The next step is to associate a floating IP address to the instance. To the right of the instance, there is a drop-down menu that has the option Associate Floating IP. If the instance is still spawning and has not quite become active, this menu option may not be available right away. Once you can select this option, a dialogue will display, as shown in this screenshot:
- Remember that a floating IP first needs to be allocated to a project before it can be associated with an instance. Click on the + button next to the IP address selection box. This will display a dialog to allocate a floating IP, as shown in the following screenshot:

- Click on Allocate IP to allocate an IP to your project. The original dialog to associate the floating IP will display again with the newly allocated floating IP address populated in the IP Address box, as shown in the following screenshot:

- Click the Associate button to complete the association. The web browser may take you to the Access & Security screen, where floating IPs are managed. The associate will be indicated next to the floating IP address. Return to the Instances list; once the floating IP has been associated, it will show up in the IP Address box next to the instance. This is not an auto-update piece of information. If you do not see it there right way, refresh your browser after a few seconds to see the update. The following screenshot captures this step:

- The final step is to open up ports to the instance through the security groups. Click on the Access & Security menu, select the Security Groups tab, and click on the Manage Rules button. In the top-right corner, click on the Add Rule button.
- Fill out the form for ICMP, as shown in the following screenshot:

- Repeat this for SSH and for any other port you need opened up.
..................Content has been hidden....................
You can't read the all page of ebook, please click here login for view all page.