
As mentioned earlier, Python developers are richly blessed in the various tools offered by Python, and its third-party ecosystem in easing and automating the deployment of applications and code written using Python.
In this section, we will briefly take a look at some of these tools.
Python comes with built in support for packaging applications for a variety of distributions—source, binary, and specific OS-level packaging.
The primary way of packaging source code in Python is to write a setup.py file. The source can then be packaged with the help of the in-built distutils library, or the more sophisticated and rich setuptools framework.
Before we get introduced to the guts of Python packaging, let us get familiar with a couple of closely related tools, namely, pip and virtualenv.
PIP stands for the recursive acronym PIP installs packages. Pip is the standard and suggested tool to install packages in Python.
We've seen PIP in action throughout this book, but so far, we've never seen pip itself getting installed, have we?
Let's see this in the following screenshot:
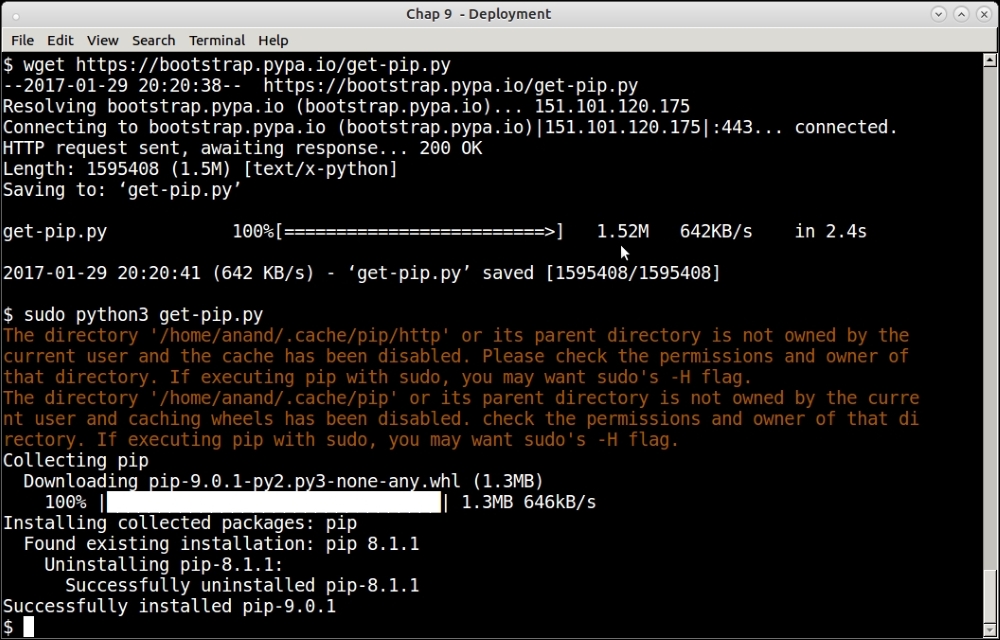
Downloading and installing pip for Python3
The pip installation script is available at https://bootstrap.pypa.io/get-pip.py.
The steps should be self-explanatory.
Take a look at the following screenshot:

Printing the current version of pip (pip3)
See how pip clearly prints its version number along with the directory location of the installation, plus the Python version for which it is installed.
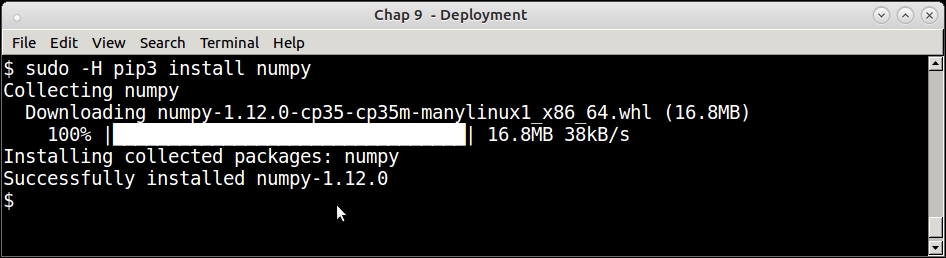
To install a package using PIP, simply provide the package name via the command install. For example, the following screenshot shows installing the numpy package using pip:
We will not go into further details of using pip here. Instead, let's take a look at another tool that works closely with pip in installing the Python software.
Virtualenv is a tool that allows developers to create sand-boxed Python environments for local development. Let's say that you want to maintain two different versions of a particular library or framework for two different applications you are developing side by side.
If you are going to install everything to the system Python, then you can keep only one version at a given time. The other option is to create different system Python installations in different root folders—say, /opt instead of /usr. However, this creates additional overhead and management headaches of paths. Also, it wouldn't be possible to get write permission to these folders if you want the version dependency to be maintained on a shared host where you don't have superuser permissions.
Virtualenv solves the problems of permissions and versions in one go. It creates a local installation directory with its own Python executable standard library and installer (defaults to pip).
Once the developer has activated the virtual environment thus created, any further installations goes to this environment instead of the system Python environment.
Virtualenv can be installed using pip.
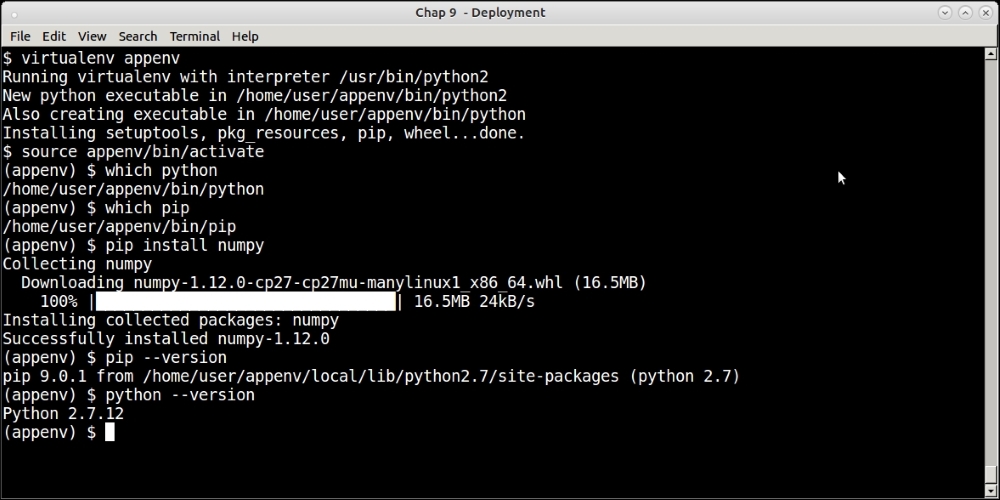
The following screenshot shows creating a virtualenv named appvenv using the virtualenv command, and activating the environment along with installing a package to the environment.
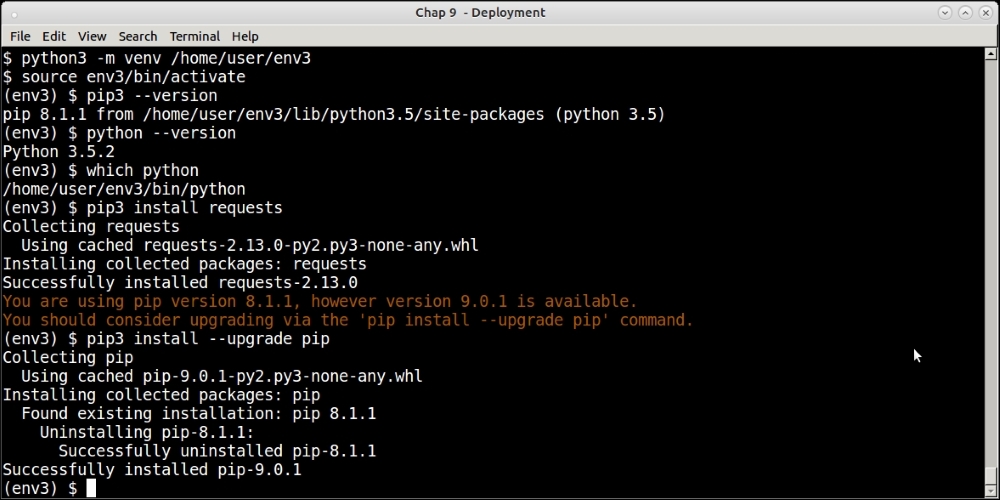
From Python 3.3 onwards, support for virtual environments is built into the Python installation via the new venv library.
The following screenshot shows installing a virtual environment in Python 3.5 using this library, and installing some packages into it. As usual, take a look at Python and pip executable paths:
Once you've set up a virtual environment for your application(s) and installed the required packages, it is a good idea to generate the dependencies and their versions. This can be easily done via the following command using pip:
$ pip freeze
This command asks pip to output a list of all the installed Python packages along with their versions. This can be saved to a requirements file, and the setup duplicated on the server for mirroring deployments:
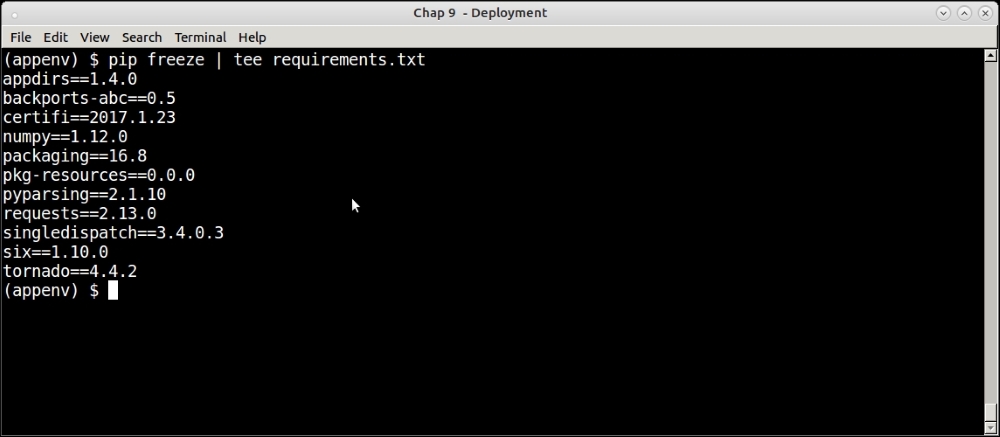
The following screenshot shows recreating the same setup in another virtual environment via the -r option of the pip install command, which accepts such a file as input:
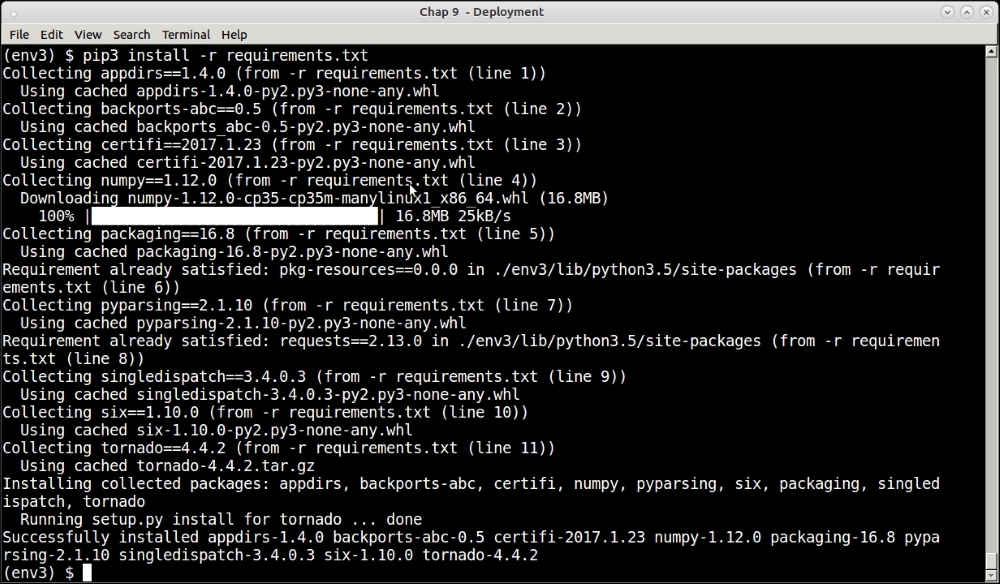
The suggested way to copy package dependencies from one virtual environment to another is to perform a freeze, and install via pip as illustrated in the previous section. For example, this is the most common way to freeze Python package requirements from a development environment, and recreate it successfully on a production server.
One can also try and make a virtual environment relocatable so that it can be archived and moved to a compatible system:
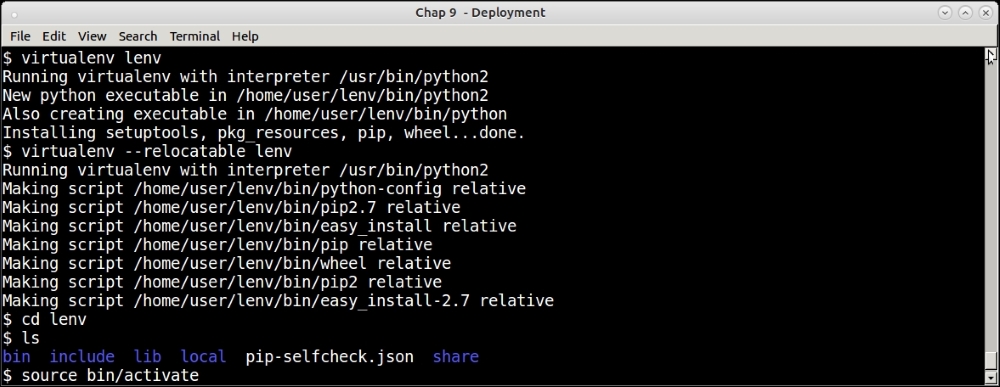
Creating a relocatable virtual environment
Here is how it works:
- First, the virtual environment is created as usual.
- It is then made relocatable by running
virtualenv –relocatable lenvon it. - This changes some of the paths used by setuptools as relative paths, and sets up the system to be relocatable.
- Such a virtual environment is relocatable to another folder in the same machine, or to a folder in a remote and similar machine.
Note
A relocatable virtual environment doesn't guarantee that it will work if the remote environment differs from the machine environment. For example, if your remote machine is a different architecture, or even uses a different Linux distribution with another type of packaging, the relocation will fail to work. This is what is meant by the words similar machine.
We learned that PIP is the standardized tool to do package installations in Python. It is able to pick up any package by name as long as it exists. It is also able to install packages by version, as we saw with the example of the requirements file.
But where does PIP fetch its packages from?
To answer this, we turn to the Python Package Index, more commonly known as PyPI.
Python Package Index (PyPI) is the official repository for hosting metadata for third-party Python packages on the Web. As the name implies, it is an index to the Python packages on the Web whose metadata is published and indexed on a server. PyPI is hosted at the URL http://pypi.python.org.
PyPI hosts close to a million packages at present. The packages are submitted to PyPI using Python's packaging and distribution tools, distutils, and setuptools, which have hooks for publishing package metadata to PyPI. A number of packages also host the actual package data in PyPI, although PyPI can be used to point to package data sitting in a URL on another server.
When you install a package using pip, it actually performs the search for the package on PyPI, and downloads the metadata. It uses the metadata to find out the package's download URL and other information, such as further downstream dependencies, which it uses to fetch and install the package for you.
Here is a screenshot of PyPI, which shows the actual count of the packages at the time of writing this:

A developer can do quite a few things directly on the PyPI site:
Now that we are familiar with the suite of all Python packaging and installation tools and their relationships, let us try out a small example of packaging a trivial Python module and submitting it to PyPI.
Remember that we had developed a mandelbrot program, which uses pymp to scale, in Chapter 5, Writing Applications that Scale. We will use it as an example of a program to develop a package, and a setup.py file, which we will use to submit the application to PyPI.
We will package the mandelbrot application in a main package consisting of two sub-packages as follows:
Here is our folder structure for the package:

Folder layout of the mandelbrot package
Let us quickly analyze the folder structure of the application which we will be packaging:
- The top directory is named
mandelbrot. It has an__init__.py, aREADME, and asetup.pyfile. - This directory has two sub directories—
mpandsimple. - Each of these subfolders consists of two files, namely,
__init__.pyandmandelbrot.py. These subfolders will form our sub-modules, each containing the respective implementation of the mandelbrot set.
The __init__.py files allow to convert a folder inside a Python application as a package. Our folder structure has three of them: the first one is for the top-level package mandelbrot, and the rest two for each of the sub-packages, namely, mandelbrot.simple and mandelbrot.mp.
The top-level __init__.py is empty. The other two have the following single line:
from . import mandelbrot
The setup.py file is the central point of the entire package. Let us take a look at it:
from setuptools import setup, find_packages
setup(
    name = "mandelbrot",
    version = "0.1",
    author = "Anand B Pillai",
    author_email = "[email protected]",
    description = ("A program for generating Mandelbrot fractal images"),
    license = "BSD",
    keywords = "fractal mandelbrot example chaos",
    url = "http://packages.python.org/mandelbrot",
    packages = find_packages(),
    long_description=open('README').read(),
    classifiers=[
        "Development Status :: 4 - Beta",
        "Topic :: Scientific/Engineering :: Visualization",
        "License :: OSI Approved :: BSD License",
    ],
    install_requires = [
        'Pillow>=3.1.2',
        'pymp-pypi>=0.3.1'
        ],
    entry_points = {
        'console_scripts': [
            'mandelbrot = mandelbrot.simple.mandelbrot:main',
            'mandelbrot_mp = mandelbrot.mp.mandelbrot:main'
            ]
        }
)
A full discussion of the setup.py file is outside the scope of this chapter, but do note these few key points:
- The
setup.pyfile allows the author to create a lot of package metadata such as name, author name, e-mail, package keywords, and others. These are useful in creating the package meta information, which helps people to search for the package in PyPI once it's submitted. - One of the main fields in this file is packages, which is the list of packages (and sub-packages) that is created by this
setup.pyfile. We make use of thefind_packageshelper function provided by the setuptools module to do this. - We provide the installment requirements in the
install-requireskey, which lists the dependencies one by one in a PIP-like format. - The
entry_pointskey is used to configure the console scripts (executable programs) that this package installs. Let us look at one of them:mandelbrot = mandelbrot.simple.mandelbrot:main
This tells the package resource loader to load the module named
mandelbrot.simple.mandelbrot, and execute its functionmainwhen the scriptmandelbrotis invoked.
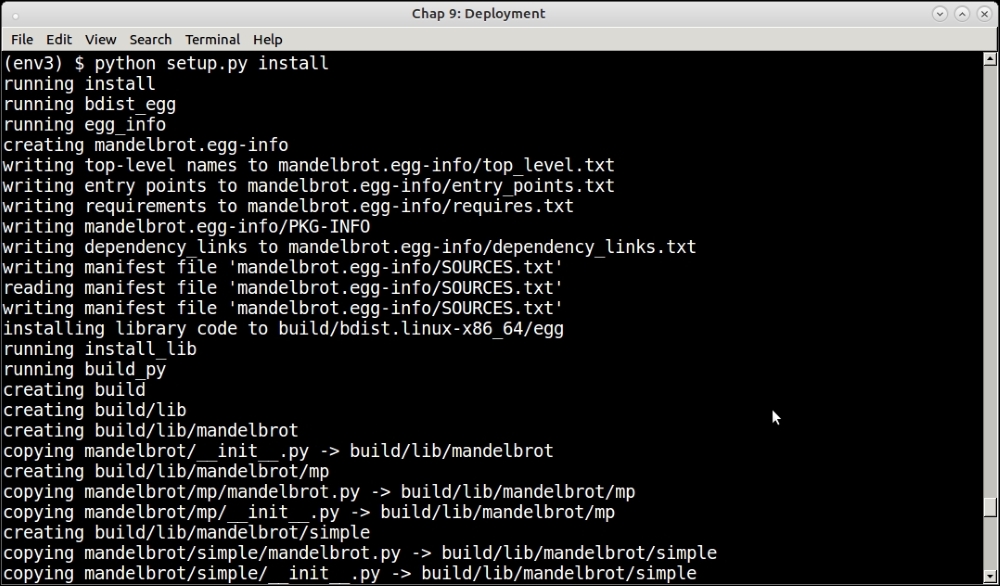
The package can be now installed using this command:
$ python setup.py install
The following screenshot of the installation shows a few of the initial steps:
The setup.py file plus setuptools/distutils ecosystem in Python is useful, not just to install and package code, but also to submit code to the Python package index.
It is very easy to register your package to PyPI. There are just the following two requirements:
- A package with a proper setup.py file
- An account on the PyPI website
We will now submit our new mandelbrot package to PyPI by performing the following steps:
- First, one needs to create a
.pypircfile in one's home directory containing some details—mainly the authentication details for the PyPI account.Here is the author's
.pypircfile with the password obscured: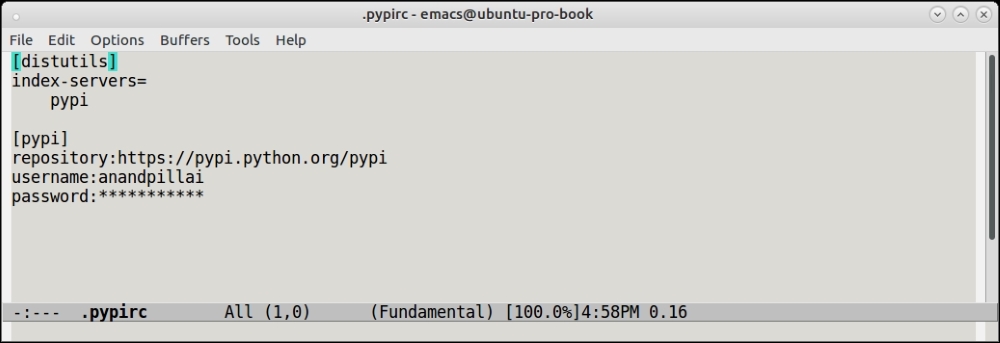
- Once this is done, registration is as simple as running
setup.pywith theregistercommand:$ python setup.py registerThe next screenshot shows the actual command in action on the console:

However, this last step has only registered the package by submitting its metadata. No package data, as in the source code data, has been submitted as part of this step.
- To submit the source code also to PyPI, the following command should be run:
$ python setup.py sdist upload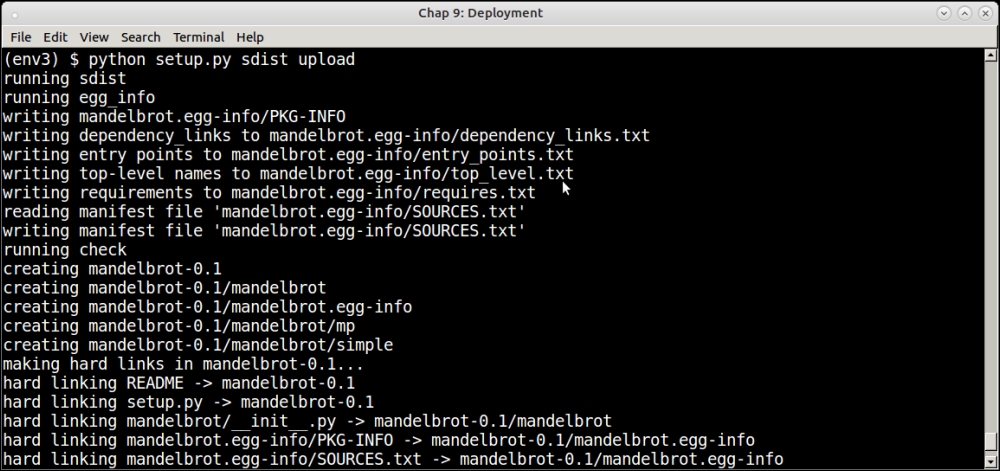
Here's a view of our new package on the PyPI server:
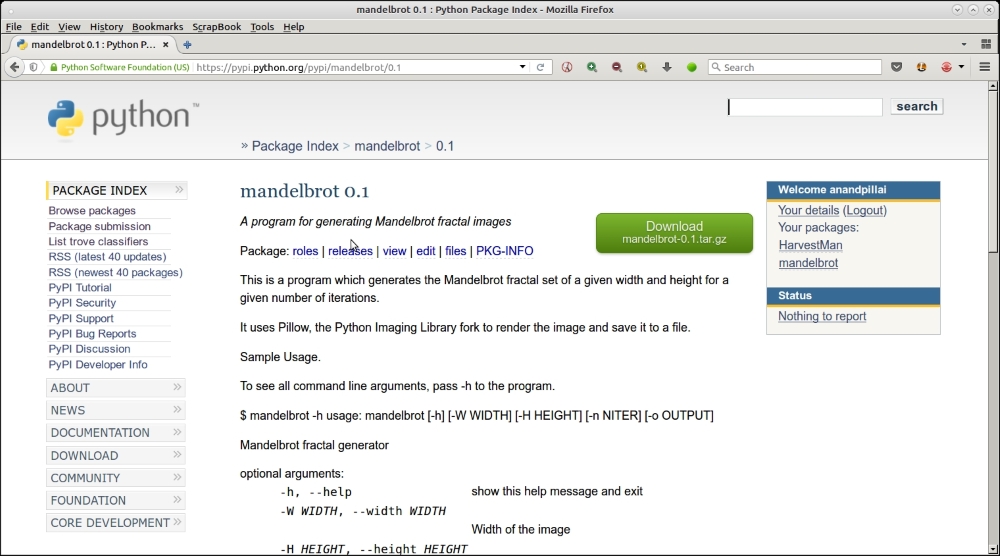
Now the package is installable via pip, completing the cycle of software development: that is, first packaging, then deployment, and finally, installation.
Python Packaging Authority (PyPA) is a working group of Python developers who maintain the standards and the relevant applications related to packaging in Python.yPA has their website at https://www.pypa.io/, and they maintain the application on GitHub at https://github.com/pypa/.
The following table lists the projects that are maintained by PyPA. You've already seen some of these, such as pip, virtualenv, and setuptools; others may be new:
|
Project |
Description |
|---|---|
|
|
A collection of enhancements to Python distutils |
|
|
A tool for creating sandbox Python environments |
|
|
A tool for installing Python packages |
|
|
Core Python utilities for packaging used by pip and setuptools |
|
|
An extension to setuptools for creating wheel distributions, which are an alternative to Python eggs (ZIP files) and specified in PEP 427 |
|
|
A secure replacement for |
|
|
The new PyPI application, which can be seen at https://pypi.org |
|
|
A low-level library implementing functions relating to packaging and distribution of Python code |
|
|
A PyPI mirroring client to mirror the contents of PyPI |
Interested developers can go visit the PyPA site and sign up for one of the projects - and contribute to them in terms of testing, submitting patches and so on by visiting the github repository of PyPA.
Fabric is a command-line tool and library written in Python, which helps to automate remote deployments on servers via a set of well-defined wrappers over the SSH protocol. It uses the ssh-wrapper library, paramiko, behind the scenes.
Fabric works with Python 2.x versions only. However, there is a fork Fabric3 which works for both the Python 2.x and 3.x versions.
When using fabric, a DevOps user usually deploys his remote system administrator commands as Python functions in a fabfile named as fabfile.py.
Fabric works best when the remote systems are already configured with the ssh public keys of the user's machine from where he performs deployments, so there is no need to supply a username and password.
Here is an example of remote deployment on a server. In this case, we are installing our mandelbrot application on a remote server.
The fabfile looks as follows. See that it is written for Python3:
from fabric.api import run

def remote_install(application):

    print ('Installing',application)
    run('sudo pip install ' + application)
Here is an example of running this, installing it on a remote server:
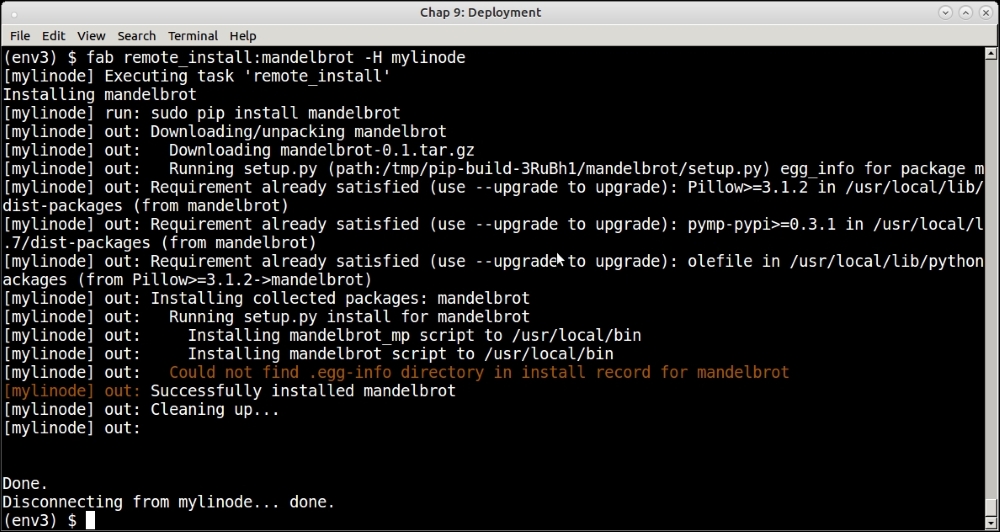
DevOps engineers and system administrators can use a predefined set of fabfiles for automating different system and application deployment tasks across multiple servers.
Ansible is a configuration management and deployment tool written in Python. Ansible can be thought of as a wrapper over SSH with scripts with support for orchestration via tasks which can be assembled in easy-to-manage units called playbooks which map a group of hosts to a set of roles.
Ansible uses "facts" which are system and environment information it gathers before it runs tasks. It uses the facts to check if there is any need to change any state before running a task to get the desired outcome.
This makes it safe for Ansible tasks to be run on a server in a repeated fashion. Well-written Ansible tasks are idempotent in that they have zero to few side effects on the remote system.
Ansible is written in Python and can be installed using pip.
It uses its own hosts file, namely /etc/ansible/hosts
to keep the host information against which it runs its tasks.
A typical ansible host file may look as follows:
[local]
127.0.0.1

[webkaffe]
139.162.58.8
The following is a snippet from an Ansible playbook named dependencies.yaml
which installs a few Python packages via pip on a remote host named webkaffeStyle
:
---
- hosts: webkaffe
  tasks:
    - name: Pip - Install Python Dependencies
      pip:
          name="{{ python_packages_to_install | join(' ') }}"

      vars:
          python_packages_to_install:
          - Flask
          - Bottle
          - bokeh
Here is an image of running this playbook on the command line using ansible-playbook:
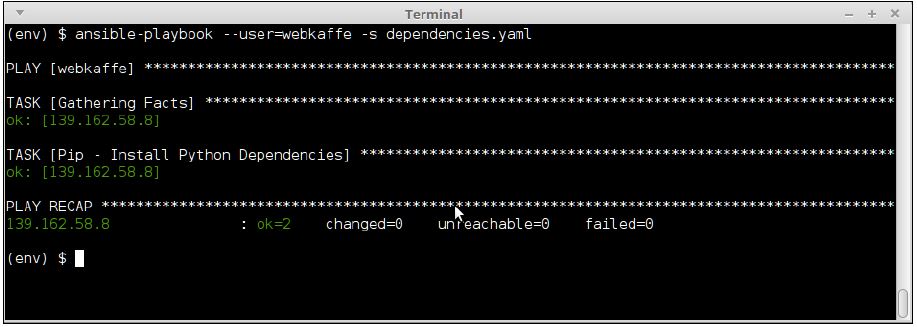
Ansible is an easy and efficient way of managing remote dependencies and, due to its idempotent playbooks, is much better than Fabric at the task.
Supervisor is a client/server system, which is useful to control processes on Unix and Unix-like systems. It consists mainly of a server daemon process named supervisord and a command-line client, which interacts with the server named supervisorctl.
Supervisor also comes with a basic webserver, which can be accessed via port 9001. It is possible to view the state of running processes, and also to start/stop them via this interface. Supervisor doesn't run on any version of Windows.
Supervisor is an application written using Python, and hence, is installable via pip. It runs only on Python 2.x versions.
Applications to be managed via supervisor should be configured via the supervisor daemons configuration file. By default, such files sit in the /etc/supervisor.d/conf folder.
However, it is possible to run Supervisor locally by installing it to a virtual environment, and keeping the configuration local to the virtual environment. In fact, this is a common way to run multiple supervisor daemons, each managing processes specific to the virtual environment.
We won't go into details or examples of using Supervisor, but here are some benefits of using Supervisor vs a traditional approach like system rc.d scripts:
- Decoupling process creation/management and process control can be achieved by using a client/server system. The
supervisor.dfile manages the processes via subprocesses. The user can get the process state information via supervisorctl, the client. Also, whereas most traditional rc.d processes require root or sudo access, supervisor processes can be controlled by normal users of the system via the client or through the web UI. - Since supervisord starts processes via subprocesses, they can be configured to automatically restart upon crash. It is also easier to get a more accurate status of the subprocesses rather than relying on PID files.
- Supervisor supports process groups allowing users to define processes in a priority order. Processes can be started and stopped in a specific order as a group. This allows implementation of a fine-grained process control when there is a temporal dependency between creation of processes in an application. (Process B requires A to be running, C requires B to be running, and the like.)
We will complete the discussion in this chapter with an overview of the common deployment patterns, which an architect can choose from to solve common issues with deployability.