In the previous recipes, we saw three different ways to set up the template images; just remember that one method doesn't exclude the others, so in my opinion, the best setup you can have is: Image Empties on one layer (visibility toggled using the eye icons in the Outliner) together with Background Images. This way you can not only have templates visible in the three orthographic views, but also in the perspective view (and this can sometimes be really handy).
However, whatever the method you choose, now it's time to start to build the character's base mesh. To do this, we are going to use the Skin modifier.
First, let's prepare the scene:
- In case it's needed, reopen the
Gidiosaurus_base_mesh.blendfile. - Click on an empty scene layer to activate it; for example, the 11th.

The starting empty scene and the scene layer's buttons on the 3D window toolbar
- Be sure that the 3D Cursor is at the center of the scene (Shift + C).
- Add a Plane (press Shift + A and go to Mesh | Plane). If you are working with the Factory Settings, you must now press Tab to go in to Edit Mode, and then Shift + right-click to deselect just one vertex.
- Press X and delete the three vertices that are still selected.
- Right-click to select the remaining vertex and put it at the cursor location in the center of the scene (Shift + S, and then select Selection to Cursor).
- Go to the Object Modifiers window on the main Properties panel, to the right-hand side, and assign a Skin modifier; a cube appears around the vertex. Uncheck X under Symmetry Axes in the modifier's panel:

The cube geometry created by just one vertex and the Skin modifier
- Assign a Mirror modifier and check Clipping.
- Assign a Subdivision Surface modifier and check Optimal Display.
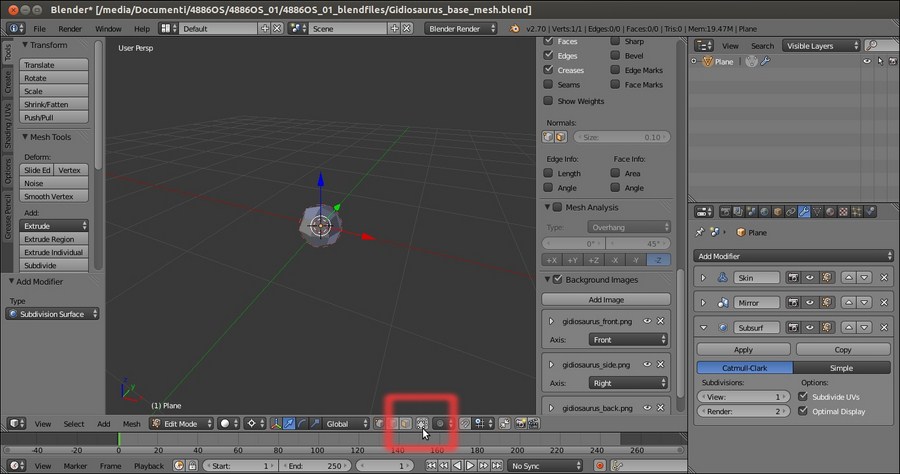
- Go to the toolbar of the 3D view to click on the Limit selection to visible icon and disable it; the icon appears only in Edit Mode and in all the viewport shading modes, except for Wireframe and Bounding Box, and has the appearance of a cube with the vertices selected:

The “Limit selection to visible” button on the 3D viewport toolbar and the cube geometry subdivided through the Subdivision Surface modifier
- Press 3 on the numpad to go in the Side view:

The created geometry and the side-view template reference
We are now going to move and extrude the vertex according to our template images, working as guides, and therefore generating a 3D geometry (thanks to the Skin modifier):
- Press G and move the vertex to the pelvis area. Then, press Ctrl + A and move the mouse cursor towards the vertex to lower the weight/influence of the vertex itself on the generated mesh; scaling it smaller to fit the hip size showing on the template:

Moving the geometry to the character's pelvis area
- Press E and extrude the vertex by moving it up on the z axis; place it at the bottom of the rib cage.
- Go on extruding the vertex by following the lateral shape of the character in the template. Don't be worried about the volumes; for the moment, just build a stick-figure going up the torso:

Extruding the vertices to create a new geometry
- Proceed to the neck and stop at the attachment of the head location.
- Select the last two vertices you extruded; press Ctrl + A and move the mouse cursor towards them to scale down their influence in order to provide a slim-looking neck:

Scaling down the influence of the vertices
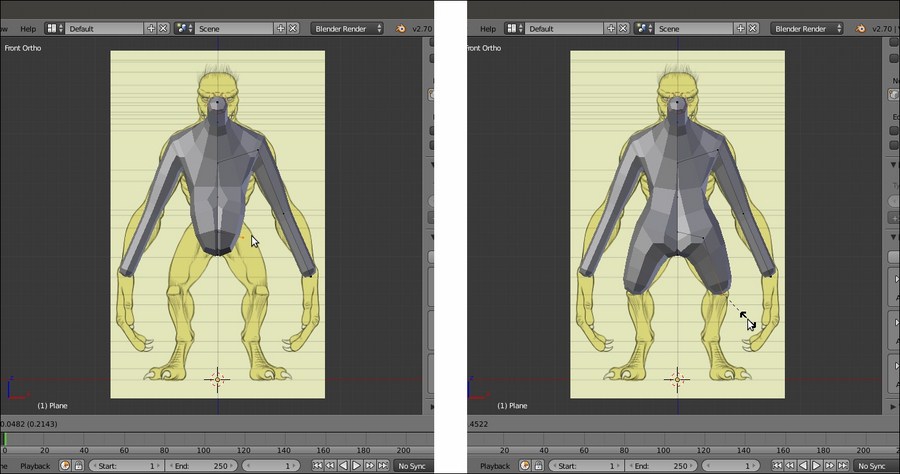
- Press 1 on the numpad to switch to the Front view, and then select the bottom vertex and extrude it down to cover the base of the creature's pelvis. Press Ctrl + A | X to scale it only on the x axis:

Adjusting the weight of the vertices in the Front view
- Go to the Mirror modifier and uncheck the Clipping item.
- Select the middle thorax vertex and extrude it to the right-hand side to build the shoulder. Press Ctrl + A to scale it smaller:

Creating the shoulders
- Extrude the shoulder vertex, following the arm shape, and stop at the wrist; select the just-extruded arms' vertices and use Ctrl + A to scale them smaller.
- Reselect the shoulder vertex, and use Shift + V to slide it along the shoulder's edge in order to adjust the location and fix the area shape:

Creating the arms
- Select the middle thorax vertex we extruded the shoulder from and go to the Skin modifier; click on the Mark Loose button:

Making a more natural transition from the thorax to the arms
- Select the second vertex from the bottom and extrude it to the right-hand side to build the hip, and then extrude again and stop at the knee. Use Ctrl + A on the vertex to make it smaller:

Extruding the thighs
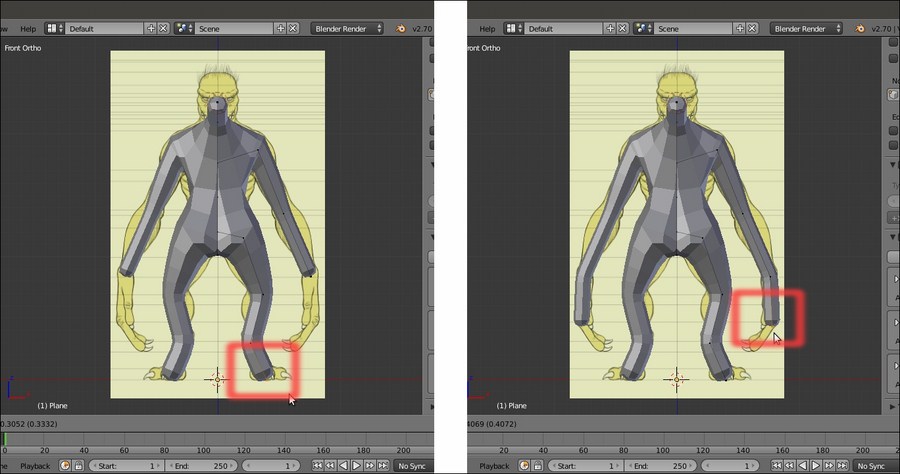
- Go on extruding the vertex to build the leg. Then, select the wrist vertex and extrude it to build the hand:

Extruding to complete the leg
- Press 3 to go to the Side view.
- Individually, select the vertices of the knee, ankle, and foot, and move them to be aligned with the character's posture (you can use the widget for this and, if needed, you can press Z to go in to Wireframe viewport shading mode); do the same with the vertices of the arm:

Adjusting the arm's position
- Select the vertices of the shoulder and elbow, and move them forward according to the template position; do the same with the vertices of the neck and waist:

Adjusting the position of the shoulders, thorax, and neck
- Select the vertex connecting the shoulder to the thorax and use Shift + V to slide it upwards, in order to make room for more vertices in the chest area. Use Shift to select the vertex at the bottom of the rib cage and press W; in the Specials pop-up menu, select Subdivide and, right after the subdivision, in the option panel at the bottom-left of the Blender UI, set Number of Cuts to 2:

Subdividing an edge
- In the Side view, select the upper one of the new vertices and use Ctrl + A to scale it bigger. Adjust the position and scale of the vertices around that area (neck and shoulder) to obtain, as much as possible, a shape that is more regular and similar to the template. However, don't worry too much about a perfect correspondence, it can be adjusted later:

Refining the shoulder's shape
- Extrude the bulk of the head. Select the last hand vertex and scale it smaller. Then, select the upper hand vertex and extrude two more fingers (scale their influence smaller and adjust their position to obtain a more regular and ordinate flow of the polygons in the generated geometry):

Creating the head, hands, and fingers
- As always, following the templates as reference, extrude again to complete the fingers; use all the templates to check the accuracy of the proportions and positions, and the Front, Side, and Back views too:

Adjusting the position of the fingers according to the templates
- Do the same thing for the foot, and we are almost done with the major part of the mesh:

Creating the feet toes
Now, it's only a matter of refining, as much as possible, the mesh's parts to resemble best the final shape of the character. Let's try with the arm first:
- Select the two extreme vertices of the forearm and press W | Subdivide | 2 (in the bottom Tool panel) to add 2 vertices in the middle. Then, use Ctrl + A to scale and move them outward to curve the forearm a little bit. Do the same for the thigh by slightly moving the vertices outward and backward:

Refining the shape of arms and legs
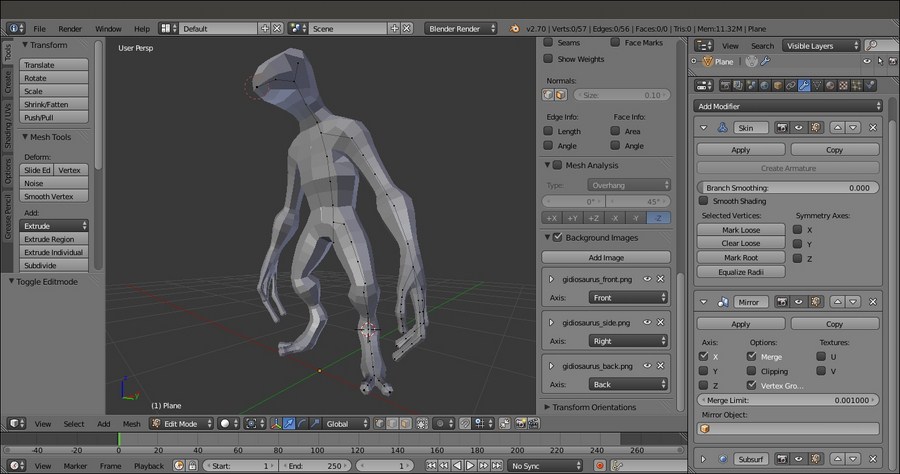
- Repeat the same procedure with the upper arm, shin, foot, and fingers; any part where it's possible, but don't go crazy about it. The goal of such a technique is just to quickly obtain a mesh that is good enough to be used as a starting point for the sculpting, and not an already finished model:

The completed base mesh
- Press Tab to go out of the Edit Mode; go to the Outliner and rename the base mesh as
Gidiosaurus. Then, save the file.
The Skin modifier is a quick and simple way to build almost any shape; its use is very simple: first, you extrude vertices (actually, it would be enough to add vertices; it's not mandatory to extrude them, but certainly it's more handy than using Ctrl + left-click to add them at several locations), and then using the Ctrl + A shortcut, you scale smaller or bigger the influence that these vertices have on the 3D geometry generated on the fly.
If you have already tried it, you must have seen that the more the complexity of the mesh grows, the more the generated geometry starts to become a little unstable, often resulting in intersecting and overlapping faces. Sometimes this seems unavoidable, but in any case it is not a big issue and can be easily fixed through a little bit of editing. We'll see this in the next chapter.
