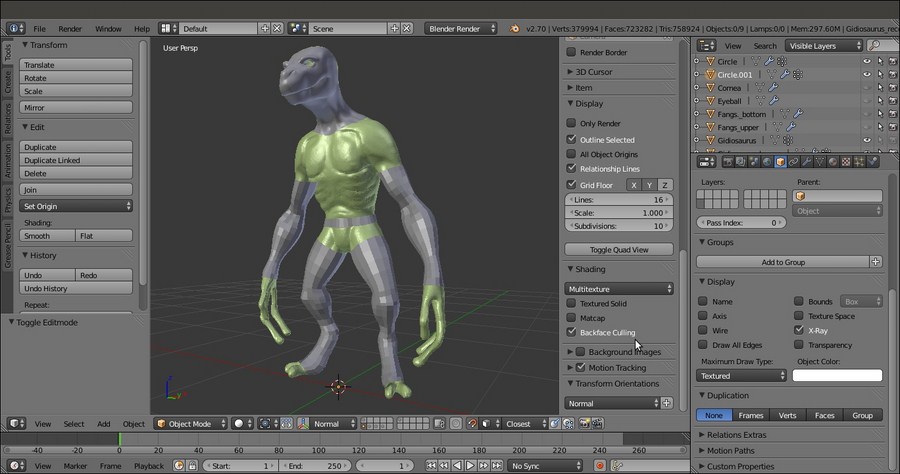
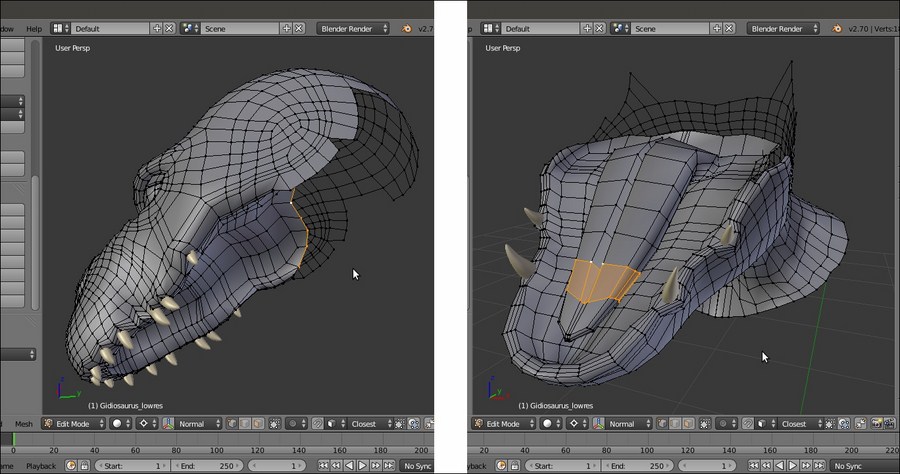
The Shrinkwrap modifier method can be the way to quickly finish the rest of the re-topology of the Gidiosaurus sculpted mesh, by quickly re-topologizing the simpler cylindrical shapes and then completing the more difficult parts by hand.
If necessary, repeat the steps to set up the Shrinkwrap modifier technique:
- Assign the Shrinkwrap modifier to the Gidiosaurus_lowres mesh and in the modifier stack, move it before the Subdivision Surface modifier.
- Click on the Target field to select the Gidiosaurus mesh item and leave Mode to Nearest Surface Point.
- Enable the Display modifier in Edit mode and Adjust edit cage to modifier result buttons and the Keep Above Surface item.
- In Edit Mode, to make the low resolution mesh more easily visible against the high resolution one, change the Offset value to 0.001.
- Having the X-Ray item still active, go to the Shading subpanel under the Properties 3D view sidepanel and check the Backface Culling item.
- Then, to conclude the re-topology, we also need to enable the Copy Attributes Menu add-on; go to Blender User Preferences | Addons | 3D View | 3D View: Copy Attributes Menu.
Let's go on by building the geometry of the neck:
- While still in Edit Mode, just select the head's last edge loop on the neck and extrude it (E key) towards the shoulders.
- Press the Ctrl + R keys and add at least 7 or 8 widthwise edge-loops:

Extruding the neck
- Also, with the aid of the Snap tool, tweak the position of the bottom row of vertices, extrude them to add an edge-loop of faces, and tweak again. Go out of Edit Mode.

The re-topology of the neck
We can use the same technique as in steps 1, 2, and 3 to quickly re-topologize the left arm and leg of the character. Instead of extruding the new geometry from the Gidiosaurus_lowres mesh, in this case, it's better to add a new simple primitive: a Circle or also a Plane; whatever the primitive, when you add it, be sure that the 3D Cursor is at the character's origin pivot point.
As you can see in the following screenshot, at first we just created the geometry only for the main cylindrical sections of the limbs:

Arms and legs re-topologized
Do the same for the body: just a couple of edge-loops placed at the waist to extrude the geometry from; remember that the chest is covered with the armor breastplate, so only the exposed area needs to be re-topologized.
One Mirror and one Subdivision Surface modifier has been assigned to the three objects (head/neck, arm, and hips/leg). Also, because of the Mirror modifier, the vertices of the half side of the abdomen's edge-loops have been deleted.
After the main parts have been re-topologized, we can start to tweak the position of the vertices on the arm and leg, to better fit the flow and shapes of the muscles and tendons in the sculpted mesh.
Thanks to the aid of the Shrinkwrap modifier, we can do it quite freely; however, before we start with the tweaking, we require a little bit of preparation for a better visibility of the working objects, to affect and modify the new geometry (visible as a wireframe) and have the underlying sculpted mesh visible at the same time.
To do this, we have two ways:
- Go to the Shrinkwrap modifier panel and set the Offset value to 0.002.
- Go to the Object window and disable the X-Ray item; in the Maximum Draw Type slot, under the Display subpanel, select Wire:

The mesh visualized in wireframe mode
- Go to the Shrinkwrap modifier and set the Offset value back to 0.000.
- If this is the case, go to the Object window and, under the Display subpanel, enable the X-Ray item. In the Maximum Draw Type slot, under the Display subpanel, select Textured.
- Go to the Properties 3D view sidepanel (press N if not already present); if necessary, enter Edit Mode and under the Shading subpanel, check the Hidden Wire item.
- In both ways (I used the second one), if you want to enable the Display modifier in Edit mode and Adjust edit cage to modifier result buttons for the Subdivision Surface modifier to see its effect in Edit Mode, it is better to move the Shrinkwrap modifier after the Subdivision Surface modifier in the stack, to have a better looking result.

The second wireframe visualization method
We can now start to add the missing parts, by extruding and moving the vertices to better fit the sculpted features and also adding, if necessary, new edge-loops to better define these features:

Refining and completing the remaining features
After the wireframe setup, it's easy to tweak the low resolution geometry to better fit the character's anatomy:

The character's anatomy
The still missing parts are modeled at this stage, such as the inside of the nostrils or the eyelids, again with the aid of the Shrinkwrap modifier; this time, targeted to the Cornea object to project the eyelids geometry onto it with an Offset value of 0.0035:

The character's eyelids
Also, we built the inner mouth and the tongue of our character and refined the dental alveoli:

The character's alveoli and tongue
As in every project, we can go on with the refining, adding edge-loops, and so on, and this would seem a never-ending work; instead, at this point, we can consider the Gidiosaurus re-topology at the end, so it's time to apply the Shrinkwrap modifiers and, if this is the case, select the Gidiosaurus body's still separated objects and join them together to have a single mesh.
It's time to do the same with the armor that is still waiting on the 13th scene layer:

The totally completed re-topologized character with the armor
First, we have to quickly build the geometry using the Shrinkwrap modifier technique and then set the visibility of this geometry to wireframe (Wire), to make the underlying sculpted mesh visible.
The Shrinkwrap modifier, in the first case with the Offset value set high enough to allow the wireframe visibility over the sculpted surface, ensured that all the moved vertices and the new added geometry are automatically wrapped around the target mesh to preserve the volume.
At the end, we took back the Offset value to 0.000 anyway and we applied the Shrinkwrap modifier; then, we joined the re-topologized arm and leg objects together to the Gidiosaurus_lowres one.
As you have probably noticed, we haven't applied the Mirror modifiers yet. This is because it will still be useful in the next chapter.
