
Let's create a sample Appium Java project in IntelliJ. This forms the foundation of all the code-related and Appium-related discussions we will have in the subsequent chapters. The following steps help you to achieve this:
- Launch IntelliJ and click on Create New Project on the welcome screen.
- On the New Project screen, select Gradle from the left pane. Project SDK should get populated with the Java version.
- Click on Next, enter the GroupId as com.test and ArtifactId as HelloAppium. The version will already be populated; click on Next.
- Check the Use auto-import option and ensure that Gradle JVM is populated. Click on Next. In case the Gradle JVM is not populated, please follow the below steps:

-
- Click on Configure > Project Defaults > Project Structure:

-
- Choose Project under Project Settings as shown below:

-
- Click on New... button.
- Point it to the JDK installed on your machine.
-
- Click on OK to close the pop up and go to the new Project creation screen.
- The Project name field will be auto-populated with what you gave as ArtifactId. Choose a Project location and click on Finish. IntelliJ will be running the background task (Gradle build), which can be seen in the status bar.
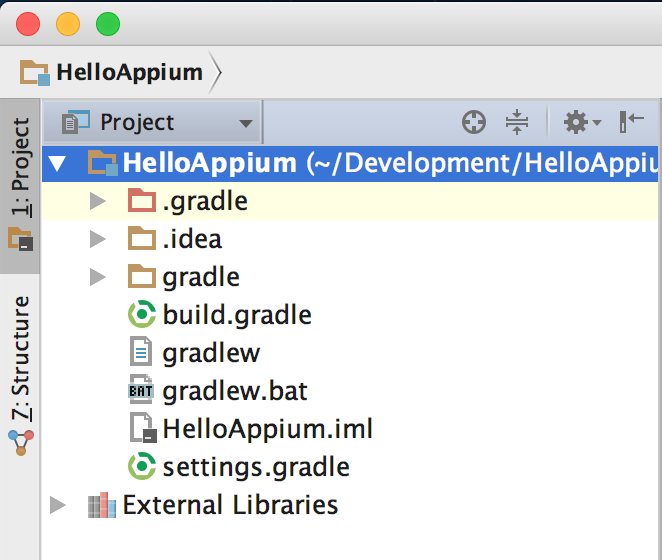
- This should create a project with the following structure:
- Open the build.gradle file. You will see a message, as shown; click on Ok, apply suggestion!:

- Enter the following two lines in build.gradle. This adds Appium and cucumber-jvm under dependencies:
compile group: 'info.cukes', name: 'cucumber-java',
version: '1.2.5'
compile group: 'io.appium', name: 'java-client',
version: '5.0.0-BETA6'
- Here's how the gradle file should look:

- Once done, navigate to View > Tools Windows > Gradle and click on the Refresh all gradle projects icon. This will pull all the dependencies in External Libraries:

- Navigate to Preferences > Plugins, search for Cucumber for Java, and click on Install (if it's not previously installed).
- Repeat the preceding step for Gherkin and install the same. Once done, restart IntelliJ if it prompts.
Once done, we are ready with the IntelliJ project creation. The next step is to write a Cucumber feature file; however, let's first understand what Cucumber is.