
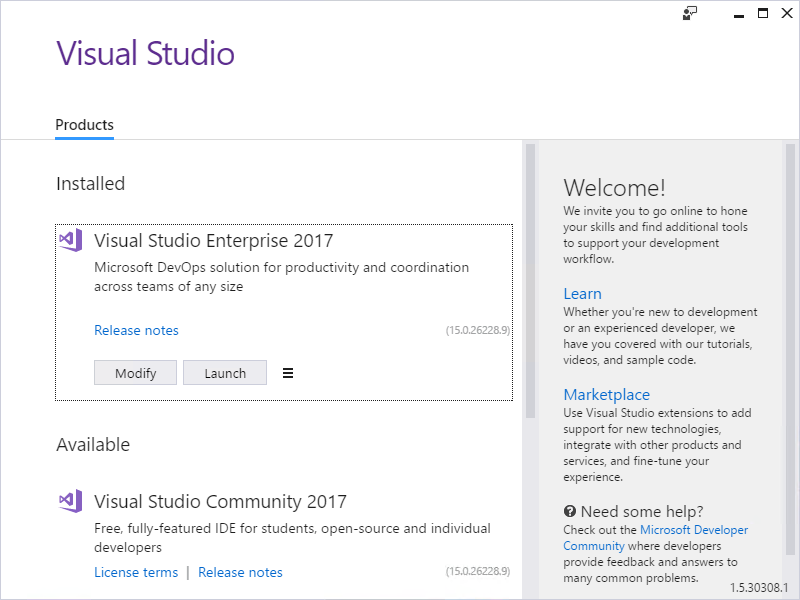
- Double-click on the installer you downloaded from the Visual Studio website. This will launch the installer and list the version of Visual Studio 2017 installed on your machine with a Modify button. Click on the Modify button:
- From the Mobile & Gaming group, select the Mobile development with JavaScript workload. Then, click on the Modify button. Depending on your specific requirements, additional components might be installed, such as support for the Android SDK and the Google Android Emulator:

- Apache Cordova uses web technologies such as HTML, CSS, and JavaScript to build mobile applications that will run on Android, iOS and Windows devices. From Visual Studio, create a new application and select JavaScript from the Other Languages templates. Then select the Blank App (Apache Cordova) template. This is just a blank project that uses Apache Cordova to build a mobile app for Android, iOS, and Universal Windows Platform (UWP). I just called my app MyCordovaApp.
- Once Visual Studio has created your application, you will notice that it has a very specific folder structure:
- merges: Expanding themerges folder, you will notice that you have three subfolders called android, ios, and windows. Developers can use these folders to deliver different content based on which mobile platform they are targeting.
- www: This is where most of your development will take place. The index.html file will become the main entry point for your Cordova application. When your mobile application is started, Cordova will look for this index file and load that first. You will also notice subfolders under the www folder. Think of these as a regular web application folder structure, because that is exactly what they are. The css subfolder will contain any style sheets you need to use.
Any images you need to use in your mobile application will be stored in the images subfolder. Lastly, you will add any JavaScript files used by your mobile (web) application in the scripts subfolder. If you expand the scripts subfolder, you will notice a JavaScript file called platformOverrides.js. This is used in conjunction with the merges folder to deliver specific JavaScript code based on the mobile platform you are targeting. - res: The res folder will be use to store non-web application resources that might be used by the different native mobile applications. These can be resources such as splash screens, images, icons, signing certificates, and so on:

You will also notice several configuration files. These are bower.json, build.json, config.xml, and package.json. While I will not go into each one of these configuration files in detail, I want to briefly mention the config.xml and package.json files. The package.json file is not currently used by Cordova at the time of writing. It is intended to eventually replace the config.xml file. Currently, the config.xml file contains settings specific to your mobile application. Double-click on this file to view the custom editor for the Cordova application. The custom editor avoids the complexities of having to edit the XML file directly by providing a standard Windows form from where you can input the application-specific settings. The settings available to you as a developer are such settings as application name, author name, application description, device orientation, plugin configuration, and so on.
- At this point, you can select a device from the debug drop-down and run your mobile application. If you had to select Simulate in Browser - Nexus 7 (Tablet), Visual Studio will launch Google Chrome and display the default Cordova application. This is the default for every Cordova application and does not contain any functionality really. It merely lets you know that your Cordova application has started correctly. What is interesting though is that you will see a new tab open up in Visual Studio while your simulator is launched. It is called the Cordova Plugin Simulation and defaults to the Geolocation plugin. This allows developers to interact with plugins and fire specific events as your application is running in the simulator. Any new plugins added to your Cordova application will expose additional panes in the Cordova Plugin Simulation:

- Next, add the NuGet package jQuery.mobile to your solution. NuGet will install jQuery.1.8.0 and jquery.mobile.1.4.5 to your solution. At the time this book was written, it was advised that jQuery.1.8.0 not be upgraded to the latest version due to compatibility reasons:

- In your solution, NuGet will add several JS files to your project's Scripts folder. Drag all these JS files to your www/scripts folder. Do the same with the project'sContent folder. Drag all the CSS files and the images subfolder to the www/css folder:

- Swing back to and open your index.html file. You will see a section between the <body></body> tags that looks as follows:
        <div class="app">
          <h1>Apache Cordova</h1>
          <div id="deviceready" class="blink">
            <p class="event listening">Connecting to Device</p>
            <p class="event received">Device is Ready</p>
          </div>
        </div>
This is the default boilerplate code added by the template and we will not be using it. Replace this with the following code and also add <script src="scripts/jquery-1.8.0.min.js"></script> and <script src="scripts/jquery.mobile-1.4.5.min.js"></script> to the bottom of the body section where the other script references are.
When you are done, your <body></body> section should look as follows:
        <body>
          <div role="main" class="ui-content">
            <form>
              <label id="current-date">The date is:</label>
              <button id="get-date-btn" data-role="button"
                data-icon="search">
                Get Current Date</button>
            </form>
          </div>
          <script src="scripts/jquery-1.8.0.min.js"></script>
          <script src="scripts/jquery.mobile-1.4.5.min.js"></script>
          <script src="cordova.js"></script>
          <script type="text/javascript" src="cordova.js"></script>
          <script type="text/javascript" src=
            "scripts/platformOverrides.js"></script>
          <script type="text/javascript" src="scripts/index.js"></script>
        </body>
- Then, between the <head></head> tags, add the <link rel="stylesheet" href="css/jquery.mobile-1.4.5.min.css" /> style reference above the existing <link rel="stylesheet" type="text/css" href="css/index.css"> reference.
When you are done, your code should look similar to the following:
        <head>
          <!--
            Meta references omitted for brevity
          -->
          <link href="css/jquery.mobile-1.4.5.min.css" rel="stylesheet" />
          <link rel="stylesheet" type="text/css" href="css/index.css">
          <title>MyCordovaApp</title>
        </head>
- Your application now includes the required jQuery libraries that will make your mobile application mobile and touch optimized. Your mobile application is now also responsive to the device it will be displayed on. We now need to add some basic styling to the application. Open up the index.css file referenced in the <head></head> section of your index.html file. This should be in www/css/index.css. Replace the contents with the following code. The #get-date-btn is just referencing the button on our form and setting the font size to 22 pixels. The form is styled to contain a solid border at the bottom of 1 pixel wide:
        form {
          border-bottom: 1px solid #ddd;
          padding-bottom: 5px;
        }

        #get-date-btn {
          font-size: 22px;
        }
- We now need to add a click event for when the user taps on the Get Current Date button. To do this, open the index.js file located at www/scripts/index.js. Find the onDeviceReady() method and modify the code to look as follows:
        function onDeviceReady() {
          // Handle the Cordova pause and resume events
          document.addEventListener( 'pause', onPause.bind(
            this ), false );
          document.addEventListener( 'resume', onResume.bind(
            this ), false );

          $('#get-date-btn').click(getCurrentDate);
        };
- Think of this code as an event handler for the get-date-btn button. It is actually adding a click listener to the button that will call the getCurrentDate function whenever the button is tapped by the user. It is probably a good time to mention the (function () { ... })(); function that contains the onDeviceReady() function. This is called an anonymous self-invoking function, which is actually just something you can think of as a form load event. You will notice that it adds an event handler for the onDeviceReady() method.
- Lastly, add the getCurrentDate() function to the index.js file.
The getCurrentDate() function is nothing special. It just gets the date and formats it to a yyyy/MM/dd format and displays it in the label on the index.html page. Your function should look as follows:
        function getCurrentDate()
        {
          var d = new Date();
          var day = d.getDate();
          var month = d.getMonth();
          var year = d.getFullYear();
          $('#current-date').text("The date is: " + year + "/"
            + month + "/" + day);
        }