
App Engine is Google’s Platform as a Service (PaaS) offering, similar to Elastic Beanstalk from Amazon. In the section Creating Elastic Beanstalk application from Eclipse
, we deployed the CourseManagementREST service using Elastic Beanstalk. In this section, we will learn how to deploy the same service using Google App Engine.
Let’s make a copy of the CourseManagementREST project. Right-click on the project in Eclipse Project Explorer and select Copy. Right-click anywhere in Project Explorer and select Paste. Eclipse will prompt you to name the project. Let’s name it CourseManagementREST-GAE. We will deploy this project using Google App Engine.
Let’s configure our project as an App Engine project. Right-click on the CourseManagementREST-GAE project in Project Explorer and select Configure | Convert to App Engine Standard Project.
Before we deploy the project, remove web.xml from the src/main/webapp/WEB-INF folder. Google App Engine’s Java platform uses the Jetty server and it does not need web.xml for this deployment.
<properties>
<failOnMissingWebXml>false</failOnMissingWebXml>
</properties>
To test this application locally, go to the Servers view, right-click on it, and select New | Server. Then, expand the Google group and select App Engine Standard:

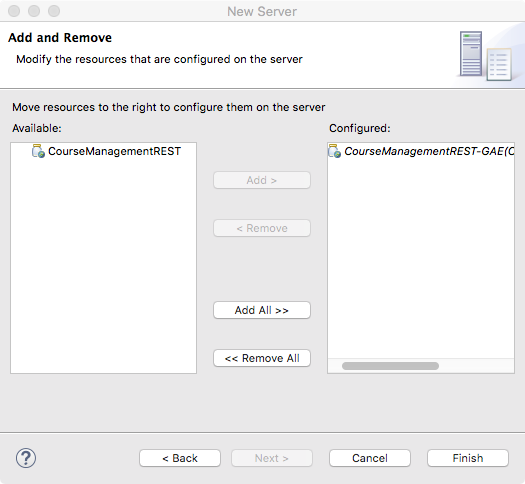
Click Next and add the CourseManagementREST-GAE project for deployment:
Click Finish and start the server from the Server view. Then, browse to http://localhost:8080/services/course/get/1 to verify that the application has been deployed properly.
<properties>
<maven.compiler.source>1.8</maven.compiler.source>
<maven.compiler.target>1.8</maven.compiler.target>
</properties>
Before you deploy this project to Google App Engine, you should make sure that an application has been created in Google App Engine. Browse to https://console.cloud.google.com/appengine and check if any application exists. If not, you can create an application from that page. Alternately, you can run the following command in Terminal:
gcloud app create
To deploy this project to Google App Engine, select the project in Project Explorer and the drop-down menu from the Google Cloud Platform toolbar button:

Select the Deploy to App Engine Standard... menu:

Select your Google account from the drop-down menu, if not already selected, and then select the Google Cloud project you want the application deployed to.
Once the project is deployed, browse to https://<your_project_id>.appsport.com/services/course/get/1 to verify it.
To stop the application, you need to disable the application—open https://console.cloud.google.com and go to App Engine | Settings and click the Disable Application button.