
Now, let's tie this all together and look at the process of building an EC2 instance:
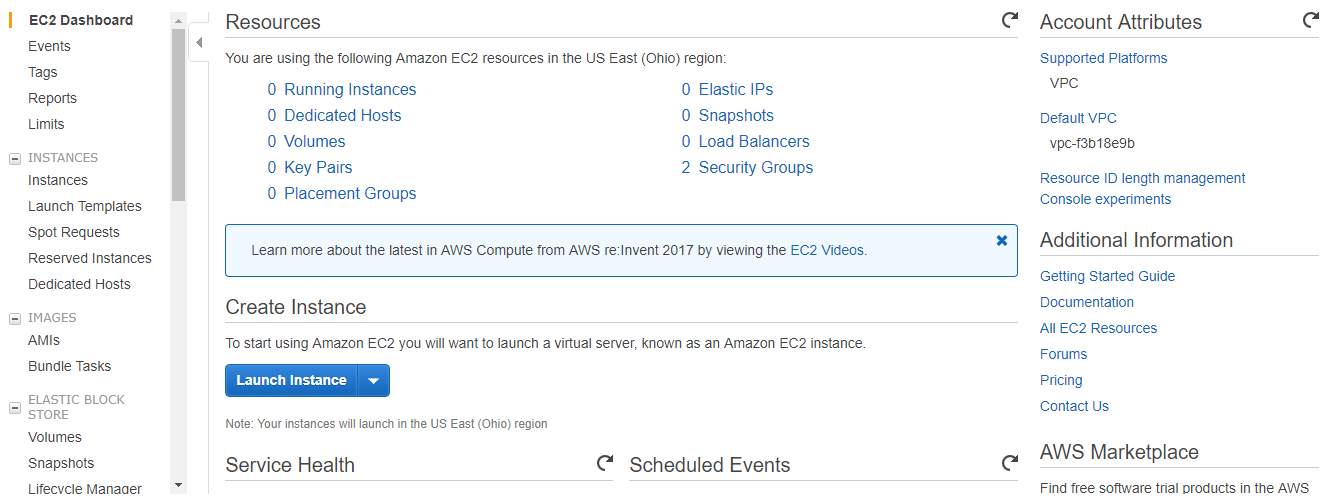
- First, we'll navigate to the EC2 Dashboard and click on the blue Launch Instance button:
This opens the launch instance dialogue where we can search for and choose an AMI representing an operating system. From the quick start menu, we can select My AMIs, the AWS Marketplace, and the Community AMIs. For the sake of this demonstration, we'll run an Amazon Linux AMI:

- Next, we can choose an instance type. We will select t2.micro as it is free-tier eligible, meaning that if you create a new AWS account, you can run over 700 hours of this type of instance each month for free for the first year:

- Next, we will configure the instance details. Here, we can choose the number of instances to run. If we need a fleet of instances, we can just choose any number up to our soft limit set by AWS. If we need to increase the soft limit for our account, we can contact AWS. We can also request spot instances straight out of this dialogue, but for the purpose of this demonstration, we will just run an On-Demand Instance.
We need to select a VPC and a subnet to connect the instance to the network. When building a highly available cluster you will need to repeat this operation multiple times so that you can put instances in more different subnets. You only need to do this if you're if building the cluster through the console.
Here, we also have the ability to give a role to the EC2 instance, determine the behavior on shutdown, and set up detailed CloudWatch monitoring, if required.
For the purposes of this demo, we will run one instance in the default VPC and put it in any default subnet:

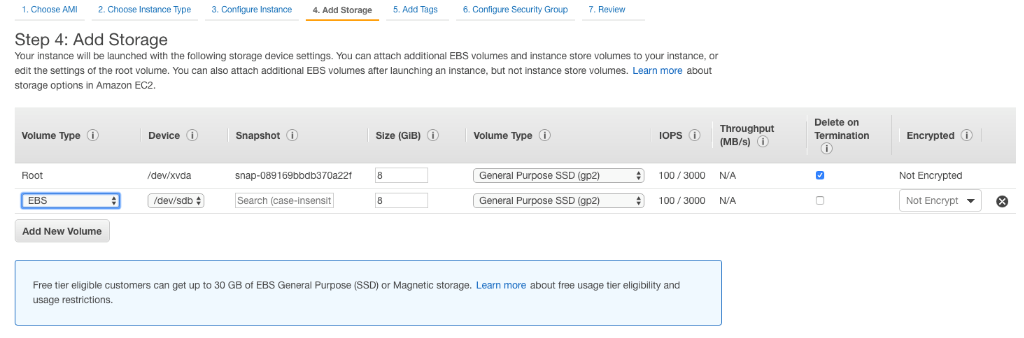
- Next, we will add an additional EBS volume. We will choose an EBS volume and select how the volume will be represented in our operating system as either /dev/xvdb or /dev/sdb by selecting the device type:
- Next, we can add tags to the EC2 instance – tags help with the administration of EC2 instances. We can do advanced filtering on tags to help determine which application the instances belong to, for instance. Tags are represented as key:value pairs:

- Now, we will create a security group. This security group will allow us to SSH into the instance from everywhere. Make sure you choose the type as SSH and enter 0.0.0.0/0 in the source:

- In the Review Instance Launch window, we will see a review of the instance creation parameters:

We will also need to choose an SSH key to log in to the instance. Password logins are not allowed to EC2 instances by default, so a SSH key is used to log in. If you have not created a key pair, you can create one, give it a name, and then download the key pair by pressing on the Download Key Pair button. Save it securely as this is your credential to authenticate to the EC2 instance:

- Once we launch the instance we will see a Launch Status window with an instance ID. We can click the instance ID and that will take us into the EC2 Dashboard under the Instances section:

- Under the Instances section, we will now see the instance. Record the IP address or DNS name assigned to the instance as we will use this to SSH into the instance and configure the secondary volume:

- Now, log in to the instance with your favorite SSH client using the SSH key pair that you downloaded in this exercise. Please refer to the link named Connecting to Your Linux Instance Using SSH provided in the Further reading section of this chapter.
- Once logged in, we can run the following command to see if there is any file structure on our secondary disk:
sudo file -s /dev/xvdb
![]()
- The result of the preceding command should be /dev/xvdb: data, meaning that there is no structure on this disk. Next, we will create a new partition by running the following command:
sudo mkfs -t ext4 /dev/xvdb

- Next, we will create a directory and mount it to our newly created volume. To create the volume, run the following command:
sudo mkdir /newvolume
- To mount the column after it has been created, run the following command:
sudo mount /dev/xvdb /newvolume
Now that we have mounted the column, we can perform traditional disk operations such as traversing directories with cd, determining storage usage with df, and writing to the new volume:

If we need to restart the instance we can run the sudo reboot or sudo init 6 commands from within the command line or we can log back in to the AWS Management Console and perform a reboot from the EC2 Dashboard. This is a good option when the instance is not accessible over the network for any application reason (perhaps we ran ifdown on the Ethernet interface or an application has a memory leak).
Once we don't require the instance anymore we can simply terminate the instance from the AWS Management Console.