
Armitage is frequently overlooked by penetration testers who eschew its GUI interface in favor of the traditional command-line input of the Metasploit console. However, it possesses Metasploit's functionality while giving visibility to its many possible options, making it a good alternative in complex testing environments. Unlike Metasploit, it also allows you to test multiple targets at the same time—up to 512 targets at once.
To start Armitage, ensure that the database and Metasploit services are started using the following command:
service postgresql start
After that step, enter armitage on the command prompt to execute the command. Armitage does not always execute cleanly and it may require the launch steps to be repeated to ensure that it is functioning correctly.
To discover the available targets, you can manually add a host by providing its IP address or selecting an nmap scan from the Hosts tab on the menu bar. Armitage can also enumerate targets using MSF auxiliary commands or DNS enumeration.
Armitage can also import host data from the following files: Acunetix, amap, AppScan, Burp proxy, Foundstone, Microsoft Baseline Security Analyzer, Nessus NBE and XML files, NetSparker, NeXpose, Nmap, OpenVas, Qualys, and Retina.
The initial Armitage start screen is shown in the following screenshot:

Armitage allows you to set a host label by right-clicking and selecting a host, and then going to the Host menu and selecting the Set Label... function. This allows you to flag a particular address or identify it by a common name, which is helpful when using team-based testing. This process is shown in the following screenshot:

Armitage also supports dynamic workspaces—a filtered view of the network based on network criteria, operating system, open ports and services, and labels. For example, you may test a network and identify several servers that do not appear to be patched to the extent of the remainder of the network. These can be highlighted by giving them a label and then placing them in a priority workspace.
Once you have identified the target systems that are present on a network, you can select specific modules to implement as part of the exploitation process. You can also use the Attacks option in the menu bar to find attacks.
To exploit a host, right-click and navigate to the Attack item, and choose an exploit. (Make sure that the operating system is set for the correct host; this does not always happen automatically.)
One interesting option is Hail Mary, which is located under the Attacks option. By selecting this function, all of the identified systems are automatically subject to exploits to achieve the greatest number of possible compromises, as shown in the following screenshot:

This is a very noisy attack and should therefore be used as a last resort test choice. It is also an excellent way to determine whether an intrusion detection system is implemented and configured properly or not.
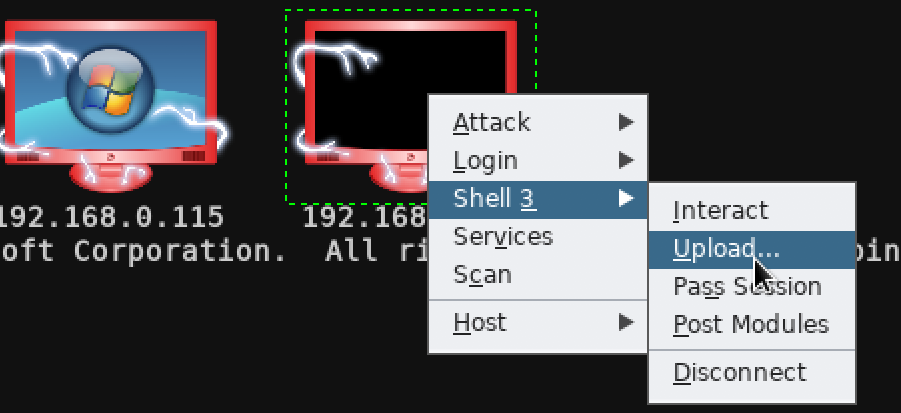
A system that is compromised shows up as an icon with a red border with electrical sparks. In the following screenshot, two test systems have been compromised and there are four active sessions in place between these systems and the tester. The Active Sessions panel indicates the connections and identifies what exploit was used to compromise the target. Take a look at the following screenshot to see what represents the different options:
During a penetration test that was conducted, the Hail Mary option identified two exploitable vulnerabilities with the target and initiated two active sessions. Manual testing with the same target eventually identified eight exploitable vulnerabilities, with multiple communication channels between the compromised system and the tester. Real-world tests of this type reinforce the advantages and weaknesses of automated tools during the penetration testing process.