Chapter 11: Enterprise Social Networking and Collaboration
Microsoft Teams has become an instant hit for social collaboration, using SharePoint Online as the backend for the application. The replacement for Skype has brought on new features that make collaborating in the cloud even more collaborative. Microsoft Teams has really taken over the social collaboration space and has overtaken the top sellers in this market, including Slack.
The reason for its success is its features and ease of use. There are so many great things to talk about with this product and we plan to do a thorough job of running through its features. From instant messaging and telephony to integrated apps, the product has really included a list of great features. We will also talk about the downfalls as well where the product could be improved and support an even more collaborative vision.
We will also look at how the product can be used to facilitate meetings and even large live events. The product gives a deeper functionality for providing support for businesses that need to manage events. There is a lot to get into but I will run through the setup of Microsoft Teams, including creating a visual and audio configuration, so that you can see the possibilities and the direction it can take you in supporting those services.
There are some features included that SharePoint offers natively that we will also talk about as some of these features have been deprecated. Yammer has some integrations as well with SharePoint 2019 and there are also Microsoft mobile capabilities that we can walk through that are native to SharePoint on-premises and social collaboration.
In this chapter, we will also look at the features of SharePoint 2019 and show how these products can be bridged together. Although Teams is a key component in the cloud, there are other features available that we can take advantage of to push the platform.
The following topics will be covered in this chapter:
- Social features in SharePoint 2019
- Microsoft Teams
Technical requirements
For you to understand this chapter and the knowledge shared, the following requirements must be met:
- 3–5 years of SharePoint experience
- 1–2 years of Microsoft Teams experience
You can find the code files present in this chapter on GitHub at https://github.com/PacktPublishing/Implementing-Microsoft-SharePoint-2019.
Social features in SharePoint 2019
SharePoint 2019 was built to bring a bigger experience to the platform by integrating features that would expand on the collaboration features of the past. SharePoint is configured differently now than it used to be. Earlier, there were restrictions or, technically put, limitations on how you could integrate products and features.
As we look at where SharePoint was and where it is now, we can notice that all integrations are outside of the product and not included in the product's installation, or can't even be installed on the same server. Again, this helps with performance and keeps applications separated that could get messy when troubleshooting if installed together on servers. The cloud now provides some integrations, as seen in Chapter 10, SharePoint Advanced Reporting and Features, where we can use applications from the outside to manipulate data in our on-premises environment.
All the social features you have seen in other versions of SharePoint, such as 2016 and SharePoint Online, are available in SharePoint 2019. As we mentioned, where SharePoint 2019 enhances these features is with integration with other applications such as Yammer that push content to SharePoint through web parts and other integrations. We will talk more about this in this chapter but here is a short list of social features that are available in SharePoint 2019:
- Community features
- Company feed
- Follow features
- Microblogging
- One-click sharing
- Personal sites
Developers can extend these features by developing enhancements to make these features do more to support their users. With the use of APIs, the developer can start developing these enhancements. Using Visual Studio 2012 or newer, the platform is available for these enhancements; we will talk more about this in Chapter 12, SharePoint Framework. They can also use Power Apps, Power Automate, and other tools within Microsoft 365 to enhance the functionality of social features within SharePoint 2019 using hybrid connectivity.
Microsoft's direction in enterprise social networking
Microsoft's direction in enterprise social networking has become very clear over the last few years. Microsoft has taken a strong move away from collaboration silos. The traditional collaboration methods offered by Microsoft and utilized within many organizations required several different applications to cover the communication and collaboration needs of a company.
Most companies would have their Outlook application, Lync/Skype client, Yammer, and browser Office clients, which of course included SharePoint, primarily for document collaboration. Although there have always been plugin methods to integrate SharePoint and Outlook, most enterprise users have been forced to hop around to different locations to fulfill all their social networking and collaboration needs.
Now we see how, with new social applications, users can stay in one application such as Microsoft Teams and do not have to hop around to find information. A bridge has been created where we can pull in information from other apps and bring them into Microsoft Teams, including SharePoint, which makes the user experience so much easier and saves time when users are looking for information.
The user experience is enhanced by Microsoft offering mobile apps for SharePoint and Microsoft Teams. This gives users access to these applications from their mobile devices and they are able to access meetings and information from anywhere. Yammer also has a mobile app and you could create your own app using Power Apps or, using other development languages, you can create single sign-on access to protect access from the internet into the company tenant, using Intune and Azure to host the mobile connectivity.
We believe we will see more of this as some of the social networking tools get more enhanced and bring more collaborative functionality to the table. It seems the goal of all this is to be able to share anything with people internally or externally securely, which is a great step in the right direction. Everyone seems to love these new features and cannot wait to see what is yet to come.
Microsoft Teams overview
Lync and Skype have been long regarded as the kings of instant messaging and meeting feature applications for Microsoft, until now. Microsoft Teams has come on the scene strong and is bringing a bigger experience and giving tighter integration with SharePoint. When mentioning those applications, we must also mention Yammer. This social app has also been used for social interactions but in a different way. We see the need to explain how Yammer works so that you can see the differences and why they are both used together.
Yammer is used primarily for organizational communication and engagement. You would find Yammer content open to everyone in your organization. As stated, when you work with larger groups of people and content is everywhere, you may see a posting of Yammer content as you surf your SharePoint site. These posts would contain organization-wide information, which can include conversational or professional information and is not suitable for confidential content.
This comes into play where maybe you have IT teams that are separated across the company. In that scenario, you may have SharePoint admins in different departments that run their own farms. Using Yammer, you can create an organizational space where they can share ideas and information through the social networking tool.
We apologize but we do not have enough page space in this book to dig deeper into this to show more ways of how Yammer can be useful in on-premises environments and how it can be easily integrated with SharePoint 2019. Research to find out how Yammer can help your organization along with Microsoft Teams.
There is also another social tool that needs to be mentioned, and that is a mobile app built and supported by Microsoft named Kaizala. Kaizala is a group communication and work management tool used for secure mobile messaging. It provides a chat interface to securely connect to colleagues, vendors, distributors, and other resources a person may need in and out of your enterprise.
Kaizala gives you options to send invoices, and other Kaizala actions can be used within the app. You can schedule work, provide training materials, or even send attachments for review by other colleagues. Polls and surveys are also available and these types of communications can be sent to thousands of people. This app is an alternative to other social media-type applications we can use within the Microsoft 365 cloud. In the case of SharePoint 2019, you must be on a hybrid configuration to take advantage of Yammer, Kaizala, and other apps like SharePoint as well. These all are supported through hybrid connectivity.
If you look at the other tools, Yammer and Kaizala, you will see that they both work for large-scale communication, more like enterprise communication tools. Microsoft Teams works better for projects and smaller teams of people within your organization, as you will see in this section. Those teams that are created are used mostly to support projects or departments within the organization. This is a smaller group of people, so responses would be quick, and you will only find yourself using Teams when you are working on projects or working with these small groups of people.
When Microsoft Teams is rolled out in an organization, so is SharePoint Online, technically, because behind every Microsoft Teams workspace is what we traditionally know as a SharePoint team site. This is important to remember and drive home with your users and management teams as they need to understand that with each team comes a SharePoint site. You could end up with many sites that you know nothing about as an administrator.
The other thing that admins need to be aware of is that Microsoft Teams only authenticates using Microsoft Azure Active Directory (AD) authentication. So, when using the product for an on-premises SharePoint farm, that farm also needs to use AD in the cloud. So, the dependency on using Teams within your on-premises environment is using Azure AD.
The reason why you want this integration is to get the presence feature working in your on-premises environment seamlessly. This would require user profiles to import users from AD in the cloud, and if you want to make an even tighter integration, use the hybrid features within SharePoint 2019 to bring it all together, integrating OneDrive and other great features.
While Microsoft Teams is an amazing interface that offers a lot of different collaboration tools under a single moniker, it is not a replacement for SharePoint. I have seen some confusion around this as management in certain organizations are solely focused on reducing redundant applications and some may wrongly believe that if Microsoft Teams is adopted, then Microsoft SharePoint disappears, yet that is simply not the case.
Use both collaboration tools for different types of collaborative options. SharePoint is used for a more advanced set of features, such as document sharing, departmental sites, libraries and lists, and automated business processes on a large scale that work to create collaborative interactions with departmental technology.
Use Microsoft Teams for meetings, project calendars, messaging, and keeping related files associated with the project or team in the SharePoint site associated with the team. With this use of collaboration tools, it seems to me to be more project focused but has some organizational areas it supports, such as meeting technology.
Bridging these two applications together creates a full, powerful collaborative experience. This is why you see more and more people flocking to the Microsoft cloud because the tools are powerful and can create a sense of your company being large but you are actually small due to the technology behind your company.
Microsoft Teams in the age of the pandemic
As everyone is aware, we were all recently blindsided by the COVID-19 pandemic. This pandemic illustrated the uncertainty not only in our personal lives but in our working lives as well. Many people were impacted by the onset of COVID-19 and there was a great loss of jobs in many areas. However, this impact was lessened a bit by using virtual technologies and social networking capabilities to keep businesses functioning and to keep people at work and school safe by social distancing using working from home. Microsoft Teams was the shining star in the midst of this need for rapid adaptation. Companies, schools, and government agencies alike leveraged the power of Microsoft Teams to keep functioning.
Users can communicate through Microsoft Teams using the chat functions that Lync and Skype historically provided. Businesses can also host meetings, both video calls and audio, through the Microsoft Teams platform. This function was typically handled by Cisco Webex functionality, GoToMeeting, and other virtual meeting platforms. Microsoft Teams also allows users and groups of users to access, view, and edit SharePoint documents right from the Teams interface. The Microsoft Teams platform can also be integrated with Outlook so that your email messages can be viewed from this single interface. Many other apps can be integrated as well, such as Salesforce, Power Apps, and so much more, which brings a new meaning to collaboration.
SharePoint and Microsoft Teams
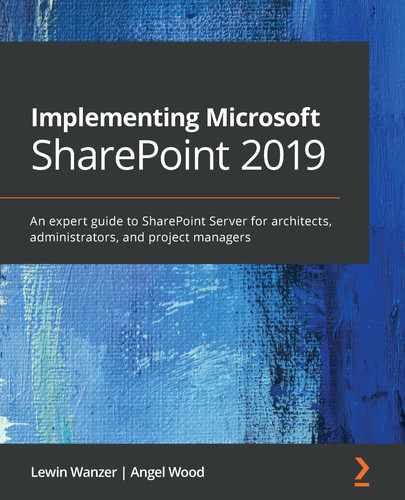
With the introduction of Microsoft Teams, organizations are now able to meet all their social networking communication and collaboration needs in one place. This will allow users to focus on the tasks at hand with all the information organized within a single location where all the messages, documents, notes, and chat conversations are accessible in real time to members of the team. For SharePoint, this means that each created team is associated with a SharePoint Online team site and each channel within that team is associated with the SharePoint site's document library. We will explore the concept of a "team" and a "channel" later in this chapter. For now, review the following chart to see a representation of the architecture of teams and channels in relation to SharePoint Online:
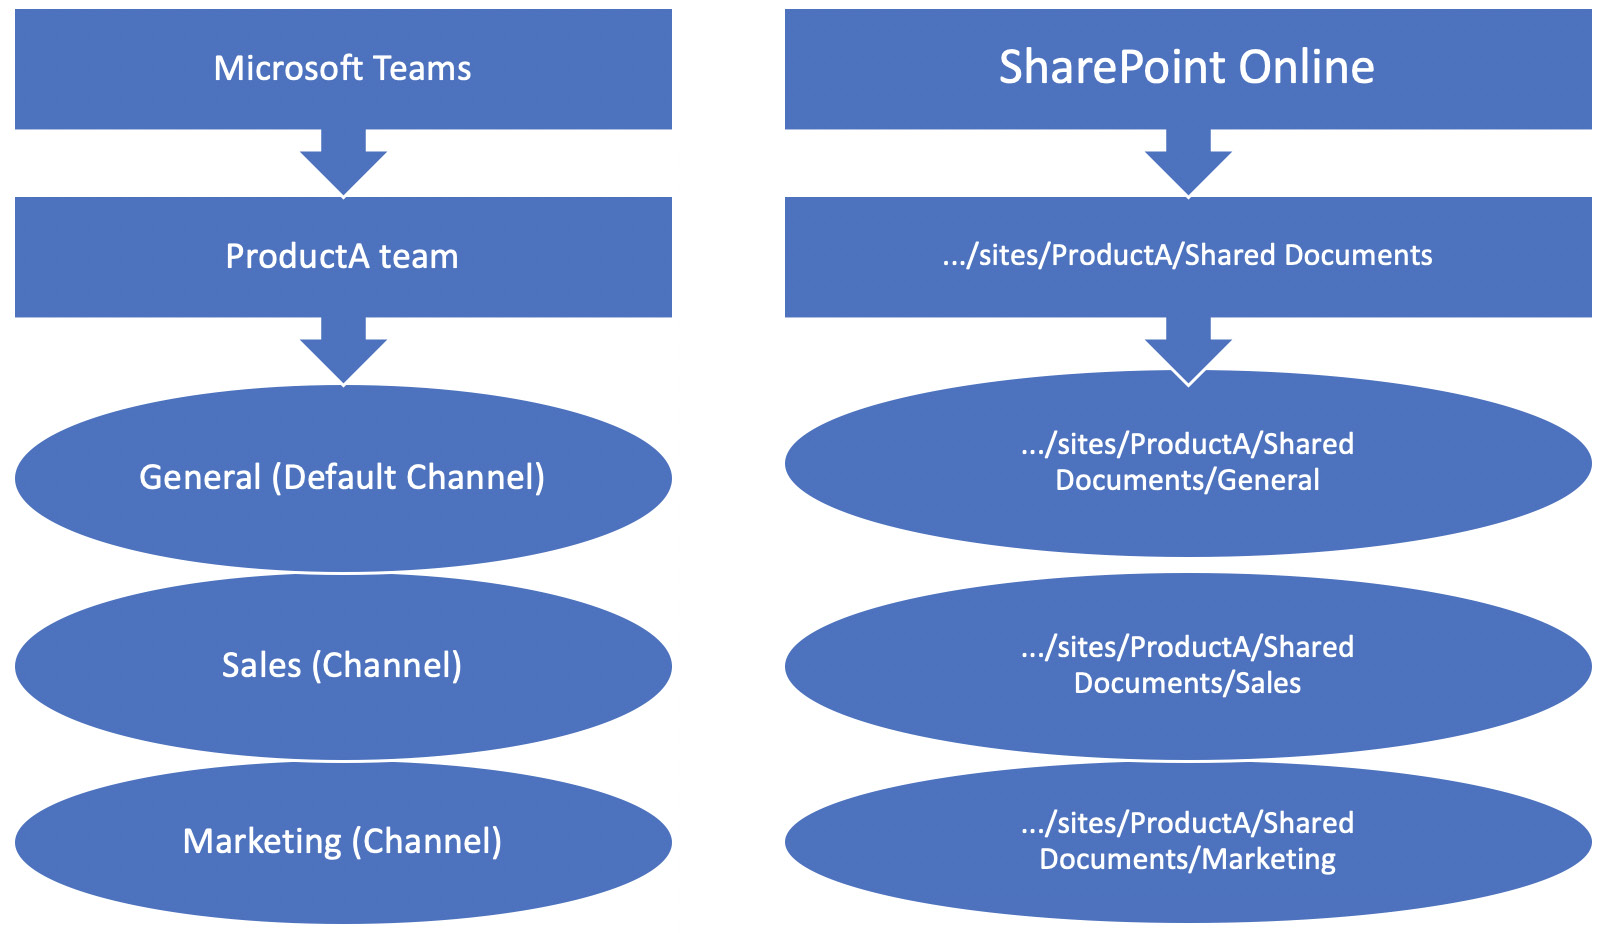
Figure 11.1 – Microsoft Teams versus SharePoint Online
As you can see, Microsoft Teams has very tight integration with SharePoint Online. When dealing with files in Microsoft Teams, any changes made to that file are made directly within SharePoint within the document library. This is not in sync with SharePoint as it is just that the file actually exists in SharePoint. The user also has the option to open the document in SharePoint and using this option will take them directly to their SharePoint Online team site, which corresponds with the team that was created in Microsoft Teams. There is also the option to add a SharePoint page tab in your Teams channel. If a page already exists within the SharePoint site, you can plug it in by adding it as a tab and view the information without having to visit the SharePoint site.
We are all familiar with the SharePoint failed newsfeed in conversations launched in SharePoint 2013. It failed when it was first launched due to the novelty of users playing around with the feature and those of us who presented the features of SharePoint highlighted this innovative feature to our customers. However, there was very low adoption in our opinion, and apparently in Microsoft's opinion as well, and this was due to the placement of the conversation and newsfeed option. It was placed outside of the actual working content and you could see the conversations on a site; however, this placement made the conversations within the newsfeed very general. Now, conversations can be placed alongside a specific document. I think that this is an amazing feature because it allows collaborators on a document to have real-time conversations about that document, thereby eliminating the need for emailing back and forth or Lync/Skype chat sessions that may be interpreted out of context without having the document readily available. The following is just a snapshot of some of the awesome features of Microsoft Teams as it relates to SharePoint:
- Open a document in SharePoint.
- Add a SharePoint page as a tab.
- Add a SharePoint document for view within a tab. This feature is useful for PowerPoint presentations or Excel spreadsheets that may be relevant to the team.
- Conversations alongside documents in real time.
- Coming soon! SharePoint web parts as tabs within Teams. This is great news and will open Microsoft Teams up to SharePoint development.
Understanding the differences between Microsoft Teams and SharePoint is critical because we want to make sure that we use the correct technology for the right purpose. Please make sure to review, document, and train users on how Microsoft Teams and SharePoint are different. It seems to be confusing for users what they can and cannot do in both applications. This is key to rolling out the application across your enterprise and if not explained, you can wind up with many Microsoft Teams SharePoint sites. So, now you are asked to spin up Teams in your company's environment; what do you do? Let's talk about the preparation and areas we need to be concerned about.
Tasked to suddenly roll out teams – now what?
As more people work remotely, many businesses have decided the best way to deal with this change and keep up employee connectivity within their enterprise is to roll out Microsoft Teams or greatly expand its usage if it already existed within their application suite. This change has left many IT administrators, particularly SharePoint administrators, scrambling to learn how to deploy and configure this platform rapidly.
While scrambling to acquire the knowledge to stand up a Microsoft Teams environment for your organization, you must not forget that governance is key to the long-term success of the rollout. All the administrative settings are in the cloud. So, there is no need, as in the case of an on-premises SharePoint 2019 environment, to set up a server or even integrate Teams one to one with SharePoint.
The activation of presence in an on-premises environment is done based on identity, as we talked about in the overview for this chapter. There are also key features in hybrid configurations that can be taken into consideration for further integration with the cloud, which is discussed in Chapter 10, SharePoint Advanced Reporting and Features. The key is to figure out how Teams works and what it provides as a service. Let's look at some of the areas we need to know about to move forward.
Governance
In this section, we will explore some of the governance features built into Microsoft Teams. Due to the rapid pace of the Microsoft Teams rollouts in many organizations, the governance of this platform became an afterthought. We highly recommend that if you are in the position to roll out your team's platform from the beginning and have time to do this properly, you consider the governance strategy for this platform beforehand. If you already have a governance strategy for your Microsoft 365 or SharePoint environment, this plan can be augmented to fit your Teams environment.
Since Microsoft Teams is most likely new to a lot of admins, decisions must be made about what type of identity model is supported in your organization, who will have what type of administrative access, whether conditional access provisioning is needed, retention and life cycle management, and a rollout communication strategy.
There are many areas to check but one of my pet peeves is not checking guest and external user access. You want to know who has access to your company's user community within the Microsoft Teams environment. The last thing you want is unwanted users contacting your users or even users sharing files outside the organization that are deemed intellectual property. There are other areas you need to make sure to check as well that concern how the application is set up. These are listed as follows:
- Team naming policies
- Team classification
- Team guest access
- Team creation
- Sensitivity labels
- Team expiration
- Retention
- Archiving
Make sure you do your due diligence on checking these governance areas. There are more as well within the Teams user settings that may need to be looked into to make sure you have complete control of what you want your users to have access to change.
Microsoft 365 licensing
Licensing comes with many options, but it all depends on what you need from the Microsoft 365 cloud, as applications are in some ways split by the following:
- The size of content needed to store
- By application
In a case where we would be looking at storage, this could be for email, OneDrive, or SharePoint, where we know that storage is key for documents and email. These applications that need storage may come at a higher price based on how much content you plan to store per user. In some cases, you may give some users a higher subscription and some a lower subscription depending on these two factors mentioned.
If you feel that by application is the more appropriate way to provide governance over subscriptions, then you would look at what applications are provided by which subscription model. This would be the case when you look at, for example, Microsoft 365 Business Basic, which includes Teams, Exchange, OneDrive, and SharePoint, but your users may need Microsoft Office as part of their subscription. In this case, they would need to buy Microsoft 365 Business Standard, which includes the four applications mentioned plus Microsoft Office apps at a higher price.
Please be aware of these pricing models as the subscriptions and pricing change; although they have not changed at this level lately, you will find that other apps outside of the subscription model, such as Stream, will cost you and those pricing models do change sometimes. You must be aware of these changes so that you understand your monthly bill.
Third-party applications
Microsoft Teams also provides ways to integrate outside applications and pull in data from those applications to present to a team within the Teams desktop. With those applications, you want to make sure that data from those applications is governed, as well as knowing what third-party apps are being used. Microsoft Teams gives you the option to control what apps are integrated with your Teams rollout and what users can or cannot use within the application.
Life cycle management
It is important to plan for life cycle management within Microsoft Teams. It may sound weird but there is a method to using this product where it can save you a lot of headache in the end. This is especially the case when there are a lot of teams and no one knows the status of the project or team's content.
All projects have a beginning, middle, and end because that is the way projects are rolled out in a company. The end date is an important date because that is when you expect the project to be completed and finished so that resources around it, be it IT or personnel, can be relieved from those projects and repurposed for other work.
Looking at Microsoft Teams, there are a few things we need to understand, which are teams and channels. Teams are the groups of users who are collaborating on the project. These users can be from any department within your company. Then there are channels, which split those users into their organizational groups or custom groups for targeted workloads.
Along with these areas, we must look at Teams access from a location standpoint, be it internal (private) or external (public) users. Then, we must also look at the types of roles we plan to include as part of the rollout of Microsoft Teams. Admins need these areas of coverage to support the service:
- Teams service administrator
- Teams communication administrator
- Teams communication specialist
- Teams communication support engineer
There are also other types of roles that need to be assigned to support members of teams, which we will talk about later in this chapter:
- Team creator
- Team owner
- Team member
- Guest
The life cycle follows a pattern as stated where you have a beginning, middle, and end of the project life pattern. Let's look at these three important parts in detail:
- Beginning: The beginning of a team would be to create the team. This would include several steps because you can also add an existing Microsoft group to a team or many of them. You can also create a team from scratch or add an existing team along with using APIs for Microsoft Graph teams to create teams programmatically. These teams would be created based on global address book attributes. Within the setup, we should also create channels and assign team members to those channels.
- Middle: The middle is used to describe the use of the Microsoft Teams product after it is set up. This would be the management of the application based on the team. Areas that need administration would be to update team members, update channels as needed, manage guests using the Microsoft Teams mobile app, and a few other areas of change and/or adoption with the product. This would also include users being more active using the product, which we want so that they enhance their knowledge of the product and build confidence with using the product successfully.
- End: After the use of a team has been completed, we must make decisions on how we handle the team's content. You need to make sure to get confirmation from the project leader or users before removing anything from the team. Closing these ended projects or teams makes sure that users do not get access to old content that is irrelevant to anything they are currently working on.
You can delete teams that you do not need. All teams are deleted as a soft delete, which you then have the option as an admin to reverse within 21 days. If the team is for a Microsoft 365 group, the reverse option is available for 30 days.
Retention policies can also be used to prohibit the deletion of teams. Policies can be added to teams or associated with SharePoint so that information can be retained for further time periods. Teams consist of files and content that need to be examined by the teams. Some teams may see value in different content and only want that content retained. This could be in SharePoint as well where you do not want things changed and kept in state going forward so that the information can be recalled if needed.
Some types of content that are captured by Microsoft Teams are as follows:
- SharePoint document library
- Conversations
- Planner boards
- Wikis
- Forms and the results
- Recorded meetings
- OneNote notebooks
In all the integrated apps, their content is retained in the app and not in Microsoft Teams. If you need that information, you should be able to either migrate it into SharePoint or keep it in the current app and pull it from that application when needed.
There are a host of new features in Microsoft Teams that you may want to look at for this purpose, which are listed as follows:
- Turn off message previews.
- Appear offline in Microsoft Teams.
- Change the notification settings.
- Team templates to change the way you work.
- Switch between devices while in a team meeting.
- The speaker name has been added to live captions.
- New keyboard shortcuts.
Now that we have our governance vision, let's look at access roles and the types of access we need to create.
Access
As we know, Microsoft Teams is a service that is only available in the cloud. However, this does not mean that you must have a cloud-only identity to access Teams. All the identity and access models allowed in Microsoft 365 are compatible with Teams. Even third-party authentication providers such as Okta are available to integrate with Microsoft 365 and your on-premises SharePoint 2019 environment for single sign-on.
However, if your access resides on-premises, for example, Windows AD, it must be configured within Azure AD. Azure AD was discussed in Chapter 10, SharePoint Advanced Reporting and Features, and briefly this chapter also offers knowledge on AD services, identity security, and application access management.
The following are the types of identity models supported by Teams:
- Cloud identity: Cloud identity is when the user is created and managed within Microsoft 365. Azure AD then stores this identity and manages password verification and security, giving access to various applications – in this instance, Microsoft Teams.
- Synchronized identity: The synchronized identity model is when the identity is managed and stored on-premises and accounts and passwords are synchronized to the cloud. This synchronization is done through Azure AD. This is the preferred method of most organizations for security reasons.
- Federated identity: With federated identity, the identities are still synchronized; however, the password is verified within the on-premises user store and/or through an online provider such as Active Directory Federation Services (ADFS).
Most organizations go with the synchronized identity model for security reasons as stated. Organizations are becoming more open to cloud offerings; however, many prefer, and some are required by policy, to have their access identities remain on-premises and be managed by an identity access management team within the organization that is separate from the IT organization or the business users. Many organizations are even audited by outside governmental agencies to ensure that access to systems and applications is managed through identities on-premises and that segregation of duties is enforced.
By using Azure AD, these organizations can leverage powerful collaborative tools such as Microsoft Teams. Once Azure AD is configured to sync with on-premises, the identity for Microsoft Teams is then able to use these identities to dole out licenses to those identities, granting them access to the Teams features, such as Exchange mailboxes and phone system licensing.
Teams uses identities used in Azure AD. Groups can be created utilizing these Azure identities and from a governance perspective, different groups can be given access to different features of Microsoft Teams that fit in line with the function of the users within the group.
Structuring these groups properly can create a group-to-Teams relationship, but in a lot of cases, this will not happen. But we want to get to a point where we don't have to do a lot of clean-up work within our Azure AD, so the closer you can relate groups to Teams, the better. As you will see, we can set retention on groups and archive information within Microsoft Teams, so we could have many groups created that are not being used if we are not careful to unprovision these teams and groups consistently.
Admin roles in Microsoft Teams
There are several administration roles in Microsoft Teams. Depending on the administration role that you have, you can perform different tasks:
- Teams service administrator: This role has access to manage everything within the Microsoft Teams admin center. Along with managing the Teams service, it also can manage and create Microsoft 365 groups.
- Teams communication administrator: This role has access to manage all the calling features of Microsoft Teams, as well as the meetings feature within the service.
- Teams communication support engineer: This role is tasked with troubleshooting communications issues within Teams using the advanced troubleshooting tools available. This troubleshooting is done through the Microsoft Teams admin center.
- Teams communication support specialist: This role has access to troubleshoot communication issues using more basic tools. The scope of the troubleshooting tools and information available for the Teams communication support specialists is the individual affected user, unlike the Teams communication support engineer who has access to view data from all of the Teams communication users.
- Teams device administrator: This role manager is actually a device that utilizes the Teams service.
The following is the Microsoft 365 role that is relevant to Teams:
- Global administrator: Has broad access to administer the entire Microsoft 365 suite, including Microsoft Teams
Setting up these high-level administrator identities for support of the product is key to supporting Microsoft Teams. Make sure to remember to look at those areas specifically as you get started working with Microsoft Teams to make the right decisions on who has what admin access.
To learn more about Microsoft Teams administration, please follow this link to try your hand at administration:
https://docs.microsoft.com/en-us/microsoftteams/manage-teams-in-modern-portal
User roles within Microsoft Teams
There are two roles that a user can have within Microsoft Teams. A user can be a team owner or a team member. By default, the user who creates the team is given the role of team owner, and a user who joins the team is given the role of team user. All users are given the permissions to create teams by default; this is the recommended setting for Microsoft Teams – however, if this does not fit your in-organization strategy, then the default permissions can be modified to limit who is able to create teams.
As a global administrator, groups can be created in the Microsoft 365 admin console. Groups can also be created within specific applications such as Microsoft Teams. It is important to keep in mind that groups created in the Microsoft 365 admin console are available for use across the Microsoft suite of applications; however, if a group is created natively in the Microsoft Teams application, it is only available for use within Microsoft Teams.
Within the user roles, there are three sets of permissions that can be granted: owner, member, and guest. The owner is the person that creates the team, a member is someone that has joined the team within the organization, and the guest role is typically reserved for those who are outside of the organization, such as vendors or consultants, that the owner invites to join the team:
- Team owner: The team owner is the person that created the team.
- Team member: A team member is anyone inside of an organization that is invited by the team owner to join.
- Guest: Anyone outside of the organization that the team owner invites to join the team. This option may or may not be allowed within an organization and can be suppressed.
The following chart represents the tasks that Teams users can perform based on their role in a particular team. Organizations may limit the out-of-the-box capabilities of each role depending on governance specifications. Please consider whether any limitations are required before deployment:

Figure 11.2 – Teams tasks by role
Note
Team admins can control what guests within the team can do. Team owners can control some of what members and guests can do if certain functionality is not limited by team admins.
For more information on Microsoft Teams guest access, check out the following link:
https://docs.microsoft.com/en-us/MicrosoftTeams/guest-access
Teams and channels within Microsoft Teams
Teams and channels are created within Microsoft Teams. A team is defined as a group of people/content organized around a particular project within an organization. A team can be public, private, or organization-wide. I will discuss a bit more about these options in the Creating a team section. The purpose of a team is to bring people together to work closely on a common goal, task, or project; product launches; or ongoing organizational activities. They can be set up to reflect the structure of your company; for instance, each division or department can have its own main team's space.
Channels are segmentations within the team that are dedicated to a specific project, topic, or action. Multiple channels can exist within one team space. Chat conversations, documents, and other files within a team's channels are only accessible to members of the team. Channels can be extended with apps, bots, and connectors, including BI connectors, in Teams.
As mentioned earlier in this chapter, each team within Microsoft Teams corresponds to a SharePoint Online site and each channel within a team corresponds to a folder within that site.
Deployment
Microsoft recommends deploying Teams in stages and not rolling out all the Teams features at once. We wholeheartedly agree and can speak from experience here as we participated in a very rapid rollout of Teams due to the pandemic. The vast number of features and lack of organizational communication (we will go into the need for a firm communication plan in the next section) left users befuddled and overwhelmed and hindered adoption due to confusion about what in fact Microsoft Teams is and what it does. As in all other rollouts, migrations, and upgrades, clear communication and training is key to satisfaction and adoption.
If you can deploy Teams in stages, pick the set of features you want to roll out first. If you already have other technologies that are performing these functions, you can drive adoption by letting the user community know that the older technologies will be phased out and suggest that they begin their transition as soon as possible to Teams for the features that will be replaced. For instance, if you are set to begin your Teams rollout with the chat and meeting features, which is recommended if you plan on making Teams the organization standard for these features, let the user community know when their previous chat and meeting technology, such as Skype or Webex, will no longer be accessible to them.
Training is also an immensely important step in your rollout. Training is made much easier when you focus it on a small set of features that are newly available versus expecting the user community to take Teams training on all the features that are rolled out at once.
Network considerations
Microsoft Teams has many features, including document collaboration, Skype phone services, chat messaging, virtual meetings, and more; each of these components requires network and bandwidth considerations. We will not do a deep dive on network preparation for Microsoft Teams in this book; however, there are some requirements that you must consider:
- Make sure that your organization's network is already optimized for Microsoft 365. If it is not, you must follow the prerequisite steps from Microsoft's site to make sure to prepare the network for this optimization.
- At a minimum, all locations where we use Microsoft Teams must have internet access, of course. For all locations that will access Teams, the following ports must be opened, and the IP must be set:
Ports: UDP ports 3478 through 3481
IP addresses: 13.107.64.0/18, 52.112.0.0/14, and 52.120.0.0/14
- SharePoint Online and Exchange Online must be deployed within your organization.
- Once Microsoft Teams is deployed, please test the following for network optimization as further optimization may be required:
- Check whether Teams is running slowly.
- Check whether meetings are connecting slowly.
- Check whether documents are opening at a sufficient rate.
- Check whether call audio is clear or whether calls are dropped.
To access Microsoft Network Planner, please visit this link: https://docs.microsoft.com/en-us/microsoftteams/prepare-network.
Communication
Having a firm communication plan is extremely important to the success of your Microsoft Teams deployment. If you have chosen to roll out only certain features, make sure that this is highlighted in the communication plan and the communications being sent to users. The user community will undoubtedly begin doing research on their own on the features of Microsoft Teams and may be confused as to why certain features are lacking in the initial rollout.
Along with the communication, if there is a long-term strategy within the organization to use Teams as their preferred method of collaboration and communication, make sure this is emphasized in the plan. This emphasis can help drive adoption as users are often hesitant to move to newer technologies when their older counterparts are still in use within the organization. Let the user community know that the older technologies will be phased out.
Also, within your communication, reference or link any training sessions that are available to the user base. I believe it is important to have live overviews and step-by-step training sessions from the beginning. These live sessions are important especially if you are doing a phased rollout or rolling out to a smaller user base at the beginning because it will allow you to gather many of the questions that users may have and ascertain any confusion that the subset of users may have concerning Microsoft Teams. Gathering this information at the beginning will allow you to tailor your environment, communication, and training going forward.
Prerequisite steps
Before you embark on a Microsoft Teams rollout, there are a few steps you need to take to make sure you look at all your environmental dependencies. As we talked about governance over SharePoint, we also need to do the same for Microsoft Teams and this should be taken even more seriously as it really opens huge areas of concern and exposure to unwanted incidents.
When looking at these prerequisite steps, we are really going back to our section on governance. Here, though, we will explain more about the high-level governance needed to be in place to make sure the service is covered and vetted by all stakeholders.
The areas that we want to concentrate on are the following:
- Project stakeholders
- Project scope
- Coexistence and interoperability
- Journey to be successful
There are many things that need to be done as well to get started, such as workloads, configured domain, Azure AD, Exchange configuration, Microsoft 365 groups interaction, and other areas, which include a public switched telephone network if this is the configuration you are implementing. Please make sure to look at this link before you start your journey:
https://docs.microsoft.com/en-us/microsoftteams/upgrade-plan-journey-prerequisites
Using Microsoft Teams
Once Microsoft Teams is deployed within your organization, you will need to log in to the Microsoft Teams environment to use the application. Within most organizations, this access will be the same as what is used to log in to your computer and other applications both on-premises and in the cloud, which is a single sign-on. If Microsoft Teams is not yet configured within your organization and you would like to get a preview, Microsoft is currently (at the time of writing this book) offering a 30-day free trial. You will need to sign up for the Microsoft 365 Business version to have access to SharePoint.
In this section, we will go over some of the basic instructions for using Microsoft Teams. You will learn how to create your own team and create a channel within your team. You will also see how to start a conversation within a document to showcase this cool social feature. We will also briefly discuss a bit about tabs, which can be added to channels within the team workspace. This book is by no means an exhaustive resource for Microsoft Teams; however, we will highlight some of the features that you can explore in more depth on your own.
When opening Microsoft Teams, you will see the following sign-on page come up on your computer. The same page renders on your mobile app if using the app on a mobile device:
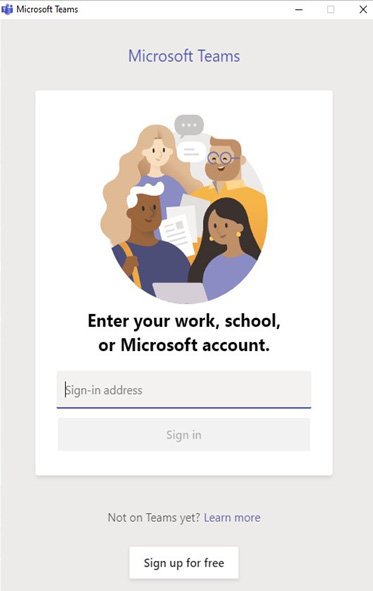
Figure 11.3 – Microsoft Teams login
Once you are successfully logged in to Microsoft Teams, you will see your Teams workspace as shown in Figure 11.4. From this location, you can view, create, upload, and edit documents, make phone calls via Skype, start a Teams meeting, or engage in or start a new conversation. You can also create a new team, a channel within a team, and much more:

Figure 11.4 – Microsoft Teams home page
- Teams: The Teams workspace is the location where you will be able to create more teams, which Microsoft defines as the groups of people that you will collaborate with on projects and assignments.
- Channels: Channels help organize your Teams content into specific topics, departments, or projects.
- Conversations: Conversations are the chat feature within Teams, which can also take place within a channel. All conversation content, including meetings, is open to the whole team that has access.
- Meetings: From the meetings icon, you can start a meeting immediately with your team members or schedule one for another time.
- Files: The files feature of Microsoft Teams allows you to manage documents and collaborate on documents within the Teams interface. As you will see, the features within the files location are similar to what you would see on a SharePoint site.
Creating a team
When Microsoft Teams is rolled out within an organization, users will have access to any organizational teams spaces that they are automatically added to by being part of the enterprise organization AD group that is synced to Azure AD. However, there is also an option to create your own group within Microsoft Teams to collaborate with a specific community of users within the organization. Follow these steps to create a new team:
- Log in to Teams.
- In the bottom-left corner, click Join or create a team:
Figure 11.5 – Invite people and send invitations
- Click Create team:
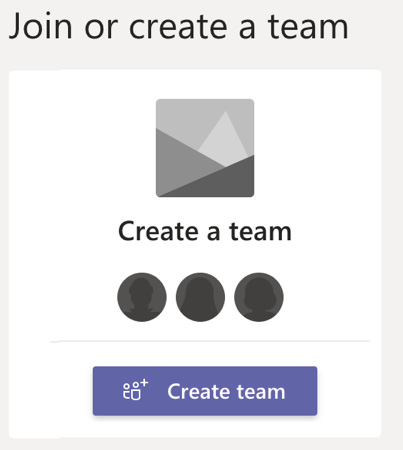
Figure 11.6 – Link to create a team
For this example, I will create a team from a template. Select Manage a Project:

Figure 11.7 – Templates for team creation
- Here, we see three different settings to determine what type of team you want to create:

Figure 11.8 – Select the type of team to create
- Private: You will want to choose the Private option if you want to keep this group to a limited audience. With this option, only those with permission to join will be able to access this team and the content native to it.
- Public: The Public group option allows anyone in the organization to join this group.
- Org-wide: The Org-wide option automatically gives everyone within the organization access to this group.
A note on creating an org-wide group. Org-wide teams can only be created by the global administrator. This type of team is synchronized with the organization's AD and is kept up to date as people join and leave the organization. Microsoft imposes limitations on this option; only organizations with less than 5,000 users can create an org-wide team and the number of this specific type of team is limited to five per tenant.
- Name your new team:

Figure 11.9 – Name your team
- Your team is now created:

Figure 11.10 – New team home page created
Now that you have added your team, let's create a channel to continue to show you the structure of how Microsoft Teams works.
Creating a channel in Microsoft Teams
The following instructions show you how to create a regular channel and a private channel within your team. Remember, it is best to think of the logical architecture of your team and channels so that the purpose of the workspace makes sense to your users. Let's look at the steps:
- Navigate to the Microsoft Teams site or desktop app and sign in:

Figure 11.11 – Microsoft Teams home page
- Select the ellipses (…) to see the list of more options, then select Add channel:

Figure 11.12 – Add a channel from the menu
- Select a name for your channel, then click the Add button:

Figure 11.13 – Name the channel
- Check on the left side of your workspace and you will see the newly created channel:

Figure 11.14 – Channel home page
- The channels within Teams are very extendable using apps, bots, and custom connections. If you click the Add tab button, you will get a list of the many tab options that you can add, by default:

Figure 11.15 – App integration tab
Many of the tabs, including Power BI, must be configured in your Microsoft 365 environment to be utilized as a tab here. You can also limit what apps are seen here by securing this area using the Microsoft Teams administration settings.
These apps come in handy when you want to create a connection to information in another app or even use Power Apps to create a survey for the team to collect information. You can use many forms of storage for the information gathered, such as Excel spreadsheets, SQL databases, and more. It is a very cool tool to help share information within Microsoft Teams!
Opening a document in SharePoint
Let's look at the steps for how we can open a document in SharePoint:
- Navigate to the document that you want to open in SharePoint.
- Click the ellipses (…) and select Open in SharePoint:

Figure 11.16 – View of SharePoint list within Microsoft Teams
- You will now see the SharePoint Online library behind Microsoft Teams:

Figure 11.17 – SharePoint list view in Microsoft Teams
Utilizing the Open in SharePoint option, you can view the SharePoint document directly from the SharePoint site; however, opening this document in Microsoft Teams offers an extra feature not available in SharePoint Online alone. This is the conversation feature that we mentioned earlier. This is one of the most useful features of Microsoft Teams when it comes to document collaboration in real time. Next, we will go through the steps of starting a conversation within a document in Microsoft Teams.
Starting a conversation within a document
Follow the steps given for creating a new conversation:
- Navigate to the document that you want to open in Teams:

Figure 11.18 – View of a file in Microsoft Teams
- Click the Conversation button at the top of the page:

Figure 11.19 – File open in Microsoft Teams
- The conversation pane will be displayed on the right side of the screen. Type your message in the chat window at the bottom of the pane and click Send:

Figure 11.20 – Start a conversation on the file with others in your team
- See your message displayed in the pane:

Figure 11.21 – Click send to send a message to a team member
- Anyone who is a member of your team has access to view the document and the conversations related to the document. If a team member misses the real-time conversation on the document, they will receive a notification with the document linked and the conversation displayed:

Figure 11.22 – Welcome page for a newbie team member
Adding a SharePoint-related tab to a Teams channel
There are a few ways to integrate content from SharePoint into a tab in your Teams channel. As mentioned, tabs are a way to extend the functionality of a Microsoft Teams workspace. There are various apps that can be added to a tab within your Teams channel. Some of these are out of the box; however, Teams allows customized apps to be added as well. Of course, these apps must be deployed and allowed within your organization's 365 instance. Teams allows you to add a SharePoint page from the SharePoint Online environment behind your Teams workspace. You can also link to SharePoint, page lists, and libraries via URL.
To add a tab in a Teams channel, use the following instructions:
- Navigate to the channel where you want to add a tab:

Figure 11.23 – Teams menu
- View the list of available options:
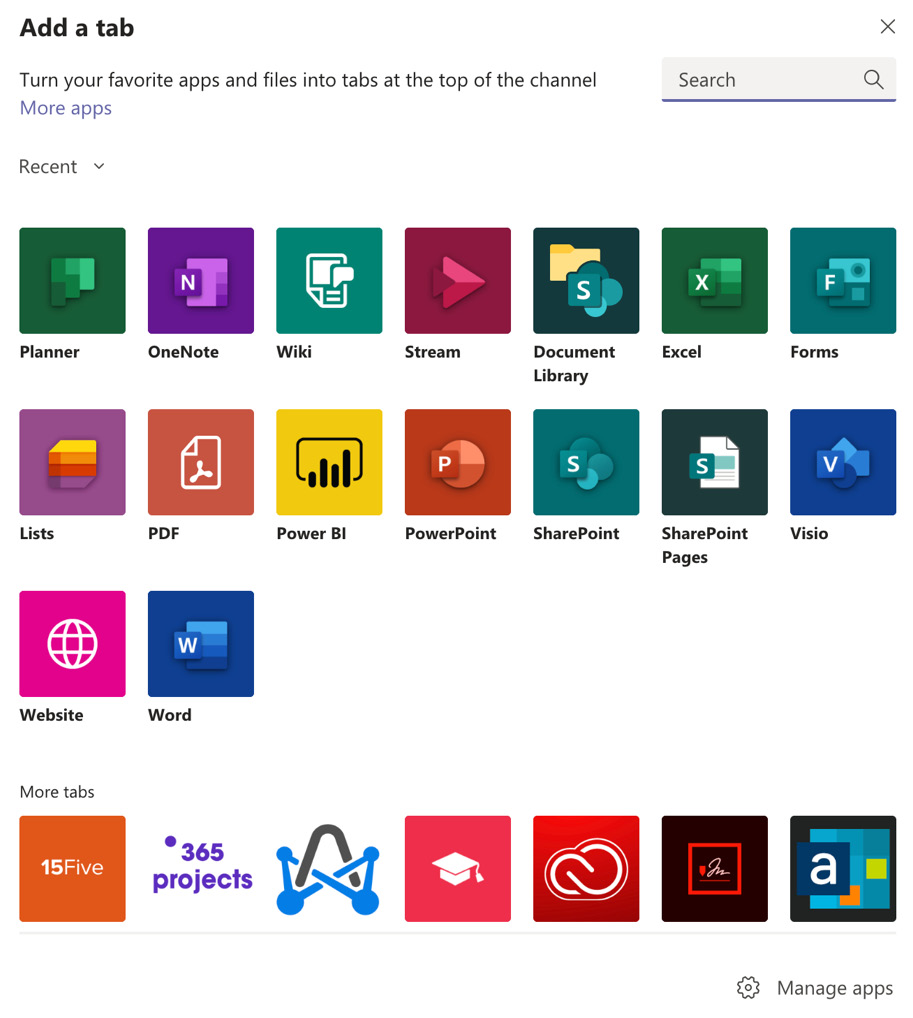
Figure 11.24 – Use apps within Microsoft Teams using tabs
You can see on the Add a tab page that there are several default apps that can be added to your Teams channel. Some of these are the standard Microsoft applications, such as Word, PowerPoint, OneNote, and Excel. However, do take special note of the Power BI app, which can be added as a tab, as well as the SharePoint Document Library app. There is a SharePoint Pages app that will allow you to add a SharePoint page from your SharePoint Online environment that is associated with this team's site. You can also select the SharePoint app, which gives you a bit more flexibility in connecting to content outside of the site that simply exists within your Teams channel. In addition to the out-of-the-box apps that are displayed, there is also the option for a developer to create custom applications within your organization, and based on access, those applications will be displayed here as well and can be chosen as a tab.
Best practices for organizing Teams
There are some best practices to consider when organizing a team within Microsoft Teams. Please keep in mind, regarding documents, that these are stored in SharePoint, and that behind every team created in Microsoft Teams is a SharePoint site, and every channel is a document library. There are limitations and restrictions imposed by Microsoft that must be considered. These limitations can be seen in the following chart – you will see that they are very high and, in most organizations, users will be just fine with not breaching these limitations. However, without firm governance and data cleanup, over time these limitations could be breached and cause issues.
If users are arbitrarily creating teams in channels within teams and these are not being used, this could cause the organization to approach these limits rather quickly. If there is a large organization with a lot of users with the ability to create teams, you can imagine how issues can arise over time. Think about how this has been an issue historically in SharePoint and it's still an issue that users have been known to create sites when a library or list would do or creating sites that are abandoned. Users must be aware of this possibility and the best practice of limiting the number of teams and channels created to only those that are purposeful within the organization should be driven home.
The option to allow team owners to create teams and channels can be restricted, although this is not recommended because this can affect the business purpose for which the organization wants to utilize Teams. This is where great communication and training will come into play; team owners must understand their responsibility in maintaining the logistical and purposeful use of Microsoft Teams. This can be likened to, within SharePoint, making sure that your site admins are knowledgeable and maintain their sites and prevent unnecessary sprawl.
Out of the box, team owners can create private channels at will. What administrators must understand is that private channels are their own SharePoint site collections and should be limited in number. You do not want team owners creating a lot of private channels that correlate to SharePoint site collections. The team administrator can limit the ability of team owners to create private channels; this option should be considered. Each team can have up to 100 team owners; if they are all creating private channels, this will become a problem.
Each team and each channel within a team should be created for a purpose, a goal, or a project, and only those that are necessary to contribute to that purpose should be added to that team. Channels and apps and connections within channels should be added solely for the purpose of reaching the goal of that team.
Limits and restriction considerations
There are some limits and restrictions that Microsoft has placed on teams and channels and we have included this information in the following chart. Please check Microsoft's site for updates as these limits can change:

Figure 11.25 – Best practices and limitations of Microsoft Teams
Now that we have looked at some of the functional areas of Microsoft Teams, let's take a look at one of the meeting features within Teams called live meetings.
Configuring an auditorium solution with Microsoft Teams
When taking advantage of Microsoft Teams as your go-to meeting application, you can do so much more with this application as it also makes sense to have live events using the application as well. As we noticed while working with the platform, it is open to governance and configuration settings to manage a host of functionalities. The focus of this section will be live events using Microsoft Teams to manage, host, and collaborate during the event.
The configuration I put together that I have implemented is for a company that recently really loved Microsoft Teams. They wanted to use Teams in an auditorium setting and wanted to host their meetings at their location, but they did not leave out those who wanted to either stream the event or call into the event. Some requirements that were stated were there was a band playing during the event and some guest speakers as well. The company also wanted video to be displayed on each side of the stage along with three cameras, one wired and two wireless. These would be used to catch separate angles from the event so that the video producer could pan back and forth between the video cameras.
Unfortunately, I am not going to be able to go through all the technical information in this section, but this will get you started at a high level on the journey to hosting live Teams events. My background in music played a big part in setting this up for the companies I configured this for and we will keep this simple so that you get an idea of what to buy, some small details, and how to set up a live event.
Our event will look like this once we set up all the hardware components:

Figure 11.26 – Auditorium setup
The components used in this diagram to make up the solution are the following:
- Behringer X32 mixing console
- Two laptops for the video team
- One HDMI video camera
- Two wireless video cameras
- Two 70-inch monitors
- Six stage monitors
- Two main speakers
- Other microphones and Cat 6, HDMI, and USB cables not shown
Since this is basically a small concert setting, we are going to start with the Behringer X32 console as the first area of focus. The Barringer X32 is an intermediate digital sound console as far as cost and notoriety around the music world go. It's not bad for the price and will give you a great sound with some amazing features to go along with it since the board is digital. The mixer supports many new functions you will not see in analog mixers:
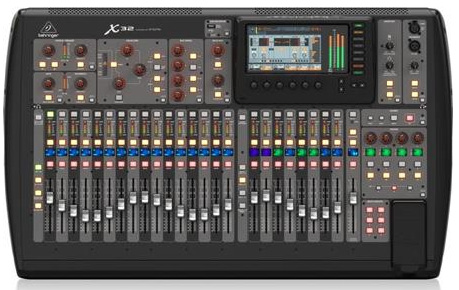
Figure 11.27 – Behringer X32 mixer
Some of the first things you will notice are that the console is large and needs some room to manage the cabling and for someone to manage the mixing. The main things you want to find in a mixer are how many channels it provides because this will play into how many instruments or vocal mics can be provided to the band or hosts while they are doing the event. If you plan on having music, there are AUX inputs that can be used for those connections but make sure to get the right type of cabling to support your source. The mixer comes with a small window console to manage settings and is fairly easy to use, and you will get a manual that is in PDF form and comes in paperback.
This mixer also comes with a network connection for Cat 5 that enables it to be managed on the network from a remote console such as an iPad. Mixing the sound on an iPad can be very useful when there is no one to manage the sound, or the sound person can also be home mixing as well. This is almost the best way to do the mix and that is due to you wanting to check the way the sound is coming out through the speakers at home because this is what your audience will hear when the event is streaming. They will not hear what you hear in the auditorium, so we must do some things outside the auditorium to make sure things are mixed well.
There is also a USB connection that takes the sound input and pushes that sound out digitally to a laptop. In most cases, all mixers will need to have a driver installed on the laptop to make sure it can connect the hardware to the computer. Once you have that driver, you will see the choice for sound sources that comes up in the Microsoft Teams device settings menu for the X32 sound source, which then will project that sound through your Teams event.
The sound needs to be mixed well and you want to make sure you verify that the mix you have created, called a scene, works for the outputs in the auditorium and for those streaming online. Using two separate scenes in the console will provide that capability and give you a way to change settings on the different mixes separately as needed.
This also brings up some other X32 capabilities, for example, you can set mixes for different outputs in the mixer. So, if you have a house mix, which could be the main mix on outputs 1 and 2, this can be set in the mixer and saved as a scene as well. So, when you select that scene or channel configuration, the mix comes back to the board, where you can change it and then save it again if needed. If you have a mix for the USB out and the sound is just not working or you added an instrument, you can also go back and edit the channels you have saved to be received by that output. Overall, the board gives you so much control over everything, but if you come from an analog background like me, then these new mixers will take some getting used to.
If you are having trouble with your X32 console, look at updating the firmware. Old firmware could cause freezes on the board and other weird power issues where the board resets power with no warning. Upgrading the firmware will provide the latest and greatest menus and functionality for the board as well. It will also fix a lot of hardware issues you may have. We suggest doing this as soon as you get your board, so you program your settings on a good foundation and download the compatible Windows drivers for that firmware as well. One thing to remember is that the board settings will be erased on this board once the firmware is upgraded. Save the scenes before you upgrade if you started adding scenes before you upgraded the firmware. You should upgrade the firmware no matter what soundboard you buy!
Headphone amps are also useful for stage sound instead of monitors and help the musicians and others who are part of the event to hear the music clearly and/or even a microphone you may deem as an instruction feed for stage coordinators could help in the production of the event as well. As a musician, I have used these many times and it helps to hear the music more clearly and even instructions from a bandleader. This requires a separate feed from the mixer, which would be from the analog or digital snake where instead of using an input, we would use an output to get the feedback to the headphone amp. Separate mixes can be sent, or you can use one mixer to feed all headphones.
The digital snake is such a lifesaver as far as cabling and getting a true digital sound from the players, singers, or MCs that will be performing at the event goes. The snake sends a signal from the digital input and output mixer on the stage with ¼ and XLR inputs and outputs back to the board so that the sounds from the instruments and vocals can be captured and mixed on the console. The snake costs a lot more than a traditional snake but provides a better quality of sound. This is really all it provides but avoiding having this huge cable from your console to your stage is also a saving as digital snakes can use Cat 5 or 6, depending on your mixing console, or a special cable. This also helps to feed the monitors on stage if needed so that everyone can hear themselves if a headphone amp is not the solution.
Wireless mics are what you see most of the time at events but there are still people that love cabled mics as well. The only thing to look at with wireless microphones is to make sure you either buy different brands of wireless mics or make sure to upgrade the firmware on the wireless microphones' bases. In most cases, the newest brands provide channel separation if there are the same brand wireless microphones on stage. If you do not have the latest and greatest, then updating the firmware may be your answer. It is important to make sure the microphones do not stay on the same channel because when they clash, you lose your sound from the microphone, which means the audience will not hear you and could miss something important you said.
Your video team should investigate what software will work with Microsoft Teams. In some cases, Teams is all you need. When doing a live event, the console changes from the normal Microsoft Teams screen where you see other people to the live interface, where you see a staging area and a live area for presenting the staged content. This is good in some cases but there is other software out there, such as Wirecast, UBS, and others, that give you better functionality to handle many types of feeds. Although Teams does handle some feeds well, some feeds are currently not handled very well. I tested many different types of HDMI adapters to see which one could help with the multiple cameras and figured out that Teams is still in need of some upgrades.
NDI was not available when I did this installation, but I believe it is soon to be available to use with Teams, which will make Teams more compatible with other video management software out there. NDI is a video network protocol that streams video from different network resources but can be captured by a software application so that it can be managed by the producer. It makes cameras that are wireless easy to connect to and brings those feeds back to the video console. You can also connect wireless cameras using IP as well by connecting them to the laptop and then pulling them into your software.
It also creates an environment where if we had a second laptop and had something we wanted to stream from that laptop, then we could use NDI to bring that video back to the main producer console. This is all wireless or you can use Cat 5/Cat 6 to connect all the hardware. With that being said, I still like the Cat 5 or 6 option because when a network protocol fails, it really makes troubleshooting tough, especially when you are live streaming. Knowing a cable could be the problem is a quick switch, so I have been up in the air so far on hardware connection. Network cables also provide reliable streaming, so you do not lose video stream during a production.
Cameras come in so many shapes, sizes, and tech varieties. The main camera used for this setup was an old Sony HVR-HD10000U camera that had HDMI and then I purchased two Mevo wireless cameras. The Sony camera was used as the main camera and was connected using HDMI. This camera did most of the main video captures for the event. It was manned by a cameraman and used to pan and follow the main person on stage. The wireless cameras were focused on other parts of the stage but with the Mevo, you can also do some remote control to zoom in and out. This became very effective for the shots during the event.
The Mevo is very unique as it will connect to your wireless network and make itself available for streaming. It can also be connected directly to some applications, such as Facebook, which it was built to be used with. The camera is small but gets some great video and you can buy a stand for it or mounting hardware to put this camera pretty much anywhere. It is not a high-end camera with a lot of tech bells and whistles but for the price, it is great, small, and compact:
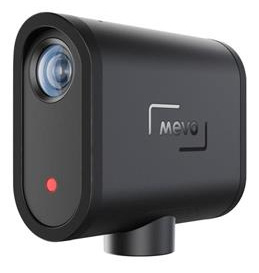
Figure 11.28 – Mevo camera
All video monitors were installed using TV risers and were 70 inches to present a good view from the back of the auditorium. We connected them all through HDMI to a switch and then back to an HDMI switcher in the booth. To get the monitors connected, we used HDMI boosters that used Cat 6 to connect a TX and RX box on each end. Those then convert to HDMI on the other end of the hardware, which is then connected to the TVs. We ran our cables over 100 feet and the feed was solid with no delay or lack of clarity on the screen.
So, let's now look at how to create a live event.
Creating a live event
Follow these steps to create a live event:
- To create a live meeting, use your calendar in Microsoft Teams to create a new event from the New meeting menu:
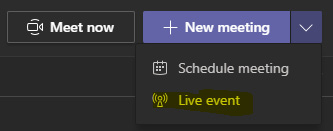
Figure 11.29 – Microsoft meeting creation menu
- Select Live event from the menu. The menu for the live event will come up on your screen:

Figure 11.30 – Create a live event screen
- Fill in the areas of information to give the event a name and provide start and end dates and times. If you have people you would like to invite now, say that are part of the production team or presenting, you can add them in the invite people area of the form.
- After clicking Next, we will get a menu to choose permissions for the event:

Figure 11.31 – Event permissions and settings
- When choosing people and groups, you are selecting specific people you want to join that are part of your organization. Org-wide is everyone in your organization and Public is a mixture of organization and external attendees.
For the event I was working with, we chose Public because this was being broadcast to anyone who wanted to attend. We had a sign-up sheet on our website and added those emails to a list so that we could email the link to them. I am sure there are other ways to collect this information, but we did not have time to get into those areas.
- Once you click Schedule, you will see the event details screen. This screen shows you the link for the attendees and gives you options to copy it so that you can share it. You can also join the event or create a chat. You can cancel the meeting if you are having trouble or need to reschedule:

Figure 11.32 – Live event creation screen
- The event is also placed on your calendar in Teams and Outlook:

Figure 11.33 – Teams calendar view
The link for the event will automatically be sent to those you added as producers and presenters for the event. Their calendars will automatically be updated.
- Once the event has started, as the producer, you will see the production screen:

Figure 11.34 – Producer screen
- You can see the Queue area, which is where we need to add a feed from our video camera or other apps to be shared live. This is how we prepare content to send live. This can be an app such as PowerPoint or any open app, video monitor, or HDMI feed. Once you have your content ready for presenting, you would click Send live and start the event.
- If you need to display two content sources such as video and content from another app, Microsoft Teams give you an interface to do that within the live event UI:
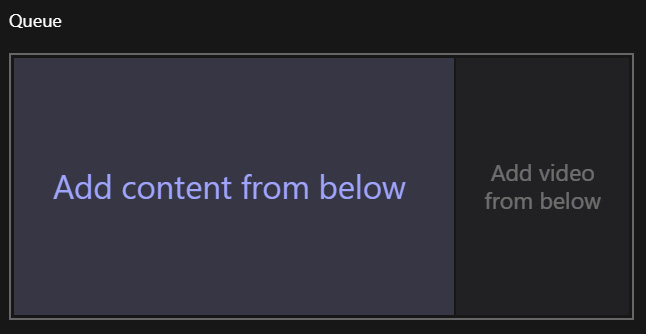
Figure 11.35 – Queuing content screen
- We can see that there are a couple of queue interfaces we can use. One interface is to display just one content source, and the preceding screenshot shows how we can add video and other content in the same feed, which is very good to show variations of content on one screen. We are sure Microsoft will provide more variations with this UI in the future but there is also other software such as UBS that give you better options and more flexibility that can be used with Microsoft Teams.
- There are also options to share a desktop or an app from the lower menu. You can also mute all users as well, but this is something you can do automatically using the administrator options in Teams to have this set beforehand:
Figure 11.36 – Sharing content
- Click the gear button in the top-right menu to see the device settings:

Figure 11.37 – Microsoft Teams device settings
- This is where you set your speaker settings if you use those for playback. This is good for mixing and hearing what the auditorium will sound like. Settings will come up when using a direct mic within your computer or, like we talked about, the X32 mixer. The mixer is our sound source. Video cameras should be set on the primary camera you have set up.
- To set the auditorium, we can use this in-room audience feature to get reactions, but the more interesting feature that is configured on your X32 soundboard is a mix-minus. What this does is you create a process in the board where people that call in can ask a question, which is then projected on the house speakers so that everyone can hear it. Then, the moderator or MC can answer questions from those who called in or joined in via the Teams app. This is needed when you want to have interactions with your audience.
- By clicking the first choice on the settings menu, you will find the health and performance menu:

Figure 11.38 – Health and performance menu
- This information is good to know especially when using video because the network means so much to the performance of the video feeds:
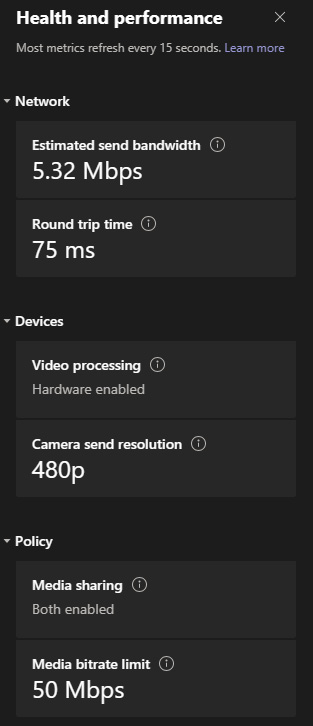
Figure 11.39 – Performance
- The following menu is for taking notes about the event. This is for the producers and presenters:

Figure 11.40 – Notes
- IM is used to communicate with those in the meeting:

Figure 11.41 – Chat
- If you need to add some attendees, you can do so by selecting the following icon on the menu:
Figure 11.42 – Add attendees
There are also other things you can set in the Teams administration that will help events such as this go smoothly. Here is a list of things you can do to better support public events:
- Mute everyone automatically.
- Hide phone numbers from users who call in.
- Auto-accept attendees or make attendees wait in the lobby.
- Set up a call center to support the event using Microsoft Teams.
- Add images in the content, such as logos and other information.
- Create break out sessions and more!
As you can see, Microsoft Teams has a great platform to host live events and meetings and supports up to 10,000 attendees depending on your subscription. I really believe it is only going to get better and I am digging deeper into this because of my music background. I wanted to share at a high level what I did to make this work for my customer as it can shed light on the possibilities for your company looking to provide auditorium-sized events with outside callers. Teams is a great tool and there is so much more you can do with it.
Summary
Microsoft Teams seemingly came out of nowhere as the hero of enterprise social networking and collaboration. During the trying times that people and organizations were dealing with due to the COVID-19 pandemic, many turned to Microsoft Teams as a solution to their social connectivity issues as the workforce and education were driven home into remote working situations that many were facing for the first time. This left many admins scrambling to get up to speed with the Microsoft Teams application and the opportunities for extendibility within this platform.
Microsoft Teams offers phone communication, virtual meeting capabilities, Outlook integration, document management, and chat-in-conversation features all in one place. As amazing as Teams is from a business perspective, from an administrative perspective, it is important to understand that Microsoft Teams is a layer on top of SharePoint and not a replacement for SharePoint. It is very important that as an administrator you drive this point home to management and the decision-makers for your SharePoint project. It is also very important to remember that a solid governance plan should be created prior to rolling out Teams in your organization because although the mini features in one location are great, Microsoft Teams can grow unwieldy without proper governance and use of best practices.
In our next chapter, on SharePoint Framework, we will cover how this all works from a developer standpoint. Developers have such a vast array of tools to use to create customizations that APIs are available to alter any Microsoft application offering. Developers also have access to all SharePoint 2019 sites and content to Microsoft 365 sites, and content using data gateways, which brings this platform to another level. This is so powerful and really takes collaboration to the next level with these integrations, especially with Microsoft Teams as pulling in an app in Teams is very easy. The ideas for collaboration at this point in time are unlimited. "Why leave on-premises?" You may ask yourself whether a hybrid configuration is your best bet after reading this book.
Questions
You can find the answers on GitHub under Assessments at https://github.com/PacktPublishing/Implementing-Microsoft-SharePoint-2019/blob/master/Assessments.docx
The answers to these questions can be found in the Assessments:
- When preparing to deploy Microsoft Teams, which of the following is true?
a) The rollout does not take much thought or planning to be successful.
b) Governance and best practice considerations are important to the long-term success of the deployment.
c) There are no network or bandwidth considerations when deploying Microsoft Teams.
- Your organization must have an a Microsoft 365 license to roll out Microsoft Teams. True or false?
a) True
b) False
- Which of the following is true of the Microsoft Teams site? Choose the best option.
a) Behind every Microsoft Teams site is a SharePoint Online site.
b) When a Microsoft Teams site is created, it automatically has a SharePoint 2019 site URL.
c) Microsoft Teams is completely independent of SharePoint.
d) None of the above.
- Having a firm communication plan when rolling out Microsoft Teams is not likely to enhance the success of the rollout. True or false?
a) True
b) False
- Which of the Microsoft Teams roles has access to manage everything within the Microsoft Teams admin center?
a) Teams communication support engineer
b) Teams device administrator
c) Teams communication administrator
d) Teams service administrator
- Which of the following can be extended using apps, bots, and custom connectors?
a) User permissions
b) Channels
c) Azure AD
d) None of the above
- In Microsoft Teams, live events can be created from which menu? Choose the best answer.
a) New meeting menu
b) Privacy settings menu
c) Add an app menu
d) None of the above
Further reading
Please check out the following helpful links to further explore Microsoft Teams on your own: