
48. An Android Jetpack Navigation Component Tutorial
The previous chapter described the Android Jetpack Navigation Component and how it integrates with the navigation graphing features of Android Studio to provide an easy way to implement navigation between the screens of an Android app. In this chapter a new Android Studio project will be created that makes use of these navigation features to implement an example app containing multiple screens. In addition to demonstrating the use of the Android Studio navigation graph editor, the example project will also implement the passing of data between origin and destination screens using type-safe arguments.
48.1 Creating the NavigationDemo Project
Select the Create New Project quick start option from the welcome screen and, within the resulting new project dialog, choose the Fragment + ViewModel template before clicking on the Next button.
Enter NavigationDemo into the Name field and specify com.ebookfrenzy.navigationdemo as the package name. Before clicking on the Finish button, change the Minimum API level setting to API 26: Android 8.0 (Oreo) and the Language menu to Kotlin.
48.2 Adding Navigation to the Build Configuration
A new Android Studio project does not, by default, include the Navigation component libraries in the build configuration files. Before performing any other tasks, therefore, the first step is to modify the app level build.gradle file. Locate this file in the project tool window (Gradle Scripts -> build.gradle (Module: NavigationDemo.app)), double-click on it to load it into the code editor and modify the dependencies section to add the navigation libraries. Also take this opportunity to enable view binding for this module:
android {
buildFeatures {
viewBinding true
}
.
.
dependencies {
implementation 'androidx.navigation:navigation-fragment-ktx:2.3.5'
implementation 'androidx.navigation:navigation-ui-ktx:2.3.5'
.
.
}
Note that newer versions of these libraries may have been released since this book was published. To identify and use newer versions of the libraries, add the above lines to the build file and then open the Project Structure dialog (File -> Project Structure...). In the Project Structure dialog, select the Suggestions option to display available updates. If new library versions are available, click the Update buttons to make sure these latest versions are used in the build.gradle file before clicking on the Apply button:

Figure 48-1
After adding the navigation dependencies to the file, click on the Sync Now link to resynchronize the build configuration for the project.
48.3 Creating the Navigation Graph Resource File
With the navigation libraries added to the build configuration the navigation graph resource file can now be added to the project. As outlined in “An Overview of the Navigation Architecture Component”, this is an XML file that contains the fragments and activities through which the user will be able to navigate, together with the actions to perform the transitions and any data to be passed between destinations.
Within the Project tool window, locate the res folder (app -> res), right-click on it and select the New ->Android Resource File menu option:

Figure 48-2
After the menu item has been selected, the New Resource File dialog will appear. In this dialog, name the file navigation_graph and change the Resource type menu to Navigation as outlined in Figure 48-3 before clicking on the OK button to create the file.

After the navigation graph resource file has been added to the project it will appear in the main panel ready for new destinations to be added. Switch the editor to Code mode and review the XML for the graph before any destinations are added:
<?xml version="1.0" encoding="utf-8"?>
<navigation xmlns:android="http://schemas.android.com/apk/res/android"
xmlns:app="http://schemas.android.com/apk/res-auto"
android:id="@+id/navigation_graph">
</navigation>
Switch back to Design mode within the editor and note that the Host section of the Destinations panel indicates that no navigation host fragments have been detected within the project:
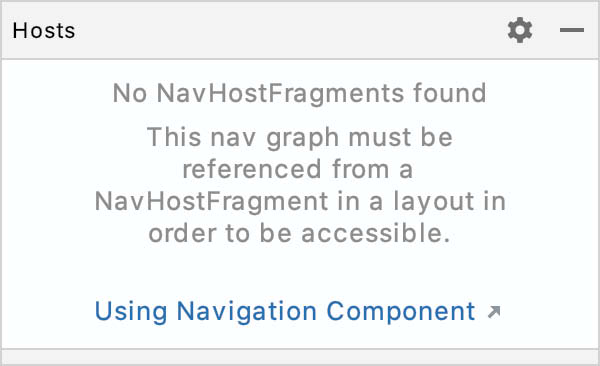
Figure 48-4
Before adding any destinations to the navigation graph, the next step is to add a navigation host fragment to the project.
48.4 Declaring a Navigation Host
For this project, the navigation host fragment will be contained within the user interface layout of the main activity. This means that the destination fragments within the navigation graph will appear in the content area of the main activity currently occupied by the main_fragment.xml layout. Locate the main activity layout file in the Project tool window (app -> res -> layout -> main_activity.xml) and load it into the layout editor tool.
With the layout editor in Design mode, drag a NavHostFragment element from the Containers section of the Palette and drop it onto the container area of the activity layout as indicated by the arrow in Figure 48-5:

From the resulting Navigation Graphs dialog, select the navigation_graph.xml file created in the previous section and click on the OK button.
With the newly added NavHostFragment instance selected in the layout, use the Attributes tool window to change the ID of the element to demo_nav_host_fragment.
Switch the layout editor to Code mode and review the XML file. Note that the editor has correctly configured the navigation graph property to reference the navigation_graph.xml file and that the defaultNavHost property has been set to true:
<?xml version="1.0" encoding="utf-8"?>
<FrameLayout xmlns:android="http://schemas.android.com/apk/res/android"
xmlns:app="http://schemas.android.com/apk/res-auto"
xmlns:tools="http://schemas.android.com/tools"
android:id="@+id/container"
android:layout_width="match_parent"
android:layout_height="match_parent"
tools:context=".MainActivity" >
<androidx.fragment.app.FragmentContainerView
android:id="@+id/demo_nav_host_fragment"
android:name="androidx.navigation.fragment.NavHostFragment"
android:layout_width="match_parent"
android:layout_height="match_parent"
app:defaultNavHost="true"
app:navGraph="@navigation/navigation_graph" />
</FrameLayout>
With the NavHostFragment configured within the main activity layout file, some code needs to be removed from the MainActivity.kt class file to prevent the activity from loading the main_fragment.xml file at runtime. Load this file into the code editor, locate the onCreate() method and remove the code responsible for displaying the main fragment:
override fun onCreate(savedInstanceState: Bundle?) {
super.onCreate(savedInstanceState)
setContentView(R.layout.main_activity)
}
Return to the navigation_graph.xml file and confirm that the NavHostFragment instance has been detected (it may be necessary to close and reopen the file before the change appears):

Figure 48-6
48.5 Adding Navigation Destinations
Remaining in the navigation graph it is now time to add the first destination. Since the project already has a fragment for the first screen (main_fragment.xml) this will be the first destination to be added to the graph. Click on the new destination button as shown in Figure 48-7 to select or create a destination:

Select main_fragment as the destination so that it appears within the navigation graph:

Figure 48-8
The home icon positioned above the destination node indicates that this is the start destination. This means that the destination will be the first displayed when the activity containing the NavHostFragment is created. To change the start destination to another destination, select that node in the graph and click on the home button located in the toolbar.
Review the XML content of the navigation graph by switching the editor to Code mode:
<?xml version="1.0" encoding="utf-8"?>
<navigation xmlns:android="http://schemas.android.com/apk/res/android"
xmlns:app="http://schemas.android.com/apk/res-auto"
xmlns:tools="http://schemas.android.com/tools"
android:id="@+id/navigation_graph"
app:startDestination="@id/mainFragment">
<fragment
android:id="@+id/mainFragment"
android:name="com.ebookfrenzy.navigationdemo.ui.main.MainFragment"
android:label="main_fragment"
tools:layout="@layout/main_fragment" />
</navigation>
Before any navigation can be performed, the graph needs at least one more destination. This time, the navigation graph editor will be used to create a new blank destination. Switch back to Design mode and click once again on the New Destination button, this time selecting the Create new destination option from the menu. In the resulting dialog, select the Fragment (Blank) template, name the new fragment SecondFragment and the layout fragment_second before clicking on the Finish button. After a short delay while the project rebuilds, the new fragment will appear as another destination within the graph as shown in Figure 48-9:

48.6 Designing the Destination Fragment Layouts
Before adding actions to navigate between destinations now is a good time to add some user interface components to the two destination fragments in the graph. Begin by double-clicking on the mainFragment destination so that the main_fragment.xml file loads into the layout editor. Select and delete the current TextView widget, then drag and drop Button and Plain Text EditText widgets onto the layout so that it resembles that shown in Figure 48-10 below:

Once the views are correctly positioned, click on the Infer constraints button in the toolbar to add any missing constraints to the layout. Select the EditText view and use the Attributes tool window to delete the default “Name” text and to change the ID of the widget to userText.
Return to the navigation_graph.xml file and double-click on the secondFragment destination to load the fragment_second.xml file into the layout editor, then select and delete the default TextView instance. Within the Component Tree panel, right-click on the FrameLayout entry and select the Convert from FrameLayout to ConstraintLayout... menu option, accepting the default settings in the resulting conversion dialog:

Figure 48-11
Using the Attributes tool window, change the ID of the ConstraintLayout to constraintLayout. With the fragment’s parent layout manager now converted to the more flexible ConstraintLayout, drag and drop a new TextView widget so that it is positioned in the center of the layout and click on the Infer constraints button to add any missing constraints. With the new TextView selected, use the Attributes panel to change the ID to argText.
48.7 Adding an Action to the Navigation Graph
Now that the two destinations have been added to the graph and the corresponding user interface layouts designed, the project now needs a way for the user to navigate from the main fragment to the second fragment. This will be achieved by adding an action to the graph which can then be referenced from within the app code.
To establish an action connection with the main fragment as the origin and second fragment as the destination, open the navigation graph and hover the mouse pointer over the vertical center of the right-hand edge of the mainFragment destination so that a circle appears as highlighted in Figure 48-12:

Click within the circle and drag the resulting line to the secondFragment destination:

Figure 48-13
Release the line to establish the action connection between the origin and destination at which point the line will change into an arrow as shown in Figure 48-14:

An action connection may be deleted at any time by selecting it and pressing the keyboard Delete key. With the arrow selected, review the properties available within the Attributes tool window and change the ID to mainToSecond. This is the ID by which the action will be referenced within the code. Switch the editor to Code mode and note that the action is now included within the XML:
<?xml version="1.0" encoding="utf-8"?>
<navigation xmlns:android="http://schemas.android.com/apk/res/android"
xmlns:app="http://schemas.android.com/apk/res-auto"
xmlns:tools="http://schemas.android.com/tools"
android:id="@+id/navigation_graph"
app:startDestination="@id/mainFragment">
<fragment
android:id="@+id/mainFragment"
android:name="com.ebookfrenzy.navigationdemo.ui.main.MainFragment"
android:label="main_fragment"
tools:layout="@layout/main_fragment" >
<action
android:id="@+id/mainToSecond"
app:destination="@id/secondFragment" />
</fragment>
<fragment
android:id="@+id/secondFragment"
android:name="com.ebookfrenzy.navigationdemo.SecondFragment"
android:label="fragment_second"
tools:layout="@layout/fragment_second" />
48.8 Implement the OnFragmentInteractionListener
Before adding code to trigger the action, the MainActivity class will need to be modified to implement the OnFragmentInteractionListener interface. This is an interface that was generated within the SecondFragment class when the blank fragment was created within the navigation graph editor. In order to conform to the interface, the activity needs to implement a single method named onFragmentInteraction() and is used to implement communication between the fragment and the activity.
Edit the MainActivity.kt file and modify it so that it reads as follows:
.
.
import android.net.Uri
.
.
class MainActivity : AppCompatActivity(),
SecondFragment.OnFragmentInteractionListener {
override fun onCreate(savedInstanceState: Bundle?) {
super.onCreate(savedInstanceState)
setContentView(R.layout.main_activity)
}
override fun onFragmentInteraction(uri: Uri) {
}
}
If Android Studio reports that OnFragmentInteractionListener is undefined (some versions of Android Studio add it automatically, while others do not), edit the SecondFragment.kt file and add it as follows:
.
.
import android.net.Uri
.
.
class SecondFragment : Fragment() {
.
.
interface OnFragmentInteractionListener {
// TODO: Update argument type and name
fun onFragmentInteraction(uri: Uri)
}
.
.
48.9 Adding View Binding Support to the Destination Fragments
Since we will be accessing some of the views in the fragment layouts we will need to modify the current code to enable view binding support. Begin by editing the MainFragment.kt file and making the following changes:
.
.
import com.ebookfrenzy.navigationdemo.databinding.MainFragmentBinding
class MainFragment : Fragment() {
.
.
private var _binding: MainFragmentBinding? = null
private val binding get() = _binding!!
override fun onCreateView(
inflater: LayoutInflater, container: ViewGroup?,
savedInstanceState: Bundle?
): View {
_binding = MainFragmentBinding.inflate(inflater, container, false)
return binding.root
}
override fun onDestroyView() {
super.onDestroyView()
_binding = null
}
.
.
Repeat the above steps for the SecondFragment.kt file, this time referencing FragmentSecondBinding.
Now that the action has been added to the navigation graph, the next step is to add some code within the main fragment to trigger the action when the Button widget is clicked. Locate the MainFragment.kt file, load it into the code editor and modify the onActivityCreated() method to obtain a reference to the button instance and to configure an onClickListener instance to be called when the user clicks the button:
.
.
import androidx.navigation.Navigation
.
.
class MainFragment : Fragment() {
.
.
override fun onActivityCreated(savedInstanceState: Bundle?) {
super.onActivityCreated(savedInstanceState)
viewModel = ViewModelProvider(this).get(MainViewModel::class.java)
binding.button.setOnClickListener {
Navigation.findNavController(it).navigate(
R.id.mainToSecond)
}
}
}
The above code obtains a reference to the navigation controller and calls the navigate() method on that instance, passing through the resource ID of the navigation action as an argument.
Compile and run the app and verify that clicking the button in the main fragment transitions to the second fragment.
As an alternative to this approach to setting up a listener, the Navigation class also includes a method named createNavigateOnClickListener() which provides a more efficient way of setting up a listener and navigating to a destination. The same result can be achieved, therefore, using the following single line of code to initiate the transition:
binding.button.setOnClickListener(Navigation.createNavigateOnClickListener(
R.id.mainToSecond, null))
48.11 Passing Data Using Safeargs
The next objective is to pass the text entered into the EditText view in the main fragment to the second fragment where it will be displayed on the TextView widget. As outlined in the previous chapter, the Android Navigation component supports two approaches to passing data. This chapter will make use of type safe argument passing.
The first step in using safeargs is to add the safeargs plugin to the Gradle build configuration. Using the Project tool window, locate and edit the project level build.gradle file (Gradle Scripts -> build.gradle (Project: NavigationDemo)) to add the plugin to the dependencies as follows (once again keeping in mind that a more recent version may now be available):
.
.
dependencies {
classpath "com.android.tools.build:gradle:4.2.0-rc02"
classpath "org.jetbrains.kotlin:kotlin-gradle-plugin:$kotlin_version"
classpath "androidx.navigation:navigation-safe-args-gradle-plugin:2.3.5"
.
.
Next, edit the app level build.gradle file (Gradle Scripts -> build.gradle (Module: App)) to apply the plugin as follows and resync the project when prompted to do so.
plugins {
id 'com.android.application'
id 'androidx.navigation.safeargs'
.
.
android {
.
.
The next step is to define any arguments that will be received by the destination which, in this case, is the second fragment. Edit the navigation graph, select the secondFragment destination and locate the Arguments section within the Attributes tool window. Click on the + button (highlighted in Figure 48-15) to add a new argument to the destination:

After the + button has been clicked, a dialog will appear into which the argument name, type and default value need to be entered. Name the argument message, set the type to String and enter No Message into the default value field:

Figure 48-16
The newly configured argument will appear in the secondFragment element of the navigation_graph.xml file as follows:
<fragment
android:id="@+id/secondFragment"
android:name="com.ebookfrenzy.navigationdemo.SecondFragment"
android:label="fragment_second"
tools:layout="@layout/fragment_second" >
<argument
android:name="message"
app:argType="string" />
android:defaultValue="No Message"
</fragment>
The next step is to add code to the Mainfragment.kt file to extract the text from the EditText view and pass it to the second fragment during the navigation action. This will involve using some special navigation classes that have been generated automatically by the safeargs plugin. Currently the navigation involves the MainFragment class, the SecondFragment class, a navigation action named mainToSecond and an argument named message.
When the project is built, the safeargs plugin will generate the following additional classes that can be used to pass and receive arguments during navigation.
•MainFragmentDirections - This class represents the origin for the navigation action (named using the class name of the navigation origin with “Directions” appended to the end) and provides access to the action object.
•ActionMainToSecond - The class that represents the action used to perform the transition (named based on the ID assigned to the action within the navigation graph file prefixed with “Action”). This class contains a setter method for each of the arguments configured on the destination. For example, since the second fragment destination contains an argument named message, the class includes a method named setMessage(). Once configured, an instance of this class is then passed to the navigate() method of the navigation controller to navigate to the destination.
•SecondFragmentArgs - The class used in the destination fragment to access the arguments passed from the origin (named using the class name of the navigation destination with “Args” appended to the end). This class includes a getter method for each of the arguments passed to the destination (i.e. getMessage())
Using these classes, the onClickListener code within the onActivityCreated() method of the MainFragment.kt file can be modified as follows to extract the current text from the EditText widget, apply it to the action and initiate the transition to the second fragment:
button.setOnClickListener {
val action: MainFragmentDirections.MainToSecond =
MainFragmentDirections.mainToSecond()
action.setMessage(binding.userText.text.toString())
Navigation.findNavController(it).navigate(action)
}
The above code obtains a reference to the action object, sets the message argument string using the setMessage() method and then calls the navigate() method of the navigation controller, passing through the action object. If Android Studio reports MainFragmentDirections as being undefined, rebuild the project using the Build -> Make Project menu option to generate the class.
All that remains is to modify the SecondFragment.kt class file to receive the argument after the navigation has been performed and display it on the TextView widget. For this example, the code to achieve these tasks will be added using an onStart() lifecycle method. Edit the SecondFragment.kt file and add this method so that it reads as follows:
override fun onStart() {
super.onStart()
arguments?.let {
val args = SecondFragmentArgs.fromBundle(it)
binding.argText.text = args.message
}
}
The code in the above method begins by obtaining a reference to the TextView widget. Next, the fromBundle() method of the SecondFragmentArgs class is called to extract the SecondFragmentArgs object received from the origin. Since the argument in this example was named message in the navigation_graph.xml file, the corresponding getMessage() method is called on the args object to obtain the string value. This string is then displayed on the TextView widget.
Compile and run the app and enter some text before clicking on the Button widget. When the second fragment destination appears, the TextView should now display the text entered in the main fragment indicating that the data was successfully passed between navigation destinations.
This chapter has provided a practical example of how to implement Android app navigation using the Navigation Architecture Component together with the Android Studio navigation graph editor. Topics covered included the creation of a navigation graph containing both existing and new destination fragments, the embedding of a navigation host fragment within an activity layout, writing code to trigger navigation events and the passing of arguments between destinations using the Gradle safeargs plugin.