In this chapter, we will learn about the Database as a Service (DBaaS) options for PostgreSQL with other cloud platforms, such as Google Cloud SQL for PostgreSQL, Heroku PostgreSQL, EnterpriseDB (EDB) cloud database, Microsoft Azure for PostgreSQL, and more.
The projects of this Appendix will set up PostgreSQL 12 to store ATM locations within a typical city for banking systems on Google Cloud SQL, Microsoft Azure, Heroku, and the EDB cloud.
We will cover the following topics in this chapter:
- Google Cloud SQL
- Microsoft Azure for PostgreSQL
- Heroku Postgre
- EnterpriseDB cloud database
Technical requirements
This Appendix will take developers around 20-22 hours to develop PostgreSQL databases on Google Cloud SQL, Microsoft Azure, Heroku, and the EDB cloud.
Google Cloud SQL
Google Cloud SQL is a high-performing managed database compared to PostgreSQL and others engines from Google.
As with most cloud services, it is completely managed through a simple interface, integrated with the other Google Cloud services, and perhaps most importantly, is reliable due to configuring replication and backups with ease to protect data.
Creating an instance
In the following steps, we will set up an instance through Cloud Console. Let's see how to do it:
- We will go to the Cloud SQL Instances page in Google Cloud Console with the following link: https://console.cloud.google.com/sql/instances.
- If you have already created a 12-month free trial account with Google Cloud, you can type in your email and click on Next; otherwise, click on Create account to sign up for a new account:

- The following step will be to fill in the password and press the Next button:

- In the following step, we will be in Google Cloud Platform and as it is our first time there, we will create our instance by clicking the CREATE INSTANCE label. Then we will go to the next step:

- The next step will be about creating our new project and we will choose the NEW PROJECT option in the modal window:

- We will now give a name to our project, Book Project, and then press the CREATE button:

- Google Cloud Platform will notify us to say our project has been created, as shown here:

- Now that we have our project, it is time to create the first instance. We can do that using the CREATE INSTANCE button:

- The following step will be to select what kind of instance we want and we will choose PostgreSQL:

- After we have chosen PostgreSQL, Google Cloud Platform will process and create this new instance:

- After the Compute Engine API has created our instance, in the following form, we will choose a couple of details:
- Instance ID: atm-instance.
- Default user password: bookdemo.
Use the default values for the other fields:

- After that, we will press the Create button and the platform will notify us about instance creation:

Instance creation could take a minute but the platform keeps us informed about it through an animation, as we can see in the following screenshot:

- Meanwhile, if we return to the list of instances, we can see some important details that we will use in the future:

We'll check out the following parameters here:
- Instance connection name: book-project-280823:us-central1:atm-instance
- Public IP address: 35.224.163.105
- When we will click on atm-instance, the platform will show another view where we will see options related to database instances:

- When we click on the Databases option, another view will be shown:

- In this new view, we will click on the Create database button and it will require a name for it. We will choose atm as the name and we will click on CREATE:

- Afterward, the atm database will show up in the Databases view:

- Now it's time to configure Connections, and we will click on that label as follows:

- On the Connections view, we will click on the Add network button and we will add our current internet IP addresses:

- Once the preceding configuration is done, we will see that our IP was allowed to access our database on Google Cloud Platform:

So far, we have guided you on how to follow the different steps to create a database in Google Cloud. In the next section, we will see how to connect to it through pgAdmin. Let's see how to do it.
pgAdmin connection for Google Cloud
A database in a cloud is nothing if we cannot access it, and that's why we will see how to connect to it through pgAdmin in the following steps:
- On pgAdmin in our local environment, we will choose the Create | Server... option:

- After the previous step, the Create-Server view will be shown and there we will write a name to our connection on the General tab:

- The following tab is Connection and there we will write the IP address that Google Cloud has provided in the previous section. After having entered the data as follows, we will save all this with the Save button:
- Host name/address: Google Cloud Instance public IP: 35.224.163.105
- Maintenance database: atm
- Username: postgres
- Password: bookdemo:

- If everything went well, we should be able to expand Google Cloud SQL - ATM, and there we will be able to see that our atm database is ready to work with:

Now we can refer to the Connecting to a PostgreSQL DB instance section in Chapter 2, Setting Up a PostgreSQL RDS for ATMs, from Step 6 to Step 11 on pgAdmin, to create the ATM locations table.
In the following section, we will see another important cloud service, provided by Microsoft, called Azure. Let's see how to configure it.
Microsoft Azure for PostgreSQL
Azure is a set of cloud services from Microsoft. With Azure, it is possible to store information and create, manage, and deploy applications in the cloud. Among the different services present in Azure, we are going to work with databases and, more precisely, with PostgreSQL. Let's see how:
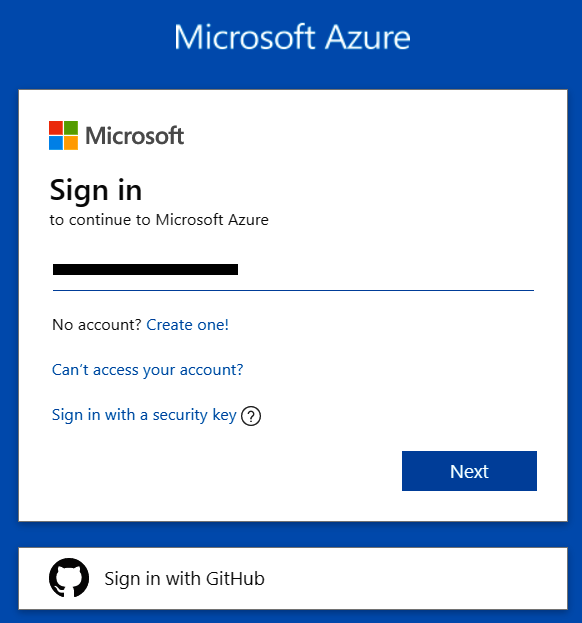
- First of all, through the following link, we are going to register for an Azure account: https://portal.azure.com/.
- We will enter our credentials to sign in to the portal:
- After the previous steps, we will see the default services dashboard view:

So far, we have seen how easy it is to connect with the services that Azure offers. In the next section, we will see how to create our PostgreSQL service in the cloud.
Creating an Azure database for the PostgreSQL server
The basis of any service in Azure is a resource. To create one, we are simply going to take the following steps:
- We will create a resource by clicking the plus icon (+) and selecting SQL databases:

- Afterward, a list of databases will be shown and we will select Azure Database for PostgreSQL:

- Once the database of our preference has been selected, we will click on the Create button under the Single server option:

- Now we will add a couple of parameter values to the deployment view:
- Server name: atm-server
- Version: 11
- Admin username: dba
- Password: Bookdemo20
- Confirm password: Bookdemo20:

- We will click on the Create new link under Resource group and we will set the resource name as book-resources. After that, we will click on the OK button:

- Now we will move to the Review + create tab and we will check the information:

- We will click on the Create button and it will launch the deployment process. It will take a few minutes:

- Once the deployment is completed, we will click on atm-server located under Deployment details:

- Now we are in the atm-server view and we will click on Connection security in the Settings section on the left-hand side:

- After the previous step, we will click on the + Add current client IP address link and add any other IPs that we will use there. When we finish, we will click on Save in order for changes to be applied:

So far, we have seen how to configure our resources in Azure. In this case, it is a PostgreSQL database but as we saw at the beginning of this section, there are many more, and with just a couple of clicks they will be available to us. Now we will see how to connect the database created previously to our local pgAdmin.
Getting an Azure resource connection for pgAdmin
Creating a resource in the cloud is useless if we don't use it. Let's see how to use the one previously created through pgAdmin:
- We will click on Overview at the top on the left-hand side in our Azure database for the PostgreSQL server:

From the preceding view, we will copy the following credentials:
- Server name: atm-server.postgres.database.azure.com
- Admin username: dba@atm-server
- Now, in our local pgAdmin, we will click on Create | Server...:

- On the Connection tab, we will name our server Azure PostgreSQL database:

- The most important step is in the Connection tab, where we will add those parameters that we obtained in Step 1 and then click on the Save button:

- Afterward, we will expand the Azure PostgreSQL database with pgAdmin and we will see our instance that was created in the previous section:

- Then, on the Azure PostgreSQL instance, we will right-click and create our atm database, as follows:

- On the Create-Database window, and over on the General tab, we will add the following parameters:
- Database: atm
- Owner: dba
After that, we will click on the Save button in order to finish our database creation:

- Now it's time to expand the new atm database as follows. It is worth remembering that this is being recorded in our Azure cloud resource:

Now we can refer to the Connecting to a PostgreSQL DB instance section, from Step 6 to Step 11 on pgAdmin, to create the ATM locations table for Azure.
So far, we have had the chance to see how easy it is to configure an Azure service in the cloud. However, it is important to mention that the up and down speeds provided by cloud services will always be lower than those provided in an on-premises environment, but perhaps customers will be willing to give up a bit of speed in exchange for the security of their data and other benefits as well.
We'll now check out another cloud service called Heroku.
Heroku Postgres
Heroku Postgres is a Heroku cloud database service based on PostgreSQL. Heroku Postgres provides features such as continuous protection, rollback, and high availability. It also allows for forking the database and creating followers and data clips.
Creating a Heroku app
Unlike the services we have seen previously, Heroku is a type of cloud service known as Platform as a Service (PaaS). In other words, this type of service is designed for the development of applications for companies of all sizes and helps to execute, implement, manage, and scale applications using various available computer programming languages. So, to create our Heroku Postgres, first we are going to create our application. Let's see how to do it:
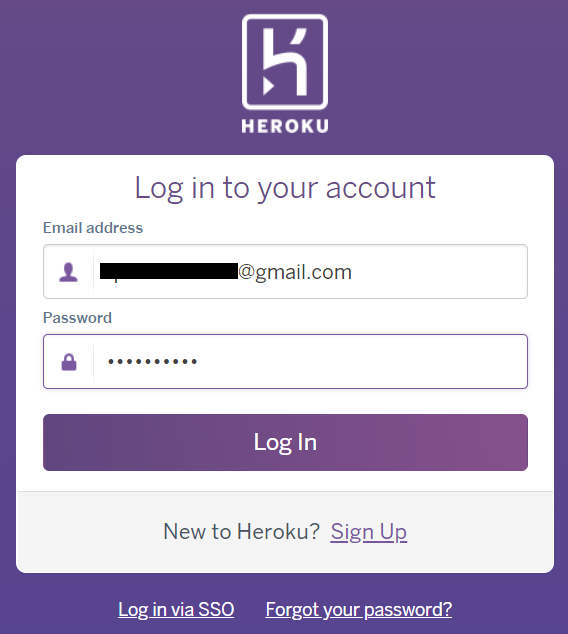
- As with all internet services, first, we will enter our Heroku credentials at the following link: https://dashboard.heroku.com/apps:
- After signing in, the Heroku dashboard is shown as follows and there we will click on Create new app:

- In the Create New App view, we will add atm-heroku-app as the app name and we will click on the Create app button:

After we create the app, this is what we'll see:

So far, we have taken the first steps to creating our database. In the next section, we will develop the Resources tab for this purpose. Let's see how to do it.
Creating a Heroku PostgreSQL database
Now, we already have our Heroku app and from here we will create our Heroku PostgreSQL. Let's see how to do it:
- On the Resources tab, under Add-ons, we will search for Heroku Postgres and then we will select it from the suggested list:

- Automatically, a pop-up window will show and there we will select Hobby Dev - Free for Plan name. Following this, we will click on the Provision button:

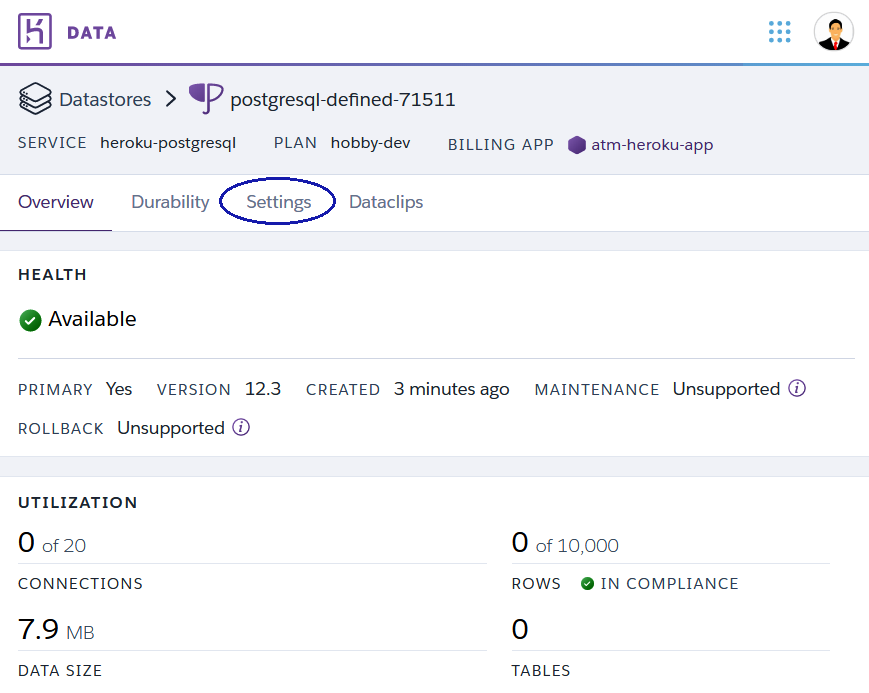
- After we click the Provision button, we will see our Heroku Postgres plan and we will click on it:

- Now, in the Datastores | Heroku PostgreSQL view, we will click on the Settings tab:
- On the Settings tab, we will click on View Credentials...:

- On View Credentials, we will obtain all the data that we will need to connect from a client:

The credential details here are as follows:
- Host: ec2-34-195-169-25.compute-1.amazonaws.com
- Database: d5ptchbma6oq5l
- User: zgovagqkpvucbf
- Port: 5432
- Password: 8b43b48b12fad90e80a9b3dd9569dff9205a270b2dd3fe72480bc8b738a00ba3
At this point, we already have our PostgreSQL database created in Heroku and the necessary data to connect from a client. As has been the case so far, our client for this purpose is pgAdmin, and in the next section, we will see how to connect from it.
Connecting Heroku PostgreSQL using pgAdmin
As we previously mentioned, now is the time to connect from our local location to our Heroku service through pgAdmin. Let's see how to do it:
- On our local pgAdmin in the browser, we will right-click on Servers and then click on Create | Server...:

- On the Connection tab, we will name it Heroku Postgres:

- Following that, we will add our credentials previously obtained on Heroku on the Connection tab:

- Once the credentials have been validated, we will expand the Heroku Postgres instance and over a public schema, we will right-click and select Query Tool from the contextual menu:

- On the new Query Editor tab, we can refer to Chapter 2, Setting Up a PostgreSQL RDS for ATMs, in the Connecting to a PostgreSQL DB instance section, from Step 6 to Step 11 on pgAdmin, to create the ATM locations table for Heroku Postgres:

However, as Heroku Postgres does not support it, we cannot rename the database name atm nor can we create it as or rename the username dba; therefore, when we re-execute the steps from Chapter 2, Setting Up a PostgreSQL RDS for ATMs on pgAdmin, we will have to fix the username of its GitHub script from dba to zgovagqkpvucbf (Heroku user) as follows:
CREATE SEQUENCE public."ATM locations_ID_seq"
    INCREMENT 1
    START 658
    MINVALUE 1
    MAXVALUE 2147483647
    CACHE 1;

ALTER SEQUENCE public."ATM locations_ID_seq"
    OWNER TO zgovagqkpvucbf;

GRANT ALL ON SEQUENCE public."ATM locations_ID_seq" TO zgovagqkpvucbf;

CREATE TABLE public."ATM locations"
(
    "ID" integer NOT NULL DEFAULT nextval('"ATM locations_ID_seq"'::regclass),
    "BankName" character varying(60) COLLATE pg_catalog."default" NOT NULL,
    "Address" character varying(50) COLLATE pg_catalog."default" NOT NULL,
    "County" character varying(15) COLLATE pg_catalog."default" NOT NULL,
    "City" character varying(15) COLLATE pg_catalog."default" NOT NULL,
    "State" character(2) COLLATE pg_catalog."default" NOT NULL,
    "ZipCode" integer NOT NULL,
    CONSTRAINT "ATM locations_pkey" PRIMARY KEY ("ID")
)

TABLESPACE pg_default;

ALTER TABLE public."ATM locations"
    OWNER to zgovagqkpvucbf;

GRANT ALL ON TABLE public."ATM locations" TO zgovagqkpvucbf;

COMMENT ON TABLE public."ATM locations"
    IS 'ATM locations of New York city';
As in the preceding screenshot, you can see that we have successfully created the ATM locations table with pgAdmin for Heroku Postgres.
As we said at the beginning, Heroku is a cloud service designed mainly to implement applications in the cloud, and perhaps due to this there are some limitations that we found with PostgreSQL. However, it is worth taking it into account as a service since many have been doing so and giving good reviews for it.
We will now check out a natively Postgres database service called EnterpriseDB.
EnterpriseDB cloud database
In order to finalize our study on the different offers that exist in the DBaaS market, now it is time to show one of the pioneers of which PostgreSQL is concerned. Maybe if you are looking for something natively PostgreSQL, EDB would be the answer. In the following sections, we will address the creation of a PostgreSQL database and its access from a client as we did with the previous vendors.
Creating a PostgreSQL cluster
One of the many services that EDB offers in the cloud is the creation of a PostgreSQL instance. Let's see how to do this in the following steps:
- We will go to the following link: https://www.enterprisedb.com/edb-postgres-cloud-database-service.
- We will add our credentials to sign in to the EDB cloud database; otherwise, you will need to sign up for a new account there through the next link:

- If this is the first time we are signing in, we will need to select the free trial by clicking the Start free button:

- Once we have logged in to the cloud database service, we will select the US East zone and it will pop up a new cluster tab:

- In this new view, we will click on the New Cluster icon on the left-hand side:

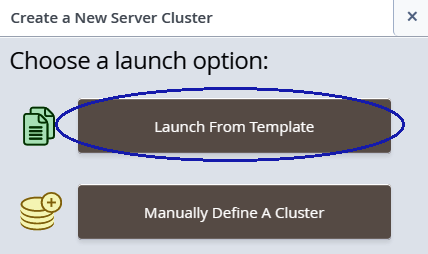
- The previous action will open a new window popup where we will select Launch from Template:
- A new view will open and there we will add the following parameters:
- PostgreSQL: Yes (checked)
- Select Version(s): 12
- Cluster Name: atm-cluster
- DB Master User: clouddba (because they require 4-20 characters)
- DB Master Password: bookdemo:

In the same view, we will delete the existing rule:

We will need to confirm the Delete Rule dialog by clicking on Delete:

- Now we will add a new rule and we will click on the Add Rule button:

- On the popping up of the Add Rule dialog, we will add our CIDR. As we did before, we can use https://www.whatismyip.com to obtain our IP address and we will click on the Apply button:

The new rule will be shown as follows and we will click on the Launch button:

- A pop-up window will show us that the creation process has begun as we will see in the following screenshot:

- After a few minutes, when the cluster has been created, we will click on atm-cluster and we will copy the details from there:

- ADDRESS: ec2-23-21-112-200.compute-1.amazonaws.com
- LB PORT: 9999
- At the same time, we will receive a notification email as follows where all the credentials are provided:

So far, we have seen that the steps were similar to those we have done with other vendors, except that here we are only talking about PostgreSQL; we do not have other database services. In the next section, we will see how to connect to this service created through pgAdmin.
Using pgAdmin to connect to EDB PostgreSQL
The following steps are already known, so we will go directly on to adding the necessary details to connect:
- We assume that previously the new server has already been created on pgAdmin, so now we will go to the General tab and we will set the name to EDB PostgreSQL - ATM:

- In the Connection tab, we will add the credentials that we received in the preceding email from EDB:
- Host name/address: ec2-23-21-112-200.compute-1.amazonaws.com
- Port: 9999
- Username: clouddba
- Password: bookdemo
- Save password?: Yes (checked):

- Then we will be able to expand the EDB PostgreSQL - ATM server with pgAdmin:

- Now, on EDB PostgreSQL - ATM, we will create a new atm database:

- In the Create | Database... window, we will add the following parameters and save them:
- Database: atm
- Owner: clouddba:

- Now we will be able to expand the newly created atm database, as shown in the following screenshot:

- Now we can refer to Chapter 2, Setting Up a PostgreSQL RDS for ATMs, in the Connecting to a PostgreSQL DB instance section, from Step 6 to Step 11 on pgAdmin, to create the ATM locations table for EDB PostgreSQL; however, our GitHub is always using username = dba, we will use a new username = dba for PGAdmin so that all of our GitHub scripts can easily be executed.
For that, we will select the Tools menu | Query Tool and we will execute the following statement:
CREATE USER dba WITH ENCRYPTED PASSWORD 'bookdemo';
GRANT ALL PRIVILEGES ON DATABASE atm TO dba;
This will result in the following output:

Hence, now, we can re-apply the ATM locations table through EDB PostgreSQL in the cloud.
So far, we have seen that connecting to the EDB cloud is similar to other, previous services. The important thing is to always have the credentials at hand, and that's it.
Summary
In this Appendix, we have learned DBaaS skills such as how to set up and manage PostgreSQL step by step with Google Cloud SQL, Azure, Heroku, and the EDB cloud. Keep in mind that the cloud providers seen are the most used and best-ranked for the DBaaS application.
For your future work after you complete this book, you can develop your own research and technology deployment from your PostgreSQL projects. Whenever you discover something new, you can contribute your invention to the PostgreSQL association with our network of PostgreSQL conferences all over Canada and the United States by contacting the Diversity Committee of the United States PostgreSQL Association here: https://postgresql.us/diversity/.
Thank you so much for your attention throughout the book!