Chapter 1: Establishing a Build Environment
In this chapter, we will learn how to set up 3D graphics development environment on your computer for Windows and Linux operating systems. We will cover the following recipes:
- OpenGL 4.6 with AZDO and Vulkan
- Setting up our development environment on Windows
- Setting up our development environment on Linux
- Installing the Vulkan SDK for Windows and Linux
- Managing dependencies
- Getting the demo data
- Creating utilities for CMake projects
Technical requirements
You can find the code files present in this chapter on GitHub at https://github.com/PacktPublishing/3D-Graphics-Rendering-Cookbook/tree/master/Chapter1
OpenGL 4.6 with AZDO and Vulkan
Approaching Zero Driver Overhead (AZDO) is not a single specific OpenGL feature. It is more of a set of techniques, a software development approach with OpenGL, and a way of structuring data access and API usage to make it faster by batching a lot of draw calls together. It was originally presented by Cass Everitt, Tim Foley, John McDonald, and Graham Sellers. Many things possible with Vulkan are also possible with OpenGL/AZDO. However, Vulkan is very different to OpenGL because it can precompile the pipeline state, while in modern OpenGL, a comparable level of performance can be achieved through a completely different set of methods; for example, bindless textures and buffers, programmable vertex pulling, and combining multiple draw calls into a single one.
There is a vendor-specific OpenGL extension, NV_command_list, from NVIDIA, which can compile OpenGL commands into a command list for efficient reuse. We will not be covering it here because it is not part of standard OpenGL. For those who are interested, here is the specification to read: https://www.khronos.org/registry/OpenGL/extensions/NV/NV_command_list.txt.
What is the essence of modern OpenGL?
First, let's focus on some of the modern OpenGL extensions that have made it into OpenGL Core and form the basis of AZDO, making the porting of OpenGL renderers to Vulkan easier, as well as helping to improve their performance in OpenGL:
- OpenGL 4.2:
ARB_texture_storage introduces immutable textures whose metadata should be provided up front. For example, the classic glTexImage() function does not have any information on how many MIP levels would be required for a texture. The new glTexStorage/glTextureStorage API is more versatile and allows more driver-side optimizations.
- OpenGL 4.3:
ARB_multi_draw_indirect (MDI) is batching "on steroids" and, compared to the classic instancing, can render a number of different geometries at once in a single draw call. This feature plays best when object data, such as geometry and material properties, is stored in large buffers. When combined with persistent mapped buffers, MDI buffers can be filled with commands from different threads. Pointers to the buffers can be passed to threads and do not require any OpenGL context to be available. The buffer content does not have to be regenerated every frame so it can be reused and even changed by the GPU directly. This allows for various GPU-based culling techniques and automatic level-of-detail implemented via compute shaders.
- OpenGL 4.4:
ARB_buffer_storage gives better usage hints than glBufferData() and allows applications to pass additional information about the requested allocation to the implementation, which may use this information for further optimizations. Furthermore, this extension introduces the concept of persistent mapped buffers, which allow applications to retain mapped buffer pointers. To implement a buffer update workflow identical to Vulkan, OpenGL app developers should use persistent mapped buffers for all buffers that are expected to be used for read or write access on the CPU. Persistent mapped buffers allow multiple threads to write them without using OpenGL at all. This opens the possibility to do straightforward multi-threaded command buffer generation for MDI buffers.
ARB_enhanced_layouts allows, among other things, the use of compile-time constant expressions in layout qualifiers and specifying explicit byte offsets within a uniform or shader storage block. These features are added on top of the explicit GLSL attribute locations functionality introduced in OpenGL 3.3, which allows us to explicitly specify our binding points. Vulkan uses hardcoded SPIR-V bindings as well and does not allow querying binding information at all.
- OpenGL 4.5:
ARB_direct_state_access (DSA) provides a set of API functions to manipulate OpenGL objects, such as textures and buffers, directly rather than by means of the classic bind-to-edit approach. Using DSA allows one to modify an object state without affecting the global OpenGL state shared among all parts of the application. It also makes the API more Vulkan-like, enabling handle-based object access.
- OpenGL 4.6:
GL_ARB_indirect_parameters allows us to store some parameters like draw count to MDI drawing commands inside buffers. This approach introduces even more possibilities to create novel GPU-driven rendering pipelines.
GL_ARB_shader_draw_parameters adds new built-in variables to GLSL vertex shader inputs, gl_BaseVertexARB and gl_BaseInstanceARB, which contain the values passed in the baseVertex and baseInstance parameters of the draw call. Besides the two previously mentioned input variables, this extension adds the gl_DrawID variable to store the index of the draw call that is currently being processed by the MDI drawing commands.
ARB_gl_spirv allows a SPIR-V module to be used as a shader stage in OpenGL. This extension is not directly related to the runtime performance or driver overhead per se. However, it allows the usage of the GL shading language compiler to produce binary modules consumable by both OpenGL and Vulkan, which makes porting to Vulkan more straightforward.
Besides the preceding core features of OpenGL, there are a few ARB OpenGL extensions that are considered to be a part of AZDO.
ARB_bindless_texture reinvents the binding of textures by using 64-bit handles instead of texture objects. Texture handles stored in buffers work fairly similarly to Vulkan's DescriptorSets and provide functionality comparable to VK_EXT_descriptor_indexing.
A very important thing to remember when switching from OpenGL/AZDO to Vulkan is that it is not necessarily going to give you any significant performance boost. The GPU hardware is the same and all the graphics rendering functionality exposed by Vulkan is almost identical to that found in OpenGL. One of the major Vulkan design goals is to considerably reduce the CPU time spent in the driver, therefore if your application is limited by the GPU rendering performance, it is highly unlikely that Vulkan will give you better performance.
Furthermore, there is a Vulkan & OpenGL Threaded CAD Scene sample from NVIDIA that compares various rendering code paths using modern OpenGL and Vulkan https://developer.nvidia.com/vulkan-opengl-threaded-cad-scene-sample. The result of this demo is that NV_command_list can deliver better performance than Vulkan on the CPU side, as it benefits from having the API designed directly with the hardware in mind.
Setting up our development environment on Windows
In this recipe, we will get started by setting up our development environment on Windows. We will go through the installation of each of the required tools individually and in detail.
Getting ready
In order to start working with the examples from this book in the Microsoft Windows environment, you will need some essential tools to be installed in your system.
The most important one is Microsoft Visual Studio 2019. Additional tools include the Git version control system, the CMake build tool, and the Python programming language. Throughout this book, we use these tools on the command line only, so no GUI add-ons will be required.
How to do it...
Let's install each of the required tools individually.
Microsoft Visual Studio 2019
Follow these steps to install Microsoft Visual Studio 2019:
- Open https://visualstudio.microsoft.com and download the Visual Studio 2019 Community Edition installer.
- Start the installer and follow the onscreen instructions. For the purposes of this book, you need to have a native C++ compiler for the 64-bit Intel platform. Other components of the Visual Studio development environment are not required to run the sample code.
Git
Follow these steps to install Git:
- Download the Git installer from https://git-scm.com/downloads, run it, and follow the on-screen instructions.
- We assume that Git is added to the system PATH variable. Enable the option shown in the following screenshot during installation:
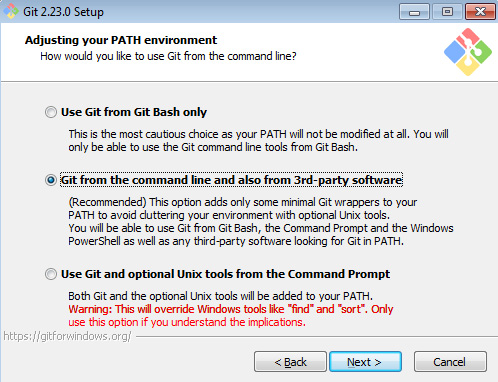
Figure 1.1 – Git from the command line and also from third-party software
- Also, select Use Windows' default console window as shown in the next screenshot. This way, you will be able to run the build scripts from the book seamlessly from any directory on your computer:

Figure 1.2 – Use Windows' default console window
Important note
Git is complex software and a huge topic in itself. We recommend the book Mastering GIT, Jakub Narębski, Packt Publishing, https://www.packtpub.com/application-development/mastering-git, along with the downloadable e-book ProGit, Scott Chacon & Ben Straub, APress at https://git-scm.com/book/en/v2.
CMake
To install CMake, please follow these steps:
- Download the latest 64-bit CMake installer from https://cmake.org/download/.
- Run it and follow the on-screen instructions. If you already have an earlier version of CMake installed, it is best to uninstall it first.
- Select the Add CMake to system PATH for all users option, as shown here:

Figure 1.3 – Add CMake to the system PATH for all users
Python
To install Python, please follow these steps:
- Download the Python 3 installer for 64-bit systems from https://www.python.org/downloads/.
- Run it and follow the onscreen instructions.
- During the installation, you also need to install the pip feature. Choose Custom Installation and make sure that the pip box is checked:
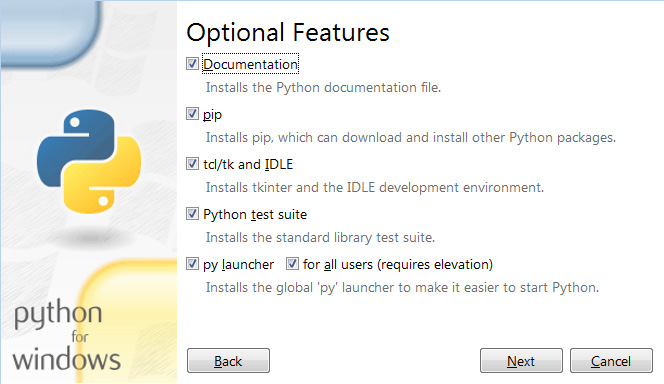
Figure 1.4 – Custom Installation options
- Once the installation is complete, make sure to add the folder containing python.exe to the PATH environment variable.
There's more...
Besides Git, there are other popular version control systems, such as SVN and Mercurial. While developing large software systems, you will inevitably need to download some libraries from a non-Git repository. We recommend getting familiar with Mercurial.
While working in the command-line environment, it is useful to have some tools from the Unix environment, such as wget, grep, and find. The GnuWin32 project provides precompiled binaries of these tools, which can be downloaded from http://gnuwin32.sourceforge.net.
Furthermore, in the Windows environment, orthodox file managers make file manipulation a lot easier. We definitely recommend giving the open source Far Manager a try. You can download it from https://farmanager.com/index.php?l=en. It is shown in the following screenshot:
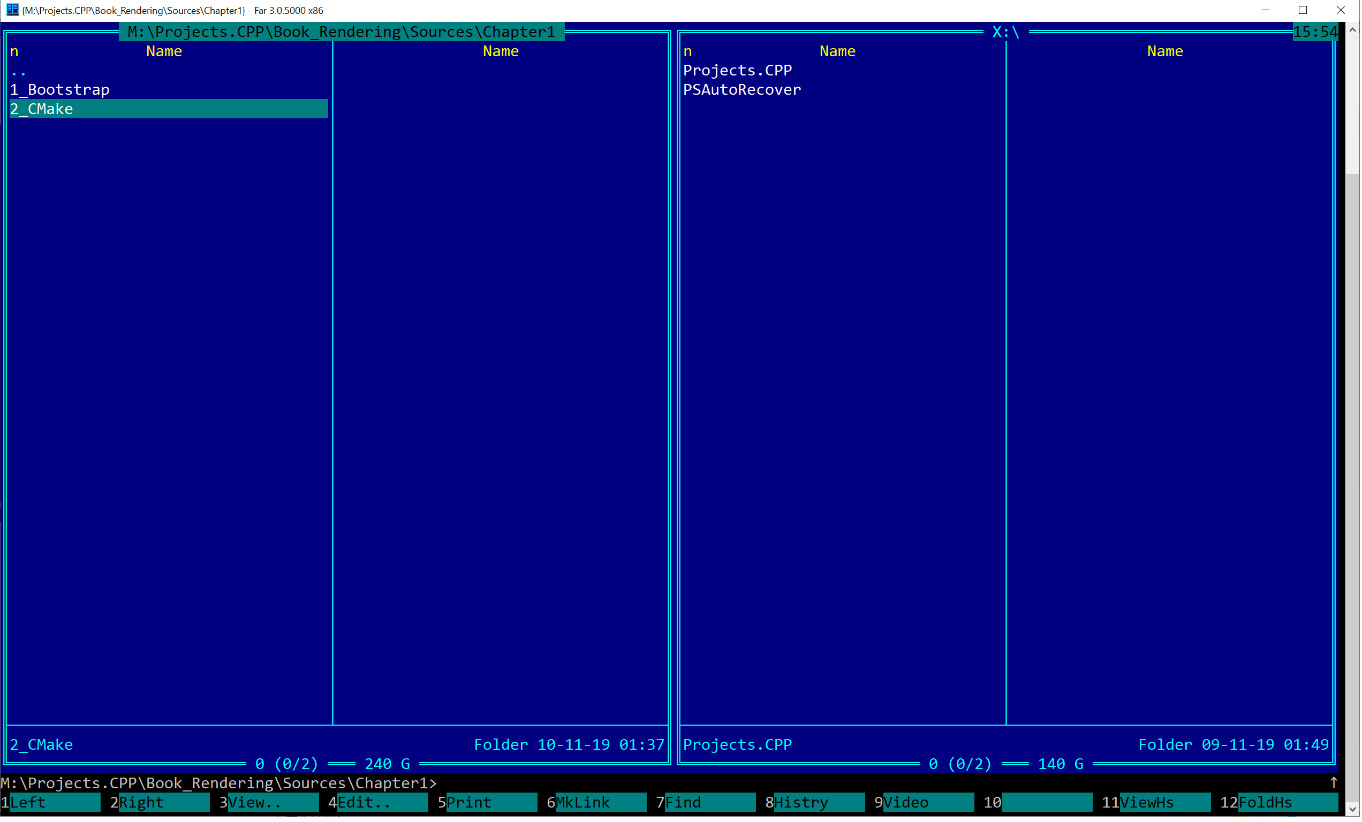
Figure 1.5 – The look and feel of Far Manager
Setting up our development environment on Linux
Linux is becoming more and more attractive for 3D graphics development, including gaming technology. Let's go through the list of the tools required to start working with this book on Linux.
Getting ready
We assume our reader has a desktop computer with a Debian-based GNU/Linux operating system installed. We also assume the reader is familiar with the apt package manager.
To start developing modern graphics programs on Linux, you need to have up-to-date video card drivers installed that support OpenGL 4.6 and Vulkan 1.2. To build the examples from this book, a C++ compiler with C++20 support is required. We use the GNU Compiler Collection.
How to do it...
On a Debian-based system, the installation process is straightforward. However, before installing any of the required packages, we recommend running the following command to ensure your system is up to date:
sudo apt-get update
Let's go through the list of essential software and install whatever is missing:
- GCC Compiler
Assuming you have a properly configured apt package manager, run the following command to install the GCC compiler and related tools:
sudo apt-get install build-essential
- CMake
The CMake build tool is also available in the standard repositories. To install CMake, run the following command:
sudo apt-get install cmake
CMake 3.15 or above is sufficient for the code examples in this book.
- Git
To install the Git version control system, run the following command:
sudo apt-get install git
- Python 3
To install the Python 3 package, run the following command:
sudo apt-get install python3.7
The exact version of Python may vary between distributions. Any version of Python 3 will suffice for the scripts in this book.
Now we are done with the basic packages, and we can install graphics-related software. Let's jump into the next recipe to learn how to deal with the Vulkan SDK.
Installing the Vulkan SDK for Windows and Linux
In this recipe, we will learn how to get started with the Vulkan SDK. We will describe the requirements and procedure for installing the LunarG Vulkan SDK for Windows and Linux.
In principle, it is possible to write Vulkan applications without the Vulkan SDK using only C/C++ header files provided by Khronos. You can get these header files by cloning the Git repository at https://github.com/KhronosGroup/Vulkan-Headers. However, it is advised to install the complete Vulkan SDK in order to use Vulkan Validation Layers and a standalone GLSL compiler.
Getting ready
Make sure you have the latest video card drivers for your operating system.
How to do it...
To install Vulkan 1.2 on Linux, follow these steps:
- Open the https://www.lunarg.com/vulkan-sdk/ page in a browser and download the appropriate Vulkan SDK for Windows or Linux.
- After the download has finished, run the Windows installer file and follow the onscreen instructions. If you have Ubuntu 20.04 installed, use the following commands provided by LunarG's website:
wget -qO - http://packages.lunarg.com/lunarg-signing-key-pub.asc |
sudo apt-key add -
sudo wget -qO /etc/apt/sources.list.d/lunarg-vulkan-1.2.176-focal.list https://packages.lunarg.com/vulkan/1.2.176/lunarg-vulkan-1.2.176-focal.list
sudo apt-get update
sudo apt-get install vulkan-sdk
- Alternatively, you may need to download the .tar.gz SDK archive and unpack it manually.
There's more...
We do not explicitly describe the development process on macOS because it seems to be a rather turbulent environment with frequent breaking changes in the development infrastructure. However, some general guidance is given along the way.
The installation of well-known frameworks mentioned in the following chapters is similar to Linux. Instead of Synaptic (apt), the installation is performed using the Brew or MacPorts package managers.
The OpenGL support is now deprecated for newer applications in favor of the Metal API, on top of which Vulkan is implemented in the MoltenVK library. The LunarG site https://vulkan.lunarg.com provides the macOS version of the Vulkan SDK, which is the MoltenVK package. Its installation guide can be found at https://vulkan.lunarg.com/doc/sdk/latest/mac/getting_started.html. Make sure you are using CMake version 3.15 or later so that the find_package(Vulkan) macro yields the correct results. Here are the steps required to install the Vulkan SDK on Linux:
- Let's download and unpack the Vulkan SDK with the following commands:
cd ~/
wget https://sdk.lunarg.com/sdk/download/1.2.176.1/mac/vulkansdk-macos-1.2.176.1.dmg
hdiutil mount vulkansdk-macos-1.2.176.1.dmg
- Then we have to set a few environment variables. To make these settings permanent, add the following lines to $HOME/.bash_profile:
export VULKAN_ROOT_LOCATION="$HOME/"
export VULKAN_SDK_VERSION="1.2.176.1"
export VULKAN_SDK="$VULKAN_ROOT_LOCATION/vulkansdk-macos-$VULKAN_SDK_VERSION/macOS"
export VK_ICD_FILENAMES="$VULKAN_SDK/etc/vulkan/icd.d/MoltenVK_icd.json"
export VK_LAYER_PATH="$VULKAN_SDK/etc/vulkan/explicit_layers.d"
export PATH="$VULKAN_SDK/bin:$PATH"
This way you can install a new version of the SDK and only change the VULKAN_SDK_VERSION value.
To check that your installation is correct, run Applications/vkcube.app from the SDK. To check whether you can build your Vulkan applications on macOS with CMake, create the following CMakeLists.txt file:
cmake_minimum_required(VERSION 3.15)
project("VulkanTest" CXX C)
find_package(Vulkan)
if (NOT Vulkan_FOUND)
message( FATAL_ERROR "Vulkan not found" )
endif()
If the output of cmake -G "Unix Makefiles" does not contain Vulkan not found, you are ready to use Vulkan in your macOS applications.
Important Note
When developing cross-platform applications, it is good to use similar tools for each platform. Since both macOS and Linux support GCC and Clang compilers, using GCC on Windows ensures that you avoid the most common portability issues. A complete package of C and C++ compilers can be downloaded from http://www.equation.com/servlet/equation.cmd?fa=fortran.
An alternative way to use GCC on Windows is to install the MSys2 environment from https://www.msys2.org. It features the package management system used in Arch Linux, Pacman.
Managing dependencies
This book's examples use multiple open source libraries. To manage these dependencies, we use a free and open source tool called Bootstrap. The tool is similar to Google's repo tool and works both on Windows and Linux, as well as on macOS for that matter.
In this section, we learn how to use Bootstrap to download libraries using the Vulkan Headers repository as an example.
Getting ready
Make sure you have Git and Python installed, as described in the previous recipes. After that, clone the source code bundle repository from GitHub:
git clone https://github.com/PacktPublishing/3D-Graphics-Rendering-Cookbook
How to do it...
Let's look into the source code bundle and run the bootstrap.py script:
bootstrap.py
The script will start downloading all the third-party libraries required to compile and run the source code bundle for this book. The tail of the output should look as follows:
Cloning into 'M:Projects.CPPBook_RenderingSourcesdepssrcassimp'...
remote: Enumerating objects: 25, done.
remote: Counting objects: 100% (25/25), done.
remote: Compressing objects: 100% (24/24), done.
remote: Total 51414 (delta 2), reused 10 (delta 1), pack-reused 51389
Receiving objects: 100% (51414/51414), 148.46 MiB | 3.95 MiB/s, done.
Resolving deltas: 100% (36665/36665), done.
Checking out files: 100% (2163/2163), done.
Once the download process is complete, we are ready to build the project.
How it works...
Bootstrap takes a JSON file as input, opening bootstrap.json from the current directory by default. It contains metadata of libraries we want to download; for example, their names, where to retrieve them from, a specific version to download, and so on. Besides that, each used library can have some additional instructions on how to build it. They can be patches, unpacking instructions, SHA hashes to check archive integrity, and many others.
Source code location for each library can be represented by either a URL of a version control system repository or by an archive file with the library source files.
A typical JSON file entry corresponding to one library looks like in the following snippet. The type field can have one of the following values: archive, git, hg, or svn. The first value corresponds to an archive file, such as .zip, .tar.gz, .tar.bz2, while the last three types describe different version control system repositories. The url field contains a URL of the archive file to be downloaded or a URL of the repository. The revision field can specify a particular revision, tag, or branch to check out:
[
{
"name": "vulkan",
"source": {
"type": "git",
"url": "https://github.com/KhronosGroup/Vulkan-
Headers.git",
"revision": "v1.2.178"
}
}
]
The complete JSON file is a comma-separated list of such entries. For this recipe, we have got only one library to download. We will add more libraries in the next chapters. The accompanying source code bundle contains a JSON file with all the libraries used in this book.
There's more...
There is comprehensive documentation for this tool that describes other command-line options and JSON fields in great detail. It can be downloaded from https://github.com/corporateshark/bootstrapping.
The Bootstrap tool does not differentiate between source code and binary assets. All the textures, 3D models, and other resources for your application can also be downloaded, organized, and kept up to date automatically.
Getting the demo data
This book makes use of free 3D graphics datasets as much as possible. The comprehensive list of large 3D datasets is maintained by Morgan McGuire, Computer Graphics Archive, July 2017 (https://casual-effects.com/data). We will use some large 3D models from his archive for demonstration purposes in this book. Let's download and patch one of them.
How to do it
To download the entire dataset, follow these simple steps:
- Open the https://casual-effects.com/data/ page in a browser and find the Amazon Lumberyard Bistro dataset.
- Click on the Download link and allow the browser to download all the data files. The following is a screenshot of Morgan McGuire's site with the download link:
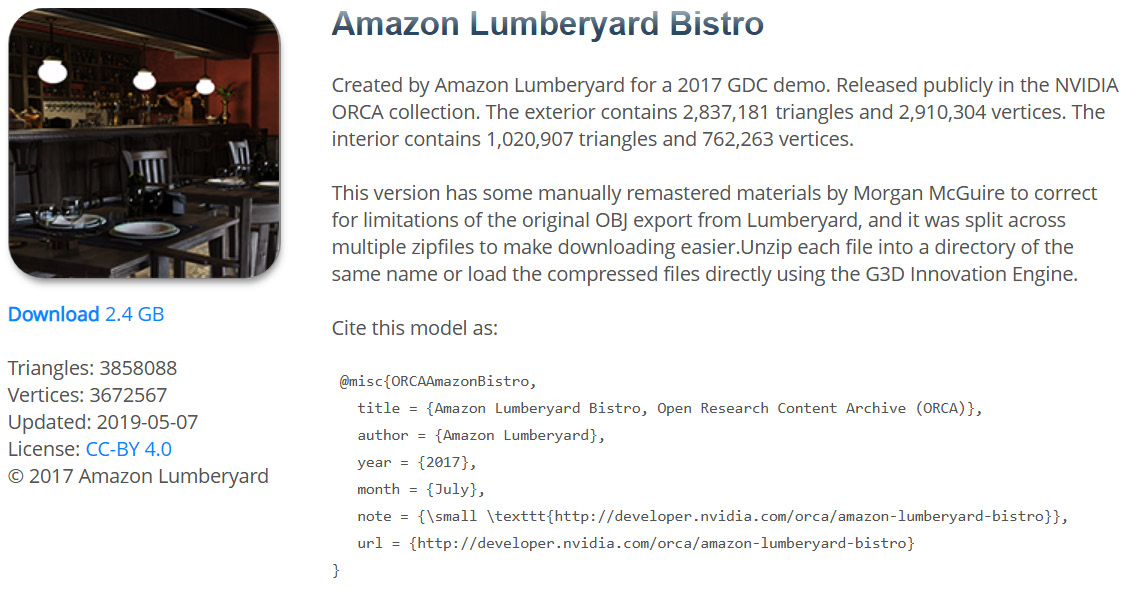
Figure 1.6 – Amazon Lumberyard Bistro as pictured on casualeffects.com as a 2.4-GB download
There's more...
Some of the material properties in the downloaded dataset should be updated. Use the interior.mtl and exterior.mtl files from the https://github.com/corporateshark/bistro_materials repository to replace the corresponding ones from the downloaded dataset.
Creating utilities for CMake projects
In this recipe, we will see how CMake is used to configure all the code examples in this book and learn some small tricks along the way.
Note
For those who are just starting with CMake, we recommend reading the books CMake Cookbook (Radovan Bast and Roberto Di Remigio), Packt Publishing and Mastering CMake (Ken Martin and Bill Hoffman), Kitware.
Getting ready
For a starter, let's create a minimalistic C++ application with a trivial main() function and build it using CMake:
int main()
{
return 0;
}
How to do it...
Let's introduce two helper macros for CMake. You can find them in the CMake/CommonMacros.txt file of our source code bundle:
- The SETUP_GROUPS macro iterates over a space-delimited list of C and C++ files, whether it is a header or source file, and assigns each file into a separate group. The group name is constructed based on the path of each individual file. This way we end up with a nice folder-like directory structure in the Visual Studio Solution Explorer window, as we can see on the right in the following screenshot:

Figure 1.7 – Without groups (left) and with groups (right)
- The macro starts by iterating over a list of files passed in the src_files parameter:
macro(SETUP_GROUPS src_files)
foreach(FILE ${src_files})
get_filename_component(PARENT_DIR "${FILE}" PATH)
- We store the parent directory name as a default group name and replace all the backslash characters with forward slashes:
set(GROUP "${PARENT_DIR}")
string(REPLACE "/" "\" GROUP "${GROUP}")
- Then, we can tell CMake to assign the current file into a source group with this name:
source_group("${GROUP}" FILES "${FILE}")
endforeach()
endmacro()
- The second macro, SETUP_APP is used as a shortcut to create a new CMake project with all the standard properties we want it to have. It is very convenient when you have a number of very similar subprojects, like in this book:
macro(SETUP_APP projname)
set(PROJ_NAME ${projname})
project(${PROJ_NAME})
- After setting the project name, this macro uses the GLOB_RECURSE function to collect all source and header files into the SRC_FILES and HEADER_FILES variables:
file(GLOB_RECURSE SRC_FILES LIST_DIRECTORIES
false RELATIVE
${CMAKE_CURRENT_SOURCE_DIR} src/*.c??)
file(GLOB_RECURSE HEADER_FILES LIST_DIRECTORIES
false RELATIVE
${CMAKE_CURRENT_SOURCE_DIR} src/*.h)
- In all our code samples, we use the src directory containing the source files as an include directory as well:
include_directories(src)
- All enumerated source and header files are added to an executable inside the current project:
add_executable(${PROJ_NAME} ${SRC_FILES}
${HEADER_FILES})
- We use the previously mentioned SETUP_GROUP macro to place each source and header file into an appropriate group inside the project:
SETUP_GROUPS("${SRC_FILES}")
SETUP_GROUPS("${HEADER_FILES}")
- The next three properties set different executable filenames for each supported build configuration. These lines are optional, yet they are really useful when using CMake with the Visual Studio IDE. The reason is that Visual Studio can change build configurations (or build types, as they are called in CMake) dynamically directly from the IDE, and each build configuration can have its own output filename. We add prefixes to these filenames so that they can co-exist in a single output folder:
set_target_properties(${PROJ_NAME}
PROPERTIES OUTPUT_NAME_DEBUG ${PROJ_NAME}_Debug)
set_target_properties(${PROJ_NAME}
PROPERTIES OUTPUT_NAME_RELEASE
${PROJ_NAME}_Release)
set_target_properties(${PROJ_NAME}
PROPERTIES OUTPUT_NAME_RELWITHDEBINFO
${PROJ_NAME}_ReleaseDebInfo)
- Since we use C++20 throughout this book, we require CMake to enable it.
set_property(TARGET ${PROJ_NAME} PROPERTY
CXX_STANDARD 20)
set_property(TARGET ${PROJ_NAME} PROPERTY
CXX_STANDARD_REQUIRED ON)
- To make debugging with Visual Studio easier, we enable console the output by changing the application type to Console. We also set the local debugger working directory to CMAKE_SOURCE_DIR, which will make finding assets a lot more straightforward and consistent:
if(MSVC)
add_definitions(-D_CONSOLE)
set_property(TARGET ${PROJ_NAME} PROPERTY
VS_DEBUGGER_WORKING_DIRECTORY
"${CMAKE_SOURCE_DIR}")
endif()
endmacro()
- Finally, the top-level CMakeLists.txt file of our first project will look like this:
cmake_minimum_required(VERSION 3.12)
project(Chapter1)
include(../../CMake/CommonMacros.txt)
SETUP_APP(Ch1_Sample2_CMake "Chapter 01")
You may notice that the project(Chapter1) line is overridden by a call to project() inside the SETUP_APP macro. This is due to the following CMake warning, which will be emitted if we do not declare a new project right from the get-go:
CMake Warning (dev) in CMakeLists.txt:
No project() command is present. The top-level CMakeLists.txt file must contain a literal, direct call to the project() command. Add a line of project(ProjectName) near the top of the file, but after cmake_minimum_required().
- To build and test the executable, create the build subfolder, change the working directory to build, and run CMake as follows:
- For Windows and Visual Studio 2019, run the following command to configure our project for the 64-bit target platform architecture:
cmake .. -G "Visual Studio 16 2019" -A x64
- For Linux, we can use the Unix Makefiles CMake generator as follows:
cmake .. -G "Unix Makefiles"
- To build an executable for the release build type, you can use the following command on any platform:
cmake --build . --config Release
- For Windows and Visual Studio 2019, run the following command to configure our project for the 64-bit target platform architecture:
All the demo applications from the source code bundle should be run from the folder where the data/ subfolder is located.
There's more...
Alternatively, you can use the cross-platform build system Ninja along with CMake. It is possible to do so simply by changing the CMake project generator name:
cmake .. -G "Ninja"
Invoke Ninja from the command line to compile the project:
ninja
[2/2] Linking CXX executable Ch1_Sample1.exe
Notice how quickly everything gets built now, compared to the classic cmake --build command. See https://ninja-build.org for more details.