Create a new sequence called PurchaseOrderDispatcher in UiPath Studio. Within the Dispatcher, we will read the Excel file we created earlier and upload each row as a queue item. Before we do that, go ahead and put the PurchaseOrders.xlsx file we created earlier in the Data folder of the project:
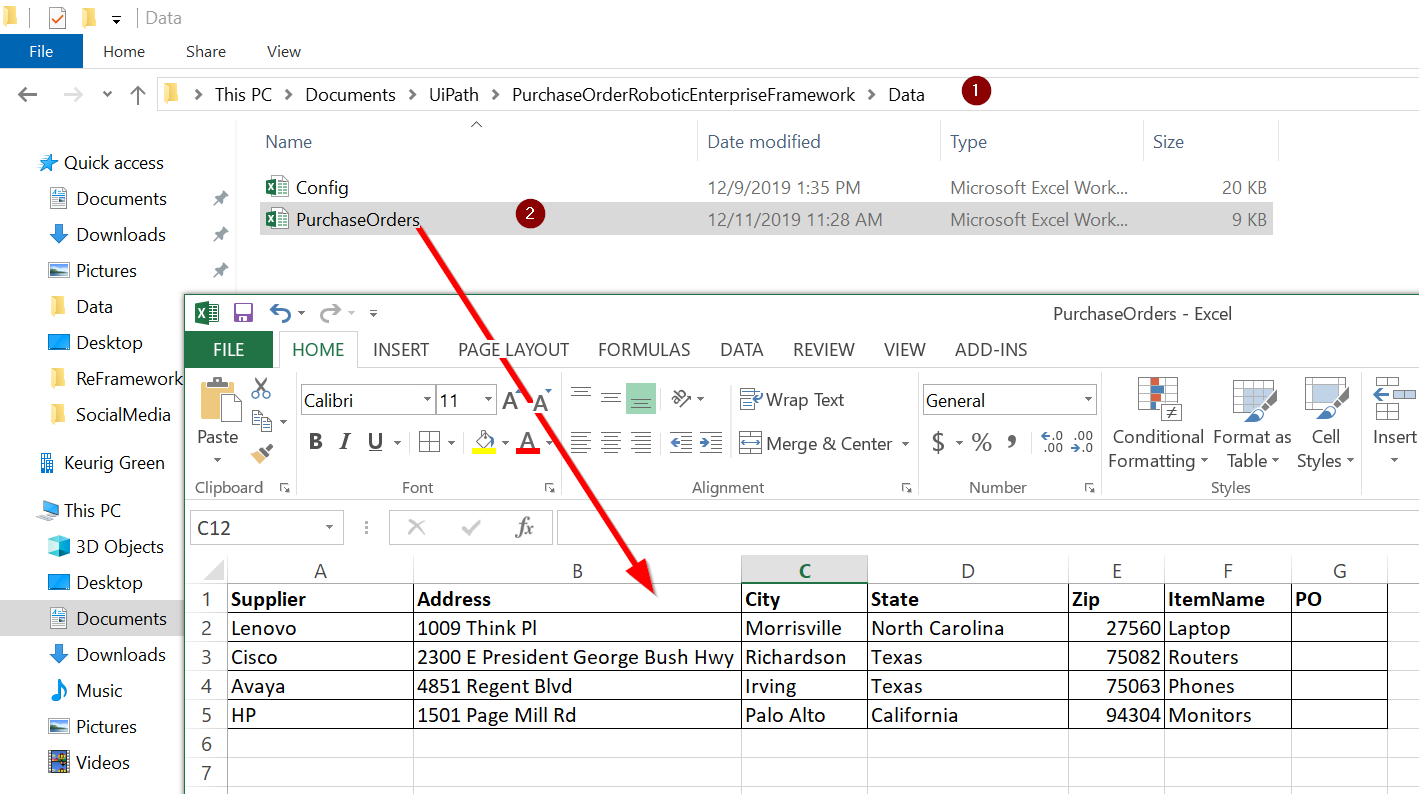
Let's now read each of the Excel rows to upload them to the queue:
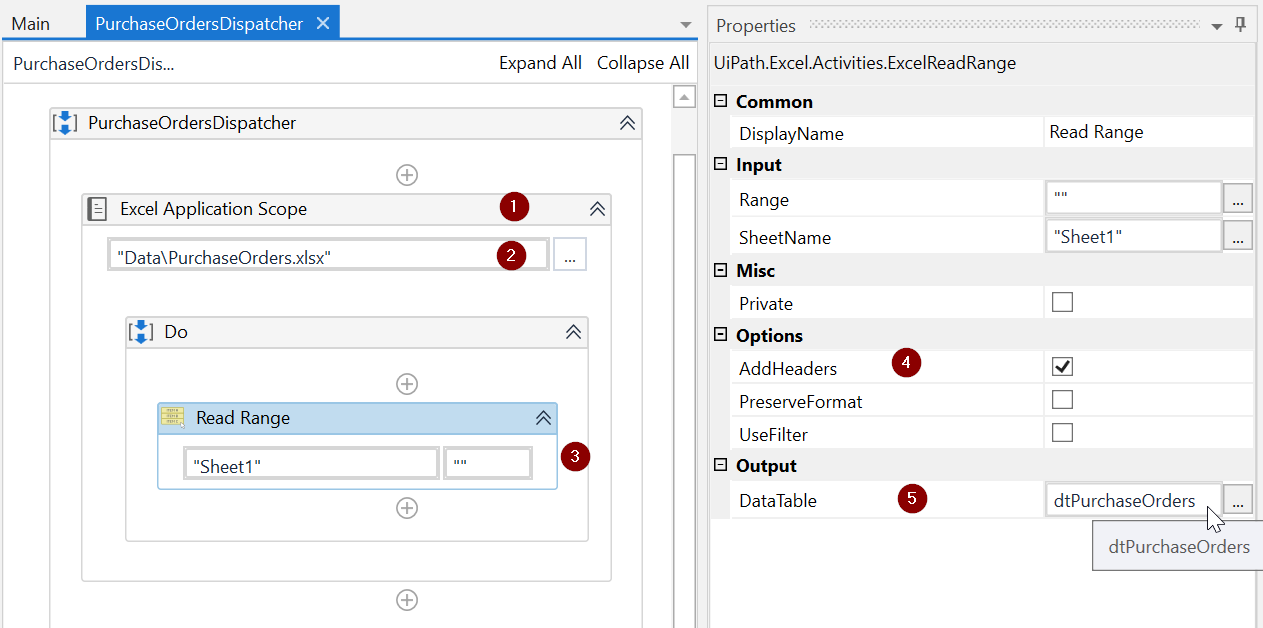
- We'll start by adding an Excel Application scope activity within the sequence that we just created. For this activity, go ahead and update the Workbook path to point to the PurchaseOrders.xlsx file.
- Within the Do sequence of the Excel scope, let's add an Excel Read Range activity to read the content to a new DataTable variable called dtPurchaseOrders, as shown in the following screenshot:
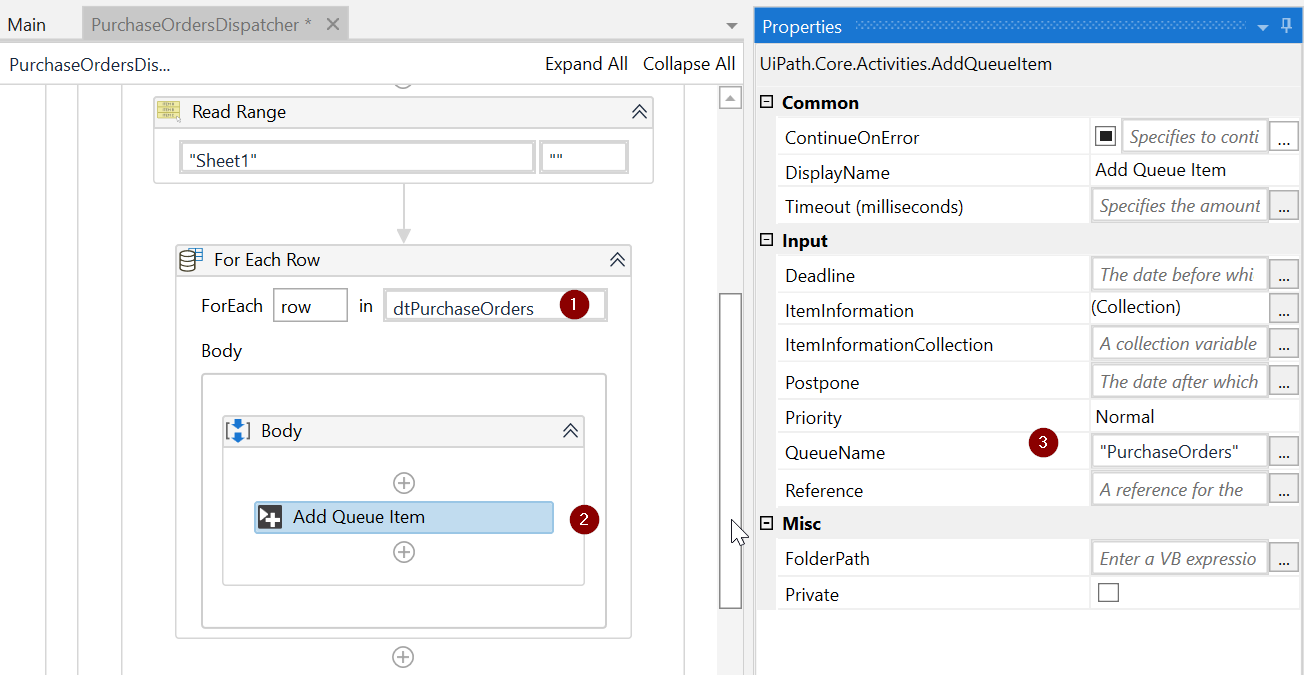
- We will now use the DataTable we created as the input for the Dispatcher to create the queue items. We will iterate each DataTable row and add them to the queue. To do that, let's use the For Each Row activity and update the DataTable value to dtPurchaseOrders.
- In the Body sequence, add an Add Queue Item activity and name the queue "PurchaseOrders", as shown in the following screenshot:
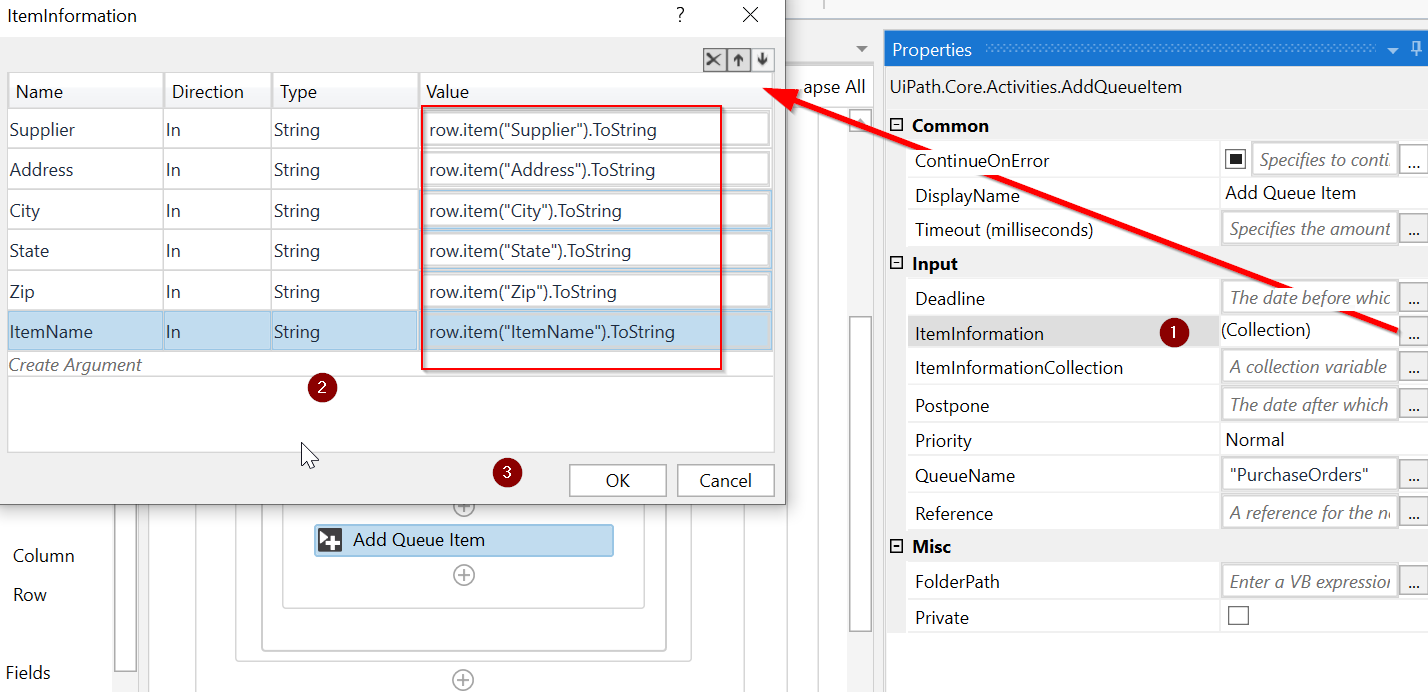
- We'll now map the DataTable columns to the queue items. To do that, we will update the ItemInformation property of the Add Queue Item activity. Let's map the column value of Name to Supplier and set the Value as row.Item("Supplier").ToString, and so on for the rest of the columns – Address, City, State, Zip, and ItemName, as shown in the following screenshot:
- So, we now have the Dispatcher that uploads the Excel rows to the queue. We'll do a quick unit test to see whether the Dispatcher is working as expected. For that, let's go to the UiPath Orchestrator and add a new queue called PurchaseOrders:
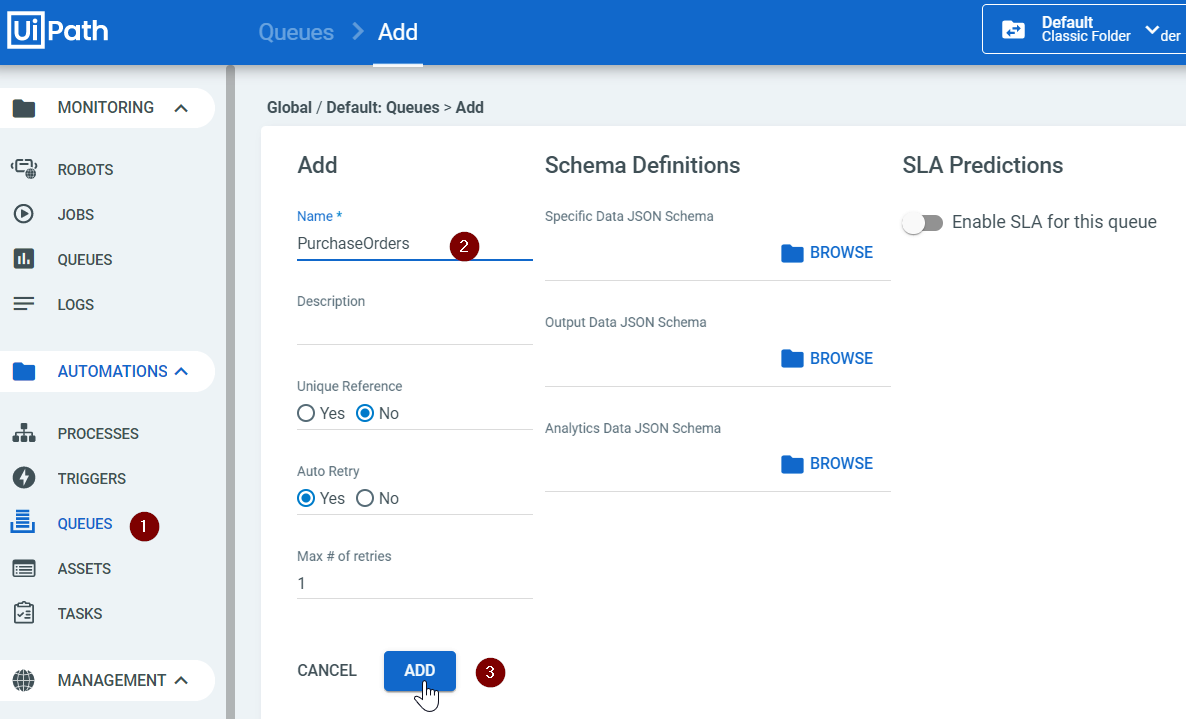
- Make sure UiPath Studio is connected to the Orchestrator. To do that, go to Robots in the Orchestrator and check if your Robot shows its status as Available.
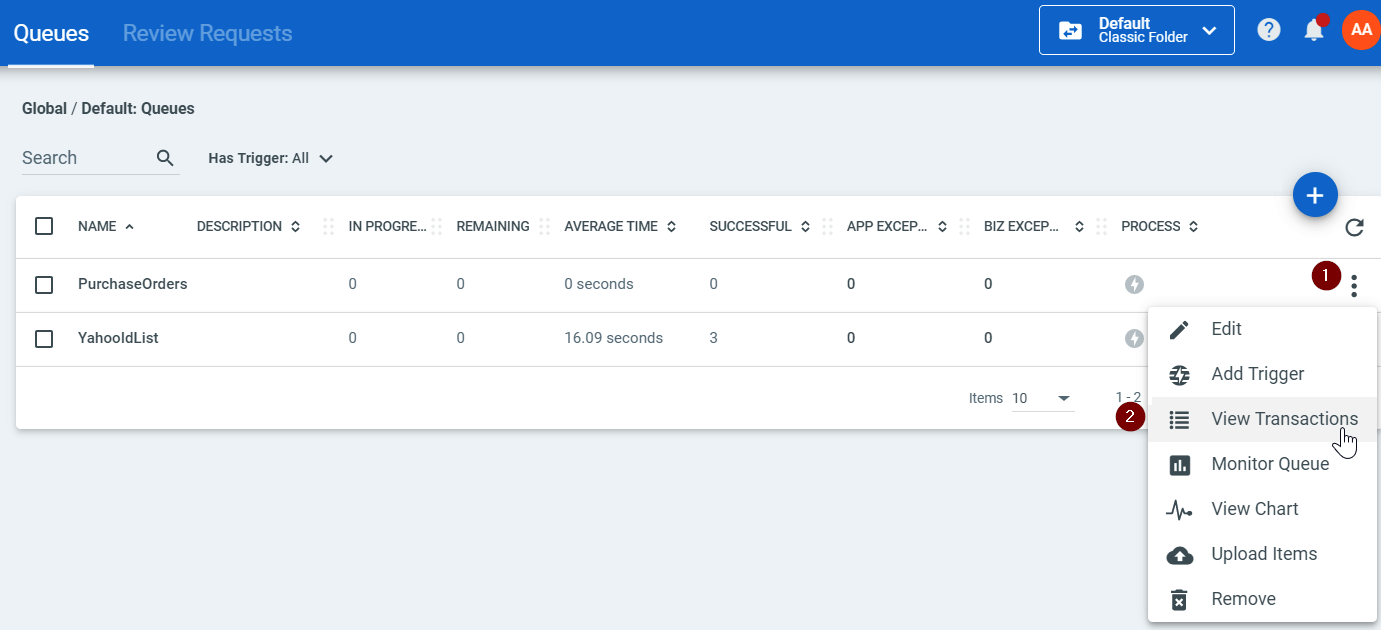
- On UiPath Studio, use Run File to run the Dispatcher sequence. Once the execution ends, go to the Orchestrator and check if the queue items were added. To do that, go to the newly added queue and click View Transactions:
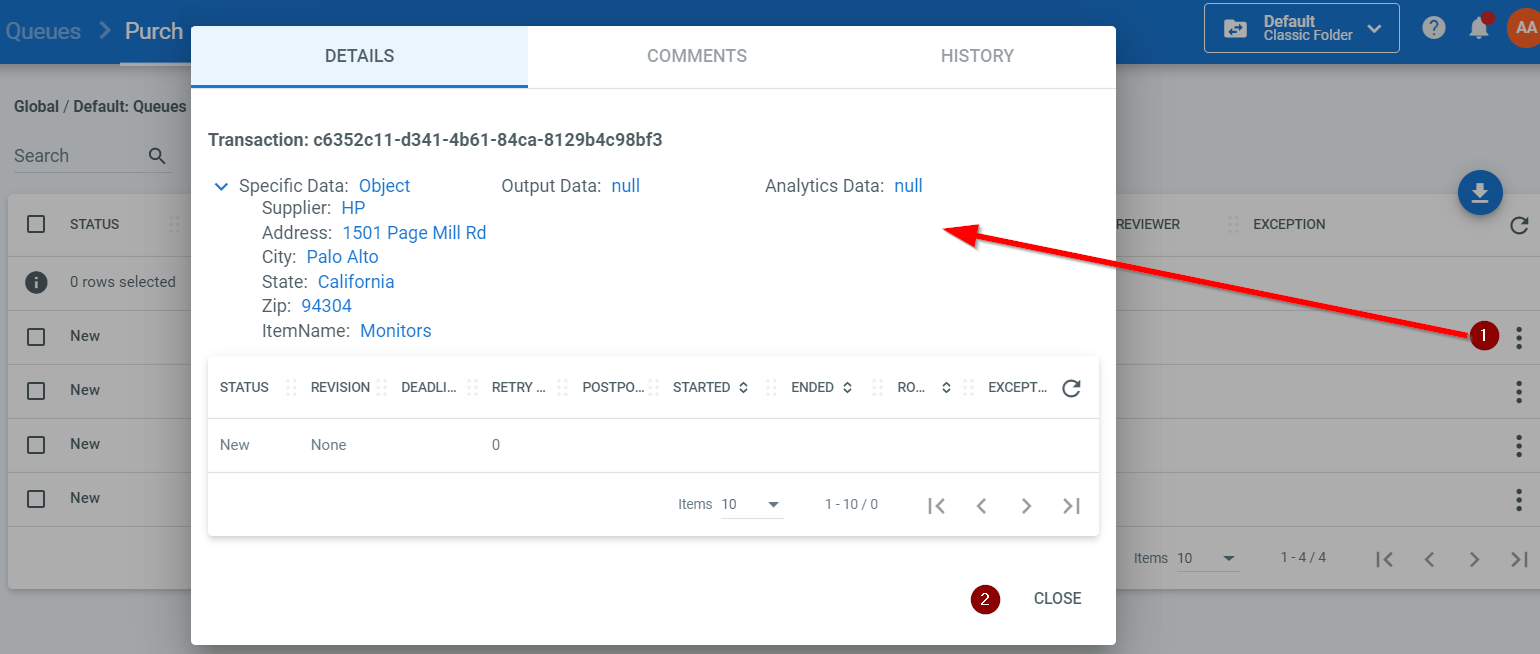
- On the transactions that show up, you can view the details and ensure that the details match with the Excel input:
As we are introducing the ReFramework, we have kept a few aspects simple to reduce the project complexity. First, the Dispatcher in this section only runs once. In a complete implementation, the automation would run in a loop reading all new PO data as it's added. Also, in the next section, the Performer can be scheduled to run periodically (say, every hour) to process new transactions. We have covered how to schedule the process in UiPath Orchestrator in Appendix B.
Now that we have verified we have all the four POs in the queue, let's move to process these transactions within the next component – the Performer.
