Let's work through the steps to activate the Apptivo application in order for us to input the POs:
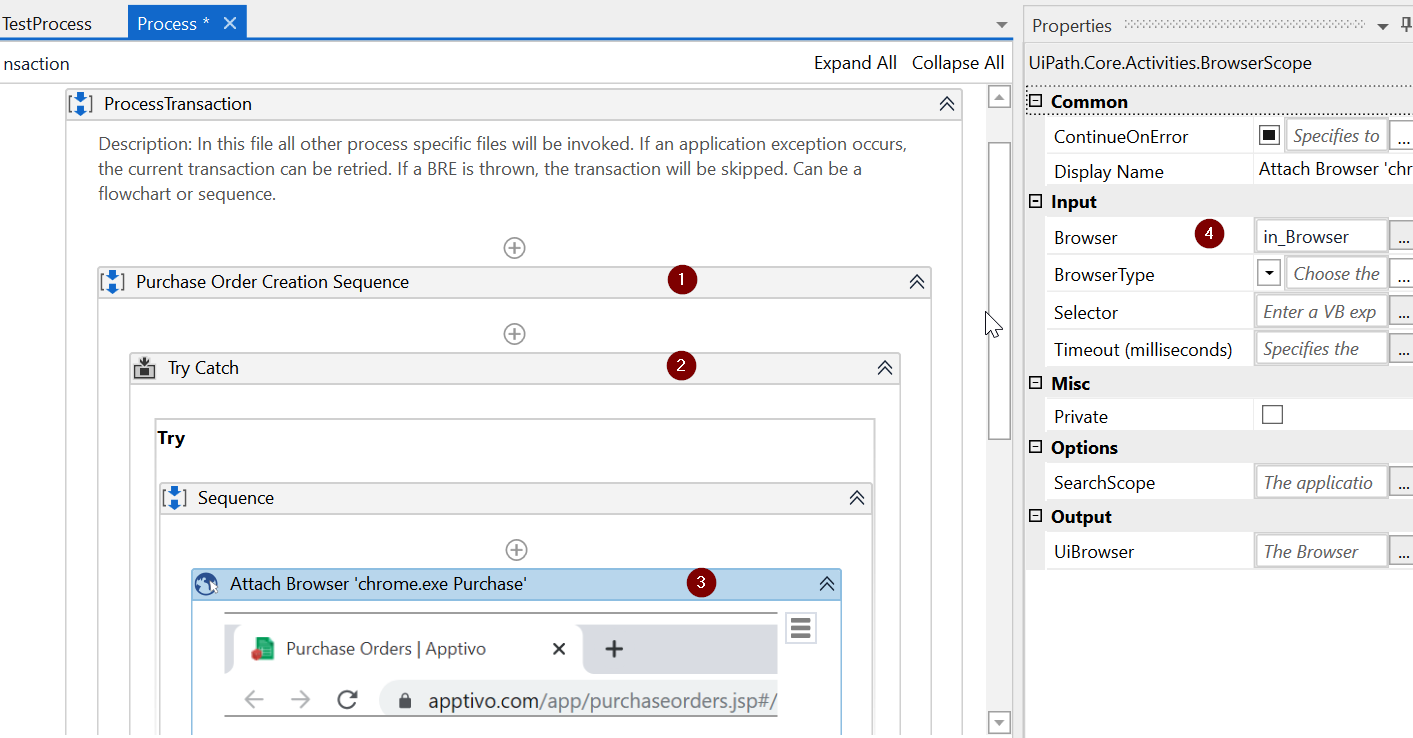
- We will start by adding a new argument called in_Browser of type Browser in Process.xaml.
- Within the ProcessTransaction sequence generated by the template, let's add a new sequence called Purchase Order Creation Sequence.
- Within the Purchase Order Creation Sequence, add a Try Catch block for exception handling.
- Within the Try block, add an Attach Browser activity and point to the Apptivo PO tab. Update its Browser property to the in_Browser argument. Delete the content in the Selector property, as we are now using the in_Browser argument. The value of this argument will be passed by the Main.xaml file, which will hold the already existing opened URL:

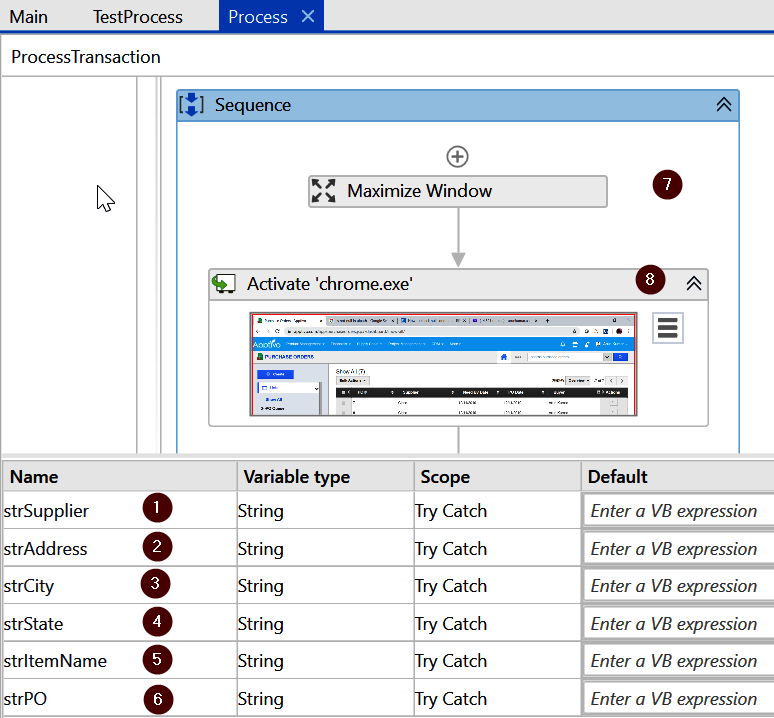
- Let's create the variables that we will be using to store the PO details. So, add the variables strSupplier, strAddress, strCity, strState, strZip, strItemName, and strPO of type String and Scope to Try Catch, as shown in the following screenshot:

- Finally, let's add a Maximize Window activity to maximize the browser, followed by an Activate activity to activate the PO application. So, within the Activate activity, indicate any element in the Apptivo PO application open in your Chrome Browser.
Now that the PO application is activated, let's go ahead and create the POs.
