We will now write the PO number we captured from Apptivo to Excel. To update the Excel sheet, we will look up the row based on a combination of supplier details and the item name, and update the last column, PO. To keep things simple for this learning project, we are assuming that each supplier only orders an item once:
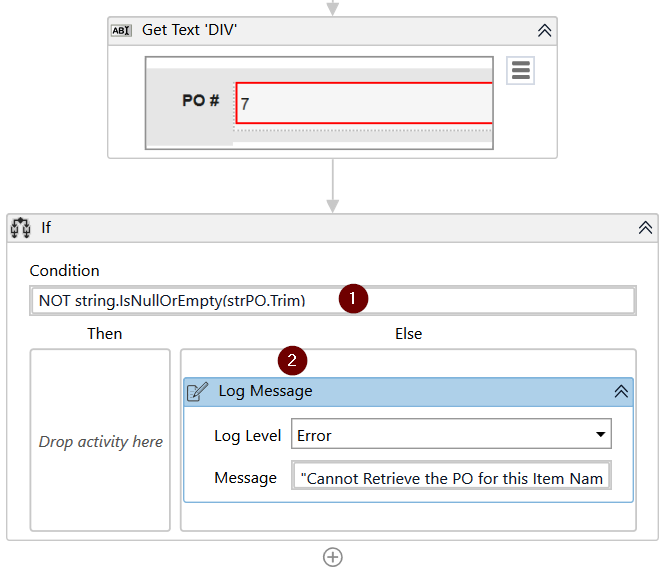
- First, let's first check that the PO number is not empty. Add an If control activity with the following condition: NOT string.IsNullOrEmpty(strPO.Trim).
- If the PO number is empty, let's handle the error in the Else block. Add a Log Message with the Log Level set to Error and a Message reading "Cannot Retrieve the PO for this Item Name: "+ strItemName:
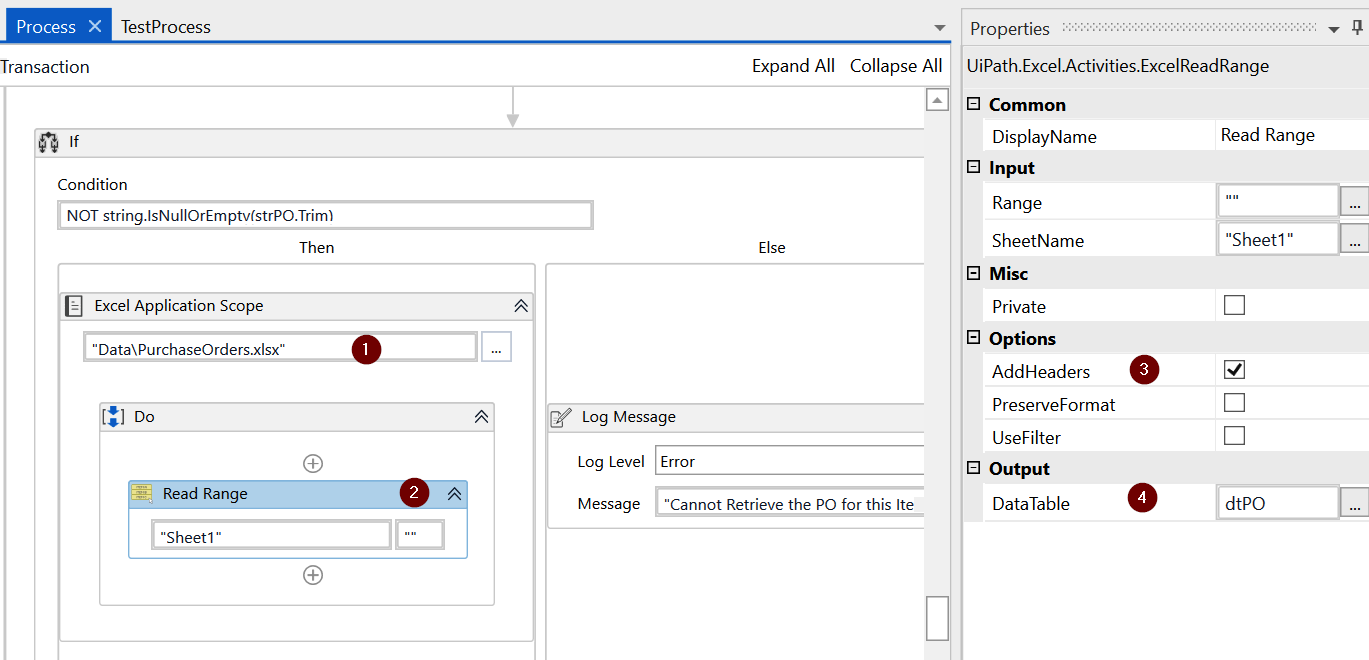
- In the Then block, let's open the DataPurchaseOrder.xlsx Excel file, find the corresponding row based on a combination of ItemName and Supplier and update the PO column. To do that, add the Excel Application Scope activity and update the workbook path to "DataPurchaseOrders.xlsx".
- Next, let's use the Excel Read Range activity to read the table into a new DataTable variable, dtPO. Ensure that the AddHeaders property is checked, as shown in the following screenshot:
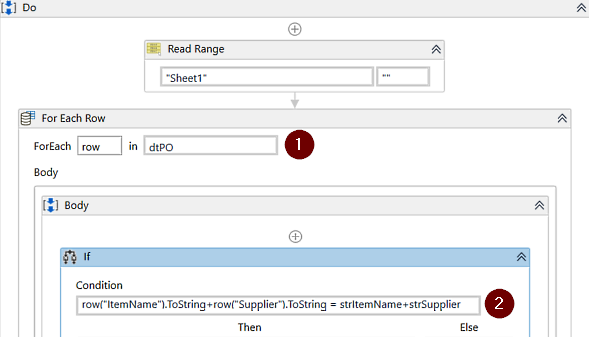
- Now, iterate the DataTable dtPO and find the respective row in the Excel sheet based on the combination. Add a For Each Row activity and within that, add an If control activity with the following condition: row("ItemName").ToString+row("Supplier").ToString = strItemName+strSupplier:
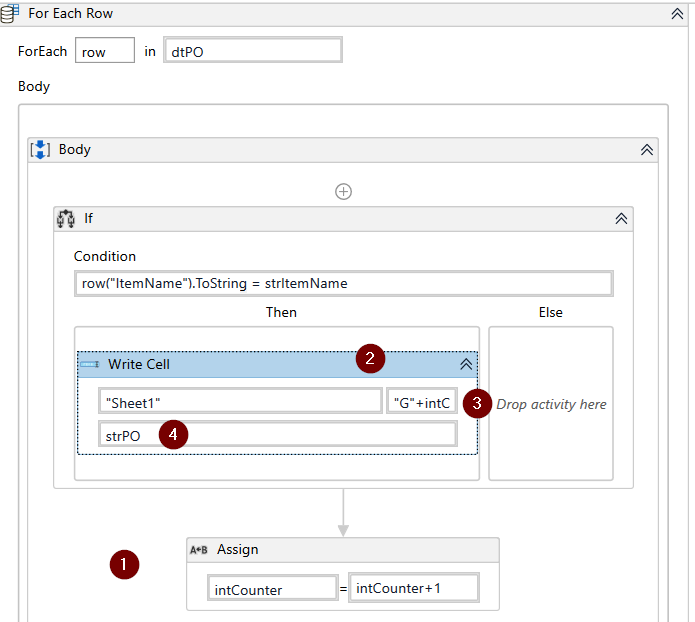
- Create a new intCounter variable of type Number (Int32) and set the default value to 2.
- Add the Assign activity intCounter = intCounter+1 to increment the counter outside the If control scope.
- Use a Write Cell activity to write each of the PO numbers in the G column with the correct index. To do that, update the Range property with "G"+intCounter.ToString and set the value to strPO. This increments the counter and writes to rows G1, G2, G3, and so on, as it reads from the DataTable:
- Add a Log Message with a level of Info and set the message to read "PO Number: "+strPO+ " Successfully update in PurchaseOrder.xlsx".
This completes the Try block. Let's now handle any exceptions in the Catch block:
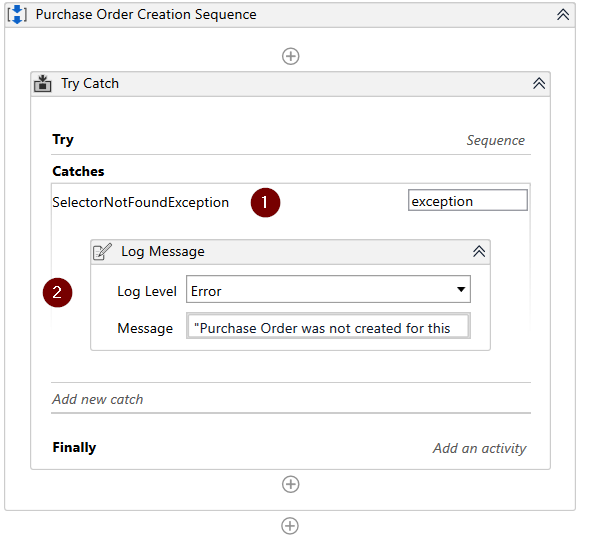
- In the Catch block, add a SelectorNotFoundException and add a Log Message with the Log Level set to Error and the message as "PO was not created for this Transaction due to this Error: " + exception.ToString:
That completes our updates to Process.xaml for this project. As you saw, most of the logic goes into this workflow. All the other workflows support the execution of logic in the Process.xaml file.
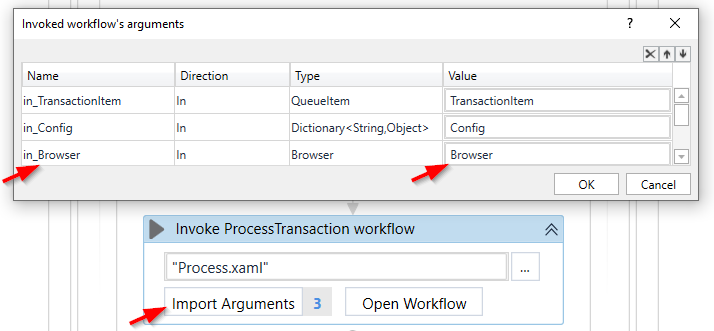
To ensure Process.xaml gets the Browser variable, it is important to add it to the invoking activity. Go to the Main.xaml file and double-click on the Process Transaction state. Scroll over to the Invoke ProcessTransaction workflow and click on Import Arguments. Add the in_Browser argument with Direction as In and Value as Browser:
Next up, as part of the ReFramework, we have come to the transaction status. The framework handles all we need here and so we do not need to make any changes to the template.
Finally, we have to update the CloseAllApplications workflow. We can look to close the Apptivo application here. This is optional – we will leave it out here and go straight to testing the automation!
Before we test, we will update the End Process State in Main.xaml. Double-click on the state and add a Message Box right after Invoke CloseAllApplications workflow stating All Transactions Processed. Let's now test our automation.
