We will create the bot in the Control Room interface on our browser. To create the bot, let's follow these steps:
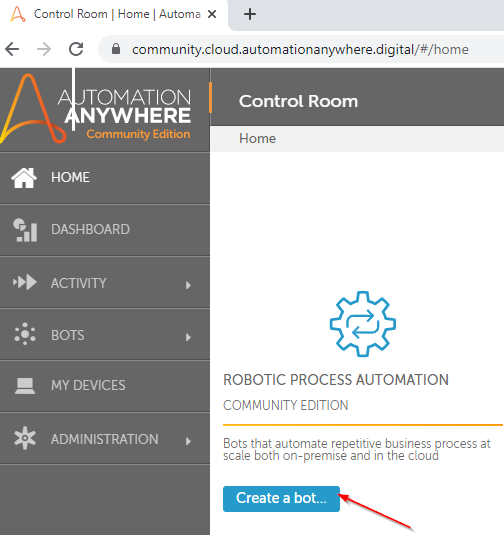
- In the A2019 control room, go to the Home option in the left-hand side pane.
- Once there, click on Create a bot..., as shown:
- Provide a name for your bot and click on Create a bot... This will take you to the Edit Task Bot interface, where you can configure the automation.
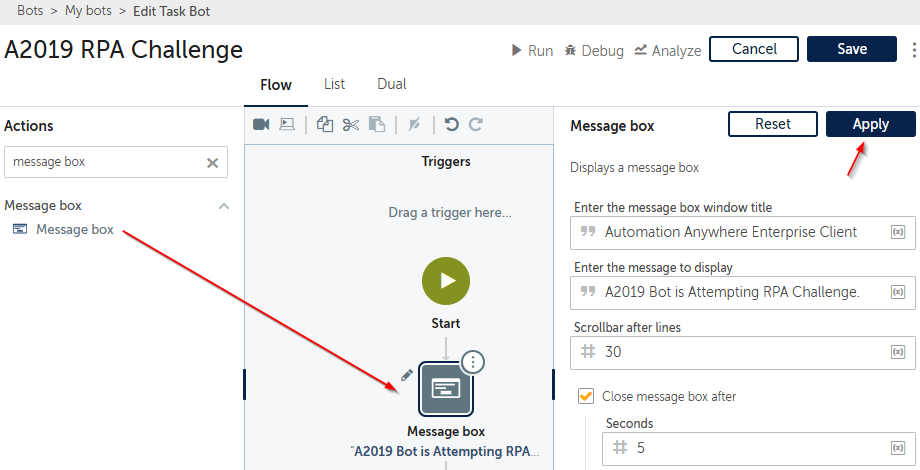
- We'll first check whether the connection to the controller is working okay by adding a message box and running the bot. To do that, search for Message box in the Actions pane. Drag and drop it into the workflow and configure its properties. Let's set Enter the message to display as A2019 Bot is Attempting RPA Challenge and check Close message box after to close the message box automatically after 5 seconds:
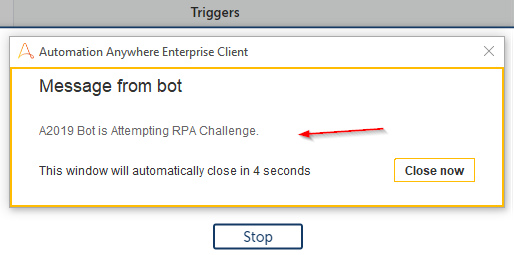
- Click on Save to save your bot so far. Go ahead and click on Run to execute the bot. The controller will download the packages to the bot agent and display the message you added:
- Let's now switch to the List view on the bot creation canvas. We will mostly use this view to create our automation:
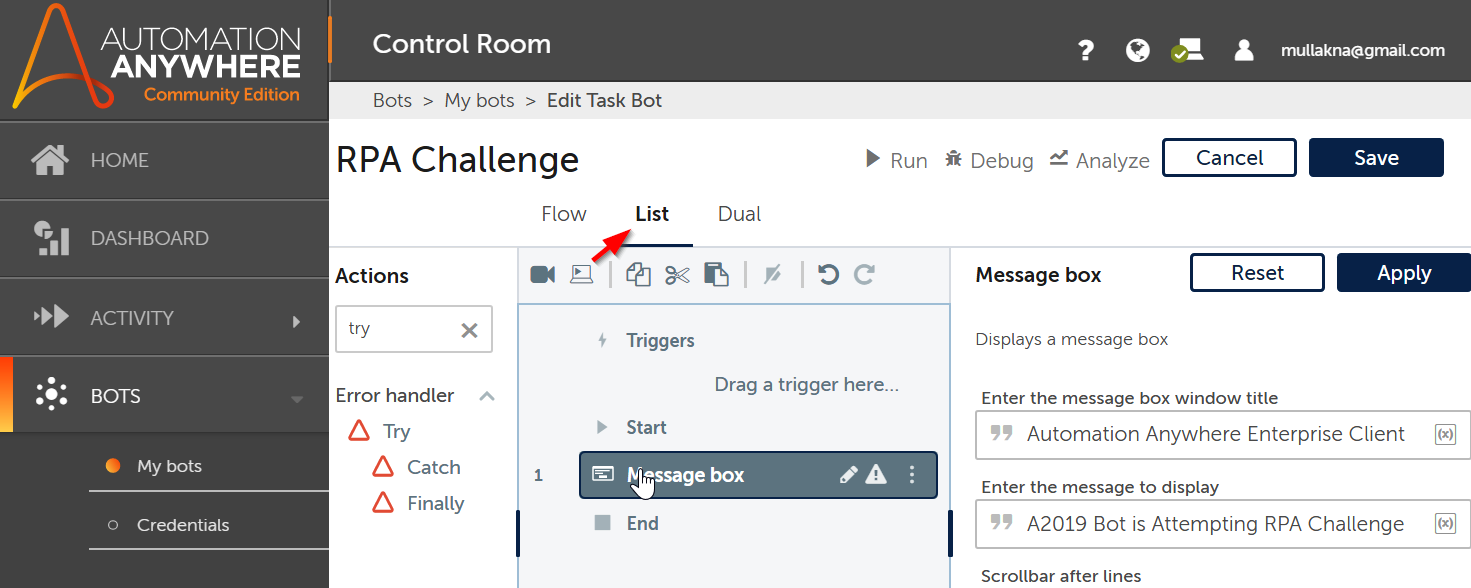
A2019 has the Flow, List, and Dual views available. You can switch your view and check the flows as you progress through the project. We will show you both the List and Flow views as we progress through the project so that you can get familiar with both modes.
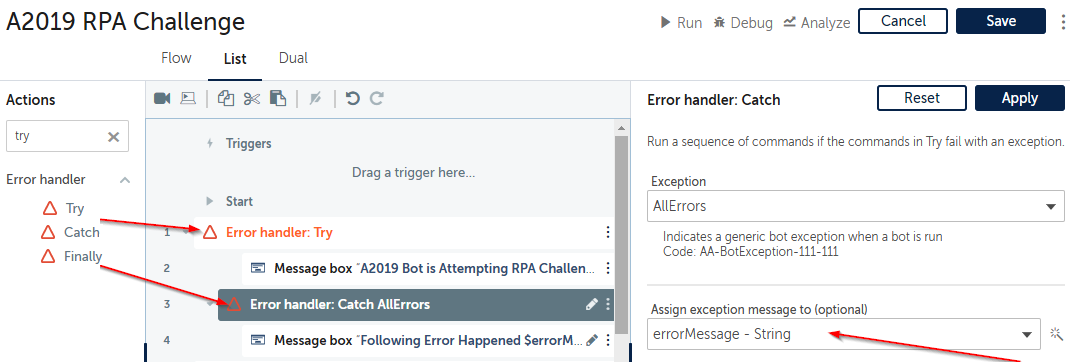
- We will now handle any exceptions before we add any automation logic. Search for and add the Try action. Let's move our existing message box to the Error Handler: Try block. We will add all our logic for the automation there.
- Next, add the Catch action underneath Try. In the Catch properties, make sure the exception type is All Errors. Create a variable called errorMesage to store the error message. Click on the wizard icon to the right of the input box to create new variables. Click on Apply to apply the properties.
- Add a message box to the Error Handler: Catch block with a Following Error Happened $errorMessage$ message. Your automation so far will look like this:
Now, we have completed the initial steps for the bot, so let's get to building the automation itself. We will start by reading the RPA challenge Excel file.
