Let's now map the screen input fields to the column data that we need to populate with. We will use the HTML Tagindex property to locate the input fields and map them to their respective columns:
- To capture the tag index for a field, let's add the Capture action and indicate the label name for the Last Name field. In the Capture properties, choose Rpa Challenge - Internet Explorer for Window. Click on Capture and point to the Last Name label (note that we are indicating the label, not the input box):

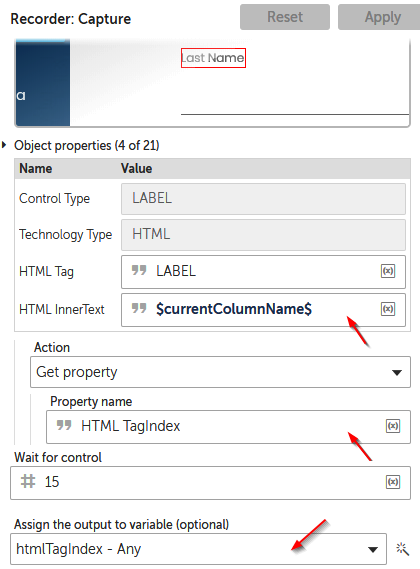
- Within the Recorder properties, let's generalize the automation to work with the current column by setting HTML InnerText as currentColumName. Let's also create a variable to store the HTML Tagindex value for the field. Let's call it htmlTagindex with an Any type. Finally, select the Get Property action for HTML TagIndex and assign it to the output htmlTagIndex variable. Ensure that only the four properties shown in the following screenshot are checked:
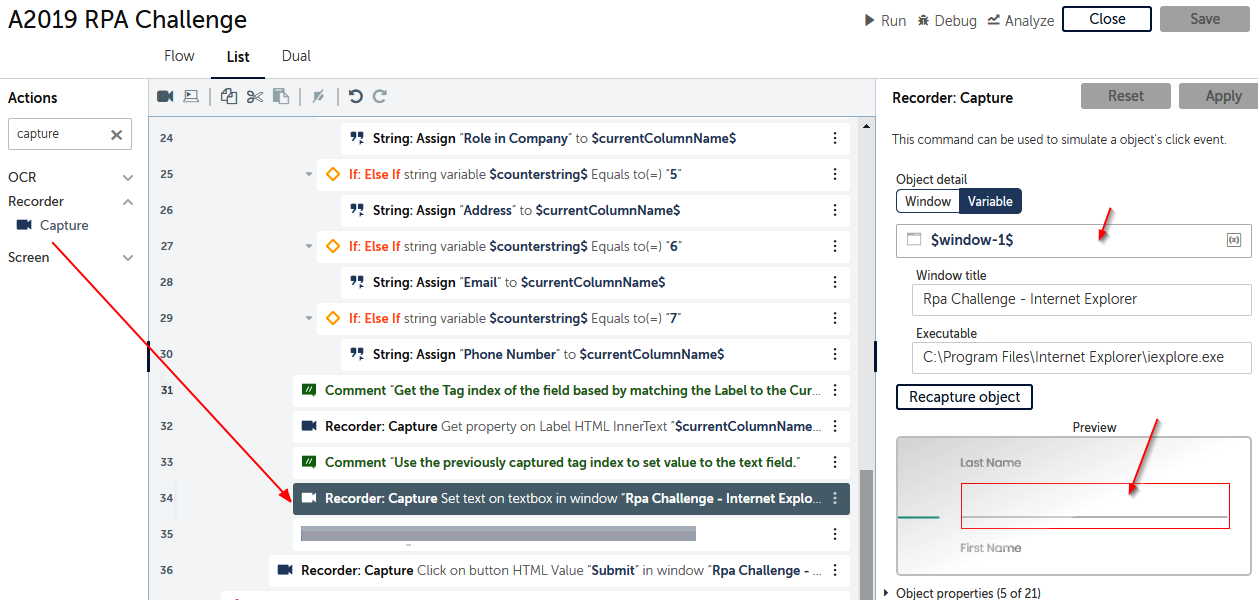
- Now that we have HTML Tagindex for the field labels, it is time to map the Excel column headers to the input boxes. Let's add another Capture action for that. Go to the input box next to Last Name. Your Recorder properties will look like this:
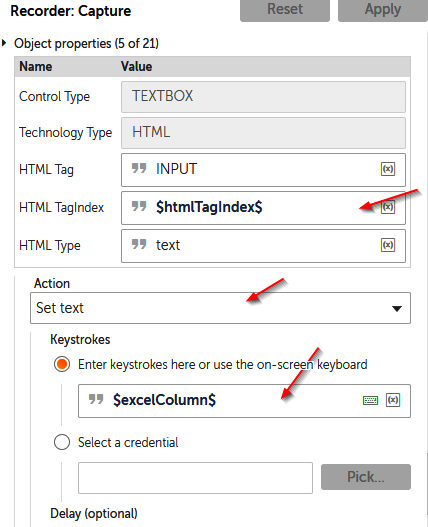
- Next, we will use the htmlTagIndex variable we populated previously to identify the correct input box to populate data. For example, if the variable has a value of 5, we know that we have to input the data from the Last Name column. The data is present in the excelColumn variable. So, we will use the Set text action on the excelColumn variable. Ensure that your screen looks like the following screenshot and only has the properties shown here:
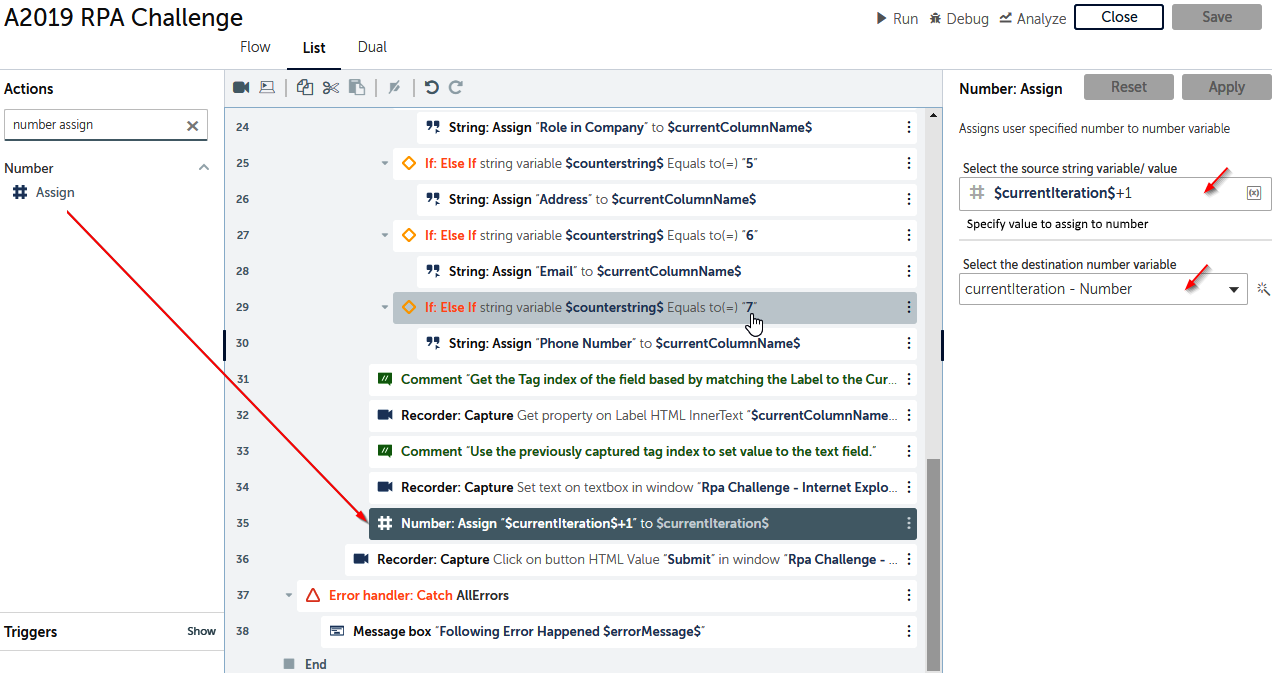
- To keep the Record loop going, let's increment the counter of the currentIteration variable. Add Assign for Number and set the property value to $currentIteration$+1 for the currentIteration destination variable:
- Finally, let's click the SUBMIT button after each form is filled. Add another Capture action outside the Column loop. In the Capture properties, choose the Rpa Challenge - Internet Explorer window and capture the SUBMIT button on the RPA challenge page:
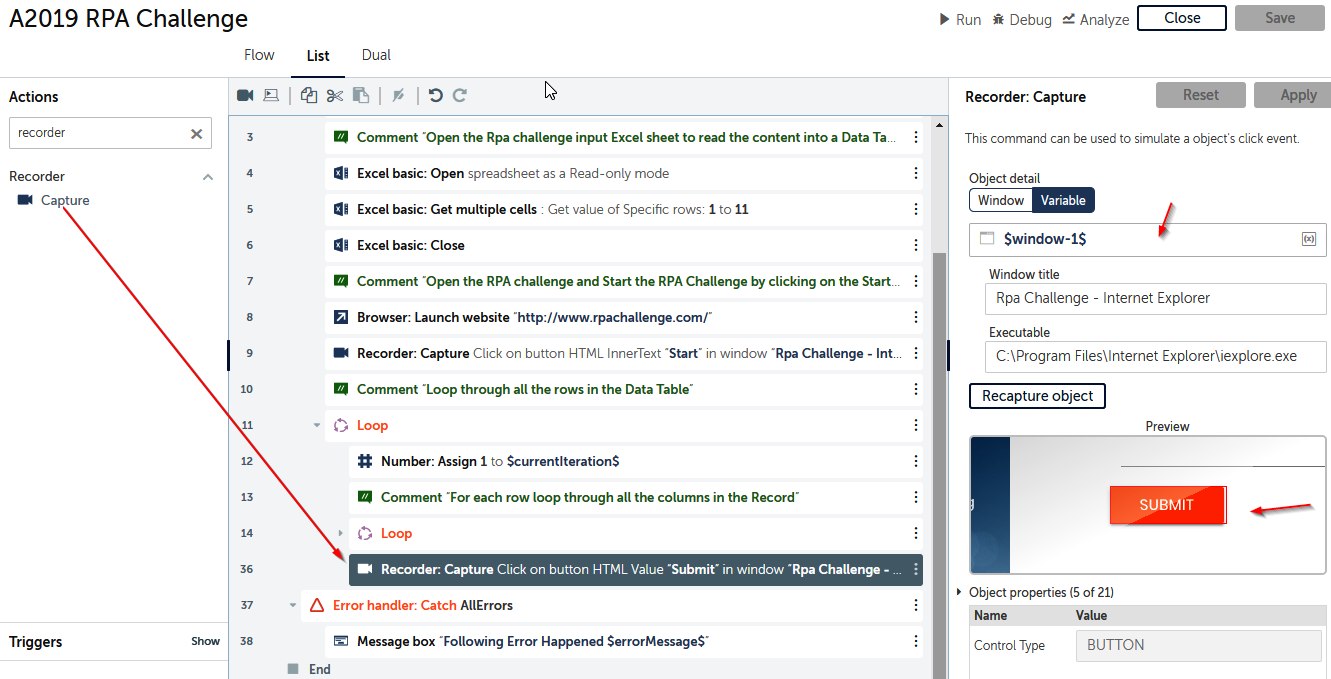
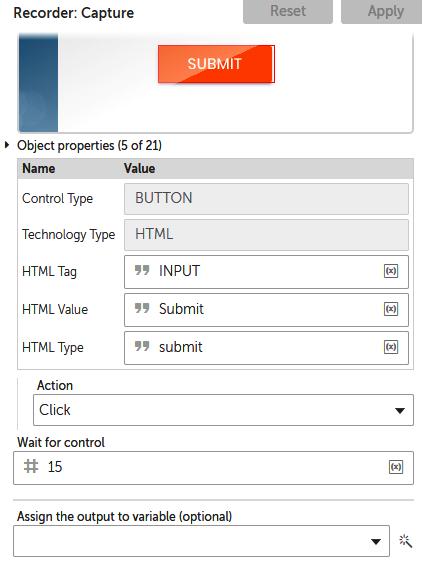
- Ensure that only the properties required for Capture are selected, as in the following screenshot. Select Click for Action to make sure that the SUBMIT button can be clicked:
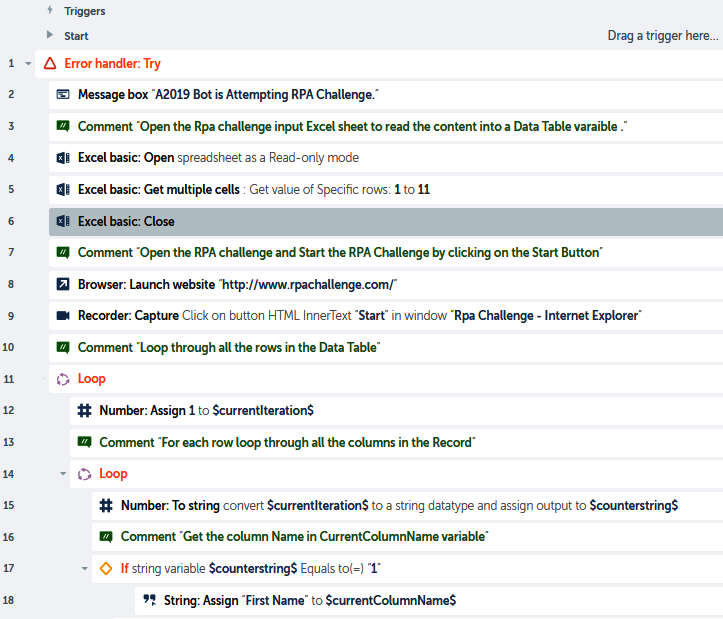
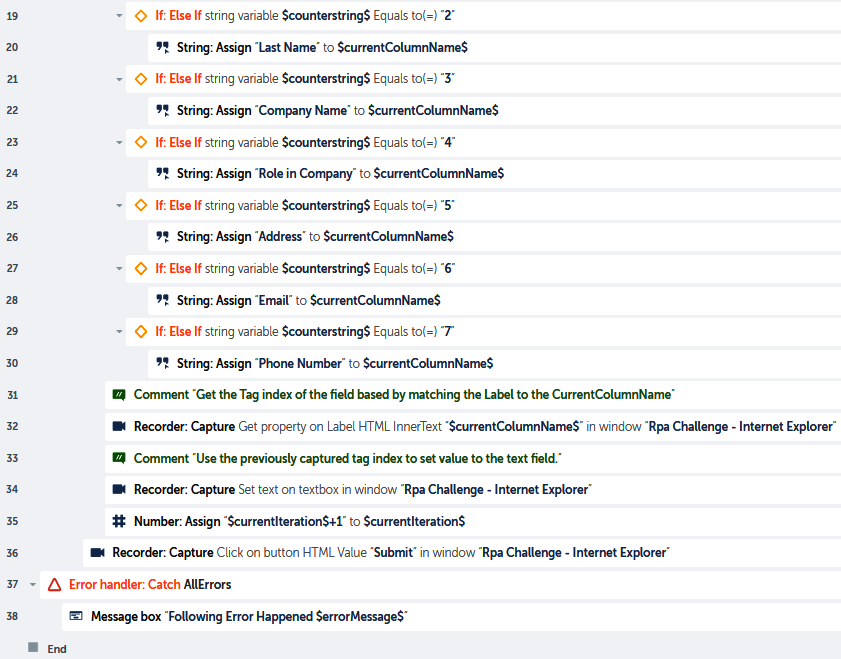
The completed List view for the bot should look like the following. We have divided the image in two for clarity. Part one:
Part two:
That completes the Automation Anywhere scripting for the RPA challenge. Let's now carry out a quick test.
