As we mentioned previously, the key component we will use to send text messages is Twilio.
Follow these steps to sign up for Twilio:
- Sign up for a free account by going to Twilio.com. Provide your details on the sign-up page and submit them.
- Once you've submitted your details, you'll need to verify your email address. You will also need to validate yourself via phone. A text message containing a verification code will be sent to your phone; simply use that to complete the verification phase.
- You can skip the next set of screens until you get to the Twilio console dashboard. Once there, get a trial number by clicking on the respective button.
- On the next screen, you will be asked to confirm the number Twilio has chosen for you.
- Once confirmed, your trial number will show up on the dashboard.
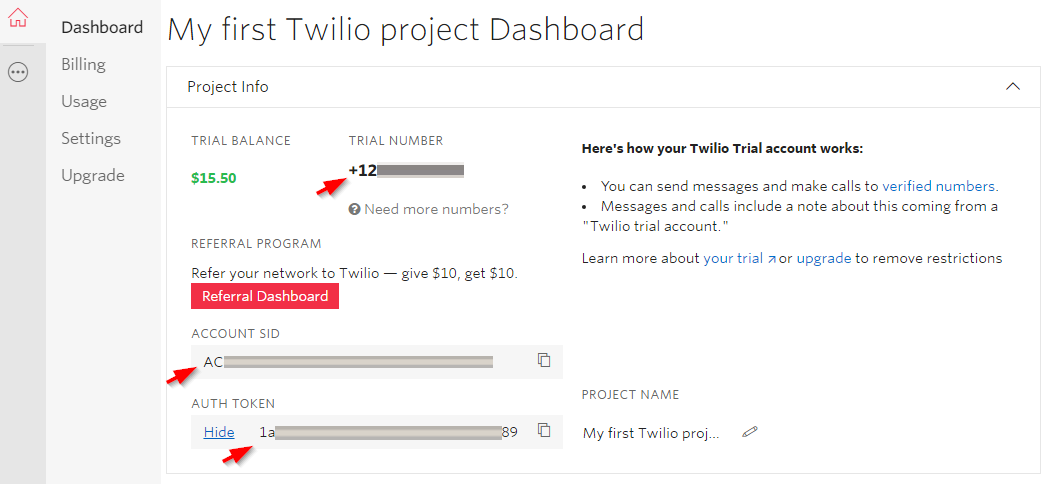
- On the dashboard, we need to take note of a few things we'll need for our automation – the trial number, the account SID (user ID), and the auth token (password), as shown in the following screenshot:
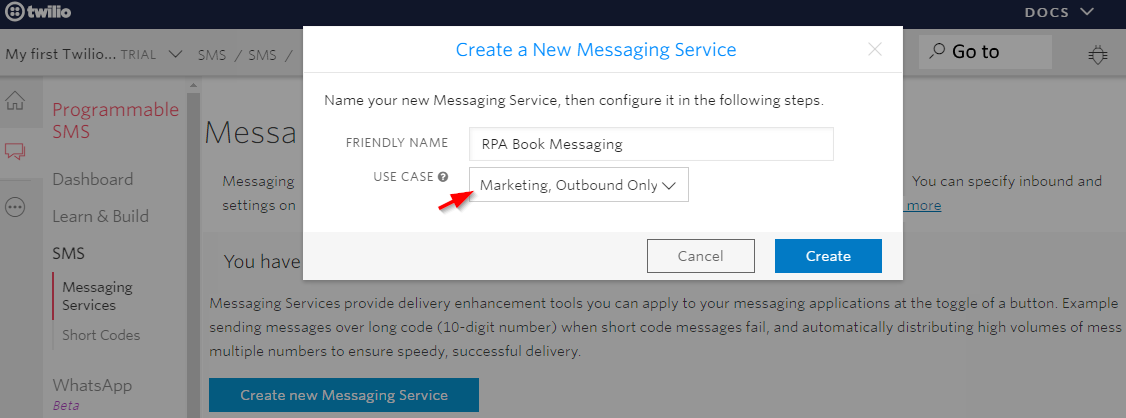
- Next, we need to configure Twilio so that it can send text messages. First, go to the Programmable SMS product option on the left panel. Then, go to the Messaging Services option and click on Create new Messaging Service, as shown in the following screenshot:

- On the next screen, choose a name for your new messaging service and set the use case to Marketing, Outbound only since we will only be sending one-way text messages for this project:
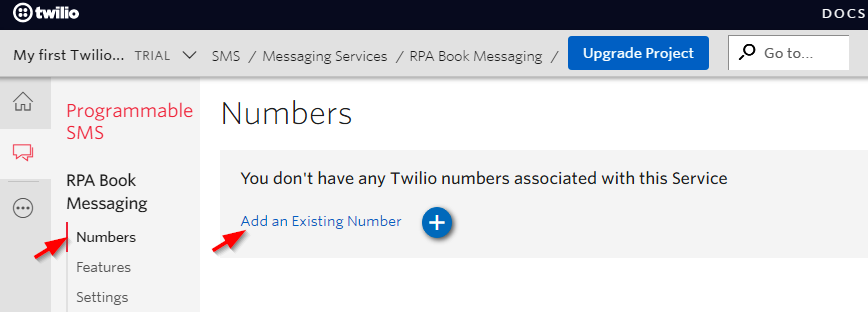
- Next, we need to associate the trial number with this SMS service. Within the new messaging service we added, go to the Numbers option and click on Add an Existing Number, as shown in the following screenshot:
- On the following screen, choose your trial number and click Add Selected:
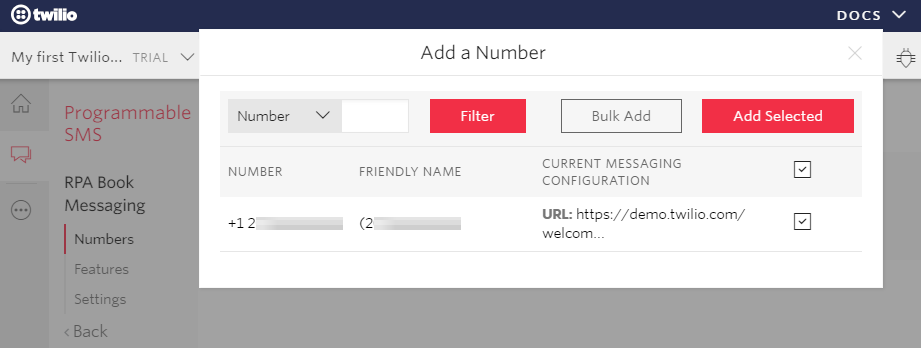
Now, the number will show up under the numbers you have for the service. With that, you have set up the Messaging Service within Twilio.
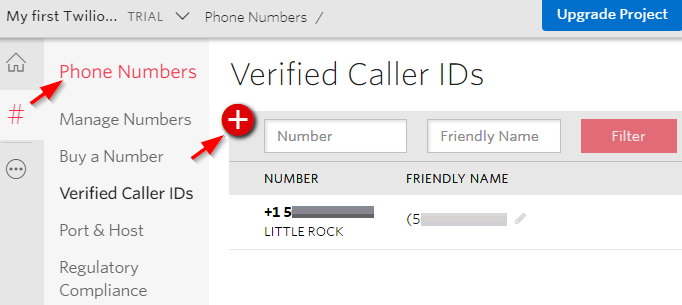
Since we only have a Twilio trial account, we can only send text messages and make calls to numbers that have been verified through our account. The number that you added at the signup stage will be one of your verified numbers. If you want to send text messages to more numbers, you will have to add and verify them as well. To do that, go to the Phone numbers option on the left panel and go to Verified Caller IDs. Use the add numbers symbol (the plus sign (+)) shown in the following screenshot to add new numbers and verify them:
That's all the setting and configuration we need to go through regarding Twilio. Now that we have set up Twilio and are ready to go, let's open A2019 so that we can start building our bots.
