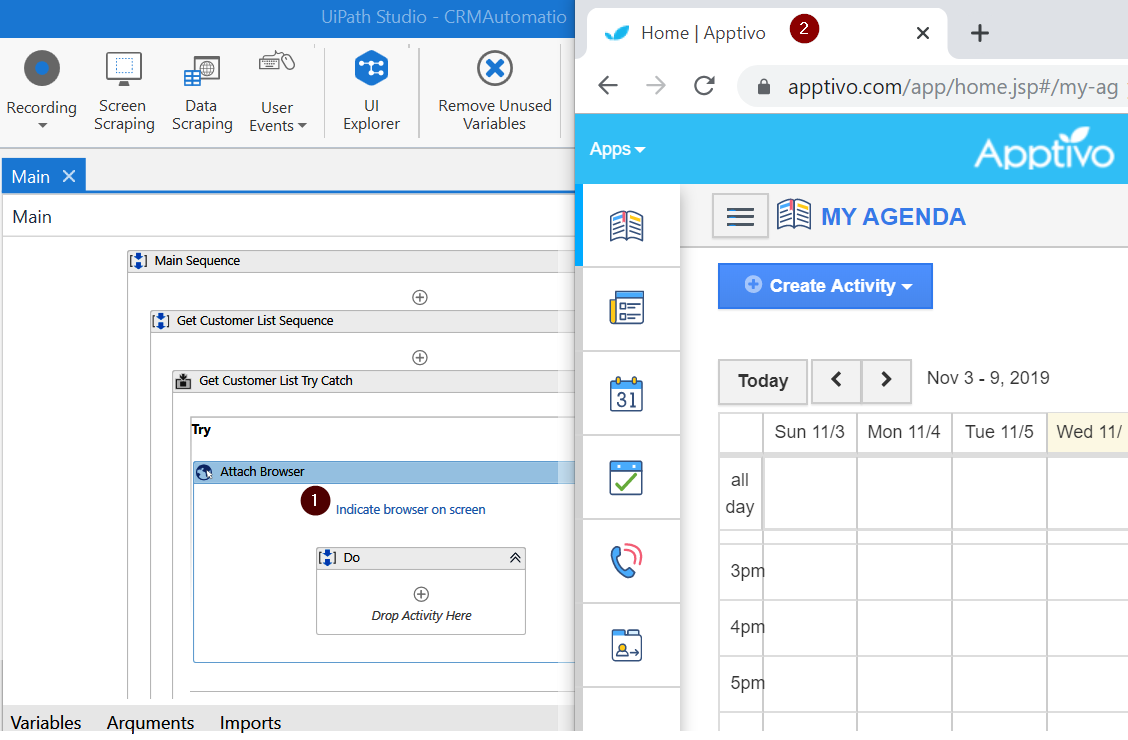
Let's identify the Apptivo application tab for Automation:
- Start by adding the Attach Browser activity and attaching it to the browser tab. After that, perform the necessary extraction steps.
- If you don't have Apptivo open in your Chrome browser, ensure that you have it open and are logged in. Now, click on Indicate browser on-screen within the Attach Browser activity and point to the Apptivo home tab in the browser, as shown in the following screenshot:

- On the properties panel for the Attach Browser activity, do the following:
- Make sure that the BrowserType is Chrome.
- Add a new variable for the UiBrowser property under output using Ctrl + K, type in browserApptivo, and press Enter.
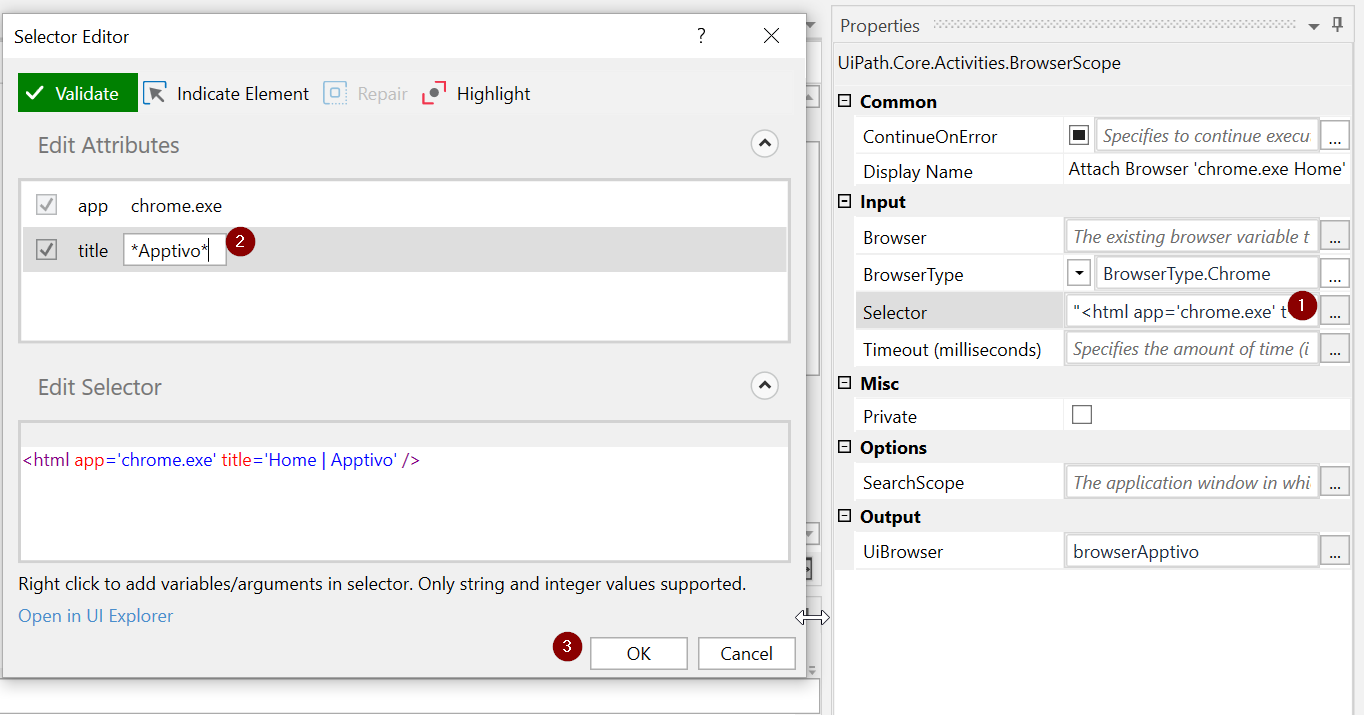
- In the same properties panel, update the Selector property. We will update the title with wild characters to make it generic across all the web pages in the Apptivo application. Click on the option to edit the selector and update the title to *Apptivo*, as shown in the following screenshot:

We are using a browser variable called browserApptivo so that we can reuse this variable wherever we need to perform any Automation steps on the Apptivo web application.
- Next up, we will use the Activate UiPath activity to bring our window to the foreground and to maximize this window using the Maximize window activity. Add these within the Do Sequence.
One of the best practices in web Automation is to check that the browser is maximized and that the zoom is set to 100%. Use the Maximize window activity to always maximize the browser in case it isn't.
Now that we have the browser ready, we can add the necessary activities so that we can get to the customer list on Apptivo and retrieve that data. We will use UiPath's web recording feature to do so.
