Now, we will loop through the data table of extracted company details and update the CRM:
- Let's add the For Each Row UiPath activity, which you can find under DataTable. Let's loop through the dtCompanyData data table.
- Within this loop, we will use the Assign activity to assign values to all the variables we created previously. We will extract each row from the data table and convert them into strings using the row(columnname or ColumnIndex).ToString syntax; for example, strCompanyName = row("CompanyName").ToString. Your looping part of the Sequence will look as follows:
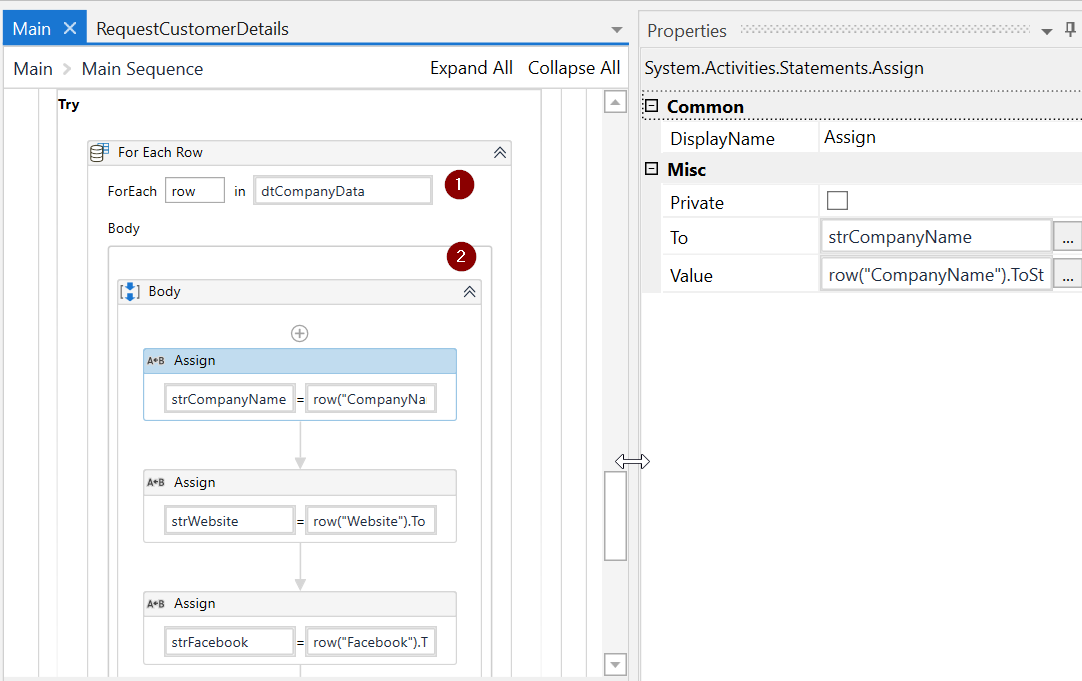
Note that we have to assign data to all five variables we defined previously.
- With the data assigned to our variables, we can update the Apptivo CRM application. We will search for our customer in Apptivo and then go to that specific customer record and update the same.
- To automate the search, we will use the UiPath web recorder to record the search steps. For that, manually open the customer page in Apptivo by going to the CRM menu option and then choosing Customers. Then, go to the UiPath web recorder option. From the Recorder panel, choose Type and input a customer name (say, Amazon) in the Apptivo search box, as shown in the following screenshot:

Once you've done that, Save and Exit the recording.
- Now that we've got to the customer record, we will start the web Automation process so that we can enter the data into Apptivo. For that, we'll need to add the Attach Browser activity to the Try block, just below the set of Assign activities. Within the properties for this activity, update the browser attribute to browserApptivo. As you may recall, this is the browser variable we created during the first part of the Automation process.
If you are not able to reuse this browser variable, go back to the variable and ensure the scope of the variable is set to Main Sequence.
- Now, let's copy the Type Into activity that was created by the web recorder into the Attach Browser activity. In the properties for this activity, let's update the Target Text value from Amazon to strCompanyName. Ensure you delete the web recorder's Web Sequence from the bottom, after copying the Type into the activity.
- Next, we will use the Send HotKey activity, point to the same search box in Apptivo, and use the Enter key:
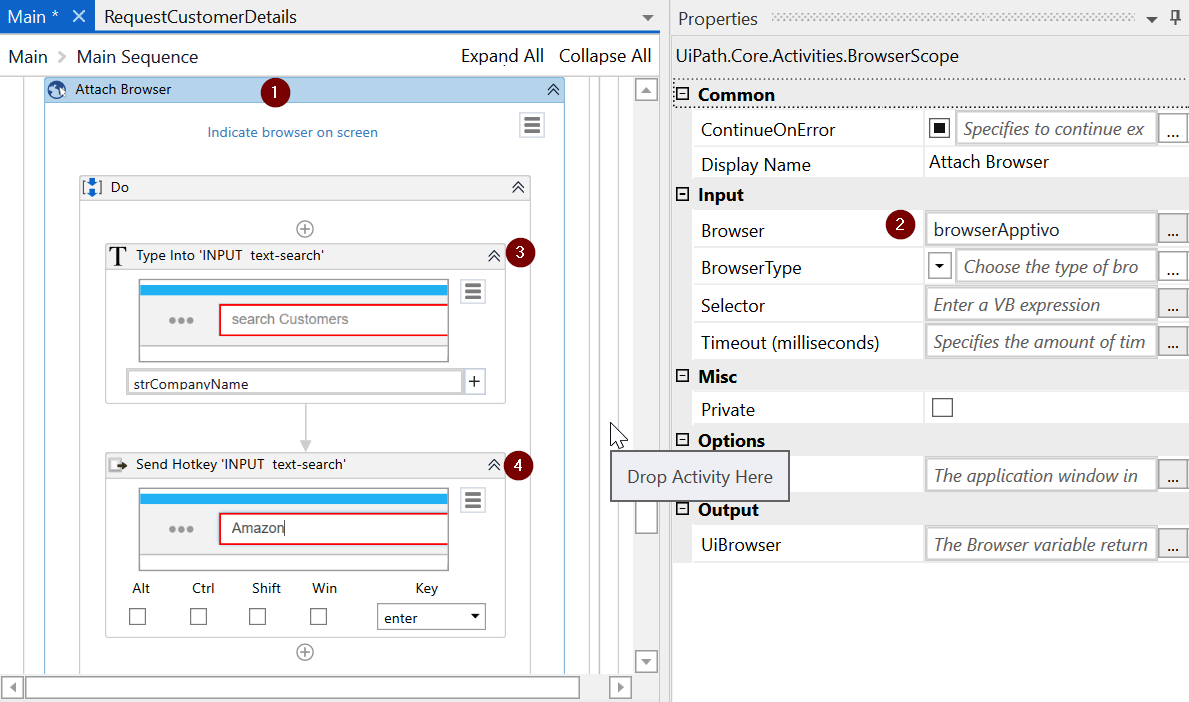
When we use the Type Into activity, in the properties panel, please use DelayAfter, DelayBefore to generate any necessary delays. Also, set the EmptyFields property to True to remove any existing input from the text boxes.
- Apptivo displays the search results in a table with an action button so that we can edit the customer record. We will use the UI Automation Click activity and point that to the More details action button (...).
- Clicking the action button takes you the customer details page in Apptivo. We have to click on any one of the text boxes – say, Name – to go to Edit mode. Let's use a Click activity again and point to the text next to the Name label:
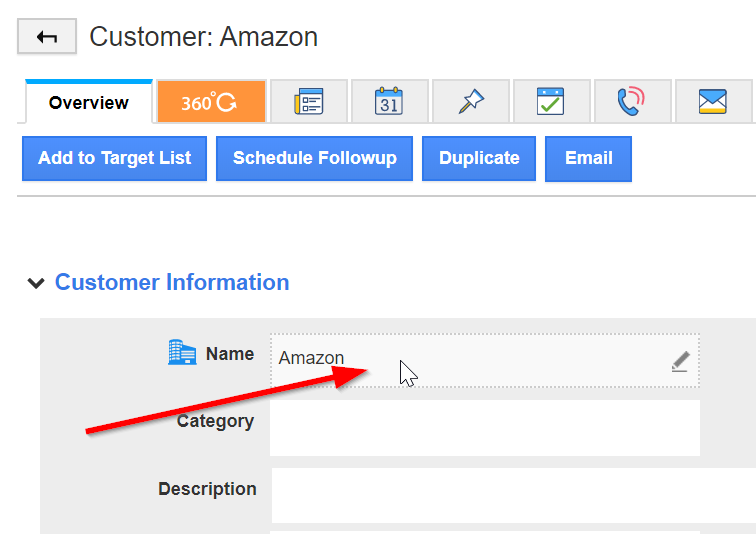
You will see the Save and Cancel buttons on the customer record, which means that you are in Edit mode.
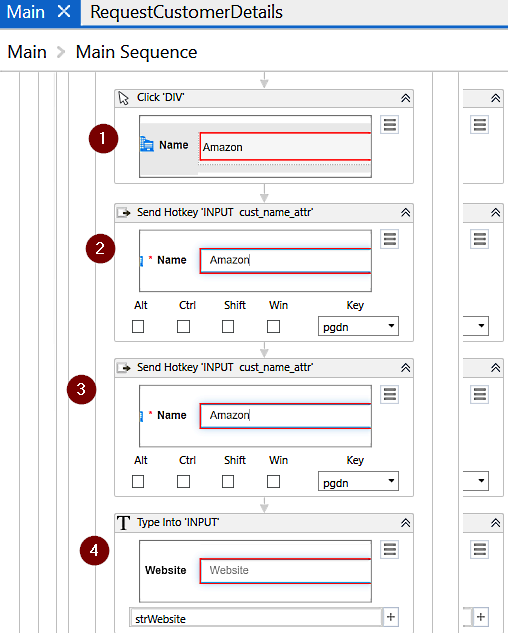
- In Edit mode, we can update the customer details. First, let's update the website's information. To do this, we have to scroll down to the Website text box. Let's use the Send HotKey activity and point to the name text box and pgdn. Copy this activity again to page down twice. You should be able to find Website in the Additional Information section.
- Now, we will use the keyboard Type Into activity and point to the text box next to the Website label. Use the strWebsite variable to input the necessary value:
- Next, we will find the social media fields on the page and update them as well. Let's use the page down twice more by using the Hot Key activity. You should be able to find the Facebook, LinkedIn and Twitter fields under the Social Information section.
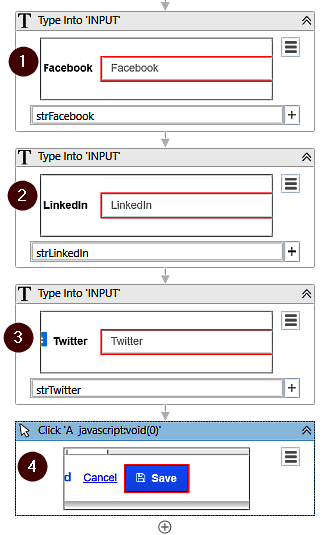
- Similar to the previous step, we will use the Type Into activity and perform the same steps to get the values of Facebook, LinkedIn, and Twitter into the strFacebook, strLinkedIn, and strTwitter variables.
- Now that we have updated all the information, let's click on the Save button. Let's use the Click activity and point to the Save button at the top of the page:
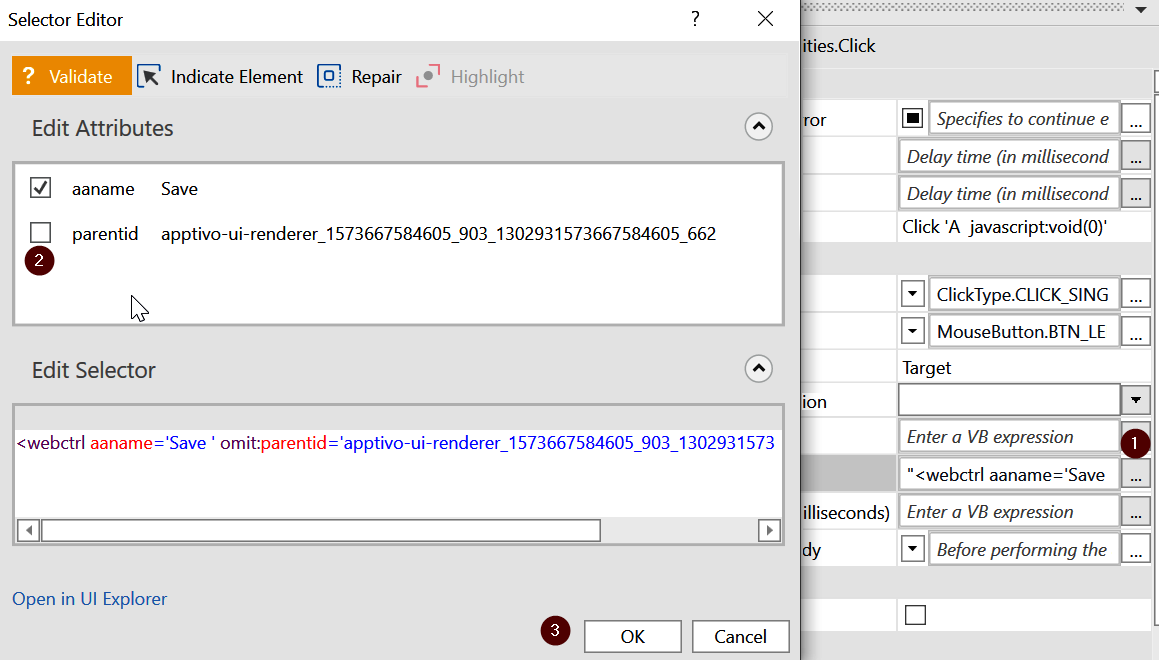
- To make the Automation generic, let's edit the selector property in Save so that it only includes aaname. Go ahead and uncheck the parentId as the selector may change every time the Automation runs:
- Finally, let's add a Log Message within the Try block that states, "Successfully Updated the Customer details for :"+ strCompanyName.
- In the Catch block for Update Customer details Sequence, let's handle any exceptions that may arise. Let's add a new exception called SelectorNotFoundException. Within that, add a Log Message with the log Level set to Error and a message stating, "Cannot Update Customer details for :"+ strCompanyName+ " Due to this Error :" + exception.Message.
- Please add a Message box activity stating that the Automation is Completed in the Finally block.
To test the complete Automation, make sure the Crunchbase.com web page is closed but ensure you're still logged in to your Apptivo page in your Chrome browser. Then, click on Run. The Automation process should take a few minutes to run and update the Apptivo CRM application.
