
Most web applications require a persistence strategy, which allows data to be stored and read from a database, thus enabling interactive web sites to be developed. The Seam Framework integrates Java Enterprise Edition persistent entities (JPA entities) with the view technology (Facelets). This enables the rapid development of data-centric applications.
In addition to using JPA, Seam provides a framework to assist us with object persistence. This framework is the Seam application framework.
In this chapter we will have a look at the following:
Overview of database persistence
How SeamGen helps with persistence
Persisting Java Entities to the database
Retrieving Java Entities from the database and viewing them in a Seam web application
Performing CRUD operations on entities
Relationships between entities
The Seam application framework
In majority of applications, it is usually necessary to persist objects between sessions. Traditionally this has been done in Java by using the JDBC APIs.
Note
The JDBC (Java Database Connectivity) API provides a set of APIs for accessing relational databases such as Oracle and MySQL. Further details of these APIs can be found at:
However, there are several drawbacks to using the JDBC APIs, as follows:
SQL statements (such as select, insert, and update) are generally written to be database specific. When an application is required to run against a different database engine, these SQL statements often need to be amended.
The code for accessing different tables tends to be almost the same. Therefore, a lot of copy-pasting of code occurs.
SQL can be verbose and unwieldy. When entities have more than a few properties, SQL statements can become very unwieldy. Typically, parameters in SQL statements are referred to by numeric position, which can easily become error prone, especially when adding additional fields into an SQL statement.
Directly accessing the database using JDBC APIs does not lend itself to easy caching of data either within a transaction (first level caching), or outside of a transaction (second level caching).
Lazy Loading is difficult to implement using JDBC, with Data Transfer Objects (DTOs) being developed to try and alleviate the problem. (Lazy Loading works out-of-the-box with Seam.)
Creating and closing connections, transactions, statements, and so on are cumbersome and error prone, which result in many instances where resources may not be handled correctly in the event of errors.
If PreparedStatements are not used correctly, SQL code can be prone to SQL injection attacks.
Note
When we are accessing databases from a Java application, we typically think of two levels of caching, namely a first level cache and a second level cache.
When we are using Session Beans as our transaction façade, and using container-managed transactions (as is the default with Seam), a transaction encompasses the lifetime of a Session Bean method. If we ask for the same piece of data more than once from the database during a transaction, Seam is clever enough to only request the data once from the database, rather than once for each client-request. This is called a first level cache. Data remains in the first level cache until a transaction is completed, that is, when the Session Beans method exits, the first level cache is destroyed.
A second level cache is where the application reads data from a database (or any other expensive resource, for example, a remote file system) and caches it, so that if it is needed again, the data is already present. This type of cache remains as long as the application requires it, and until the application explicitly destroys the cache. This is called a second level cache.
Because of these drawbacks when using JDBC to communicate directly with relational databases, and the lack of a good persistence mechanism in J2EE 1.4, Object Relational Mapping (ORM) toolkits were devised, and these gained popularity within the Java community. Probably the most widely-used of these is the Hibernate toolkit devised by Gavin King (who is also the founder of Seam).
The Java EE 5 specification took on board ORM toolkits such as Hibernate that made database development much easier, and defined the standard Java Persistence API (JPA) to perform database persistence within Java EE 5 applications. There are different implementations of the JPA specification, such as Hibernate and TopLink. Hibernate is set as the default JPA implementation with Seam. However, Seam can also work with TopLink or other JPA implementations.
Note
The Java Persistence API defines a standard Java EE mechanism for performing CRUD operations against Java POJOs. The entities being persisted are managed via annotations, rather than via XML deployment descriptors. Full details of JPA can be found at:
When using JPA, we do not need to write direct SQL statements that can be executed by the database any more. Instead, we add annotations to our entity classes (which are simple POJOs) and then JPA takes care of generating the correct SQL for the database engine that we are using. We no longer have to write SQL and don't have to worry about SQL becoming unwieldy too. Additionally, because we are typically running applications using Seam's transaction manager, we don't need to worry too much about first level caching. Second level caching is made easy because we are dealing with POJOs.
As we saw in the previous chapters, the SeamGen application is used for generating skeleton Seam applications. One of its benefits is that it will configure all of the aspects required for using JPA within a Seam application.
Let's take a look at the database-related questions that SeamGen asks when we set up a new project.
When we create a new project with SeamGen, we are asked several questions about the database and how we would want the application to interact with it.
Initially, SeamGen asks us which type of database would we want to use for our application. SeamGen has knowledge of HSQL, MySQL, Oracle, Postgress, Microsoft SQL Server, DB2, Sybase, EnterpriseDB, and H2. The default option is to use the embedded Hypersonic database that is supplied with all of the JBoss Application Servers.
./seam setup
<non-database questions omitted for brevity>
[input] What kind of database are you using? [hsql] ([hsql], mysql, oracle, postgres, mssql, db2, sybase, enterprisedb, h2)
Next, SeamGen requires the Hibernate dialect to be specified. In JBoss, Hibernate is used as the backing technology behind JPA, so we need to specify which dialect JPA should use when it generates SQL statements to execute against the database. The dialects define the different syntaxes that the different database engines support. It is important to get the dialect correct otherwise Seam may try to execute an invalid SQL against the database. The following dialects are commonly used:
|
Dialect |
Database engine |
|---|---|
|
|
Hypersonic HSQL |
|
|
MySQL 5+ |
|
|
MySQL versions prior to 5 |
|
|
Oracle 9+ |
|
|
Oracle 8 |
|
|
Postgress |
|
|
Microsoft SQL Server |
|
|
IBM DB2 |
|
|
Sybase |
|
|
H2 |
[input] Enter the Hibernate dialect for your database [org.hibernate.dialect.HSQLDialect] [org.hibernate. dialect.HSQLDialect]
After selecting a Hibernate dialect, we are asked to specify the location for the database driver JAR file. For HSQL, the default value is ../lib/hsqldb.jar, that is, the JAR file that is included with the JBoss distribution. For any other database engines, you will need to download the relevant driver and put it in your class path.
[input] Enter the filesystem path to the JDBC driver jar [../lib/hsqldb.jar] [../lib/hsqldb.jar]
The JDBC driver class name for the driver specified in the previous stage now needs to be specified again. SeamGen uses HSQL by default at this stage, using the org.hsqldb.jdbcDriver class.
[input] Enter JDBC driver class for your database [org. hsqldb.jdbcDriver] [org.hsqldb.jdbcDriver]
After specifying the JDBC driver class, the URL for the database connection must be specified. Check with your database vendor for the format of this URL.
[input] Enter the JDBC URL for your database [jdbc: hsqldb:.] [jdbc:hsqldb:.]
The username that Seam will use to connect to the database is required next. For HSQL, the sa user is selected as the default value. For production databases, it is recommended to have a user who has the lowest possible security rights that can be applied.
[input] Enter database username [sa] [sa]
After specifying the username, we must specify an appropriate password.
[input] Enter database password [] []
Database engines can use different schema names to allow data to be partitioned. If your database supports schema names, then enter the required schema name here.
[input] Enter the database schema name (it is OK to leave this blank) [] []
Database engines can use different catalog names to allow data to be partitioned. If your database supports catalog names, then enter the required catalog name here.
[input] Enter the database catalog name (it is OK to leave this blank) [] []
Next, Seam needs to know whether the database tables that you are working with already exist or not.
[input] Are you working with tables that already exist in the database? [n] (y, [n])
Finally, we need to specify whether we want the database to be cleared and created from scratch every time we deploy our application. If we answer "yes" to this question, Seam will run the contents of the import.sql file each time our applications are deployed.
[input] Do you want to drop and recreate the database tables and data in import.sql each time you deploy? [n] (y, [n])
After setting the SeamGen wizard to create a project, several deployment descriptor files are created that allow applications to access the database. SeamGen also creates three different profiles for the application depending on whether we are in a development, test, or production environment.
Development profile
Test profile
Production profile
The profile that is currently selected is defined within the profile property within the build.xml file for the project.
<property name="profile" value="dev" />
Properties files for the ant build script are present alongside the build.xml file to allow different configurations of the build depending upon whether the development or the production profiles are selected.
build-dev.propertiesbuild-prod.properties
For a fresh project, build-dev.properties sets the Java compiler to build debug symbols into the code, whereas the build-prod.properties turns off debugging within the Java compiler.
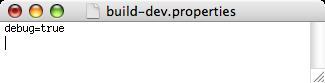
In the preceding screenshot of the build-dev.properties file, we can see that debugging is turned on.
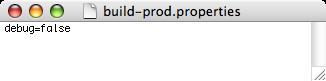
In the preceding screenshot of the build-prod.properties file, we can see that debugging is turned off.
As mentioned earlier, when a Seam application is deployed, SQL can be executed against the database. This can be useful to populate tables with data, thus allowing realistic testing to be performed, or initial default data to be loaded into the database.
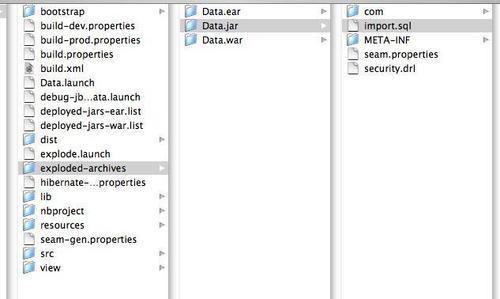
In a Seam application folder structure, we have three data import files within the resources folder. These three files represent the initial data import files for the development, test, and production profiles.
import-dev.sqlimport-prod.sqlimport-test.sql
When a project is built using the SeamGen generated ant script, the appropriate file is copied to the root of the EJB project JAR file and renamed to import.sql. Seam is then able to pick this file up at the time of application deployment and run the enclosed SQL.
To access the database from a Seam application deployed to the JBoss application server, we need to have a datasource deployed to the application server. Fortunately, SeamGen does this for us.
In the JBoss Application Server, datasource files are XML files with a file name in the pattern *-ds.xml. To deploy a datasource to JBoss, we need to place it in the deploy folder of the JBoss Application Server instance. For the default instance, this folder is:
<Jboss_home>/server/default/deploy
In the Seam application's resources folder, there are two datasource files. One file is for production and the other one is for development.
<projectname>-dev-ds.xml<projectname>-prod-ds.xml
When a Seam application is deployed, the relevant datasource is copied to the JBoss Application Server's deploy directory.
Note
If you are using a database other than HSQL, then the database driver may also need copying into the JBoss Application Server's classpath. On JBoss AS 5.0, this classpath would be the jboss/common/lib folder.
JBoss Application Server allows the hot deployment of datasource files, so that they can be deployed whilst JBoss is running without needing to restart the server. When a datasource is deployed, the output is shown on the JBoss console, which indicates whether the datasource has been deployed correctly or not.
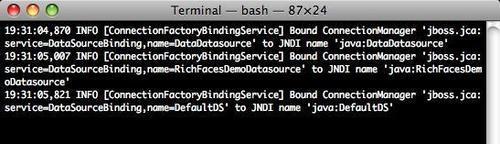
In this sample, taken from the JBoss console log, we can see that three datasources (DataDatasource, RichFacesDemoDatasource, and DefaultDS) have been successfully deployed and are bound to the JNDI names java:DataDatasource, java:RichFacesDemoDatasource, and java:DefaultDS, respectively.
SeamGen fortunately creates datasource files for new projects. However, let's take a quick look at the structure of a datasource file. This knowledge can be useful if we need to change the connection or other details of a datasource.
<?xml version="1.0" encoding="UTF-8"?>
<!DOCTYPE datasources
PUBLIC "-//JBoss//DTD JBOSS JCA Config 1.5//EN"
"http://www.jboss.org/j2ee/dtd/jboss-ds_1_5.dtd">
<datasources>
<local-tx-datasource>
<jndi-name>DataDatasource</jndi-name>
<connection-url>jdbc:hsqldb:.</connection-url>
<driver-class>org.hsqldb.jdbcDriver</driver-class>
<user-name>sa</user-name>
<password></password>
</local-tx-datasource>
</datasources>
The data source definition file (*-ds.xml) is fairly straightforward. A datasource file must have a root <datasource> element, which contains one or more <local-tx-datasource> elements. Each <local-tx-datasource> element can contain one datasource definition. Thus, if your application needs to use more than one database, you can define multiple datasources in a single *-ds.xml file.
In this sample datasource configuration file, there are several pieces of information that define the database connection. All of this information was specified when we created a project using SeamGen.
|
|
Description |
|---|---|
|
|
This specifies the JNDI name to which the application server binds the database connection. JBoss will create a pool of database connections, which JPA will look up using this JNDI name. |
|
|
This parameter specifies the connection URL for the database engine. Consult your database driver documentation for details of the format of this URL. |
|
|
This parameter specifies the driver class that is to be used for connecting to the database engine. Consult your database driver documentation for details of this driver class. |
|
|
The username to authenticate with the database. |
|
|
The password to authenticate with the database. |
Depending upon your database engine, additional parameters may be required within the datasource files in order to fully define a database connection. For example, instance and port numbers are needed to define a connection to an Oracle database. A sample Oracle datasource connection would look like the following:
<?xml version="1.0" encoding="UTF-8"?>
<datasources>
<local-tx-datasource>
<jndi-name>OracleDS</jndi-name>
<connection-url>jdbc:oracle:thin:@youroraclehost:1521: yoursid</connection-url>
<driver-class>oracle.jdbc.driver. OracleDriver</driver-class>
<user-name>x</user-name>
<password>y</password>
<exception-sorter-class-name>org.jboss.resource.adapter.jdbc. vendor.OracleExceptionSorter</exception-sorter-class-name>
<metadata>
<type-mapping>Oracle9i</type-mapping>
</metadata>
</local-tx-datasource>
</datasources>
The JBoss Application Server is provided with sample datasource files for a number of databases. These sample datasource files are held in the JBoss Application Server deployment at:
<jboss_home>/docs/examples/jca
The final piece of XML configuration that is required is the persistence.xml file, which configures how database lookups are performed for JPA objects. Again, SeamGen creates development, production, and test versions of this file, all of which are stored in the resources/META-INF folder of a generated application.
persistence-dev.xmlpersistence-prod.xmlpersistence-test.xml
When Seam applications are built using the generated ant script, the relevant persistence file is renamed to persistence.xml and placed within the EJB JAR file.
A typical persistence-dev.xml file is as follows:
<?xml version="1.0" encoding="UTF-8"?>
<!-- Persistence deployment descriptor for dev profile -->
<persistence xmlns="http://java.sun.com/xml/ns/persistence" xmlns:xsi="http://www.w3.org/2001/XMLSchema-instance" xsi:schemaLocation="http://java.sun.com/xml/ns/persistence http://java.sun.com/xml/ns/persistence/persistence_1_0.xsd" version="1.0">
<persistence-unit name="Data">
<provider>org.hibernate.ejb.HibernatePersistence</provider>
<jta-data-source>java:/DataDatasource</jta-data-source>
<properties>
<property name="hibernate.dialect" value="org.hibernate.dialect.HSQLDialect"/>
<property name="hibernate.hbm2ddl.auto" value="create-drop"/>
<property name="hibernate.show_sql" value="true"/>
<property name="hibernate.format_sql" value="true"/>
<property name="jboss.entity.manager.factory.jndi.name" value="java:/DataEntityManagerFactory"/>
</properties>
</persistence-unit>
</persistence>
The generated persistence.xml file will probably be sufficient for your needs and you probably won't need to alter this file, as it has been generated using the responses to the questions asked when your project was created using SeamGen. However, there are several interesting properties within the file that are worth looking at.
|
Property |
Description |
|---|---|
|
|
This element holds the JNDI name of the datasource that we want to connect to. |
|
|
This is the database dialect that will be used, and must match the database engine that you are connecting to. |
|
|
This property specifies whether the schema for the database is dropped and created (create-drop) every time the application is deployed or not. |
|
|
This property defines whether SQL that is executed against the database is shown on the JBoss console or not. This can help with debugging as you can see which SQL statements are being executed against the database. Here is an example: 23:16:14,807 INFO [STDOUT] Hibernate: select customer0_.id as id0_, customer0_.foreName as foreName0_, customer0_.secondName as secondName0_ from Customer customer0_ order by customer0_.secondName |
Now that we've seen how SeamGen helps us to configure persistence in our applications, let's take a look at how we can persist Java entities into a relational database.
The Seam Framework makes persisting entities or POJOs to relational databases much easier than executing SQL directly against the database. For an object to persist as an entity, there are several requirements that the POJO must enforce, as defined in the Java EE tutorial (http://java.sun.com/javaee/5/docs/tutorial/doc/bnbqa.html).
The class must be annotated with the
@Entityannotation, as defined in thejavax.persistence.Entityclass.The class must not have a private no-argument constructor. If you have not explicitly defined a no-argument constructor in a class, then the class will inherently have one.
The class must not be declared as
final.Entity properties must be accessible via getter and setter methods.
Let's take a look at a simple Java class that can be persisted to the database using JPA.
package com.davidsalter.data.entity;
import javax.persistence.Entity;
import javax.persistence.GeneratedValue;
import javax.persistence.Id;
import org.hibernate.validator.Length;
import org.hibernate.validator.NotNull;
import org.jboss.seam.annotations.Name;
@Entity
@Name("customer")
public class Customer {
private Long id;
private String foreName;
private String secondName;
@Id
@GeneratedValue
public Long getId() {
return id;
}
public void setId(Long id) {
this.id = id;
}
@NotNull
@Length(max = 50)
public String getForeName() {
return foreName;
}
public void setForeName(String foreName) {
this.foreName = foreName;
}
@NotNull
@Length(max = 50)
public String getSecondName() {
return secondName;
}
public void setSecondName(String secondName) {
this.secondName = secondName;
}
}
In this class, we can see that all of the rules for a class to be persisted with JPA have been followed. Our class is decorated with the @Entity annotation, we have a default no-argument constructor, all of the attributes of the class are available as getters and setters, and the class is not declared as final.
In this class, we've added the annotations @Id and @GeneratedValue to the getId() accessor in the class. These are standard JPA annotations that specify the primary key of the entity and that this key is automatically generated for us.
Also, it can be observed that we've added a few Seam-specific annotations. We have declared this object as a Seam component by adding the @Name annotation to the class. This allows us to look up the component from the Facelets' pages as we saw earlier in the book. We've also added some @NotNull and @Length annotations onto the getter methods of some of our fields. These annotations allow us to perform data validation, which will be performed before we try to persist objects to the database.
JPA also provides annotations for mapping an entity to a database table, as well as for mapping the entity properties to the database columns. The @Table annotation is used to map entities to database tables, whereas the @Column annotation is used to map properties to database columns.
Just like Seam, JPA uses configuration by exception, to define the default values of these annotations. These default values are usually sufficient, with the default table name being the name of the entity and the default column names being the names of the properties.
If we wanted to map the Customer class to a database table called CUSTOMER_TABLE and wanted the id column to be called CUSTOMER_ID, we could define the class as follows.
@Entity
@Name("customer")
@Table(name="CUSTOMER_TABLE")
public class Customer {
// .. Omitted for brevity
@Id
@GeneratedValue
@Column(name="CUSTOMER_ID")
public Long getId() {
return id;
}
// .. Rest of class omitted for brevity.
Once we have created an entity, we can easily persist it to the database by using the JPA entity manager. The entity manager is obtained via injection by using the @PersistenceContext annotation. To persist an object, we call the persist() method of the entity manager.
To save an instance of the preceding Customer class defined in a Seam application, we create a manager Session Bean and invoke a method, which in turn invokes the persist method on the entity manager, as shown in the following code.
package com.davidsalter.data.actions;
import com.davidsalter.data.entity.Customer;
import javax.ejb.Remove;
import javax.ejb.Stateful;
import javax.persistence.EntityManager;
import javax.persistence.PersistenceContext;
import org.jboss.seam.annotations.Destroy;
import org.jboss.seam.annotations.Name;
@Stateful
@Name("customerManager")
public class CustomerManagerAction implements CustomerManager {
@PersistenceContext
private EntityManager em;
public void saveCustomer (Customer customer) {
em.persist(customer);
}
@Destroy
@Remove
public void destroy() {
}
}
The Java Persistence API provides facilities to retrieve entities from the database by using the Java Persistence Query Language. The Java Persistence Query Language is very similar to SQL. Therefore, if you are familiar with SQL, you should find that the JPA QL is not too different.
Note
In this chapter, we are just going to cover the Java Persistence Query Language briefly. Full details of the query language can be found at:
To retrieve a list of entities using JPA, we use the entity manager, just as we did when persisting an entity. To retrieve a list of customers, we would use a method similar to the following one.
private List<Customer>customers;
public void getCustomers() {
customers = em.createQuery("select customer from Customer customer order by customer.secondName").getResultList();
}
Here, we can see that we use the createQuery() method of the entity manager to perform a query. The query we are running here is:
select customer from Customer customer order by customer.secondName
As you can see, this JPA QL is very similar to the corresponding SQL that we would use if accessing the database directly.
Sometimes, we need to restrict queries by putting WHERE clauses in them to limit the results that will be returned. Seam allows us to do this either by using the Seam Expression Language (EL), or by using parameters within the query.
Seam Expression Language allows us to take input directly from a Facelets page and use it to affect the query. For example, say we have an edit box on a Facelets page that is bound to an instance of the Seam customer component as defined earlier:
<h:inputText value="#{customer.secondName}"> </h:inputText>
If we wanted to find customers whose name is similar to the text that we have entered within this edit box, we could change our query to:
public void getCustomers() {
customers = em.createQuery("select customer from Customer customer where customer.secondName like #{customer.secondName} order by customer.secondName").getResultList();
}
Alternatively, we can use named parameters within a query instead of using the Seam Expression Language.
public void getCustomers() {
String namedParameter="…";
customers = em.createQuery("select customer from Customer customer where customer.secondName Like :name order by customer.secondName")
.setParameter("name", namedParameter)
.getResultList();
}
Typically when we retrieve a list of objects, we may want to display it on a web page. Seam provides annotations that allow this to be easily done, without having to create data transfer objects to pass data between the EJB tier and the web tier.
Within our manager Session Bean, we annotate the list of objects with the @DataModel annotation. Seam will then automatically outject the list as a JSF data model that can be displayed within a Facelets page.
To allow the easy selection of objects within a list, Seam also provides the @DataModelSelection annotation that is used by Seam to inject an instance of a selected entity in a list. If we apply this to our customerManager component, we get:
package com.davidsalter.data.actions;
import com.davidsalter.data.entity.Customer;
import javax.ejb.Remove;
import javax.ejb.Stateful;
import javax.persistence.EntityManager;
import javax.persistence.PersistenceContext;
import org.jboss.seam.annotations.Destroy;
import org.jboss.seam.annotations.Factory;
import org.jboss.seam.annotations.Name;
import org.jboss.seam.annotations.datamodel.DataModel;
import org.jboss.seam.annotations.datamodel.DataModelSelection;
@Stateful
@Name("customerManager")
public class CustomerManagerAction implements CustomerManager {
@PersistenceContext
private EntityManager em;
@DataModel
private List<Customer> customers;
@DataModelSelection("customers")
private Customer selectedCustomer;
@Factory
public void getCustomers() {
customers = em.createQuery(
"select customer from Customer customer order by customer.secondName").getResultList();
}
@Destroy
@Remove
public void destroy() {
}
}
We can see several key Seam concepts within this small piece of code. Our Session Bean is defined as a Stateful Session Bean. This means that the state held within the bean is maintained throughout different invocations of our web page. As a result, we can cache any results within the bean itself so that they do not have to be loaded from the database every time the page is refreshed.
Within the bean we have a list of customers, which is annotated as @DataModel. We also have an instance of Customer called selectedCustomer, which is annotated with the @DataModelSelection() annotation.
Note
The @DataModelSelection annotation takes an optional parameter that specifies the name of the list that the selection belongs to—in this case, the list customers. This is done so that we can have multiple @DataModel annotations on a page and multiple @DataModelSelection annotations. If you are only going to have one list on a page, then this parameter is optional.
The corresponding Facelets page to view this list of customer objects is as follows:
<h:form id="customers">
<rich:panel>
<h:outputText value="There are no customers on file." rendered="#{customers.rowCount==0}"/>
<h:dataTable id="customers" value="#{customers}" var="customer" rendered="#{customers.rowCount>0}">
<h:column>
<f:facet name="header">First Name</f:facet>
#{customer.foreName}
</h:column>
<h:column>
<f:facet name="header">Second Name</f:facet>
#{customer.secondName}
</h:column>
<h:column>
<f:facet name="header">View</f:facet>
<h:commandLink id="view" value="View" action="#{customerManager.view}"/>
</h:column>
</h:dataTable>
</rich:panel>
</h:form>
This Facelets code fragment renders the text There are no customers on file if the expression language #{customers.rowCount} == 0 is true, that is, if the outjected list of customers from our Session Bean is empty. Similarly, the <h:dataTable /> tag is rendered only if the expression language #{customers.rowCount>0} evaluates to true, that is, if the outjected list of customers from our Session Bean is not empty.
In the data table, three columns are displayed. The first two of these display the first and second names of our customers. The third column contains a <h:commandLink /> which causes the view() method to be invoked on our Session Bean. We'll see more about that method in the next section, where we'll see how this method uses the injected selectedCustomer object.
The Java Persistence API allows us to define relationships between entities. The four different types of relationships are as follows:
One-to-one relationships
One-to-many relationships
Many-to-one relationships
Many-to-many relationships
A one-to-one relationship is useful when we have two entities that have a direct relationship, but we do not want to model these entities in the same Java classes. For example, a customer may have a one-to-one relationship with an account—one customer has one account and one account belongs only to one customer.

In this case, we use the @OneToOne annotation within Java classes to express the relationship between entities.
@Entity
@Name("customer")
public class Customer {
private Account account;
@OneToOne(mappedBy="customer")
public Account getAccount() {
return account;
}
public void setAccount(Account account) {
this.account = account;
}
// Rest of class omitted for brevity.
}
@Entity
@Name("account")
public class Account {
private Customer customer;
@OneToOne
@JoinColumn(name="customerId")
public getCustomer() {
return customer;
}
public void setCustomer(Customer customer) {
this.customer = customer;
}
// Rest of class omitted for brevity.
}
In the Customer and Account classes, we can see that there is a relationship between the two classes. To specify this relationship between the entities, we use the @OneToOne annotation. Within the Customer class, we have specified that we have a one-directional relationship with the Account class, with the Account class having a foreign reference to the Customer class. In database terms, this would be equivalent to the Account table having a foreign key to the Customer table, but the Customer table would not have a foreign key to the Account table.
The one-to-many or many-to-one relationships are probably the most common relationships that can be modeled.
Consider the situation where a customer may have many telephone numbers, but each telephone number belongs only to one customer. In this case, we have a one-to-many relationship between the customer and the telephone number.

To map this type of relationship, we use the @OneToMany and @ManyToOne annotations.
@Entity
@Name("customer")
public class Customer {
private Set<TelephoneNumber> telephoneNumbers = new HashSet<TelephoneNumber>();
@OneToMany(mappedBy="customer")
public Set<TelephoneNumber> getTelephoneNumbers() {
return telephoneNumbers;
}
public void setTelephoneNumbers(Set<TelephoneNumber> telephoneNumbers) {
this.telephoneNumbers = telephoneNumbers;
}
// Rest of class omitted for brevity.
}
@Entity
public class TelephoneNumber {
private Customer customer;
@ManyToOne
public Customer getCustomer() {
return customer;
}
public void setCustomer(Customer customer) {
this.customer = customer;
}
// Rest of class omitted for brevity.
}
In this code, we can see that the customer has a Set<TelephoneNumber> of telephone numbers. We have modeled this as a Set rather than a Collection, as each TelephoneNumber is unique.
Let's put all of this together now and look at a sample application that shows a list of customers. For each customer, we can show a list of telephone numbers possessed by the customer. We'll start by defining the Customer and TelephoneNumber classes that have a one-to-many relationship.
package com.davidsalter.data.entity;
import java.util.HashSet;
import java.util.Set;
import javax.persistence.Entity;
import javax.persistence.GeneratedValue;
import javax.persistence.Id;
import javax.persistence.OneToMany;
import org.hibernate.validator.Length;
import org.hibernate.validator.NotNull;
import org.jboss.seam.annotations.Name;
@Entity
@Name("customer")
public class Customer {
private Long id;
private String foreName;
private String secondName;
private Set<TelephoneNumber> telephoneNumbers = new HashSet<TelephoneNumber>();
@Id
@GeneratedValue
public Long getId() {
return id;
}
public void setId(Long id) {
this.id = id;
}
@NotNull
@Length(max = 50)
public String getForeName() {
return foreName;
}
public void setForeName(String foreName) {
this.foreName = foreName;
}
@NotNull
@Length(max = 50)
public String getSecondName() {
return secondName;
}
public void setSecondName(String secondName) {
this.secondName = secondName;
}
@OneToMany(mappedBy="customer")
public Set<TelephoneNumber> getTelephoneNumbers() {
return telephoneNumbers;
}
public void setTelephoneNumbers(Set<TelephoneNumber> telephoneNumbers) {
this.telephoneNumbers = telephoneNumbers;
}
}
package com.davidsalter.data.entity;
import javax.persistence.Entity;
import javax.persistence.GeneratedValue;
import javax.persistence.Id;
import javax.persistence.ManyToOne;
@Entity
public class TelephoneNumber {
private Long id;
private Customer customer;
private String type;
private String number;
@Id
@GeneratedValue
public Long getId() {
return id;
}
public void setId(Long id) {
this.id = id;
}
@ManyToOne
public Customer getCustomer() {
return customer;
}
public void setCustomer(Customer customer) {
this.customer = customer;
}
public String getType() {
return type;
}
public void setType(String type) {
this.type = type;
}
public String getNumber() {
return number;
}
public void setNumber(String number) {
this.number = number;
}
}
These two classes (Customer and Telephone) show how the Customer and TelephoneNumber classes are defined. To use these entities, we need to have a Session Bean to manage the interaction between the user interface and the database. First, we need to define an interface that our Session Bean can implement.
package com.davidsalter.data.actions;
import javax.ejb.Local;
@Local
public interface CustomerManager {
public void getCustomers();
public void getTelephoneNumbers();
public void view();
public void destroy();
}
Here, we have defined a local interface with methods to get the list of customers and to get the telephone numbers for a given customer. As we are defining our Session Bean as a Stateful bean, we also need to add the destroy() method to the interface. Following is the implementation of this interface:
package com.davidsalter.data.actions;
import com.davidsalter.data.entity.Customer;
import com.davidsalter.data.entity.TelephoneNumber;
import java.util.List;
import java.util.Set;
import javax.ejb.Remove;
import javax.ejb.Stateful;
import javax.persistence.EntityManager;
import javax.persistence.PersistenceContext;
import org.jboss.seam.annotations.Destroy;
import org.jboss.seam.annotations.Factory;
import org.jboss.seam.annotations.Name;
import org.jboss.seam.annotations.Out;
import org.jboss.seam.annotations.datamodel.DataModel;
import org.jboss.seam.annotations.datamodel.DataModelSelection;
@Stateful
@Name("customerManager")
public class CustomerManagerAction implements CustomerManager {
@PersistenceContext
private EntityManager em;
@DataModel
private List<Customer> customers;
@DataModelSelection("customers")
@Out(required=false)
private Customer selectedCustomer;
@DataModel
private Set<TelephoneNumber>telephoneNumbers;
@DataModelSelection("telephoneNumbers")
private TelephoneNumber selectedTelephoneNumber;
@Factory
public void getCustomers() {
customers = em.createQuery("select customer from Customer customer order by customer. secondName").getResultList();
}
@Factory
public void getTelephoneNumbers() {
if (selectedCustomer != null )
telephoneNumbers = selectedCustomer.getTelephoneNumbers();
}
public void view() {
}
@Destroy
@Remove
public void destroy() {
}
}
We also need to define a Facelets' view to display the customer list and selected telephone numbers.
<!DOCTYPE composition PUBLIC "-//W3C//DTD XHTML 1.0 Transitional//EN" "http://www.w3.org/TR/xhtml1/DTD/ xhtml1-transitional.dtd">
<ui:composition xmlns="http://www.w3.org/1999/xhtml" xmlns:s="http://jboss.com/products/seam/taglib" xmlns:ui="http://java.sun.com/jsf/facelets" xmlns:f="http://java.sun.com/jsf/core" xmlns:h="http://java.sun.com/jsf/html" xmlns:rich="http://richfaces.org/rich" template="layout/template.xhtml">
<ui:define name="body">
<h:form id="customers">
<rich:panel>
<f:facet name="header">Customer Details</f:facet>
<h:outputText value="There are no customers on file." rendered="#{customers.rowCount==0}"/>
<h:outputText value="There are no customers on file." rendered="#{customers.rowCount==0}"/>
<h:dataTable id="customers" value="#{customers}" var="customer" rendered="#{customers.rowCount>0}">
<h:column>
<f:facet name="header">First Name</f:facet>
#{customer.foreName}
</h:column>
<h:column>
<f:facet name="header">Second Name</f:facet>
#{customer.secondName}
</h:column>
<h:column>
<f:facet name="header">View</f:facet>
<h:commandLink id="view" value="View" action="#{customerManager.view}"/>
</h:column>
</h:dataTable>
</rich:panel>
<rich:panel rendered="#{telephoneNumbers.rowCount>0}">
<f:facet name="header">Telephone Numbers</f:facet>
<h:panelGrid columns="2">
Customer ID <h:outputText value="#{selectedCustomer.id}" />
Forename <h:outputText value="#{selectedCustomer.foreName}" />
Second Name <h:outputText value="#{selectedCustomer. secondName}" />
</h:panelGrid>
<h:dataTable id="phones" value="#{telephoneNumbers}" var="phone" rendered="#{telephoneNumbers.rowCount>0}">
<h:column>
<f:facet name="header">Type</f:facet>
#{phone.type}
</h:column>
<h:column>
<f:facet name="header">Number</f:facet>
#{phone.number}
</h:column>
</h:dataTable>
</rich:panel>
</h:form>
</ui:define>
</ui:composition>
Finally, before we can run the application, we need to have some test data. Because we are in a development phase and not production, we need to enter SQL within the import-dev.sql file. This file will be renamed to import.sql during the build process, and then executed against the database when the application is deployed. For this sample application, the contents of the file are as follows:
insert into customer(id, foreName, secondName) values (1, 'David', 'Salter'),
insert into customer(id, foreName, secondName) values (2, 'Bill', 'House'),
insert into customer(id, foreName, secondName) values (3, 'Henry', 'Sugar'),
insert into customer(id, foreName, secondName) values (4, 'Steve', 'Booth'),
insert into customer(id, foreName, secondName) values (5, 'Arthur', 'Andrews'),
insert into telephoneNumber(id, customer_id, type, number) values (1, 1, 'M', '01 23 45 678'),
insert into telephoneNumber(id, customer_id, type, number) values (2, 1, 'F', '07 65 43 210'),
insert into telephoneNumber(id, customer_id, type, number) values (3, 2, 'M', '01 98 43 247'),
When we run the application, we are presented with a list of customers, as shown in the following screenshot.
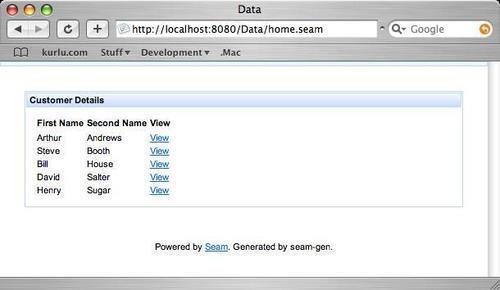
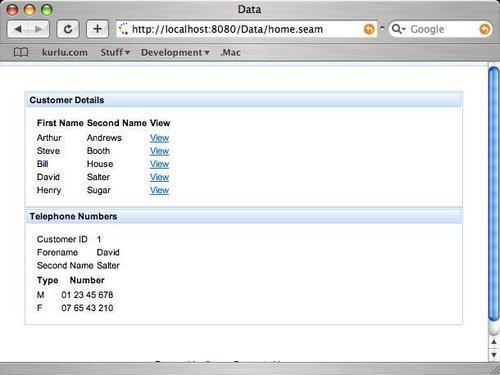
We can click on any of the links on the page to get a list of all of the telephone numbers that belong to the selected customer.
The final type of relationship that we can model is the many-to-many relationship.

To model a many-to-many relationship, we define our classes in the same way as we defined the one-to-many relationships, but we annotate our relationships with the @ManyToMany annotation.
@Entity
@Name("customer")
public class Customer {
private Set<Product> products = new HashSet<Product>();
@ManyToMany(mappedBy="product")
public Set<Product> getProducts() {
return products;
}
public void setProducts(Set<Products> products) {
this.products = products;
}
// Rest of class omitted for brevity.
}
@Entity
public class Product {
private Set<Customer> customers;
@ManyToMany
public Set<Customer> getCustomers() {
return customers;
}
public void setCustomers(Set<Customer> customers) {
this.customers = customers;
}
// Rest of class omitted for brevity.
}
In addition to persisting and retrieving entities from the database, JPA also allows us to delete and update data from the database. Deleting is achieved using the remove() method on the entity manager.
If we already have an instance on an entity that we wish to delete, we can simply call the remove() method to delete it.
@PersistenceContext
EntityManager em
…
em.remove(customer);
If we do not have an instance of an entity to remove, we can first find and load it from the database using the find() method of the entity manager.
Customer customer = em.find(Customer.class, customerId);
em.remove(customer);
To update an entity in the database, we simply get an instance of the object and invoke the relevant setters on it. As the code that is running is inside a Session Bean method using Container Managed Persistence, any changes to the object will be persisted to the database when the method exits. Once again, we can use the find() method of the entity manager to load an entity from the database.
@PersistenceContext
EntityManager em
…
Customer customer = em.find(Customer.class, customerId);
customer.setSecondName(secondName);
By using the JPA style queries, as described in previous sections, we can quickly write database-centric applications using Seam. Seam adds to the JPA framework by providing a few extension classes that make writing database-centric applications even easier. The Seam application framework provides a couple of objects to enable this easier development:
Home objects
Query objects
Let's take a look at each of these types of objects and see how they can be used to help us when accessing the database.
Home objects provide database persistence methods for entity classes. Each entity has its own specific home object, which is responsible for performing create, read, update, and delete (CRUD) functionality.
If we have an entity class, it is easy to create a home object for that entity. Consider the following VacationType entity.
@Entity
@Name("vacationType")
public class VacationType implements Serializable {
private Long id;
private Integer version;
private String name;
// .. Rest of class omitted for brevity.
}
To create a home object, we must define a class that extends the specialized version of EntityHome<>. A home object, for the VacationType class, would therefore be defined in the following manner.
@Name("vacationTypeHome")
public class VacationTypeHome extends EntityHome<VacationType>
{
}
The EntityHome class provides the following methods to perform our CRUD operations:
These methods can be used directly from within a Facelets page to enable us to perform database operations on the entity. Therefore, we can define a Facelets form to hold information about a new VacationType in the following way:
<h:form id="vacationTypeForm">
<h:inputText id="name" required="true" value="#{vacationTypeHome.instance.name}"/>
<h:commandButton id="save" value="Save" action="#{vacationTypeHome.persist}" rendered="#{!vacationTypeHome.managed}"/>
<h:commandButton id="update" value="Save" action="#{vacationTypeHome.update}" rendered="#{vacationTypeHome.managed}"/>
<h:commandButton id="delete" value="Delete" action="#{vacationTypeHome.remove}" immediate="true" rendered="#{vacationTypeHome.managed}"/>
</h:form>
Let's walk through this code to see what we've done to utilize the home object.
First, we've created an HTML form and added an <h:inputText /> component to it. We've set the value of this component to #{vacationTypeHome.instance.name}, which is the name property of the vacationType entity. Any text we enter into this input text field, will be used as the name value for our entity. Each home object has an instance property, which represents the one object that is currently being managed.
Next, we added three <h:commandButton /> objects. These objects have save, update, and remove functionalities. As such, we have set the action property to #{vacationTypeHome.persist}, #{vacationTypeHome.update}, and #{vacationTypeHome.remove} respectively.
For each of our <h:commandButton /> objects, you will see that the rendered property depends upon the #{vacationTypeHome.managed} expression. This expression evaluates to true if the entity is being managed, that is, it has already been created.
If we want, we can override any of the methods on the EntityHome<> class to perform additional functionality. For example, if we want to set a creation date or creation user to an entity when it is persisted, we could override the persist() method to do this.
@Name("vacationTypeHome")
public class VacationTypeHome extends EntityHome<VacationType>
{
@Override
public string persist() {
instance.setXXX();
return super.persist();
}
}
Home objects can also be defined completely in XML rather than in Java code, if required, by defining them within the application's components.xml file. Defining home objects in XML is probably easier and less work than defining them in Java code. However, the drawback is that you can't override any of the methods when home objects are defined in XML.
To define home objects within the components.xml file, we need to reference the framework namespace within the file. This namespace is called http://jboss.com/products/seam/framework and is defined within the components.xml file as shown in the following code snippet.
<?xml version="1.0" encoding="UTF-8"?>
<components
xmlns="http://jboss.com/products/seam/components"
xmlns:core="http://jboss.com/products/seam/core"
xmlns:persistence="http://jboss.com/products/seam/persistence"
xmlns:web="http://jboss.com/products/seam/web"
xmlns:framework="http://jboss.com/products/seam/framework"
xmlns:xsi="http://www.w3.org/2001/XMLSchema-instance"
xsi:schemaLocation="http://jboss.com/products/seam/core
http://jboss.com/products/seam/core-2.1.xsd
http://jboss.com/products/seam/persistence
http://jboss.com/products/seam/persistence-2.1.xsd
http://jboss.com/products/seam/web
http://jboss.com/products/seam/web-2.1.xsd
http://jboss.com/products/seam/framework
http://jboss.com/products/seam/framework-2.1.xsd">
http://jboss.com/products/seam/components
http://jboss.com/products/seam/components-2.1.xsd">
To define a home object within the components.xml file, we need to add a <framework:entity-home /> element specifying the name and entity-class elements. The name attribute specifies the Seam component name for the home object (vacationTypeHome in our example), whereas the entity-class attribute specifies the fully qualified class name for the entity on which the home object operates (com.davidsalter.vacationplanner.entity.VacationType in the example).
The fully-defined home object vacationTypeHome looks similar to the following.
<framework:entity-home
name="vacationTypeHome"
entity-class="com.davidsalter.vacationplanner. entity.VacationType" />
You can see that there is comparatively very little typing required to define a home object via configuration, when compared to writing Java code.
Query objects allow us to perform queries against the database, and return lists of entities corresponding to the relevant query.
Query objects extend the specialized EntityQuery<> class. A query object for the VacationType entity VacationTypeList would be defined as follows.
@Name("vacationTypeList")
public class VacationTypeList extends EntityQuery<VacationType> {
public VacationTypeList() {
setEjbql("select vacationType from VacationType vacationType");
}
}
In this class, all we did was write a VacationTypeList() constructor in which we have defined the EJB QL (Query Language) to get our list of VacationType entities from the database. This simple piece of code allows us to get a list of entities from the database.
If we wish to order the entities that we get back from the database, we must override the getOrder() method on the query object to add the relevant EJB QL query clause.
@Override
public String getOrder() {
return "vacationType.name";
}
We can also limit the number of results in a query by specifying restrictions on the EJB QL that is executed against the database. To do this, we must override the public List<ValueExpression> getRestrictions() method on the query object. When overriding this method, we must define a set of restrictions, as shown in the following example.
private static final String[] RESTRICTIONS = {
lower(vacationType.name) like lower( concat(#{vacationSearch.name},'%') )
}
@Override
public List<ValueExpression> getRestrictions() {
List<String> restrictions = Arrays.asList(RESTRICTIONS);
Expressions expressions = new Expressions();
List<ValueExpression> valueExpressions = new ArrayList<ValueExpression>();
for (String expression : restrictions) {
valueExpressions.add(expressions. createValueExpression(expression));
}
return valueExpressions;
}
In this code, we have defined a String[] containing a list of restrictions (only one in this case). Each restriction must contain exactly one value expression (#{vacationSearch.name} in this example). We then need to override the getRestrictions() method to return a correctly-formatted List<ValueExpression> of restrictions.
When you are adding restrictions to a query object, you will need to define the RESTRICTIONS String[], but the overridden getRestrictions() method will most likely be the same for all of the implementations.
Now that we have defined a query object, we need to state how it can be called from a Facelets page. First of all, let's take a look at how we can use a query object to populate a drop-down <h:selectOneMenu /> control.
To define a <h:selectOneMenu /> control, we need to define several elements, as shown in the following code snippet.
<h:selectOneMenu value="#{vacationType}">
<s:selectItems value="#{vacationTypeList}" var="type" label="#{type.name}" noSelectionLabel="Please select" />
<s:convertEntity />
</h:selectOneMenu>
In this code, we first create a <h:selectOneMenu /> and set its value. This is the value that is returned to Seam when a selection is made from the drop down box. Within the <h:selectOneMenu /> element, we create a <s:selectItems /> element. This tag is similar to how we defined it in Chapter 3, with the list of items to show how it is being bound to the value attribute (and the vacationTypeList Seam component in this example). However, in this example, note that we have specified the <s:convertEntity /> converter alongside the <s:selectItems /> element. We have used this converter because we are displaying a list from an entity class in the drop-down box, rather than from the enumeration, as shown in Chapter 3.
Next, lets have a look at how to display the results from a query object within a <h:dataTable />.
<h:dataTable
id="vacationTypeList" var="vacationType"
value="#{vacationTypeList.resultList}"
rendered="#{not empty vacationTypeList.resultList}">
...
<h:dataTable />
In this code, we can see that a standard <h:dataTable /> has been defined. The important thing to see here is that we have bound the data table value to the EL #{vacationTypeList.resultList}, which is the contents of the list retrieved from the query object. We have also specified the rendered attribute so that the data table is only displayed if the vacationTypeList has results.
Just like home objects, it is possible to define query objects within the application's components.xml file. Again, the framework namespace must first be specified within the file. To define a query object, we add a <framework:entity-query /> element to the components.xml file. The two main attributes that define a home object are the name and ejbql attributes. These specify the Seam component name and the EJB QL that is to be executed for the query object.
In its basic form, the vacationTypeList query object, as defined in Java code previously, is defined as:
<framework:entity-query name="vacationTypeList" ejbql="select vacationType from VacationType vacationType">
This is the basic form of the query object. You will note that there is no ordering and no restrictions on the EJB QL that is executed. To add ordering, we need to add an order attribute into the <framework:entity-query /> element. This attribute specifies the field that we wish to order. It is written in the following way:
<framework:entity-query name="vacationTypeList"
ejbql="select vacationType from VacationType vacationType"
order="name desc">
The desc at the end of the order attribute specifies that the query will be ordered in descending order (that is, Z before A, and so on). Ascending order is defined by adding asc as the suffix to the order.
Adding restrictions into the EJB QL is a matter of adding a <framework:restrictions /> element inside the <framework:entity-query /> element and specifying <value /> elements for each restriction.
The full vacationTypeList query object that we previously defined in Java code in components.xml, is now defined in the following way:
<framework:entity-query name="vacationTypeList" ejbql="select vacationType from VacationType vacationType" order="name">
<framework:restrictions>
<value>
lower(vacationType.name) like
lower( concat(#{vacationSearch.name},'%') )
</value>
</framework:restrictions>
</framework:entity-query>
Again, you can see that with minimal configuration we have created a query object that matches the Java code that we previously wrote.
In this chapter, we've taken a look at database persistence with Seam. We've looked at how SeamGen helps us create and configure our applications allowing tests, development and production profiles to be configured.
We saw how we can use JPA within a Seam application and how we can perform all of the CRUD operations on entities. We also looked at managing relationships between entities. These were one-to-one, one-to-many, many-to one, and many-to-many relationships.
Finally, we looked at the Seam application framework and saw how this delivers even simpler database access when performing CRUD operations on entities via home and query objects. We saw that the Seam application framework allows us to define home and query objects in both Java and configuration via the components.xml file.