
Magento sends emails to you and your customers under several conditions. Customers receive emails when they create accounts, when they place orders, and when their orders are shipped. The store administrator receives emails when customers fill out the Contact Us form, and sometimes when the store administrator creates an order for a customer (instead of the customer placing the order online).
To make all of these email functions work correctly, you must configure them. In this chapter, we will cover how to configure the most basic and necessary email functions. First, we will cover the basic configuration that is needed for all of these email functions. Next, we will cover the configuration of the Contact Us feature, which enables your customers to contact you through a form on your site. Finally, we will learn how to manage customer accounts.
The email addresses that Magento uses to send and receive emails are set up under System | Configuration | Store Email Addresses. Have a look at the following screenshot:
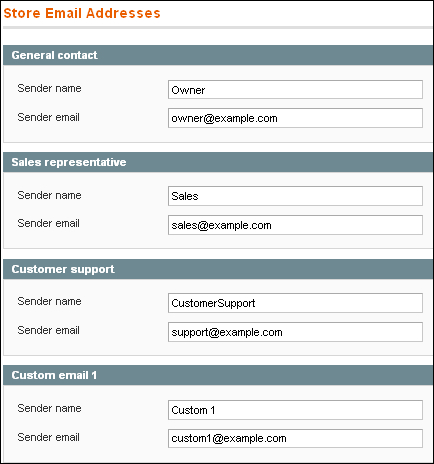
Notice that each of the email addresses has fields labeled Sender name and Sender email. These are outgoing email addresses. Magento sends emails, but does not receive them. For example, suppose that Magento sends out a customer support email. Even though the email came from Magento, to the customer it will appear to come from the Customer support email address and the Sender name will be displayed in the email. This helps your customers in two ways.
First, when your customer gets an email from Magento with a Sender name such as Brew-Me-A-Cup Customer support, (s)he knows immediately that the message is from your store, and is not spam. Second, if you enter a working email address for the Sender email, the customer can just click on Reply in his or her email application to reach you.
Follow these steps to enter email addresses for your store:
Go to System | Configuration | Store Email Addresses.
At a minimum, you should enter the General contact, Sales representative, and Customer support email addresses.
Save the page.
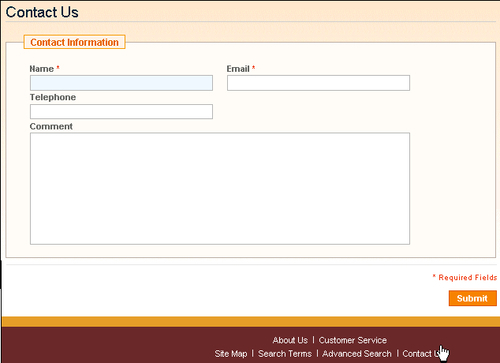
Magento can give your visitors an online form that they can use to contact you. This can be a better option than posting your email address on your store. Posting your email address makes it vulnerable to being spammed. The address is likely to be harvested by spammers. However, it is more difficult to spam an online form. Also, the online form prompts the customer to enter all of the information that you need to help the customer.
By default, Magento puts a Contact Us link at the bottom of each page. This link takes you to a Contact Us form at /index.php/contacts/.
Magento emails the contents of this form to the email address of your choice. You must enter that email address and other configuration options for this form.
You can also disable this form. If you don't use the Contact Us function, consider putting your contact information into one of the callouts so that customers are reassured they can reach you.
Make sure that you have an email address that is set up to receive messages from the contact form. For example, our demo store is at
brew-me-a-cup.com. We might create an email address [email protected] to receive messages from our store's contact form. This was covered in the previous Time for action section.From the Admin interface, select System | Configuration | Contacts.
Expand the Contact Us and Email Options by clicking on them:
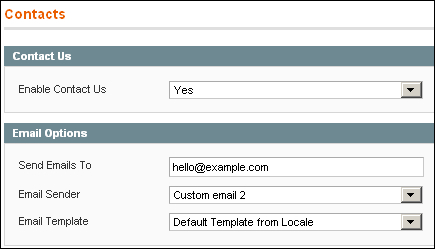
Notice that the Contact Us function is enabled by default. Also notice the fictional email address, which you must change.
To display a Contact Us link at the bottom of each page, for Enable Contact Us select Yes. Selecting No will remove the link.
In the field Send Emails To, enter the email address that you have set up for receiving messages sent by the contact form. Remember, this is the recipient of the form.
In the field Email Sender, select one of the email addresses that you set up under Store Email Addresses.
Modifying email templates is beyond the scope of this quick-start guide. Leave the Email Template field set to Default Template from Locale.
Click on the Save Config button.
In Magento, a customer is any shopper who has created an account in your store. In this quick-start guide, we differentiate customers from shoppers—customers have accounts, and shoppers are just visitors to your store's site.
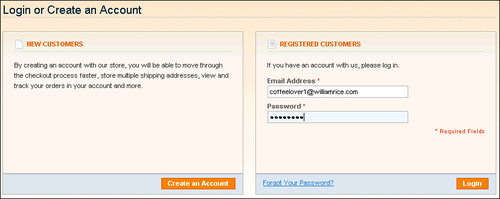
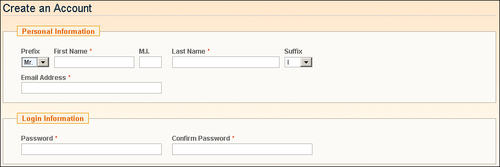
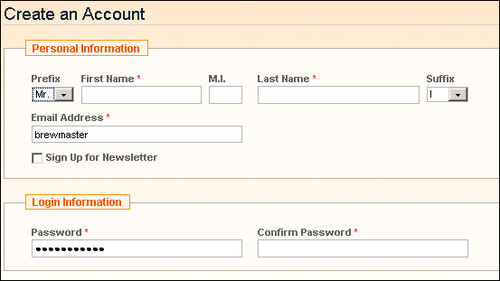
When a customer creates an account, (s)he fills out the new user form. This form doesn't require the customer to fill in personal information, although that can be entered in the customer's profile later:
Using customer accounts on your site has advantages for your customers as well as for you. Before we learn how to manage customers, let's discuss some of the advantages.
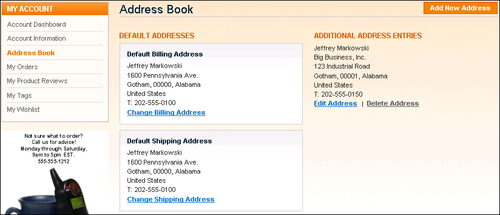
From the customer's point of view, creating an account in your store has several advantages. For example, a customer can store addresses for billing, shipping, and alternative addresses (such as a work address for taking delivery during the day).
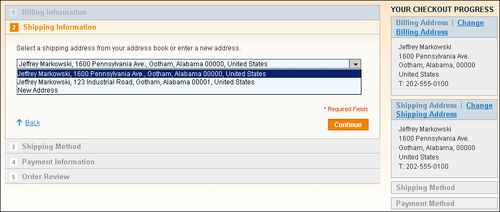
During the checkout process, a customer can select the following addresses that (s)he has stored in the profile, instead of typing them every time (s)he orders:
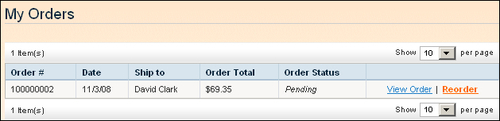
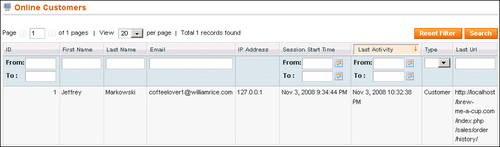
Customers can also track their orders as shown in the following screenshot:
Finally, customers can review and tag Products, and create wish lists.
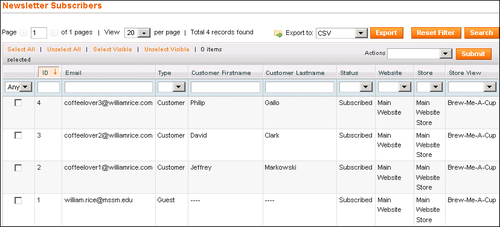
From the store administrator's point of view, there are also advantages when your customers create accounts on your site. When a shopper places several orders with your store, you can't guarantee that the shopper will use the same name each time. For example, a customer could use William Rice or Bill Rice. Magento's reports on a customer's history are sorted by the customer's name. If some of your customers have used several names, these reports will not be completely accurate. When a customer uses a name and address that (s)he has stored online, the customer's name will be the same for every order. This enables you to get accurate reports on customer activity, such as the following one under Reports | Customers:

Customers can subscribe to your newsletter, which gives you a chance to further build your relationship with them.
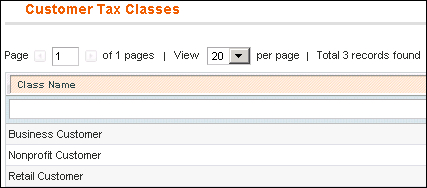
You can organize your customers into Customer Groups. This enables you to assign different price levels and tax rules to each Customer Group, as shown in the following screenshot:
Let's look at how Magento enables you to manage customer accounts and how you can use them.
Before using customer accounts, you should configure your customer settings. You do this under System | Configuration | Customer Configuration:
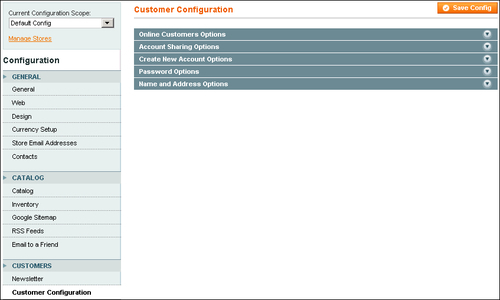
There are five sections under Customer Configuration. Let's examine each of them.
Online Customers Options
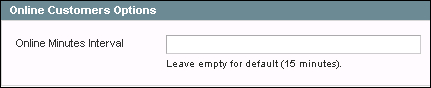
Magento enables you to see which customers are online at any particular time. You can see this by selecting Customers | Online Customers.
This report is refreshed every few minutes. The time interval is set under Online Customers Options.
Account Sharing Options
The settings in this section are relevant only if you have created multiple stores on the same site. This quick-start guide only covers creating a single store. As a basic user, you can safely skip this section.
Create New Account Options
When your customers create accounts, the options that you set for them will affect how they create those accounts and how you use them. These options are as follows:
Default Group: This is the Customer Group to which every new customer is assigned. For a simple site, you can leave this set to the default of General. If you begin using different Customer Groups to classify your customers (business, non-profit, wholesale, and so on), you can assign them to the groups later. For now, you only need to differentiate between shoppers who are not logged in and customers who are logged in. Customers will belong to the group General, and all others will belong to NOT LOGGED IN.
Default Email Domain: When a shopper or customer places an order in your store, (s)he must enter an email address to fill out the order form. After the order is placed, Magento sends a confirmation email to the address that the shopper enters. Magento also enables you to create what is called an Admin Order. This is an order that the site administrator (you) enters into the system for the shopper. For example, if you take an order over the phone instead of the shopper using your web site. In that case, you will fill out an order form in the same way that an online shopper would. That order form would also have a place for the shopper's email address. When creating an Admin Order, the shopper might not have an email address. Remember, you are creating an order for someone who cannot or will not use your online form. On an Admin Order, if you leave the shopper's email address blank, Magento will create an email address for the shopper. That email address will be
customer_id@default_email_domain. For example, if you create an Admin Order for customer ID number2, and you enter a Default Email Domain of brew-me-a-cup.com, Magento will send an order confirmation to the email address2@ brew-me-a-cup.com. As you can see, the Default Email Domain is relevant only if you create Admin Orders, and your customers don't give you an email address to send order confirmations. In that situation, you can use the Default Email Domain to have Magento send you a confirmation at your domain for your records.Default Welcome Email: When a user creates a customer account, Magento sends the new customer a welcome email. This field enables you to select the template for that email. You can create new email templates and edit the default templates that come with Magento. Editing these templates is beyond the scope of this book. As a basic Magento user, you can safely leave this set to the default.
Email Sender: Select the email address that the recipients (new customers) will see in the "From" field of their welcome email.
Require Emails Confirmation: If you select Yes for this field, new customers must confirm their accounts by clicking a link in the welcome email. This is an extra step to creating a customer account. You will inevitably lose some people at this step, as some people will consider it too inconvenient. Consider the trade-off. This is extra security for you, but extra inconvenience for your customer.
Confirmation Link Email and Welcome Email: Use these fields to select the email template for the account confirmation and welcome emails. Modifying email templates is beyond the scope of this quick-start guide. Leave these fields set to Default Template from Locale.
Password Options
These fields determine how a customer can retrieve his or her forgotten password. Leave Forgot Email Template set to Default Template from Locale. For the field Forgot Email Sender, select the email address that customers will see in the "From" field when they receive their password reminder.
Name and Address Options
This section contains settings for the Name and Address sections of the new customer form.
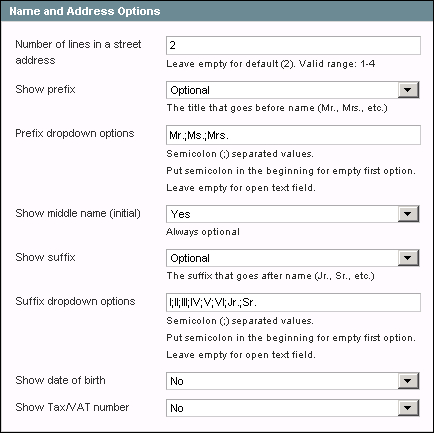
Most of the fields in the configuration screen are self-explanatory. The Prefix and Suffix fields enable the customer to add a title before and after the name, as you can see in the following form:
When you finish configuring the new customer function, click on the Save Config button. Now you're ready for customers to begin registering and using their accounts.
You customer accounts are configured, and are ready to be used by your customers.
Under System | Configuration | Store Email Addresses, the email addresses that you enter are:
a. Used by Magento to receive emails from your customers
b. Used by Magento to send emails to your customers
c. Not used by Magento at all, but are displayed on contact forms for your customers' informati on
In Magento, is the Contact Us form enabled by default? Yes/No.
Reports about customer activity are found under which menu?
a. Sales
b. Customers
c. Reports
In this chapter, we examined the advantages of having customer accounts. These advantages apply to both customers and to the store administrator. Then we examined the options that you can set for your customers' accounts. You should encourage your customers to make accounts on your site, and select the settings that make it as easy and quick as possible for them to create those accounts.