
In the real world, the tax rate that you pay is based on three things: location, product type, and purchaser type. In Magento, we can create Tax Rules that determine the amount of tax that a customer pays, based upon the shipping address, product class, and customer class.
When you buy a product, you sometimes pay sales tax on that product. The sales tax that you pay is based on:
Where you purchased the product from. Tax rules vary in different cities, states, and countries.
The type of product that you purchased. For example, many places don't tax clothing purchases. And, some places tax only some kinds of clothing. This means that you must be able to apply different tax rates to different kinds of products.
The type of purchaser you are. For example, if you buy a laser printer for your home, it is likely that you will pay sales tax. This is because you are a retail customer. If you buy the same printer for your business, in most places you will not pay sales tax. This is because you are a business customer.
The amount of the purchase. For example, some places tax clothing purchases only above a specific amount.
A Tax Rule is a combination of the tax rate, shipping address, product class, customer class, and amount of purchase.
Note
A Tax Rule states that you pay this amount of tax if you are this class of purchaser, and you bought this class of product for this amount, and are shipping it to this place.
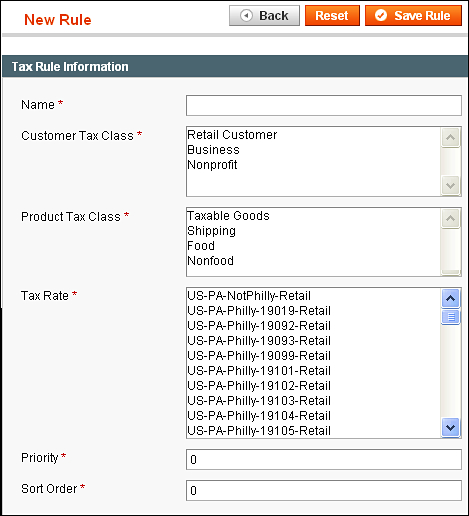
The components of a Tax Rule are shown in the following screenshot. This screen is found under Sales | Tax | Manage Tax Rules | Add New Tax Rule.

You will see the Name of the Tax Rule while working in the backend.
Customer Tax Class is a type of customer that is making a purchase. Before creating a Tax Rule, you will need to have at least one Customer Tax Class. Magento provides you with a Tax Rule called Retail Customer. If you serve different types of customers—retail, business, and nonprofit—you will need to create different Customer Tax Classes.
Product Tax Class is a type of Product that is being purchased. When you create a Product, you will assign a Product Tax Class to that Product. Magento comes with two Product Tax Classes:Taxable Goods and Shipping. The class Shipping is applied to shipping charges because some places charge sales tax on shipping. If your customer's sales tax is different for different types of Products, then you will need to create a Product Tax Class for each type of Product.
Tax Rate is a combination of place, or tax zone, and percentage. A zone can be a country, state, or zip code.
Each zone that you specify can have up to five sales tax percentages. For example, in the default installation of Magento, there is one tax rate for the zone New York. This is 8.3750 percent, and applies to retail customers. The following window can be found at Sales | Tax | Manage Tax Zones & Rates and then clicking on US-NY-*-Rate 1:
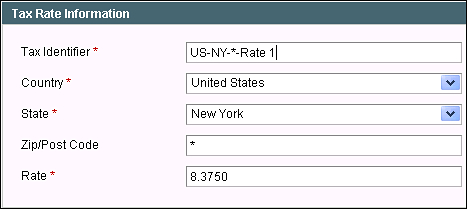
So in the screenshot of our Tax Rule, the Tax Rate US-NY-*-Rate 1 doesn't mean "a sales tax of 1 percent." It means "Tax rate number 1 for New York, which is 8.3750 percent."
In this scenario, New York charges 8.3750 percent sales tax on retail sales. If New York does not charge sales tax for wholesale customers, and you sell to wholesale customers, then you will need to create another Tax Rate for New York:
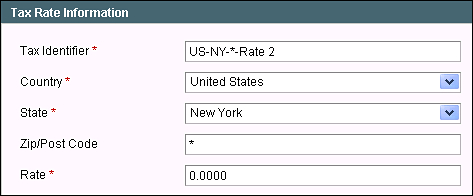
Whenever a zone has different sales taxes for different types of products or customers, you will need to create different Tax Rates for that zone.
If several Tax Rules try to apply several Tax Rates at the same time, how should Magento handle them? Should it add them all together? Or, should it apply one rate, calculate the total, and then apply the second rate to that total? That is, should Magento add them or compound them?
For example, suppose you sell a product in Philadelphia, Pennsylvania. Further suppose that according to the Tax Rule for Pennsylvania, the sales tax for that item is 6 percent, and that the Tax Rule for Philadelphia adds another 1 percent. In this case, you want Magento to add the two sales taxes. So, you would give the two Tax Rates the same Priority.
By contrast, Tax Rates that belong to Tax Rules with different Priorities are compounded. The Tax Rate with the higher Priority (the lower number) is applied, and the next higher Priority is applied to that total, and so on.
Why create a Tax Rule now, before adding our first Product? When you add a Product to your store, you put that Product into a Category, assign an Attribute Set, and select a Tax Class for that Product. By default, Magento comes with two Product Tax Classes and one Tax Rule already created. The Product Tax Classes are Taxable Goods and Shipping. The Tax Rule is Retail Customer-Taxable Goods-Rate 1. If you sell anything other than taxable goods, or sell to anyone other than retail customers, you will need to create a new Tax Rule to cover that situation.
The process for creating a Tax Rule is:
Create the Customer Tax Classes that you need, or confirm that you have them.
Create the Product Tax Classes that you need, or confirm that you have them.
Create the Tax Rates that you need, or confirm that you have them and that they apply to the zones that you need.
Create and name the Tax Rule:
Assign Customer Tax Class, Product Tax Class, and Tax Rates to the Rule.
Use the Priority to determine whether the Rule is added, or compounded, with other Rules.
Determine the Sort Order of the Rule and save it.
Each of these steps is covered in the subsections that follow.
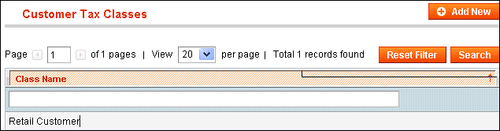
Click on Add New. A Customer Tax Class Information page is displayed.


Enter a name for the Product Tax Class.
In our demo store, we are going to create Product Tax Classes for Food and Nonfood products. We will apply the Food class to the coffee that we sell. We will apply the Nonfood class to the mugs, coffee presses, and other coffee accessories that we sell.
Click on Save Class. Repeat these steps until all of the Product Tax Classes that you need have been created.
A Tax Rule is composed of a Customer Class, Product Class, Tax Rate, and the location of the purchaser. You have just created the second part of that formula: the Product Class.
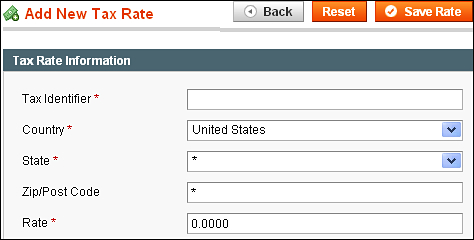
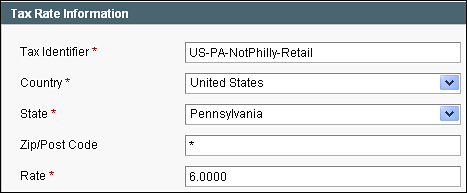
Tax Identifier is the name that you give this Tax Rate. You will see this name when you select this Tax Rate.
The example that we saw is named US-CA-*-Rate 1. Notice how this name tells you the Country, State, and Zip/Post code for the Tax Rate. (The asterisk indicates that it applies to all zip codes in California.) It also tells which rate applies. Notice that the name doesn't give the actual percentage, which is 8.25%. Instead, it says Rate 1. This is because the percentage can change when California changes its tax rate. If you include the actual rate in the name, you would need to rename this Tax Rate when California changes the rate. Another way this rate could have been named is US-CAAll- Retail. Before creating new Tax Rates, you should develop a naming scheme that works for you and your business.
Country, State, and Zip/Post Code determine the zone to which this Tax Rate applies. Magento calculates sales tax based upon the billing address, and not the shipping address. Country and State are drop-down lists. You must select from the options given to you. Zip/Post Code accepts both numbers and letters. You can enter an asterisk in this field and it will be a wild card. That is, the rate will apply to all zip/post codes in the selected country and state.
You can enter a zip/post code without entering a country or state. If you do this, you should be sure that zip/post code is unique in the entire world.
Suppose you have one tax rate for all zip codes in a country/state, such as 6% for United States/Pennsylvania. Also, suppose that you want to have a different tax rate for a few zip codes in that state. In this case, you would create separate tax rates for those few zip codes. The rates for the specific zip codes would override the rates for the wild card. So in a Tax Rate, a wild card means, "All zones unless this is overridden by a specific zone." In our demo store, we are going to create a Tax Rate for retail customers who live in the state of Pennsylvania, but not in the city of Philadelphia as shown:
Click on Save Rate. You are taken back to the Manage Tax Rates page. The Tax Rate that you just added should be listed on the page.
This procedure is useful for adding Tax Rates one at a time. However, if you need to add many Tax Rates at once, you will probably want to use the Import Tax Rates feature. This enables you to import a .csv, or a text-only file. You usually create the file in a spreadsheet such as OpenOffice Calc or Excel. The next section covers importing Tax Rates.
A Tax Rule is composed of a Customer Class, Product Class, Tax Rate, and the location of the purchaser. You have just created the third part of that formula: the Tax Rate. The Tax Rate included the location and the percentage of tax. You created the Tax Rate by manually entering the information into the system, which is suitable if you don't have too many Tax Rates to type.
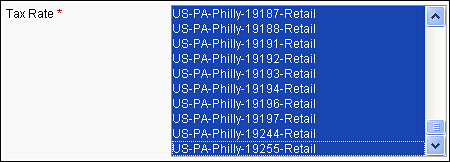
In my demo store, I have created a Tax Rate for the state of Pennsylvania. The Tax Rate for the city of Philadelphia is different. However, Magento doesn't enable me to choose a separate Tax Rate based on the city. So I must create a Tax Rate for each zip code in the city of Philadelphia. At this time there are 84 zip codes, and are shown here:
|
19019 |
19092 |
19093 |
19099 |
19101 |
19102 |
19103 |
19104 |
19105 |
19106 |
19107 |
|
19108 |
19109 |
19110 |
19111 |
19112 |
19113 |
19114 |
19115 |
19116 |
19118 |
19119 |
|
19120 |
19121 |
19122 |
19123 |
19124 |
19125 |
19126 |
19127 |
19128 |
19129 |
19130 |
|
19131 |
19132 |
19133 |
19134 |
19135 |
19136 |
19137 |
19138 |
19139 |
19140 |
19141 |
|
19142 |
19143 |
19144 |
19145 |
19146 |
19147 |
19148 |
19149 |
19150 |
19151 |
19152 |
|
19153 |
19154 |
19155 |
19160 |
19161 |
19162 |
19170 |
19171 |
19172 |
19173 |
19175 |
|
19177 |
19178 |
19179 |
19181 |
19182 |
19183 |
19184 |
19185 |
19187 |
19188 |
19191 |
|
19192 |
19193 |
19194 |
19196 |
19197 |
19244 |
19255 |
I don't want to manually create each of these Tax Rates in Magento. It would be much faster if I create them in a spreadsheet program, and import the file into Magento. The process will be like this:
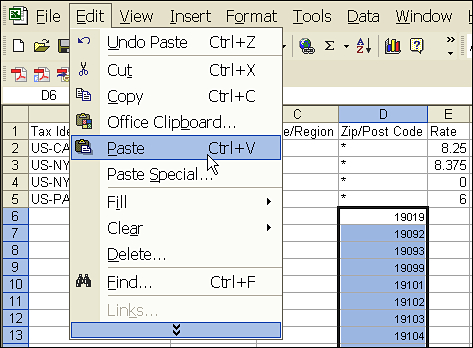
Export the existing Tax Rates from Magento to a
.csv(text-only) file.Add the new Tax Rates and/or edit the existing ones.
Check the file in a text editor and convert to UNIX format.
Import the file and check that Magento has updated the Tax Rates.
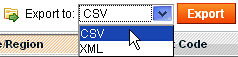
Click on Export.
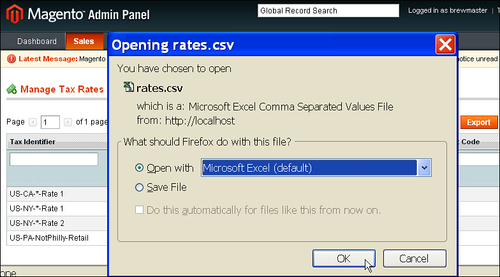
You will be prompted to save or open the exported file. Choose the option that enables you to open the file in your spreadsheet application.
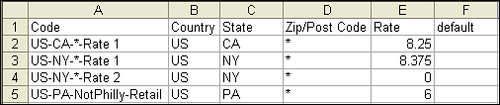
Now that the file is open in your spreadsheet, you can see the column headings in the first row and the Tax Rates in the rows below that:
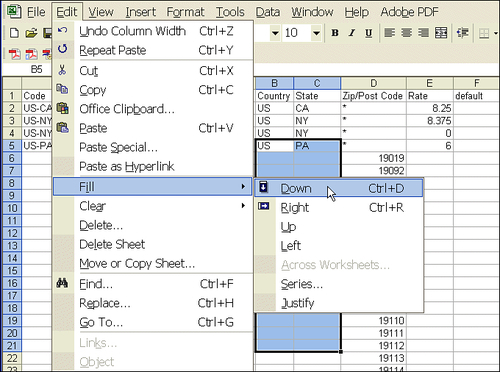
Now fill in the Country and State/Region columns. In most spreadsheets, you can enter the values into the first row, select the first cell and the ones below that, and fill the lower cells with the contents of the top cell:
You probably want the name of the Tax Rate to use the same format as the others, Country-State-ZipCode-TypeOfRate. For example, the first rate for Philadelphia would be called US-PA-Philly-19019-Retail. However, I do not want to type all of the 84 names. So, I will use the
CONCATENATEfunction in my spreadsheet to join the different parts of the name into one text string as shown in the following screenshot:
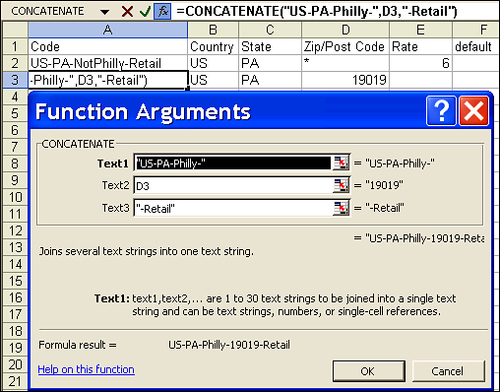
Notice that the first part of the name consists of the text US-PA-Philly-. Then, this function looks at the cell in column D, which is the zip code. Finally, it adds the text -Retail to the end of the text string. The result is the name of the Tax Rate.

Finally, use Fill | Down to copy this formula into the other 83 rows.
Save the spreadsheet as a
.csv, or text-only, file. Make a note of where you save it.
When using a text file, Magento may display an error reading Invalid file format upload attempt, your text file is probably saved in a Windows or Macintosh, text-only format. Even though text-only files look the same on Windows, Mac, and UNIX (Linux), they are not. Before Magento can read the file, you need to convert the file to the UNIX format.
We need to use a text editor designed to work with Windows/Mac/UNIX formats. On Windows, try the free program TedNPad. On Mac, try TextWrangler. Now, let's convert it to a UNIX format:
Open the file using a text-editing program. Make sure your spreadsheet saved the file in the correct format.
Here are the first few lines of my
.csvfile:"Code","Country","State","Zip/Post Code","Rate","default" "US-PA-NotPhilly-Retail","US","PA","*","6.0000","" "US-PA-Philly-19019-Retail","US","PA","19019","7.0000","" "US-PA-Philly-19092-Retail","US","PA","19092","7.0000","" "US-PA-Philly-19093-Retail","US","PA","19093","7.0000",""
Notice that each item of data is enclosed in double quotes. Also, notice that each tax rate has four decimal places.
In your text editor, save the file in the UNIX format. For example, in TedNPad you select File | Save in Unix as shown:
Notice that I've named the file
TaxRates.txt. The filename extension really doesn't matter, as long as the file is text-only, saved in the UNIX format, and follows the format that we saw.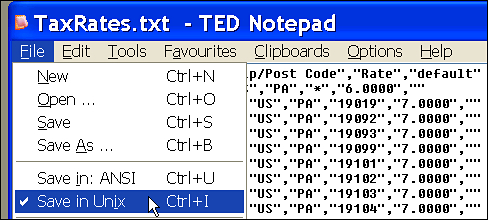
Click on the Browse… button and select the file that you created.
When the file is finished importing, you should see a message stating Tax rate was successfully imported.
Select Sales | Tax | Manage Tax Zones & Rates and check the list of Tax Rates to ensure that yours were imported.
A Tax Rule is composed of a Customer Class, Product Class, Tax Rate, and the location of the purchaser. We have just created the third part of that formula: the Tax Rates. Each Tax Rate included the location and the percentage of tax. We created these Tax Rates by exporting a template from Magento. We opened this template in Excel, entered the tax rates, and saved it as a text file. Finally, we imported the Tax Rates back into Magento.
Finally, after creating the Customer Tax Classes, Product Tax Classes, and Tax Rates/Zones that we need, we are ready to create Tax Rules. For our demo store, we will need only one Tax Rule.
Retail customers who purchase non-food items within Pennsylvania (including Philadelphia) pay sales tax.
All other purchases are tax-free, so we don't need any Tax Rules to cover them.
Go to Sales | Tax | Manage Tax Rules.
The Manage Tax Rules page is displayed.
Click on Add New Tax Rule. The New Rule page is displayed.
Notice that all of the Customer Tax Classes, Product Tax Classes, and Tax Rates/Zones that you created are displayed here. The Tax Rule will be a combination of these three elements. You can choose one or more of each element.
Enter a Name for the Tax Rule.
In our demo store, we want the name to indicate the purpose of the Rule. So we will enter a name that tells us the type of customer, product, and rate/zone the Rule contains.

Select one or more Customer Tax Classes for the Rule.
In our demo store, we want this rule to apply only to Retail Customers.

Select one or more Product Tax Classes for the Rule.
In our demo store, we want this rule to apply only to Nonfood items.

Select one or more Tax Rates for the Rule.
In our demo store, we want this rule to apply to all zones in PA.
Click on Save Rule.
You are returned to the Manage Tax Rules page. You should see the Rule that you just added listed there, as seen in the following screenshot:
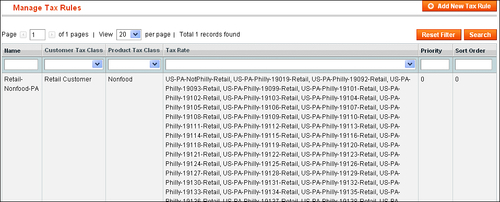
A Tax Rule is composed of a Customer Class, Product Class, Tax Rate, and the location of the purchaser. You have just combined these elements into a Tax Rule. This Rule will apply to the unique combination of customer/product/location.
Choose the three elements that combine to form a Tax Rule:
a. Customer class
b. Product class
c. Tax rate
d. Location
When you use a spreadsheet to create Tax Rules, what must you do in Magento before adding those Rules to the spreadsheet?
a. Export a template.
b. Create the locations.
c. Type in the rates.
In this chapter, we saw how a Tax Rule combines the zone/rate, product type, and purchaser type into a Rule that determines the tax on a product. We created these components first, and then combined them into a Rule.
Now that we have created Categories, Attributes, and Tax Rules, we are ready to add Products to our store.