
Locating information is crucial to carrying out enterprise tasks successfully. Often, at times the delay, or lack of such information, causes communication problems between employees in the same organization. This is because they do not have easy access to the documents and the information that they need. Usually, there are paper and electronic documents and there is no single point that informs what is where.
Over time the number of documents keeps increasing. Not categorizing or classifying these documents does not help. Storage and indexing of these is important for the timely use and location of the documents.
Poor document management can lead to a significant loss of time.
Alfresco Share has a document library function to cater to the wide ranging document library capabilities. The Document Library page component enables you to store and collaboratively manage any content related to a site, such as documents, media files, and graphics.
By the end of this chapter you will have a clear idea of the following:
Creating and managing documents
Versioning
Tagging documents
Ways to access the document library
When the user clicks on and opens the site page, the document library is a tab on the top navigation:
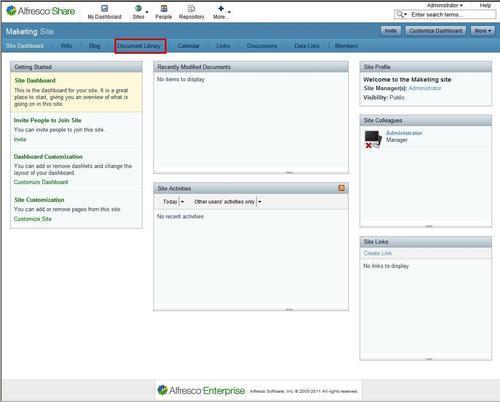
Clicking on the Document Library tab opens up the document library page. This page allows the user to create content, upload content from the system, view recent, and user's own documents. The tags that have been used for the various documents in the library are listed too. Users can also see the document library structure, as per the access and permission they have. This document library structure is a tree like structure that lists the folders and the subfolders present:
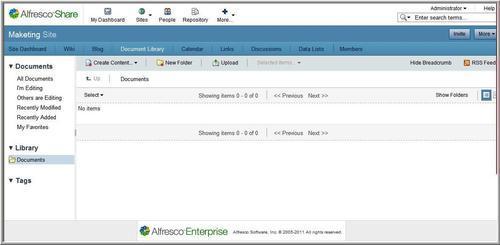
Users can also create folders and sub folders if they have the permission to do so. To create a folder, the user needs to click on the New Folder tab on top:
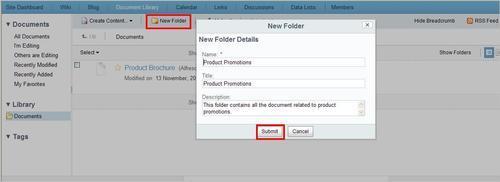
A new folder pop up page opens. Fill in the details for the new folder and click on Submit to create the folder.
The new folder is now listed in the document library's folder structure. To create/upload a document in a folder, select the folder and then either click on Create content or Upload.
To create a sub folder within a folder, click on the folder name and then select the Create folder button. The steps to create the sub folder are the same as when creating a folder. The new folder created will be placed within the folder that was selected.
Content and information can be stored in the document library. This information can be stored in the library by creating the content in the Share interface, or by uploading a pre-existing content from the user's own system.
We shall first look at creating content in Share.
To create content in the Share Document Library, click on the Create content tab at the top:
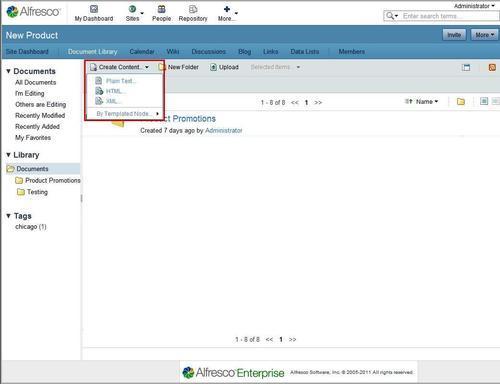
Users can select the kind of content they want to create by selecting from the drop down. They can choose from plain text, HTML, and XML. For this example, we shall create plain text content. You can also create Google Docs spreadsheets, presentations, and documents.
Select plain text from the drop down. This will open a page that allows users to create content.
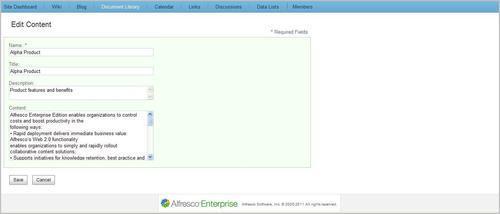
The following page opens up:
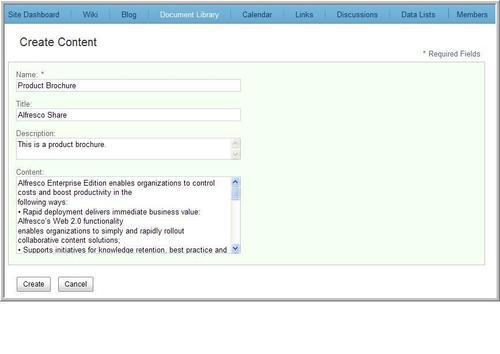
Users are required to fill in the fields to create content. The only mandatory field on this page is Name. Users can create a blank content and come back later and fill in the rest of the fields. The Name does not support the following special characters:
* " < > / . ? :and|. When the name contains a disallowed character the Create button is disabled.Click on Create to create the content. If you do not want to create the content, then click on Cancel:

The page that comes up shows the various document details and a document preview.
The metadata associated with the document created are listed. Any changes to these can be done via the Edit Metadata action in the Document Action section.
The document tags, permissions, workflows, versions, and so on are all listed too. These can also be changed from the Documents Action section.
This content is currently in the root folder of the document library. You can also move, copy, and delete the document. Users can also manage permissions at the document level and assign the document to a workflow.
For all of the preceding actions, click on the checkbox beside the document name and select the document. This will make the Selected Items tab active. Clicking on the Selected Items tab will give a drop down list that lists the various actions that can be performed on a document.
To move the selected document to another folder, click on Move to. This will open a page that lists the folders and you can select the folder you want to move the document to:
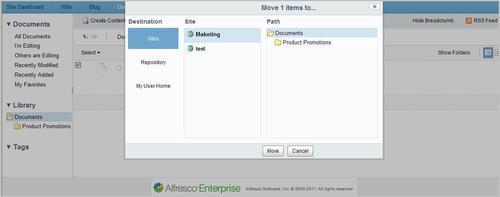
After selecting the folder where you want to move the document, click on the Move button to move the document or on Cancel to cancel the action:
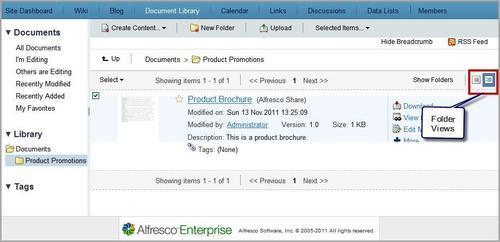
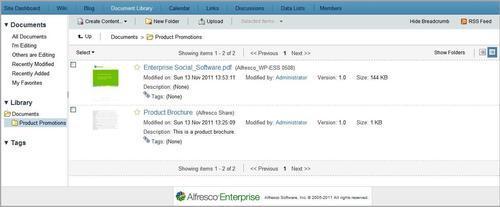
The document is now a part of the Product Promotions folder. Furthermore, the document inside the folders can have two kinds of views, simple and detailed view. These views can be seen by selecting from the folder views, as highlighted in the previous image.
The simple view gives an icon besides the document to indicate the type of document, MS Word, PDF, or any other. It also gives the details of the creator of the document and the date on which it was created. The detailed view gives a thumbnail image of the document. Besides the information in the simple view, the detailed view also informs of the version, size, document tags, and a description of the document.
The documents in a folder are listed in a paginated manner. Furthermore, on mouse over on a document, or on selecting a document, the various document actions available are listed.
Content that already exists in the user's system can also be uploaded into the document library. Alfresco provides a built-in flash uploader. This requires installation of Adobe Flash player on your machine. If the flash player is not installed, then multi-file uploading is not possible and an HTML file uploader takes its place and lets you upload documents, one at a time.
Click on the Upload tab in the document library, as follows:
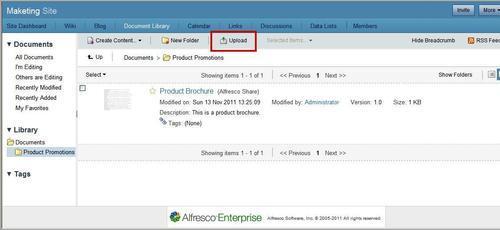
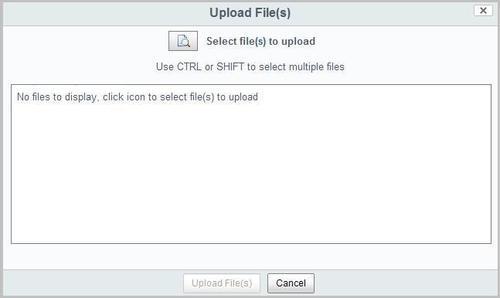
A new pop up window opens up which allows users to upload documents. Users can upload a single document or multiple documents:
-
Click on the icon
 to upload existing file(s) from the system. Users can browse the system and locate the files to be uploaded, as shown in the following screenshot:
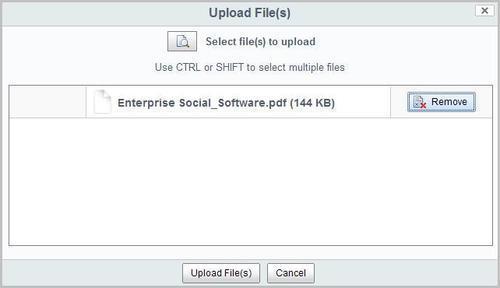
Click on the Upload File(s) button to upload existing file(s) from the system.
The document is now a part of the document library and is in the folder that was specified, as follows:
Sorting Content in the Document Library
Alfresco provides a feature of sorting the content of the document library based on different sorting parameters:
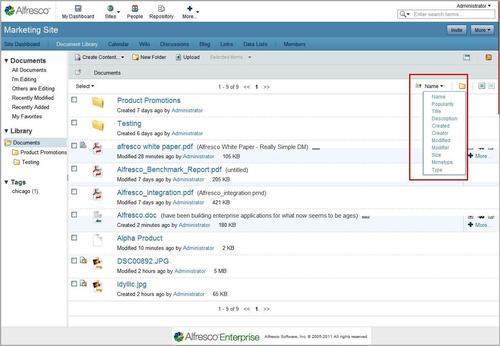
Some of the parameters for the sorting are name, popularity, description of the document, creator of the document, date of creation, size, and so on.
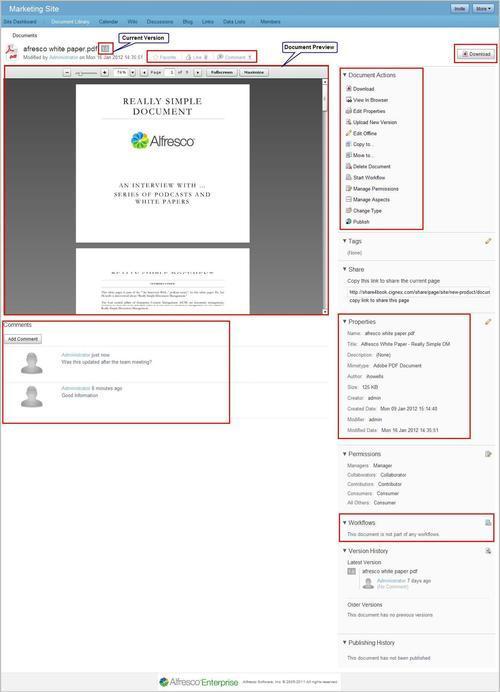
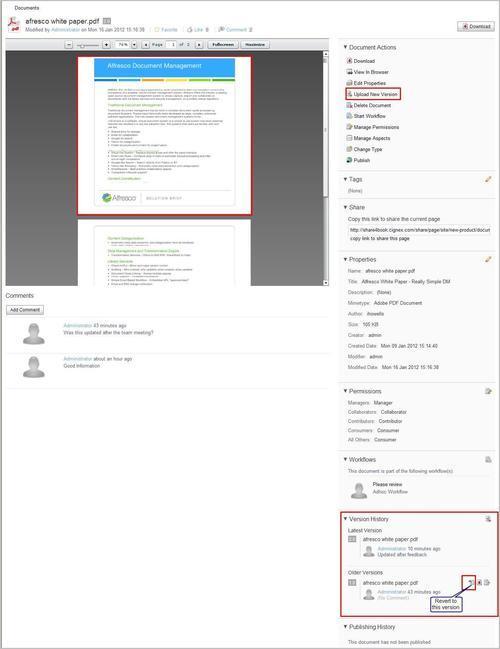
The document details page gives all the relevant information about the document. This page gives a bird's eye view of the document, associated metadata and tags, permissions, discussions around the document via comments, various document actions that can be carried out, associated workflows, and version history.
This page has a flash previewer for previewing the document. The preview also allows for a custom zoomed view of the document.
Various document access URLs are also mentioned.
The metadata associated with the document are listed in the metadata section.
Users access the document based on the roles and permissions defined for the document in the Permissions section on the page:
Users can allow user permissions on a document based on their roles. By default, Alfresco Share has four roles in addition to an Everyone role. The various roles have been discussed in a previous chapter.
To manage permissions for these roles the user should click on Manage Permissions in Document Actions.
This will open the following pop up window:

Users can click on the down arrow besides each role privilege and change the permissions. Click on Save to save the change:
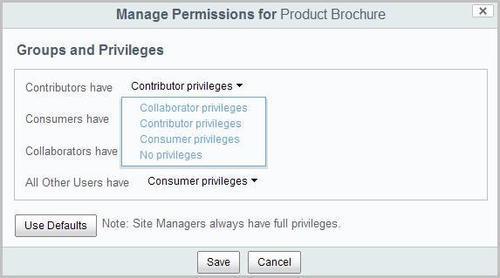
The new permission set will now reflect in the Permissions section.
Workflows can be assigned at a document level in Alfresco Share. To manage workflows, click on Start Workflow in the Document Actions section. This will open a page where the user will be asked to select a workflow:
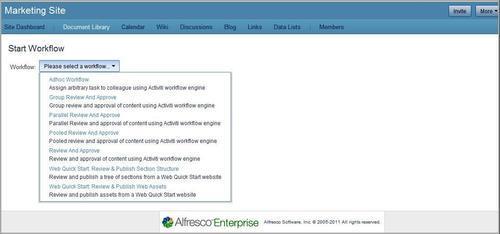
Here, we see a list of workflows that are a part of the Share system. There are Adhoc, parallel, and serial workflows. For this example, we select the Adhoc workflow. This is essentially a single step approve or reject workflow:
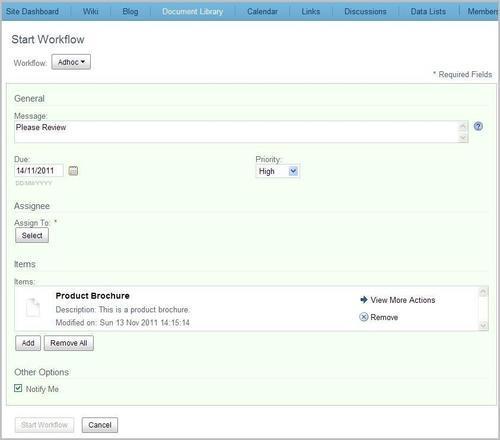
The message to be sent along with the workflow task needs to be put into the message section. The due date, if any, can be selected by clicking on the ![]() icon and selecting a date. The task priority can be selected from an option of high, medium, or low from the drop down priority list.
icon and selecting a date. The task priority can be selected from an option of high, medium, or low from the drop down priority list.
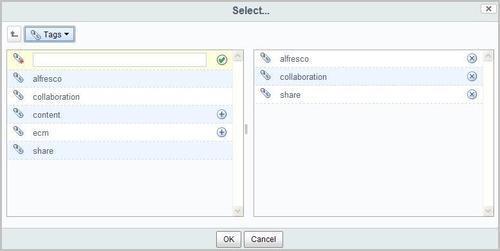
The next step is to select an assignee for the task. Click on the Select button in the Assign To section. This opens up a new window, as follows:
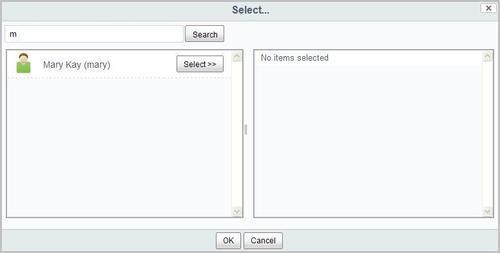
Search for and select the user. Click on OK to confirm the selection:
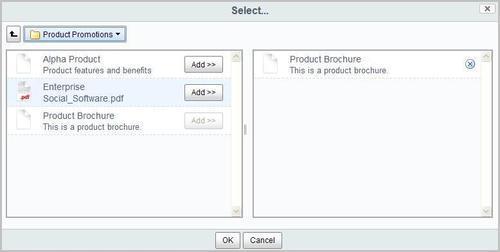
Other documents and resources may be added to this by clicking on Add. Remove all, removes any document, and so on that has been included here.
Click on Notify me to get an e-mail, or any other such notification. Please note that to get an e-mail notification, the e-mail server must be configured and integrated with the Share system:
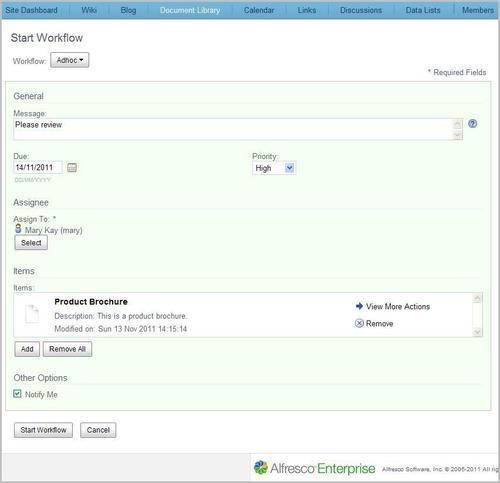
Click on Start Workflow to start a workflow on the document. The workflow that the document has been assigned to will be added to the document details page now:
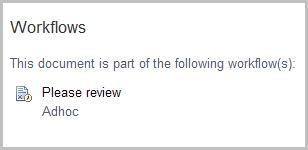
Clicking on the workflow message will open the workflow details page, as follows:
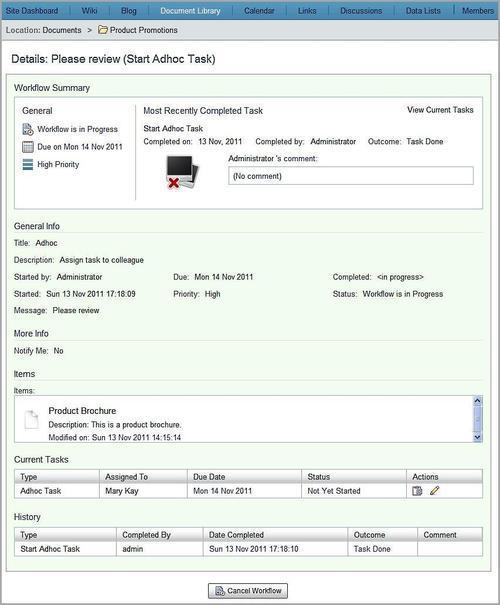
The workflow details page gives a summary of the workflow task. Any comments by the person that started the workflow and general information of the task are listed too. It also tells the user if notifications will be provided. The resources for the workflow task, history, and current tasks are also listed.
The user, if he/she is the creator of the workflow, has the option of cancelling the workflow by clicking on the Cancel Workflow button.
Workflows are detailed in another chapter in this book and, hence, not covered here.
A number of actions are available for the user to do for a document. These are also listed in the Document Details page:
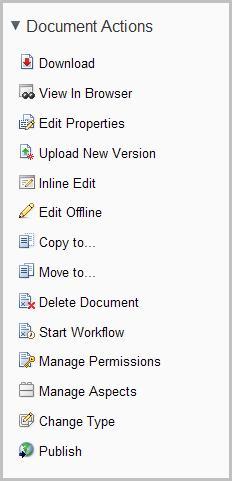
The following table lists the document actions and the consequences. For each of the actions a new window opens which allows the user to carry out the desired task:
|
Document Actions |
Consequence |
|---|---|
|
Download |
Click on Download to download the document onto your system. |
|
View in Browser |
Click on View in Browser to view the document in the browser. |
|
Edit Properties |
Document properties can be edited by clicking on this |
|
Upload New Version |
A new document version can be uploaded through Edit Properties. |
|
Edit Offline |
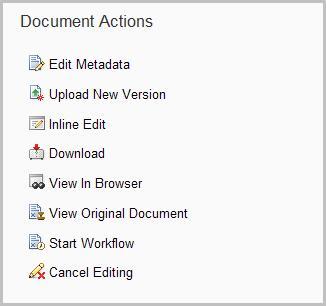
When you click on Edit Offline the document is downloaded on your system as a working copy and the document on Share is locked to prevent any editing. The document actions that remain are Edit Metadata, Upload New Version, Inline Edit, Download, View in browser, View Original Document, Start Workflow, and Cancel Editing. View Original Document lets users preview the original document. In this case users see the document action View Working Copy. |
|
Copy to… |
Copies the document to a specified location. |
|
Move to… |
Moves the document to a specified location. |
|
Delete Document |
Deletes the document upon confirmation. |
|
Start Workflow |
Starts a document workflow as per the user's selection. |
|
Manage Permissions |
Manages permissions based on the user's roles. |
|
Manage Aspects |
Aspects for the document can be managed from here. |
|
Change Type |
The content type can be changed by clicking on this. It will open up a window which will give a drop down list for the user to select the type from. |
|
Publish |
You can publish the document library content to various social media sites. Alfresco also has the provision for you to publicize this through posing messages on Facebook, Twitter, and LinkedIn. |
Any document that is created or uploaded in the document library is versioned and, by default, is stored as version 1.0.
Clicking on a document name will open the Document Details page. On this page, the version history of the document is also maintained.
Managing versions can be done in the following two ways:
Upload a new version of the document. This can be done from the Upload New Version action listed in Document Actions.
Edit document and save the changed document as a new version.
In the document details page, click on the Upload New Version action in the document actions listed.
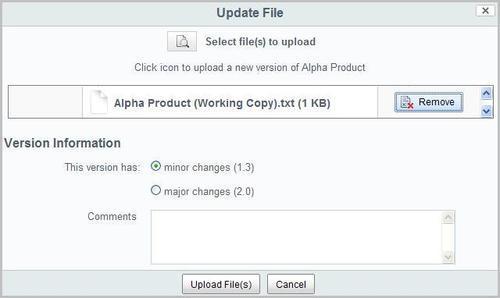
This will open an Update File pop up window, as follows:
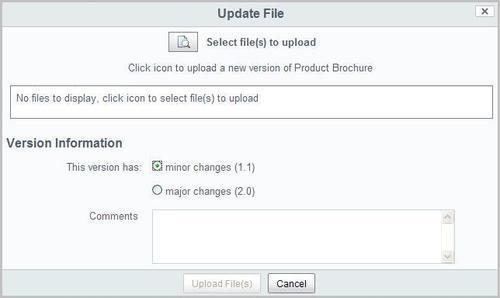
Once the file has been selected, choose whether the new version has minor or major changes and the versioning will be carried out in the Share system accordingly. Click on Upload File(s).
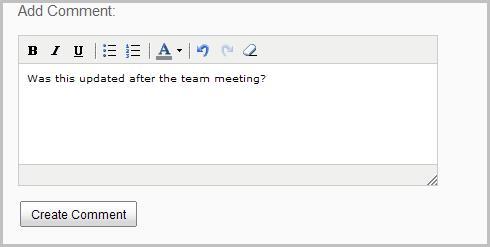
Users can also add their comments for added information on the updated file.
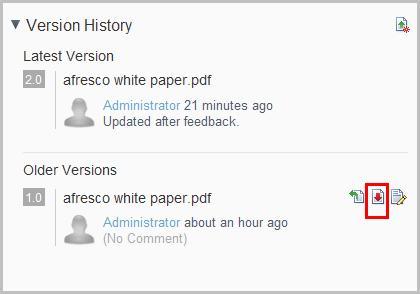
The Document Details page of the updated document opens up. The version number of the document is now updated in the version history:
The users can also update the version when they have edited and updated a document. They can make the changes to the document and save it. They need to specify if the change is a minor one or a major change.
Alfresco provides intelligent editing features. Inline editing is available only for content that is created in Alfresco. For content such as MS Word, editing can be done online or offline. For content such as PDFs only offline editing is available.
Users can choose to edit a document inline by opening a document in a WYSIWYG editor. The document can also be edited offline by downloading it on to the user's system and then editing it.
Click on Inline Edit in Document Actions. This opens the document in the Inline Edit page:
Make the required changes and save the document by clicking on Save. Now in the Document Details page, the version history lists the new version, as follows:
SharePoint Protocol needs to be configured to enable this feature. However, it is important to note that there is a known issue with Office 2003 and 2007. The documents open as read-only in Internet Explorer for all versions before Vista SP1.
Furthermore, to use online edit in Windows 7, you must set BasicAuthLevel in the registry. Basic authentication is disabled in Office 2010. To enable it, you must create, or edit, the following registry key:
HKCUSoftwareMicrosoftOffice14.0CommonInternet: BasicAuthLevel=2.
Kerberos authentication can also be used. Set the vti.server.external.host and vti.server.external.port properties in the alfresco-global.properties file. This will set the values to the externally resolvable host and port name that SharePoint clients will communicate with. These properties default to the host machine's local name and port 7070, respectively. Share will use these to generate the Edit Online link. The document is opened using the SharePoint module.
Enabling the Online Edit option allows you to bypass the tasks of downloading the item to your computer and then updating the repository version with the changes. Navigate to the space containing the content item you want to make changes to, they are as follows:
-
Click the icon
 to edit the item online. Once this is clicked, the item is locked to prevent others from making changes to the item at the same time. It is locked by you.
An online editor opens up. This now displays the content you have selected to edit. It is a working copy of the content.
Edit the document. Click on Save to save the changes you have made.
-
At any time, you can click the
 icon. This cancels the editing task and unlocks the item without saving any changes that may have been made.
The working copy of the item displays the updated timestamp. You can leave the item locked if you plan to work on it again, or you can unlock it so that it is available to other users.
-
Click the
 icon once you are done editing. This will unlock the document and add the updates to the repository.
Click on Edit Offline in Document Actions to edit the document offline. This creates a working copy of the document and locks the document for editing by any other user until the editing is done:
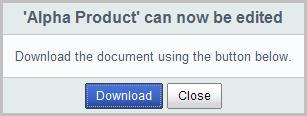
Download the document to a desired location and then edit the document. The document actions that can be performed include uploading the new version, view original version, view in browser, assign workflow, and so on. The user can also cancel the editing:
Once the document has been edited, users can click on Upload New Version to upload the updated document. Click on Upload File(s) to upload the revised document. Users can add their comments to add more information, as shown in the following screenshot:
This is, again, reflected in the version history in the Document Details page.
The documents in the library are listed in the library. Each document has a thumbnail, or an icon, besides its name and description depending on the folder view that is selected. In the simple view, the icons represent the type of document, PDF, Word, and so on.
In the detailed view, every document has a thumbnail beside it, as follows:

If a document has an active workflow associated, an icon is displayed besides the thumbnail to represent this. Similarly, if external information about an image is available, it is represented by an icon beside the image icon.
Clicking on the View in Browser action in the Documents action, or on the actions that appear besides the document on move over, opens the document in the browser.
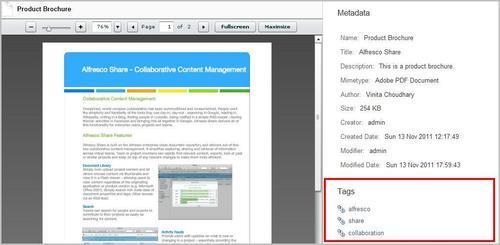
To tag documents, click on Edit Metadata in the Document Actions section. This will open a window where metadata can be edited and tags can be added:
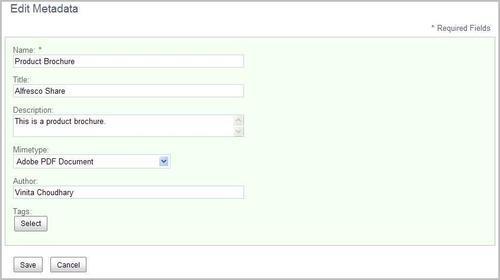
To add tags, click on the Select button, as shown in the following screenshot:
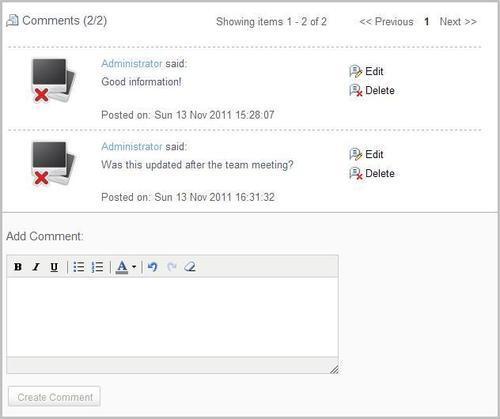
This will attach the tags selected with the document. Now, the tags will appear listed in the Document Details page:
Searching for documents is efficiently carried out by the Lucene search engine, which powers the search in Alfresco. The search results display the term that was searched for not only in the file/document name, but also if the term is within the document:
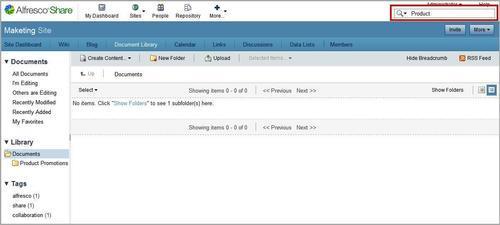
The search is carried out through the system and the search results are displayed in a paginated manner. The search results can be sorted based on the current site, all sites or the entire repository by selecting from the tabs on top:
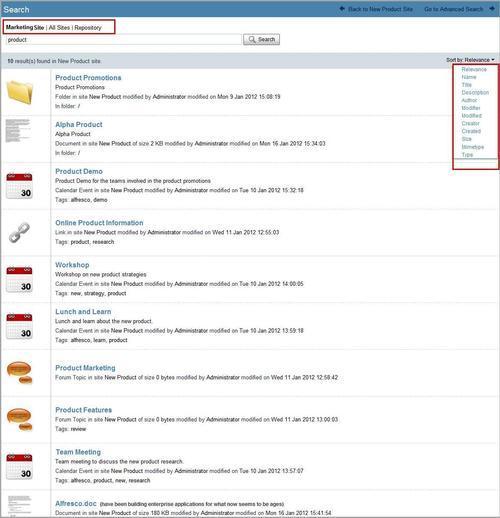
The search results can be sorted based on various parameters such as relevance, name, author, created, size, and so on.
Click on the Repository button on the top navigation bar to access the repository, as shown in the following screenshot:
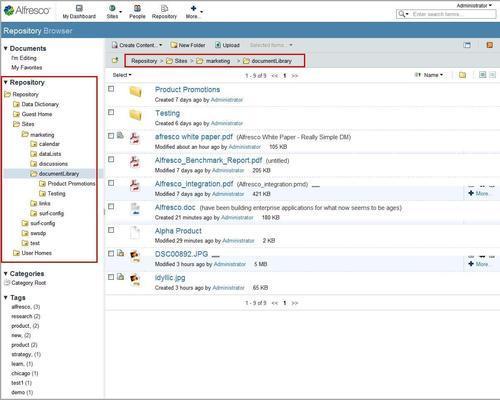
The document library of the site can be accessed by going in to the Sites folder and selecting the relevant site. Clicking on the document Library thereafter will allow users access to the folders and documents of the site's document library.
As seen in this chapter, the document library in Share is an easy to use feature which has many benefits for the teams collaborating on various tasks. The features of tagging enable a better search. Workflows, permission, and aspects can be easily managed through the document actions available.
The next chapter is on implementing workflows in Alfresco Share. Here we shall learn how the documents, and other content, are put through the workflow and the various options available to use.