
Before we can reference this with JDeveloper, we need to define a connection to the file-based MDS.
By default, a file-based repository is installed with JDeveloper and sits under the directory structure:
<JDeveloper Home>/jdeveloper/integration/seed
This already contains the subdirectory soa, which is reserved for, and contains, artifacts used by the SOA infrastructure.
For artifacts that we wish to share across our applications in JDeveloper, we should create the subdirectory apps (under the seed directory); this is critical, as when we deploy the artifacts to the SOA infrastructure, they will be placed in the apps namespace.
We need to ensure that the content of the apps directory always contains the latest version of our XML library; as these are stored under Subversion, we simply need to check out the right portion of the Subversion project structure.
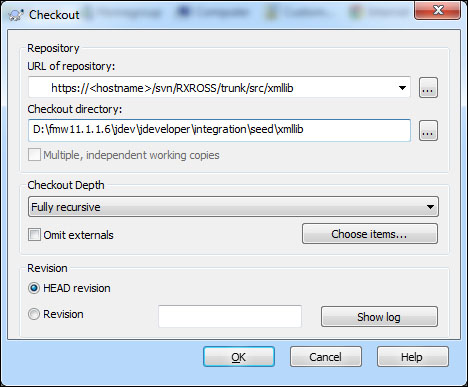
- First, we need to create and populate our file-based repository. Navigate to the
seeddirectory, and right-click and select SVN Checkout..., this will launch the Subversion Checkout window.- For URL of repository, ensure that you specify the path to the
appssubdirectory. - For Checkout directory, specify the full pathname of the
seeddirectory and append/appsat the end. Leave the other default values, as shown in the following screenshot, and then click on OK:
Subversion will check out a working copy of the
appssubfolder within Subversion into theseeddirectory. - For URL of repository, ensure that you specify the path to the
- Before we can reference our XML library with JDeveloper, we need to define a connection to the file-based MDS.
Within JDeveloper, from the File menu select New to launch the Gallery, and under Categories select General | Connections | SOA-MDS Connection from the Items list.
This will launch the MDS Connection Wizard.
- Enter
File Based MDSfor Connection Name and select a Connection Type of File Based MDS.We then need to specify the MDS root folder on our local filesystem; this will be the directory that contains the
appsdirectory, namely:<JDeveloper Home>jdeveloperintegrationseed
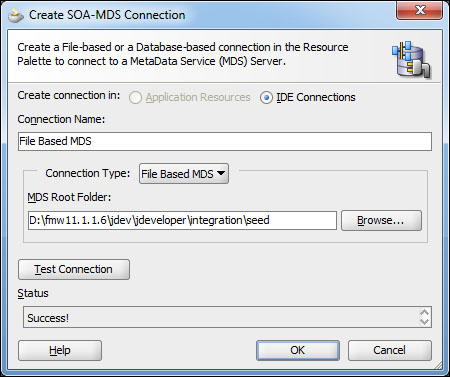
Click on Test Connection; the Status box should be updated to Success!. Click on OK. This will create a file-based MDS connection in JDeveloper.
- Browse the File Based MDS connection in JDeveloper.
Within JDeveloper, open the Resource Palette and expand SOA-MDS. This should contain the File Based MDS connection that we just created.
- Expand all the nodes down to the xsd directory, as shown in the following screenshot:
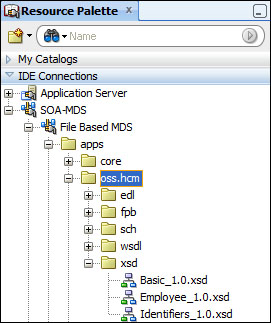
If you double-click on one of the schema files, it will open in JDeveloper (in read-only mode).
Once the apps directory has been checked out, it will contain a snapshot of the MDS artifacts at the point in time that you created the checkpoint. Over time, the artifacts in MDS will be modified or new ones will be created. It is important that you ensure that your local version of MDS is updated with the current version.
To do this, navigate to the seed directory, right-click on apps, and select SVN Update.