
This recipe will guide you through a sample implementation of a proxy service which polls a directory for XML files compressed using the gzip utility, and uses the Java wrapper created in the previous recipe, to convert it to standard XML which can then be manipulated as normal within the OSB.
This recipe assumes you have completed the first recipe and created the GzipAdapter.jar. Alternatively, you can use the Jar file contained with the samples for this recipe.
Prior to beginning this recipe, you will also want to prepare some test data, consisting of XML files compressed using GZIP.
- Open Eclipse and create an OSB project. Name it
GzipFileAdapterif you want to follow the example used in this recipe. - First we need to import the
GzipAdapterjar plus any of its dependencies into the project. Right-click on the GzipFileAdapter OSB Project in the Project Explorer, and select New Folder from the context menu.Enter the name
jarsfor the folder and click on Finish. - Right-click on the jars folder and select Import | Import…. Select General | File System and click on Next.
Browse to the
modulesdirectory under<FMW Home>modulesand click on OK. Within the import window selectcom.bea.core.xml.xmlbeans_2.2.0.0.jar(as used earlier in the first recipe), and then click on Finish.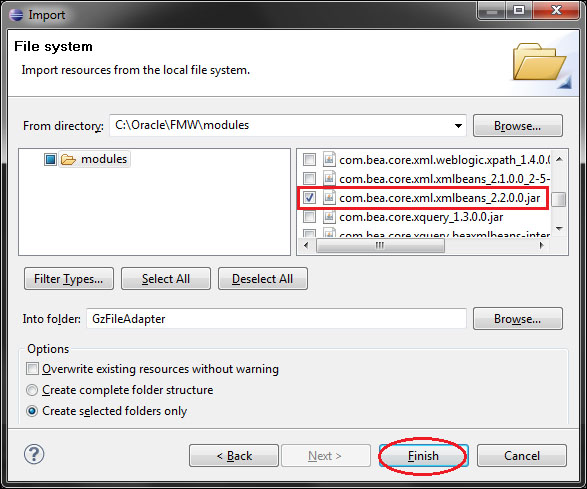
- Right click on the jars folder and select Import | Import…. Select General | File System and click on Next.
Browse to the directory containing the
GzipAdapter.jar, created in the first recipe, and click on OK. Within the import window, selectGzipAdapter.jarand click on Finish. - We now need to inform OSB of the dependencies between the jars. Double-click on
GzipAdapter.jarin Project Explorer. In the Modify Jar Dependencies dialog box, selectcom.bea.core.xml.xmlbeans_2.2.0.0.jarfile from the Available jars pane on the left, and click on the Add > button to move it to the Jar references pane. Click on OK. - The next step is to create the file adapter, as a binary file-based message proxy service, from the Oracle Service Bus IDE.
Right-click on the
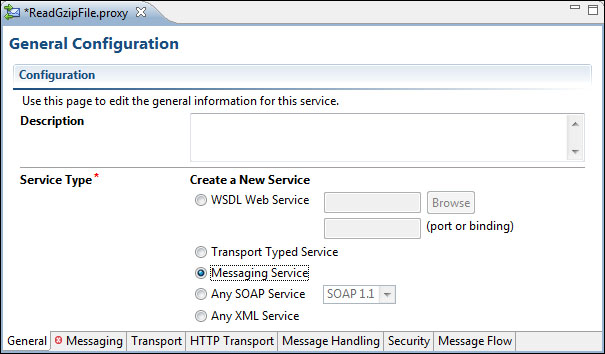
GzipFileAdapterOSB project in Project Explorer and select New | Proxy Service. Name itReadGzipFileand click on Finish. - In the General tab of the Proxy Service editor, select Messaging Service as the Service Type.
- In the Messaging tab, select Binary as the Request Message Type. Leave Response Message Type as None.

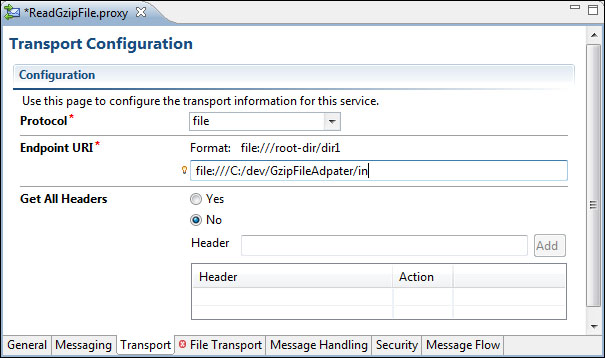
- In the Transport tab, select file as the Protocol and provide a directory name where you would like to poll for files from, as the Endpoint URI.
- In the File Transport tab, customize the adapter to suit. In this example, we'll select a file mask of
*.gz, as well as configuring a Post Read Action to be archive and specifying all the necessary directory file destinations.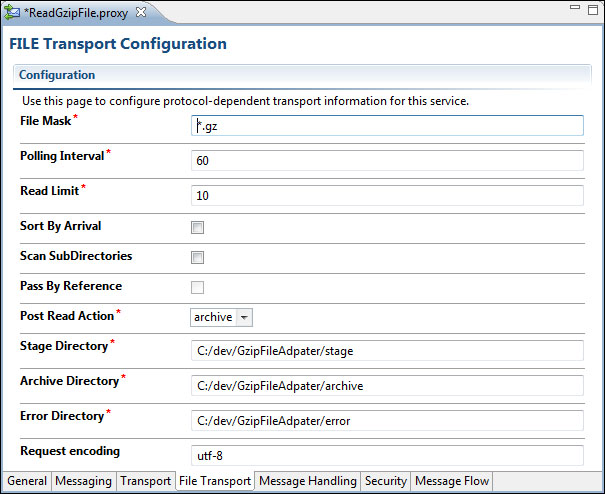
- The next step is to incorporate a call to the
readGzipObjectJava method into the proxy service Message Flow.Start by dragging a new Pipeline Pair from the Design Palette into the Message Flow editor.
- Add a new Stage to the Request Pipeline and name it
Extract GZIP. - Drag an Assign action into the new Stage. In the Properties tab for the Assign action, set the Expression as
$body/ctx:binary-contentand the Variable asgzBinaryContent.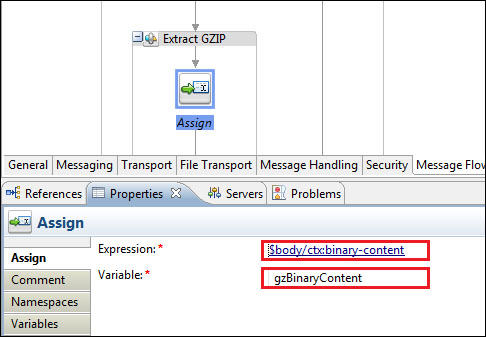
- Drag a new Java Callout action from the Design Palette to just under the Assign action. In the Properties tab for the new Java Callout, select Browse next to the Method field. Select the
GzipAdapter.jarand click on OK.In the Select a Java Method window, select the
readGzipObjectmethod and click on OK. - With the Properties tab, click on < Expression> for the only parameter and specify
$gzBinaryContent. Set the Result Value variable topayload.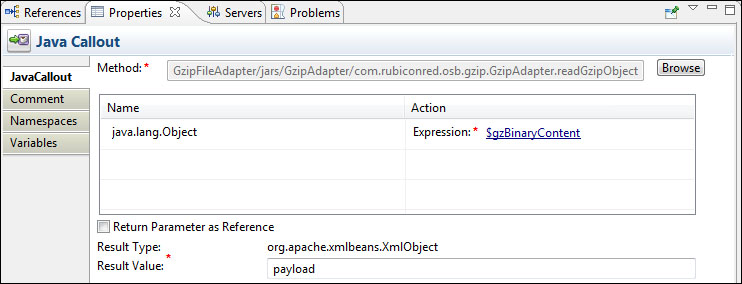
- To test the new file adapter, you can place a GZIP'd file in the input directory and confirm the contents are read successfully by following these additional steps:
i. Create a new Reporting stage below the
GZIP Extractstage and drag a new Log action in.ii. Set the log Expression as
$payloadand the Annotation asGzipFileAdapter message payload.iii. Change the Severity to
Errorso that it is guaranteed to appear on your weblogic's console output.iv. Deploy the service to your server, copy a GZIP'd text file to the input directory you specified earlier, and observe that the contents are written to the console.
OSB's binary message format capability allows us to accept files of any type, and extract the binary content using the built-in constructs which are generated by the engine.
From there, the Java Callout allows us to manipulate and parse the content using standard libraries. Note, that the return type from the Java Callout is org.apache.xmlbeans.XmlObject, the standard XMLBeans interface which OSB uses to manipulate XML. By using this return type (as opposed to a String) we are able to immediately start manipulating the returned content as XML using all the standard OSB message processing actions.
In some cases, multiple files may be included in the same compressed archive. There are a couple of viable strategies for manipulating these files using OSB:
- Use a 2-stage process with two file adapters, one to decompress and write the files out, and the other to read the uncompressed files in separately
- Use a single file adapter which reads all the contained files in a single pass, then concatenates the contents inside a batch XML element for a downstream process to separate