
In this recipe, we will address how to configure Oracle Internet Directory (OID) as an alternative authentication provider and create users and groups in the authentication provider using Oracle Directory Services Manager.
You will need to have an instance of OID installed and configured; you will also need to have installed and configured an instance of Oracle Directory Services Manager (ODSM), OVD, and Oracle SOA Suite running on Oracle WebLogic.
We need to use the WebLogic Admin console to add our new authentication provider. To do this:
- Log in to Oracle WebLogic Server Admin Console at
http://host:port/consoleas a user with administrator privileges, such asweblogic.Once logged in, within the Domain Structure select Security Realms; this will list the currently defined security realms.
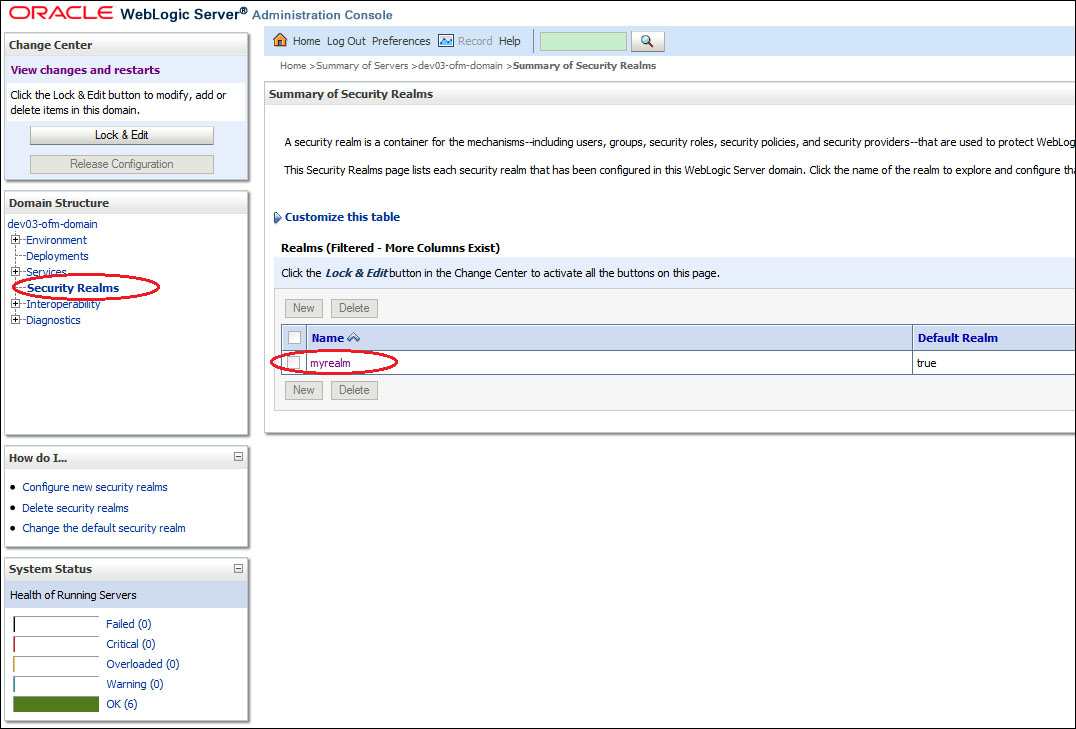
- Select myrealm; this will display the settings for myrealm.
Click on Lock & Edit to edit the session. Then select the Providers tab, and within that select the Authentication tab. This will list the authentication providers currently defined for myrealm.
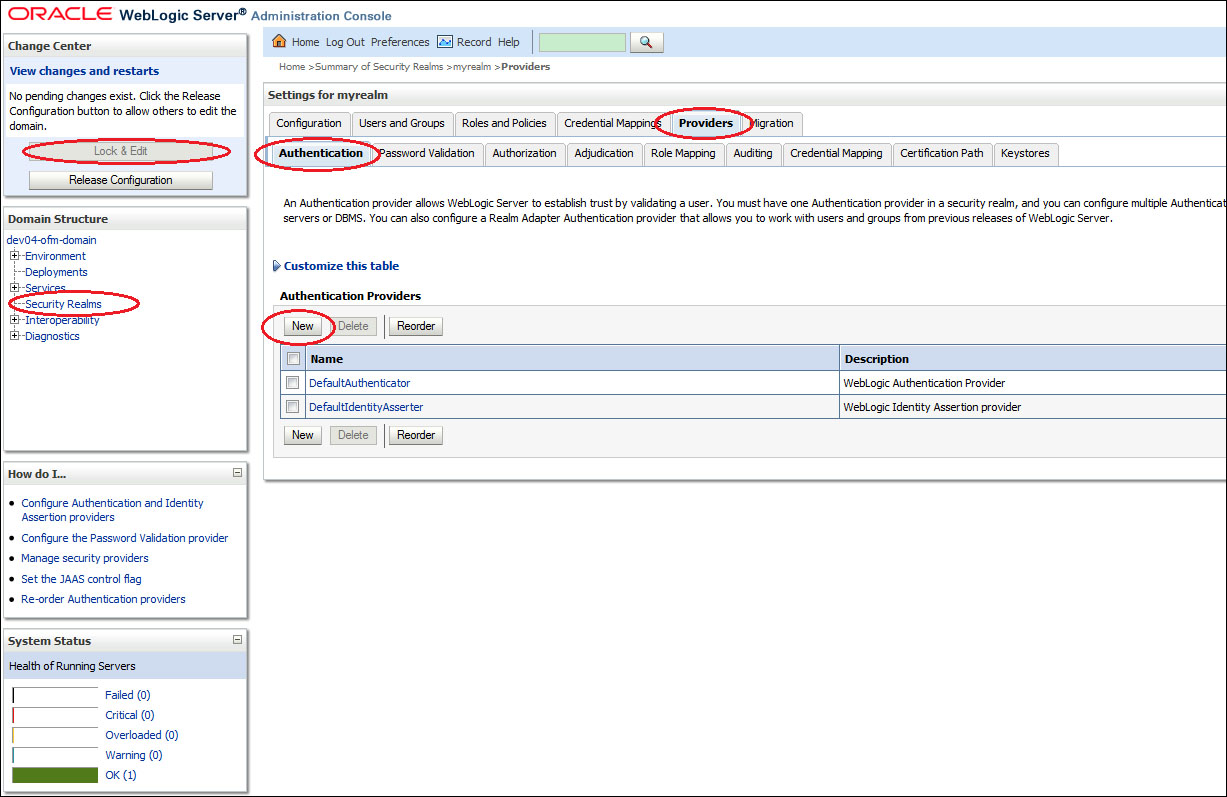
- Click on the New button to create a new authentication provider. This will open the Authentication Provider configuration page.
Enter a name, such as
OID LDAP, and select Type as OracleInternetDirectoryAuthenticator as the authentication provider type and click on OK.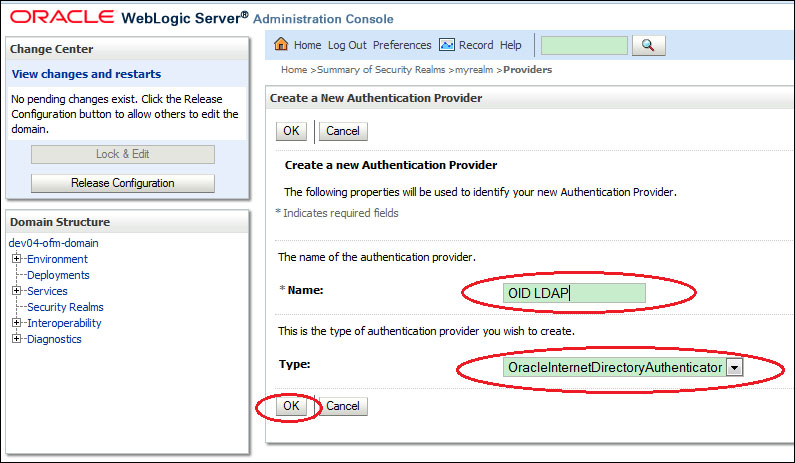
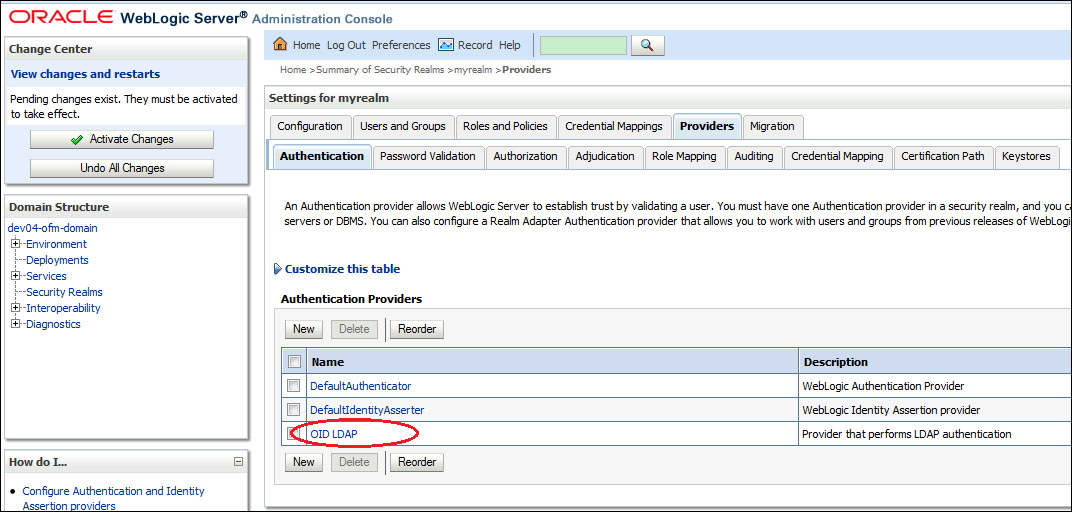
This will return us to the list of authentication providers; here we can see our newly created OID authentication provider.
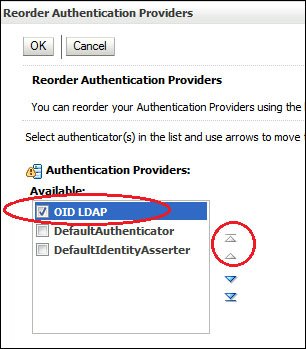
- The authentication providers are listed in the order in which they will be called. We need to move the OID LDAP authentication provider to the top of the list.
To do this, click on Reorder, ensure OID LDAP is selected, then click on the up arrow to move it to the top of the list and then click on OK.
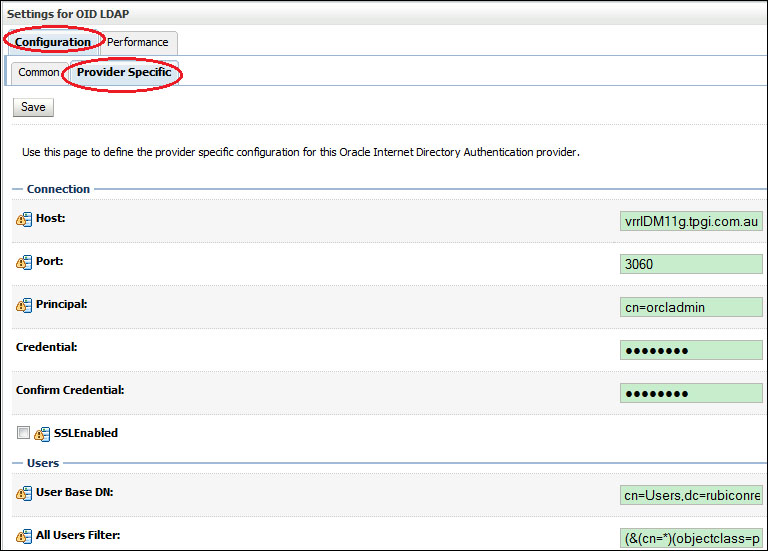
- Now, we need to configure our OID Provider to connect to our instances of OID; select OID LDAP from the authentication provider list and click on the Configuration tab. From here select the Provider Specific tab.
Here we need to provide our OID-specific connection details as well as the location of our users and groups within the identity store, as shown in the following table:
Field
Description
Host
The host of the machine hosting the Oracle Internet Directory LDAP server.
Port
The port number on which the Oracle Internet Directory LDAP server is listening.
SSLEnabled
If the connection to Oracle Internet Directory uses SSL, select SSLEnabled.
Principal
The Distinguished Name of the LDAP user that the WebLogic server should use to connect to the LDAP server.
Credential
The credential (password) used to connect to the LDAP server.
User Base DN
The base Distinguished Name of the tree in the
LDAPdirectory that contains users.Group Base DN
The base Distinguished Name of the tree in the
LDAPdirectory that contains groups.The settings for your OID Authenticator should look similar to the following:
- Next, select the Common tab, and set Control Flag to SUFFICIENT and click on Save.
- Finally, we need to set Control Flag to SUFFICIENT for our default authenticator.
Select Default Authenticator from the authentication provider list, click on the Configuration tab, and then select the Common tab. From here set Control Flag to SUFFICIENT and click on Save.
- The final step is to put our changes into effect. Within the Change Center, click on Activate Changes.
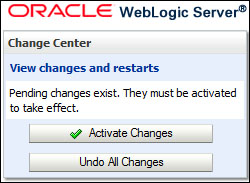
Next, shut down and restart the Oracle WebLogic Admin Server and related managed servers.
- Next, we will create the
demouser and groupAdministratorsin OID and configure them with the appropriate privileges to log in to the WebLogic Server Admin Console and Fusion Middleware Control (EM Console).Log in to Oracle Directory Service (
http://oidhost:port/odsm), select Connection to OID , select the Data Browser tab and click on New Entry.This will open the Create New Entry dialog. On the Entry Properties page, click on the green + icon to add Object Class and select inetOrgPerson.
For Parent of the entry specify the User Base Distinguished Name; this should be the same value we specified in step 5 and click on Next.

- This will take us to the Mandatory Properties screen; enter
demofor both cn and sn, and set the Relative Distinguished Name to cn. Click on Next and then Finish on the Status page.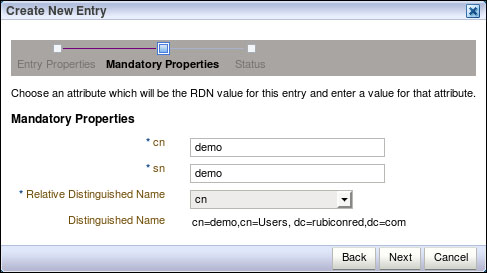
We should see our newly created user under Data Tree.

- Open cn=demo in the data tree, and then click on the Attributes tab; from here click on the Optional Attributes icon.
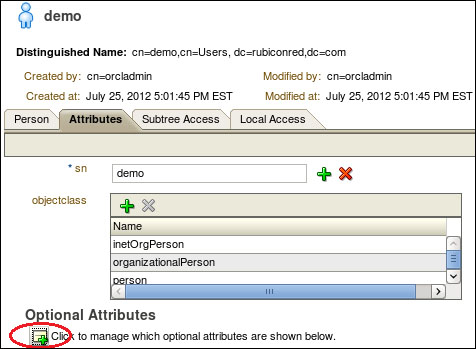
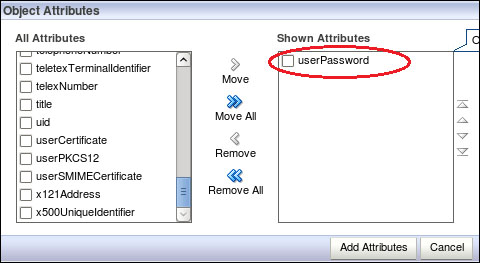
In the All Attributes list, select userPassword and move it to the Shown Attributes list and then click on the Add Attributes button.
Enter the password for the
demouser in the Password textbox and click on Apply. - Next, we will create the group
Administratorsin OID, select Data Browser tab, and click on New Entry.This will open the Create New Entry dialog on the Entry Properties page; click on the green + icon to add Object Class and select groupofNames as the object class and click on OK.
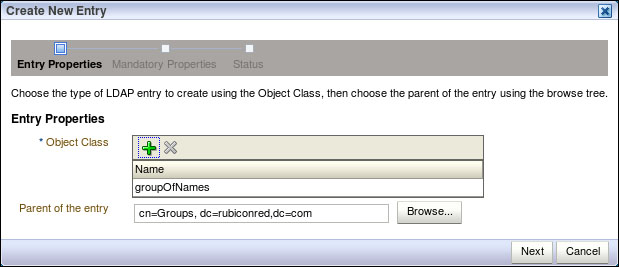
For Parent of the entry specify Group Base Distinguished Name; this should be the same value we specified in step 5 and click on Next.
Enter
Administratorsin the cn textbox and select cn from the Relative Distinguished Name list and then click on Next, then click Finish. We should see our newly created group in the data tree. - The final step is to add the
demouser to theAdministratorsgroup. From the Data Tree, open cn=Administrators, select the Group tab and click on the green + icon next to Members. Select DN ofdemo, click on OK, and then click on Apply. - Now, we should be able to log in to Oracle WebLogic Admin Console by using the
demouser we created or as the userweblogic(via the embedded LDAP server).
We have defined two authentication providers, the first being the OID authentication provider with the control flag SUFFICIENT, and the second being the default authenticator defined against the embedded LDAP.
When we log in as the demo user, WebLogic will attempt to authenticate the user against OID. Assuming the password is correct, the authentication will be successful and the user will be logged into the application.
When we log in as weblogic, authentication will fail against OID, but because the OID authentication provider is defined as SUFFICIENT, WebLogic will attempt to authenticate the user against the embedded LDAP at the point at which it succeeds and the user will be logged into the application.
If we configure OID as the sole authentication provider, we introduce a point of failure into our WebLogic configuration. Since WebLogic must authenticate the administrative user as part of the server startup process, if OID or the network connection to OID is not available, then the server will be unable to start.
To prevent this, you may want to keep the default authenticator to provide additional resilience; alternatively, you can configure OID to be highly available to protect against this scenario.