
This recipe provides an example of how to use OSB to publish a message to a remote JMS queue on OC4J via a JMS message bridge. The JMS message bridge will forward messages from a local JMS queue to the remote OC4J queue. An advantage of using a JMS message bridge is that it keeps your OSB configuration clean and simple, and all of the gory details for connecting to the remote JMS location are configured and managed by the WebLogic server. Also, the same bridge could be used by multiple JMS clients should this be required.
You will need to adjust your OSB domain's classpath, as we detailed in the Creating an OSB proxy service to consume JMS messages from OC4J recipe given in this chapter, to bridge between a local JMS queue and a remote OC4J queue.
You will also need the connection details and the JNDI names for a connection factory and a queue on your OC4J server. The connection factory should not be an XA-enabled connection factory.
- First we create the local queue in our OSB domain from where messages will be forwarded by the JMS bridge. From the domain structure in the WLS console, expand the Services menu and the Messaging submenu and select JMS Modules. Click on the New button, and you will be presented with the Create JMS System Module wizard.
- For Name enter
OC4JBridgeand click on Next. - Target this JMS module to your OSB-managed server (normally
osb_server1), and click on Next. - Select Would you like to add resources to this JMS system module and click on Finish. You will be presented with a summary of resources.
- Click on the New button to start the Create a New JMS System Model Resource wizard.
- Select Connection Factory and click on Next.
- Set Name to
OC4JLocalCFand JNDI Name to/jms/OC4JLocalCFand click on Next, followed by clicking on Finish (you must not just click on Finish, otherwise the connection factory will not get its default target). You will be taken back to the summary of resources where you should see your connection factory. - Click on the New button again, and this time select Queue and click on Next.
- Set Name to
OC4JLocalQueueand JNDI Name to/jms/OC4JLocalQueue, and click on Next. - Click on the Create a New Subdeployment button accepting the default as Subdeployment Name, and click on OK.
- Select a JMS server that is targeted to your OSB-managed server in the JMS Servers table, shown as follows:

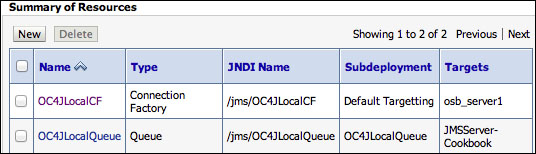
- Click on Finish and you will be taken back to the summary of resources where you should see your queue and the connection factory you created before, as shown in the following screenshot:
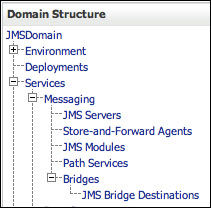
- From Domain Structure in the WLS console, expand the Services menu and the Messaging submenu followed by the Bridges submenu, shown as follows:
- Click on the JMS Bridge Destinations menu item. This is where we configure the details of both ends of the bridge. Click on the New button, and you will be presented with the Create a New JMS Bridge Destination wizard. Enter the values detailed as follows, and when complete click on OK.
Property
Value
Name
OC4JLocalQueueAdapter JNDI Name
eis.jms.WLSConnectionFactoryJNDINoTXConnection URL
t3://[OSB Host Name]:[PORT]Connection Factory JNDI Name
/jms/OC4JLocalCFDestination JNDI Name
/jms/OC4JLocalQueue - Repeat the previous step for the remote JMS queue using the following values:
Property
Value
Name
OC4JRemoteQueueAdapter JNDI Name
eis.jms.WLSConnectionFactoryJNDINoTXConnection URL
opmn:ormi://[HOSTNAME]:[PORT]:[Container Name]Connection Factory JNDI Name
The JNDI name of a connection factory on your OC4J server
Destination JNDI Name
The JNDI name of a queue on your OC4J server
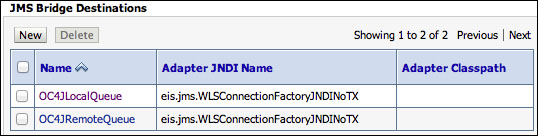
- You will now see your two JMS Bridge Destinations in the summary, shown as follows:
- Click on the OC4JRemoteQueue destination you created and configure it, as shown in the following table, and then click on the Save button:
Property
Value
Initial Context Factory
oracle.j2ee.rmi.RMIInitialContextFactoryUser Name
The username of the account on OC4J that you configured earlier.
User Password and Confirm User Password
The password for this account.
- We can create the bridge now that we have created the destinations. Click on the Bridges item in the domain structure from WLS console and click on New. You will see the Create a New Bridge wizard. Enter
OC4JBridgeas Name and select the Started checkbox. Select Duplicate-Okay as Quality of Service and click on Next. - Select OC4JLocalQueue as Existing Source Destination and click on Next.
- Select WebLogic Server 7.0 or higher as Messaging Provider and click on Next.
- Select OC4JRemoteQueue as Existing Target Destination and click on Next.
- Select Other JMS as Messaging Provider and click on Next.
- Target the bridge of the managed server that your OSB services are running on and click on Next, followed by Finish.
- Reboot your OSB-managed server(s) and your Admin server.
- Once your OSB-managed server(s) has started, confirm that your bridge is functioning properly by selecting Bridges from the domain structure of the WLS console and clicking on the Monitoring tab. You should see your bridge is Active and Forwarding messages, shown as follows:

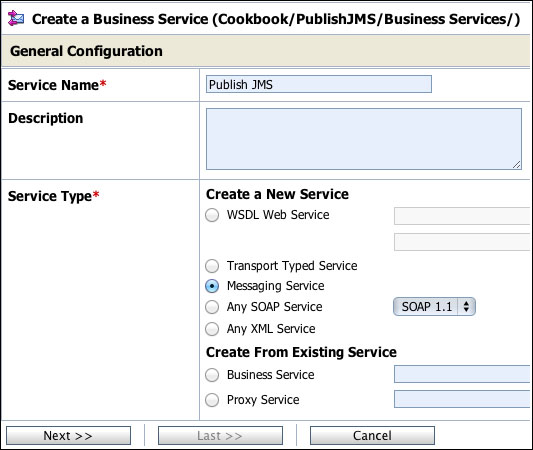
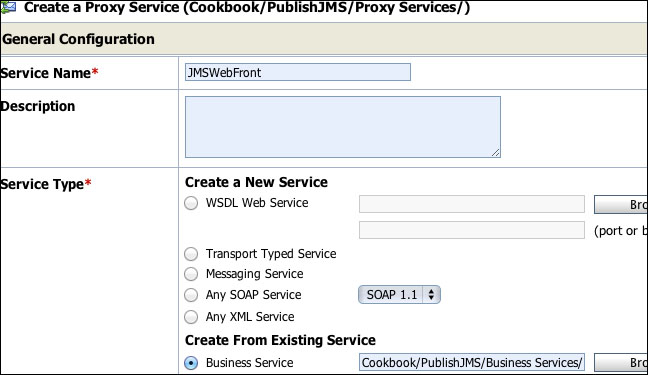
- Now we are ready to configure an OSB business server to publish messages to our local queue, and the message bridge forwards them to OC4J for us. Create a business service as you normally would, but make sure Service Type is Messaging Service (as shown in the following screenshot) and click on Next.
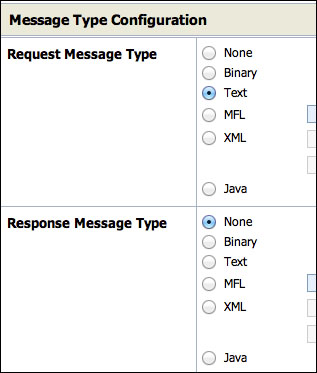
- Configure Request Message Type to Text and Response Message Type to None, as shown in the following screenshot. Once complete, click on Next.
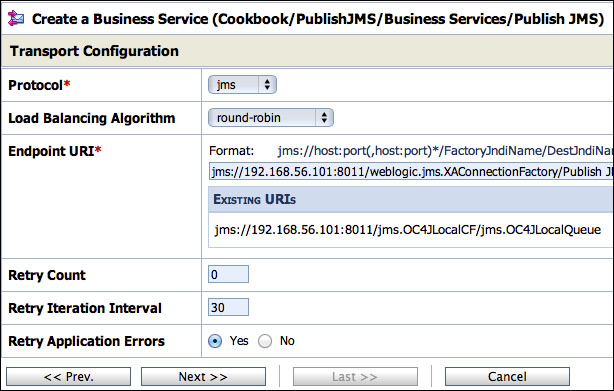
- On the Transport Configuration screen (shown in the following screenshot); ensure that the Protocol is JMS and the Endpoint URI transport is constructed as follows, and then click on Next:
jms://[OSBHOST]:[PORT]/jms.OC4JLocalCF/jms.OC4JLocalQueue
- Configure Message Type to Text for JMS Transport Screen, and then click on Last followed by Save and activate your session.
- To create a simple proxy service, create one from the existing business service you defined previously. In the Transport Configuration screen, you should select Protocol as HTTP to make testing simple.
This recipe publishes JMS messages to an OC4J server via a JMS message bridge. Our business service publishes messages to our local JMS queue, which is forwarded by the message bridge to the remote OC4J server. It is important to note (in the setup for this recipe) that the business service returns when the JMS message is accepted by the local JMS server and not when it gets to the OC4J server; this is handled by the bridge asynchronously.
We could have used this method of a JMS bridge in our first recipe instead of the foreign JNDI provider, by having a remote OC4J queue as the source for the bridge and a local queue as the destination; so, the bridge would pull remote messages to our local OSB domain for the proxy service to pick up.
If you need a high message throughput, you will need to tune the message bridge as it defaults to only one thread per bridge. This can be done by either creating multiple bridges for the same JMS bridge destinations or (the preferred option) by creating a work manager for the JMS bridge. More information on this topic can be found in the Performance and Tuning for Oracle WebLogic Server documentation at http://docs.oracle.com/cd/E23943_01/web.1111/e13814/bridgetuning.htm.
This recipe would be simple to extend to other JMS providers by including different libraries on the classpath and adjusting the connection details appropriately.
In the recipe, we selected the quality of service as duplicate-okay, because some versions of OC4J do not offer true XA support and selecting anything other than the quality of service detailed previously will cause the bridge to fail (WebLogic server will try to perform a global transaction and the OC4J server will not have enrolled in it). If you're using an XA-compliant JMS provider (a late version of OC4J, another WLS domain, and so on), you may consider setting a higher quality of service if required.