
The next step, after setting up distribution, is publication. This is the part where we select the objects that we want to propagate to the subscriber. In the distribution, we set up SQL2012-01 as the publisher. So, let's go to that server and configure the publication:
- In the Object Explorer window, expand the
SQL2012-01object. Then, expand theReplicationfolder. Select and right-click on theLocal Publicationsfolder, and select New Publication as shown in the following screenshot:
- That initializes the New Publication Wizard. Read the information on the dialog. Click on Next.
- On the select Distributor step, select the second radio button to specify we want to use a different distributor. Click on the Add button, which displays the Connect to Server prompt. Log in to
SQL2012-02which we designated as our distributor. Click on Next. - At the Administrative Password dialog, specify the password that we entered when we set up the distributor. This allows the publisher to contact the distributor. Click on Next.
- The next step allows us to choose the database the data or objects that we want to publish. In the Databases list, select
AdventureWorks2012. Click on Next. - In the Publication type, select Transactional publication. Click on Next.
- Now, we get to select the database objects, or the articles that we want to publish. Expand the tables and select
SalesOrderHeaderandSalesOrderDetail. You may notice you can select an individual column too. This is huge because you may not want to propagate sensitive data that has security risks, such as social security numbers, credit card numbers. - Use the Article Properties drop-down list to set properties of the table articles. We'll just click on Next now.
- The Filter Table Rows step gives you another opportunity to filter your data. Just click on Next for now.
- On the next step, Snapshot Agent, specify that we want to create a snapshot immediately. And also, select to run the Snapshot agent at a particular schedule.

- Click on Next when done.
- On the Agent Security step, specify a domain account that is either the SQL Server Agent account's security context or a Windows account with low privilege. Click on the Security Settings button to configure. Click on Next.

- On the next two steps, select the option to create this publication and give it a name. Click on Finish to complete the setup.
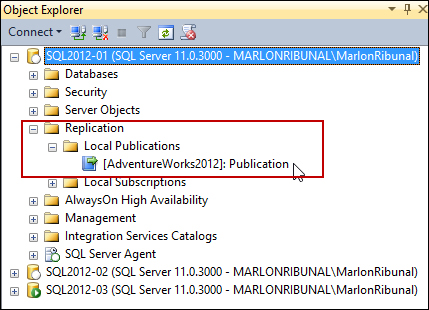
- Verify that the publication is successful. Check the Object Explorer window if the Publication object now exists:
..................Content has been hidden....................
You can't read the all page of ebook, please click here login for view all page.