
The WebSocket protocol, defined by IETF's RFC 6455, is a TCP-based protocol that enables two-way communication between a web page running on a browser and a server; even though it uses a single socket connection, both ends of the channel can send and receive information simultaneously, thanks to the full-duplex nature of the protocol. This connection is controlled by your application's code, unlike the HTTP protocol, where the browser itself manages the connections. This control is possible by the use of W3C's WebSocket API, which declares an interface to use the protocol.
With this feature we can directly communicate with a server in real time, bringing a whole new level of possibilities and sophistication to what can be accomplished on web applications.
Tip
To check which browser version has WebSocket support, access http://caniuse.com/websockets and look for the Current line on the table.
Let's see how to implement and test a really simple WebSocket that receives a message from a client and echoes it back.
There are two ways to create a WebSocket: you can either extend the WebSocketReader class or implement the WebSocketListener interface. Either one will get you to the same point, but as WebSocketReader already implements this interface, you just have to override what you will actually use instead of implementing all 13 methods of the interface. So, extending WebSocketReader should be the preferred way to go.
Here's the complete code of a class that extends WebSocketReader; we just need to override the onMessage method to echo the received message back to the client:
@WebSocket(pathPatterns = {"/wsock"},
            timeout = 30,
            maxConnections = 1000,
            maxMessageSize = 4096)
public class WebSocketListener extends WebSocketAdapter {
  @Override
  public void onMessage(WebSocketConnection connection,
                         String payload) {
         try {
            connection.send(payload);
         } catch (IllegalStateException e) {
         } catch (IOException e) {
            try {
                 connection.close(ClosingMessage.SC_GOING_AWAY);
                } catch (IOException ioe) { }
         }
  }
}
A few pointers about this code:
- The WebSocket annotation declares the basic functionality of the WebSocket:
- The
pathPatternsattribute declares the relative URL that will be mapped by the component and accepts several entries - The
timeoutindicates for how many seconds the server should hold an idle connection before closing and releasing it
- The
- You can limit the size of the messages received by the component by setting the
maxMessageSizeattribute. The value is expressed in bytes and only applies to incoming messages from the client; this is useful to keep the consumption of server resources in check, as the server automatically closes the offending connection when a message larger than the maximum value is received. - If an error occurs when trying to send a message to the client, the connection is closed passing
ClosingMessage.SC_GOING_AWAYthat indicates to the client that the server is deliberately closing the connection. There are other informative values defined by this interface that can be used by the client to take specific actions when being disconnected from the server.
To test the component we just created, we're going to use a web page that is already available that connects to a server and sends messages to it:
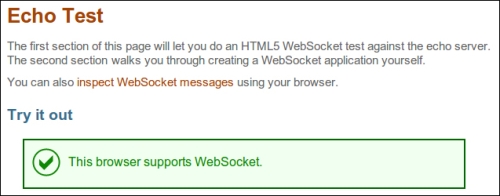
- Open the URL http://www.websocket.org/echo.html in your browser.
- The Echo Test page will be loaded and displayed. After a few seconds, a green box should be rendered just after the Try it out phrase, stating that your browser supports WebSocket:
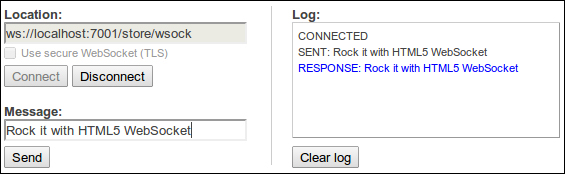
- Enter your WebSocket's implementation address,
ws://localhost:7001/store/wsock, in Location and click on Connect. - A connection is opened and the text CONNECTED should be rendered inside the Log box.
- You can now start sending information to the server by entering it in the Message field and clicking on the Send button.
- As the server is echoing the message received, this is what you should see in the Log field:
- If you stop sending messages for 30 seconds, a timeout event will occur, the server will close the connection, and the browser will be notified; just wait and a DISCONNECTED message will be printed inside the Log box.
The WebSocket specification creates two new schemes to address a resource: ws: and wss:. We used the first one in the previous section where an unsecured connection was opened; the second one uses an encrypted channel to send and receive messages.
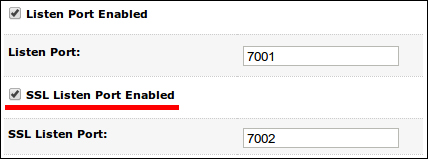
To use the secured connection, you must first enable HTTPS in WebLogic. Open the server's Configuration screen, find the SSL Listen Port Enabled field under the subtab General, enable it, change the SSL Listen Port to 7002, and save the configuration:
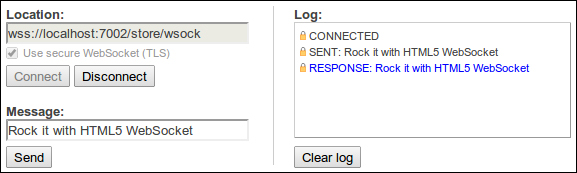
You don't need to restart the server. Just go back to the browser, adjust the port number at the Location field, check the box Use secure WebSocket (TLS), click on Connect, and start sending messages to the server:
It's really easy to use WebSockets and this opens up lots of possibilities when creating Rich Internet Applications (RIA). But, keep in mind that you have a limited number of connections available at any given time, so if the projected usage of your application is high, you have to carefully design how it will use this feature.