
You can drag-and-drop images, for example, in JPEG, PNG, or TIFF format, straight into your iWork documents without first downloading them to your hard disk. The image will be stored in your iWork document, and you can extract it easily as a separate file any time you want to.
When you find an image that you want on the Internet, click on it and hold, then drag it from an open browser window, such as Safari, Explorer, Firefox, or Chrome, to an open iWork document.
When the iWork document is ready to receive the image, it shows this in two ways:
- A green button with a plus sign appears attached to the cursor. That's when the image will simply plop as a floating object exactly where the cursor is hovering.
- A blue outline will appear in the iWork document.
The blue contour indicates the shape, in the document, that will be filled by the image. If the blue border appears along the margins of the page, the image will just land on it. Or, you can place it inside a shape that you have already created in your Pages document—the shape will show itself with a blue border—or in an image that is defined as media holder (Format | Advanced | Define as Media Placeholder). In Numbers, it might be a segment in a pie chart, and in Keynote, it could be an image in one of the slides.
Of course, there are other ways of downloading images from the Internet that you may already be familiar with. I am describing the drag-and-drop method here as it is perhaps the quickest and most efficient. With this method, we don't overload our computers with downloads that we may not need for anything other than the one particular project.
It is easy to copy a photo from one iWork document and paste it into another. But sometimes, you will need the original JPG or TIFF file, to change format, send it to someone, or edit it in some other application. But you can't just drag it back from iWork to your desktop. Annoying, isn't it?
The photo sits in Pages, you don't know how to get it back, and your old files containing the original have all been dumped long since or stored on a disk in a dust-covered pile at the back of the shelf and it's too much trouble to look for it.
Instead, when you need to get the original image, you can easily extract a copy from an iWork document. This can be done as follows:
- Select the image that you want to extract.
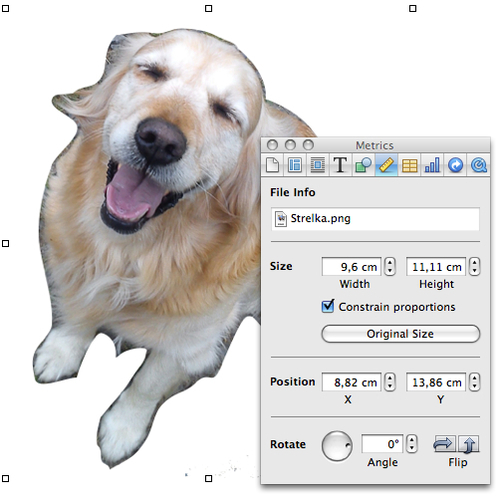
- Open Inspector and click on Metrics (with the little ruler icon). In the File Info window, you will see a small icon with the name of the file and its type (as shown in the following screenshot):
- Click on it and drag it to the desktop or wherever you want to put it—iPhoto or a dedicated folder.
It may seem like an obvious trick, but it's only so when you know how to do it. Also, it saves a lot of time, because most of us are more likely to remember the document where we last used a particular photo than which folder or iPhoto album we stored the original in.
It is particularly worth recommending these two techniques—dragging images from the Internet and extracting them from iWork documents—to Windows switchers. Mac users know that many operations on Macs can be done by dragging and dropping.