
The first simple step to master when working with photos is to learn how to insert one into your document. Then, because photos rarely come out in perfect composition, we may want to crop them, leaving only the most interesting details. Next, a few small adjustments can enhance the graphic impact of the original photo. In this recipe, we look at these basic techniques.
First, open a blank iWork document and find a photo with several objects in it, but with one that is clearly the focal, central point of the composition. Put the photo into an easily accessible place, for example on the Desktop, in iPhoto, or in a folder created for this purpose.
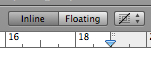
There are three basic ways in which a photo is positioned in the document:
- An inline photo is "anchored" in the text. As you add or delete text, the photo moves with the text. If the bit of text where the photo is anchored is deleted, so is the photo.
- A floating photo, on the other hand, stays where you put it and the text flows around it as though the picture is glued to a sheet of paper and you are writing around it.
- Photos in the background sit behind the text, at the back of the document—imagine writing an inscription across your portrait or on a postcard.
As usual, there are several ways to do the same operation, so choose the one that suits you best. The following are the options to insert photos:
- Go to the Insert menu at the top of the screen and slide down to Choose... (Command+ Shift+ V). When the dialog opens, find the photo, click on it, and then click on Open. Or you can simply double-click the photo.
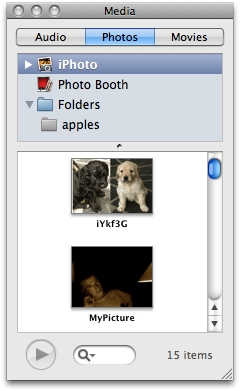
- If your photo is in iPhoto, Photo Booth, or any folder that you've added to the browser, click on the Media icon in the toolbar to open the media browser, and click on the Photos tab to find the photo. Click on the photo and drag it to the document.
- To add a folder, select it and drag to the open Media Browser window.
- And—the easiest way—you can find the photo wherever it is on your computer, on the local network, or even on the Internet, and drag to the iWork document.
The following steps describe how cropping photos works with the Masking and Image Fill tools.
Usingthe Masking tool to crop photos:
- Insert a photo. Here we have a picture of red apples.
- Under the Format menu choose Mask.
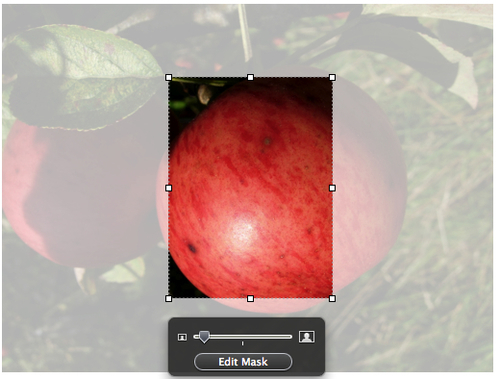
- When the mask is applied, it shows as a rectangular shape with a dotted outline. It has the same handles as any other object. Click on the handles and drag to resize the mask and show just the details that you want.
- The dark control panel that appears with the mask has a slider with two—one small and one large—portrait icons. Drag the slider button from left to right in order to change the size of the photo inside the mask.
- When you are done, click on the Edit Mask button, and the rest of the photo will become invisible.
- Move and resize the masked photo as an object.
Using the Image Fill tool to crop photos:
- Insert a shape from the Shapes menu. It could be a rectangle or any other shape.
- Open the GraphicInspector; in the Fill drop-down menu choose Image Fill.
- Click on the Choose... button and find the photo of the apples. Then click on Open.
- Next, click on the Scaling tab and choose Scale to fill from the drop-down menu. With this option, the photographic image will always fill all the space inside the shape no matter how you resize or change it.
- Drag the handles to achieve the result that satisfies you. Here, the apple sits within an oval shape stretched horizontally.

Now, for editing photos, we will be talking about more than just Photoshop. A few tools in iWork that can change the way a photo looks include Adjust Image, Tinted Image Fill, and Opacity.
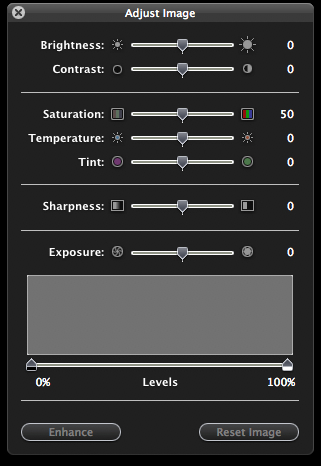
Follow these steps to Adjust Image:
- Under View, click on Show Adjust Image, and a control panel similar to the one in iPhoto opens.
- Drag the Brightness slider to make a darkish photo lighter.
- The Sharpness option can add a "soft focus" effect to a portrait.
- The Temperature control can make a gray day in the picture brighter. Do not overdo it, though, otherwise the photo may look unnatural.
Follow these steps to use Tinted Image Fill:
- Open Graphic Inspector|Fill.
- From the Fill menu, choose the Tinted Image Fill option. It puts a colored "veil" over the photo.
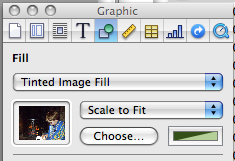
- Click on the color well that appears when you choose Tinted Image Fill. When the Colors Viewer opens, change and mix the color of the veil.
- At the bottom of the ColorsViewer window, you will find the Opacity slider. Drag the button from left to right in order to make the colored veil more or less transparent and the image more or less visible.
The following steps describe how to edit photos with the Opacity function.
- Select the photo and open Graphic Inspector. Opacity is at the bottom.
- Drag the slider button or click on the up and down arrows to change the photo's transparency.
Let's discuss Masking. If you often apply masking, memorize the shortcut—Command + Shift + M (it's easy to remember—M for masking)—or add the Mask icon to the toolbar (under the View menu choose Customize Toolbar, drag the Mask icon there, and then click on Done).
You can always remove a mask if you don't like the result; use the shortcut Command + Shift + M again or click on the Unmask icon in the toolbar. It changes from Mask to Unmask after masking is applied.
Opacity is especially useful when a large photo is used as the background for a whole page or even a complete document. Where there are other elements—text, pictures, or maps—you don't want the background to be too dominant. Reducing the opacity to around 40 or 50 percent will make the photo less obtrusive, yet still visible. To make text stand out against the photographic background, reduce the photo's opacity. In GraphicInspector, move the Opacity slider to achieve the desired effect.
If reducing opacity doesn't work well, consider putting the text onto a semi-opaque color background, for example inside a Text Box with fill color. Reduce the opacity of the color by moving the slider in the Graphics Inspector, so that the photo is discernible.
Photos can be resized as follows:
Photos can be moved as follows:
- The inline photos can be dragged to a new place within the text—click-and-drag, watching the anchor point as you do this. When the anchor is where you want the photo to be, let go.
However, some iWork users find this method too cumbersome and slow. Another, quicker, way of moving the inline photo is to cut and paste it. Click on the photo and press Command + X to cut. Then, click on the text where you want the photo to go and press Command + V to paste.
- To move a floating photo, click on it and drag it to a new position.
Floating photos can be moved with keyboard arrows. Each hit on an arrow moves the photo by one point. Press continuously and the image will leapfrog into position.
To make the photo leap by ten points at a time, press Shift and then hit the keyboard arrow.
- To change photo placement from inline to floating and vice versa, select the photo. In Wrap Inspector, click on the Floating button, or in the Format Bar, click on the Floating tab.
There are some other tasks, which can be performed on photos.
Strictly speaking, Masking and Image Fill aren't cropping in the sense that the photo stays there in its entirety. We have only hidden parts of it from view.
To crop the photo itself, use the cropping tools in iPhoto or Preview and import the image into the iWork document.
If you crop the image in iPhoto, make a copy of it before cropping. Select the photo and duplicate it with Command + D. Otherwise, you may lose the original image.
Remember that on your Mac you can edit photos in iPhoto, Preview, and Photo Booth. They all have additional editing tools and a choice of effects. Edit the photo there and then import it into the iWork project.
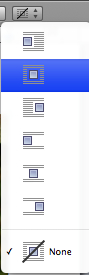
When you import the photo as an inline object, it will sit slightly above the text where it is anchored. To make text flow around the photo, use the wrap function. Select the photo, open the Wrap Inspector, check the Object causes wrap option, and then click on one of the icons showing the way that text will flow around the image—left, right, center, and so on.

Wrapping options can also be accessed through the Format Bar—click on the wrap icon to open the drop-down menu and choose one.
The quickest way of moving a photo into a desired position is to set coordinates. In the Metrics Inspector, Position shows X (horizontal) and Y (vertical) coordinates of the object. Click on the arrows to move the photo.
Alternatively, if you want to place the photo in the exact same position in another page or project, note down the coordinates there and type them in the X and Y co-ordinate fields. Hit Return, or click in the document.
This technique is very useful when you have a multi-page project with repeating graphic elements. Write down the coordinates shown in Metrics Inspector.
- The Fitting files of other formats into iWork documents recipe in Chapter 3, Working Across Platforms and Applications, describes more tricks with masking
- The Masking photos, and the magnifying glass trick recipe
- The Masking versus Image Fill—when Image Fill is easier than Masking recipe
- The Stacking photos, using Bring to Front, Send to Back options to layer photos recipe in Chapter 1, Lateral Thinking