
On Internet forums, many iWork users are asking where they can find clip art to use with their projects. While there are dozens of websites that allow free downloads of clip art and the elements of iWork's own templates can also be used as clip-art images, it can still be difficult to find high definition images of exactly what you want, especially if you don't want to spend time registering, logging in, or paying download fees.
So, where can we find objects suitable for making into clip art?
Look around your house— cell phones, pencils, toys, mugs, kitchen utensils, furniture, DIY tools, even electric plugs—anything can be turned into clip art. Look in the garden or walk in the park and you will find that a leaf of ivy, a twig from a holly bush or from a frosted fir tree are all material for clip art.
Here is a pile of supermarket chocolate coins, which we could use as clip art for an article on the financial crisis:

To make your digital photos into a clip art, follow these steps:
- Set your digital camera to macro. Cell-phone cameras sometimes have macro settings too.
Take a photo of the object you want to make into clip art. Make sure that the object is placed against a background with a solid color, which contrasts with the main colors of the object itself. Here, a pile of chocolate coins is on a sheet of white paper. A lighter object can be put on a black t-shirt. Another great background is blue sky—hold your object against the sky and take a snapshot.

- Import your photo into an iWork document.
- Remove the background with Instant Alpha.
The Alpha tool is under the Format menu or in the toolbar. If it isn't already in the toolbar and you often work with images, put the Alpha icon in the toolbar. Under the View menu go to Customize Toolbar, and drag the icon to the toolbar.
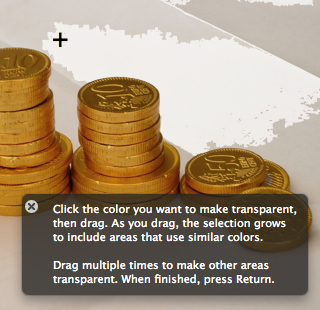
When you activate Alpha, the cursor turns into a little cross. Move it over the background to rub out the background. Do this several times, rubbing out the background in several goes. Be careful not to scratch out bits of the object itself. If you accidentally scratch out some of the object, press Command + Z to undo the last operation. Or, remove Alpha—this radical option is under the Format menu. When you finish, hit Return.
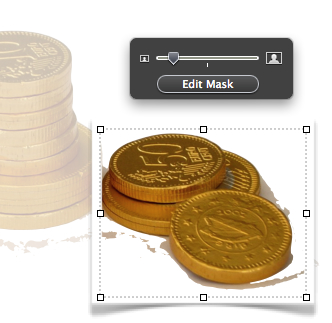
If you later find that you only want part of the image, you can use a mask to crop the photo—the rest of it will be hidden. The Masking function is under the Format menu.
Clip art made with this technique can also be used as bullets within our text. Open the Text Inspector, click on the List tab, and then on Bullets. From the Bullets drop-down menu, choose Custom Image and click on Choose. Find your clip art image and open.
If you want to use the Alpha image, that you have created, in other iWork projects, copy-paste it from your document. You can also make a screenshot (Command + Shift + 4) and keep it as a separate file.
The current version of Mac OS, Mountain Lion, has Alpha in Preview. Open your photo in Preview, remove the background with Alpha, and save, for using in iWork or other applications.
If you need to reduce the size of the image, for example to use on your website, use the Save as... dialog window to make it smaller.
- The Making cutouts with edited masks recipe in Chapter 5, Working with Photos: Tips and Tricks