Keyword-driven Testing is such an approach to automated tests creation that goes together with visual representation of user-actions.
Each action is twofold involving the following two parts:
- An object, which is being handled
- An action, which is necessary to accomplish for the object at hand
The simplest way to create a Keyword Test is recording it. In this recipe, we will learn on a simple example of a Keyword Test.
Launch the Calculator Plus application (C:Program Files (x86)Microsoft Calculator PlusCalcPlus.exe).
To record the Keyword Test, it is necessary to complete the following actions:
- Navigate to Test | Record | Record Keyword Test menu item. This will kick off the recording.
- Switch to the Calculator Plus window and click on several buttons (for example, 6, +, 3, =).
- Stop the recording by clicking on the button Stop on the Recording panel.
- Click on the OK button in the opened Create Project Item window for automatic creation of the NameMapping project element.
- As a result, we will have the new Keyword Test created.
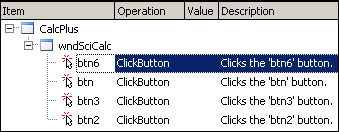
Each operation in Keyword Test is represented in TestComplete by the four columns:
- Item: This is the controls element which will undergo the action. In our example, it is mapped to the following four buttons: btn, btn1, btn3, and btn6; which are sibling objects of the wndSciCalc window. The wndSciCalc window, in its turn, is a sibling object of the CalcPlus process.
- Operation: This is the action we perform over the object. In our example, we are performing the action of ClickButton throughout.
- Value: This stands for optional parameters, which are passed to the action. For the ClickButton action no parameters are implied.
- Description: This is a more detailed explanation of the executed action.
If, in the process of recording, you have committed some wrong actions (for example, by having clicked on a wrong button, as in case with the calculator), there is no need to redo the recording of the test all over again. The objects and actions are easily changeable in TestComplete editor.
Let's take the ClickButton operation for an example. This operation will trigger a mouse-click in the center of the object. If we would like to click in the preassigned button coordinates, we would have to use the Click operation, which accepts the parameters for the given button-click coordinates.
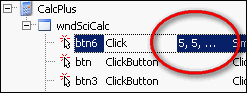
To change the used operation for the btn6 button perform the following steps:
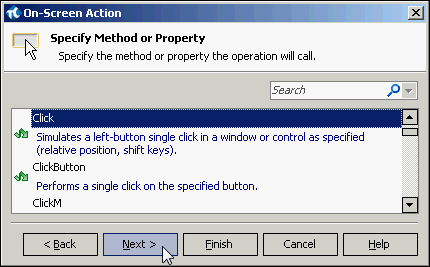
- Double-click on the name of the operation.
- In the On-Screen Action window, select the Click element and click on Next, as shown in the following screenshot:
- Assign values for the parameters ClientX and ClientY and click on Finish. These values should not exceed the object's width and height, these can be viewed in the Object Browser:
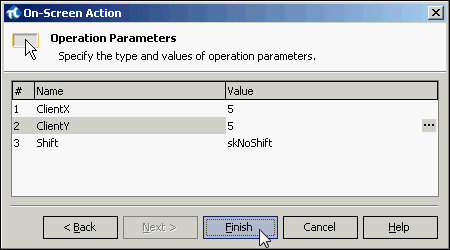
- Now, the click on the btn6 button will always be made in the coordinate of 5,5: