
A Web site can be a drain on your wallet, especially if it gets popular and you’re charged for bandwidth and space usage overages. Wouldn’t it be nice if you could at least recoup part of the cost of running your Web site? Perhaps you have a great new product or service that you want to sell online. With iWeb and a little ingenuity, you can start selling your goods to the world.
In this section, I talk about two ways of generating income from your Web site—affiliate programs and online stores. You probably won’t be a millionaire after implementing these ideas, unless you were a millionaire to begin with. But you can make a start at paying for the cost of running the site or begin your climb to fame as an online retailer.
Warning!
If you want to create an online store or advertise products on your iWeb site, then you should host your site some-where other than on .Mac. The .Mac terms and conditions state “.Mac has been designed for personal use and is not intended to be used to host e-commerce businesses for marketing, promotions and sales (including, without limitation, software distribution) over the Internet.” If that isn’t enough to send you running to another Web host, then some of the other prohibited uses probably will:
Soliciting for advertisers or sponsors
Posting sponsorships or third-party advertisements and banners
There’s nothing nicer than a Web site that can pay for itself. It’s surprisingly easy to do this through affiliate programs. Affiliate programs let you put advertisements on your Web pages that can generate money for you every time someone clicks an ad or purchases a product you’ve linked to.
Since you can’t easily edit the HTML that iWeb generates, it makes sense to participate in an affiliate program that can work through a hyperlink. A popular affiliate programs is Amazon.com’s Associates program, so I use it here to demonstrate how to link to products that you talk about in blogs, podcasts, or even on your About Me page.
The first thing to do is to sign up for the affiliate program at http://associates.amazon.com/gp/associates/join/. Take some time to read about the program, how you are compensated, and how Amazon provides you with traffic and earnings reports. Once you’ve been added to the Amazon Associates program, you can create links on your Web site that will result in a nice royalty check for you if many people purchase a product that you suggested.
Now create some links on your site to items for sale at Amazon.
For example, on my About Me page, I mentioned my favorite book (Lord of the Rings), my favorite movie (North by Northwest) and my favorite gadget (iPod nano). I’m so enthusiastic about the favorites of mine that I want everyone to benefit from them, so I linked to them in the Amazon store:
Opening the Amazon.com Web site in my browser (http://www.amazon.com/), I typed the search phrase
iPod nano 4GB black) in the field at the top of the page and clicked Go. Within seconds, a page full of iPods and accessories appeared, with my favorite listed at the top. I clicked the link to go to the detail page for the nano, made sure that it was indeed the model I was seeking, and then I copied the ASIN (Amazon Standard Identification Number). If the item I wanted to link to were a book, I would copy the ISBN (International Standard Book Number).I log in to Amazon Associates through the link listed in Step 1. I click “Build Links” on the left side of the page, then click “Text Links” below that. A page for creating text-based Associates links appears (Figure 56).
In the section of the page marked Link to Search Results, I pasted in the ASIN I copied earlier, typed a name (nano) for the link I’m creating, and clicked Get HTML.
Amazon Associates generates the following HTML:
<a href="http://www.amazon.com/exec/obidos/redirect?link_code=ur2&tag=mysecretcode&camp=1789&creative=9325&path=external-search%3Fsearchtype=ss%26index=blended%26keyword=B0007Y79B2">nano</a><img src="http://www.assoc-amazon.com/e/ir?t=mysecretcode&l=ur2&o=1" width="1"height="1" border="0" alt="" style="border:none !important; margin:0px!important;" />
I didn’t need all of this code, just the URL (red in the code above). That address is a special link to the iPod nano page with a code embedded into it that helps track hits and purchases. I copied the URL and switched to the About Me page in iWeb.
I selected iPod nano on the About Me page, opened the Link Inspector, enabled the words as a hyperlink, and pasted in the URL.

Now, my visitors can click the link if they would like to purchase an iPod nano. If they do, I get a portion of the purchase price sent to me as a finder’s fee. If my Web site is popular, I may be able to pull in some serious money. (In practice, many Web sites of this nature pull in $20 or $30 a quarter, or maybe a few hundred if traffic is high.)
It’s fun to talk about new gadgets, CDs, DVDs, tools, software, books, and more in your blog, and then link to a page where people can purchase those goodies and make some money for you.
If you make your own products, wouldn’t it be nice to sell them in your own online store? iWeb isn’t the easiest Web design program to use to create an online store thanks to its inability to allow embedded pages. There are many online store applications (for example, Zen Cart, http://www.zen-cart.com/) that are sophisticated and flexible, but until future versions of iWeb allow iFrames (Web sites embedded within a frame on your site), you won’t be able to take advantage of the power of these programs.
You can still create and run an online store using iWeb, but it takes some work. You must have a way to link to a product description, plus a way to link to a payment system and gather customer information. In this section, I show you two ways to create an online store.
I can remember the hassles I went through years ago when I was running a bulletin board system called MAGIC. Many of my users had asked to buy t-shirts so they could support the system, so I designed a cool-looking logo, went to a local t-shirt shop, had a variety of shirts in a plethora of sizes printed, and then waited for the checks to roll in. Surprisingly enough, I did make a profit from the t-shirt sales, but it was quite a painful experience since I was the designer, manufacturer, marketing and sales rep, shipper, and accounts receivable department all in one person.
CafePress (http://www.cafepress.com/) can make you a shop owner immediately, and you don’t have to worry about having a minimum quantity order, keeping items in stock, or shipping merchandise to buyers. CafePress specializes in printing clothing, home decor items, posters, calendars, and even print-on-demand books and CDs, all based on content you provide. (For an example of a non-iWeb site that sells goodies on CafePress, visit http://www.tidbits.com/store/.)
I won’t go through the process of signing up with CafePress (it’s free, by the way) or creating your store, since CafePress provides easy instructions. I’ve already created some accessory and clothing items for my GizmoRanch.com Web site (strangely, the Gizmo Ranch thong has been popular...). Follow along as I add a sales page for those items to my iWeb site:
Log into your CafePress account and click the “Visit” link for your store. A list of your merchandise appears, categorized by type.
Choose an item to add to your iWeb store, and click the CafePress link for that item to bring up the description. For my example, I’m choosing the Gizmo Ranch mousepad.
Switch to iWeb, and add a new page for your store. I recommend that you choose a Blank page, since you will want to start from scratch. (When I made my store, iWeb 1.0 was the current version, so I used the Welcome page from the White template because it had the least amount of custom formatting on it, so it was easy to change. The Blank page is new in iWeb 1.1.)
Change the name of your store page in the Site Organizer. I changed the name of mine to Store.
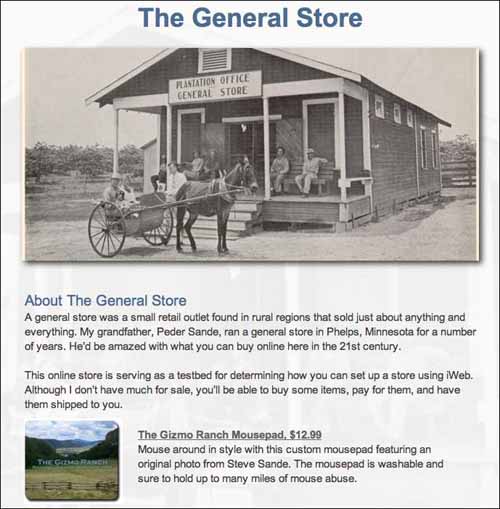
Change the headline at the top of the page by double-clicking it and typing your new headline. I changed mine to The General Store in homage to my grandfather, who ran a general store in Phelps, Minnesota, for many years.
Replace the placeholder image with one of your own. I found a picture of a general store and dragged it to the placeholder. To keep the general format of the page similar to other pages on my Web site, I used the same picture for the page background and used a blue color for the browser background.
Replace the placeholder title and descriptive text with your own writing. This text should be a description of the store you’re running and include any special notes about products that you’d like to add.
Now we’re ready to get to work. Switch back to your CafePress store and the item you want to sell on your own Web site. Using Grab (found in your
/Applications/Utilitiesfolder) or a similar screen-capture utility, capture a screen shot of the item you want to sell and copy it.Switch back to iWeb and paste the screen shot onto your store Web page. If you want to make the image larger or smaller, click it to select it, then drag one of the corner handles.
Add a text box to the store Web page and use it to add text that describes the product. I typed a short description with the price, made it bold, and wrote a longer description beneath.
Last but not least, use the tricks you’ve learned earlier in this ebook to link to the appropriate page in your CafePress store (see Create Web Hyperlinks and Create Picture Hyperlinks). When you link to a product listing in the CafePress store, copy the URL from the CafePress site and paste it in the URL field in iWeb’s Link Inspector.
For the mouse pad I’m selling, the URL is http://www.cafepress.com/gizmoranch.22945409. In the URL,
gizmoranchindicates the CafePress store that the item is located in, while22945409is the specific item number for the mouse pad with the special artwork I’ve created.
Once the links have been created, your store is open for business (Figure 57).
CafePress is great when you want to make a limited range of items, but what if you want to sell a product that isn’t in their catalog? That’s where PayPal can come in handy.
If you want to sell single items, sell subscriptions to a service, or collect donations, then PayPal (http://www.paypal.com/) and iWeb are the answer to your online retail questions. PayPal is the world’s largest online payment company and, despite the best attempts of hackers and spoofers, has a very good record of making online payments secure.
One of the most helpful PayPal features is the email link. An email link is a URL that a seller usually pastes into an email message to a buyer to ask for payment. The email link works well for would-be iWeb storekeepers.
I won’t go through the mechanics of getting an account set up with PayPal. This example assumes that you have already signed up for PayPal and have an approved account. To open an iWeb shop backed by PayPal:
Visit https://www.paypal.com/us/cgi-bin/webscr?cmd=_web-tools, and log in to your account.
You’re taken to a Selling Single Items page.
Enter the details of the item you’re selling. Although this is listed as an optional item, I recommend that you do it, since it fills out the purchase information on the buyer’s page. Enter the name of the product or service you’re selling, the ID or product number, the price, and the currency. You also have the option of making the buyer’s payment form default to a certain country. I recommend leaving this setting alone so your buyers can choose their own country if they wish.
You can ignore the section of the PayPal page titled “Choose a button to copy to your website,” because you aren’t going to use a button on your store page.
Under Security Settings, make sure that the “No” radio button under “Click Yes to encrypt your payment button” is selected. You cannot use encryption for the email link that PayPal will generate.
Click the Add More Options button at the bottom of the page. This takes you to a second page with many more options, which you should set. These include:
The capability to calculate shipping costs.
Calculation of state and local sales taxes.
Adding option fields doesn’t work with the type of link we’re making, so don’t add size or color options. If you have multiple options you must create multiple listings for the item, one for each size and color combination. This is a case where you probably don’t want to use iWeb to create your store page.
Customization of your payment page. You can make your PayPal payment page look like your online store to provide a seamless shopping experience for your customers.
Add successful or cancelled payment URLs. If a customer’s transaction is successful, they are directed to the successful payment page on your Web site. This page usually provides contact information, details on how to track shipping, and other useful things the customer wants to know. If a customer cancels an order partway through the process, or if an order is unsuccessful, they are directed to the cancelled-payment page.
Miscellaneous includes whether or not a customer can order more than one of an item and if you’d like customers to provide a shipping address.
The “Collect Additional Information From Your Customers” radio button lets your customers send you additional info.
You can change the email address where you want your payment notice to be sent.
Once all the appropriate settings and fields are filled out, click the Create Button Now button. On the page that appears, copy the text in the “Link for Emails” box. You’ll use this URL to create the links on your iWeb store page.
Now switch to iWeb. Following the processes I’ve described elsewhere in this ebook to create photo-based and text-based links, make a button to link to the PayPal payment page and add a text description of the item you’re selling.
Test the payment button. Since you’re going to use an outside payment processor, it’s a good idea to make sure everything works before turning the store loose on an unsuspecting world. Your buyers will be able to pay with a variety of methods, including credit cards, even if they are not members of PayPal.
To try this, I set up a button and link to sell a 1-year subscription to my Podbus.com podcast hosting service. You can see the button and how it works by visiting the example Web site.
I wouldn’t be entirely surprised if Apple added a Store page type to a future version of iWeb, to be used only when the site is hosted away from .Mac. Until then, you can use link-based services such as Cafe Press and PayPal to sell a variety of goods and services.
Tip
Zen Cart is a full-featured open-source Web store application with thousands of installations around the world. While you may not be able to embed a Zen Cart store into your iWeb site to give it the look and feel of your theme, you can create a link to the store from your site and take advantage of the power of this free application (http://www.zen-cart.com/).
Now that you’ve added some moneymaking opportunities to your Web site, how do you get people to visit your site? There many methods, including pay-per-click web advertising and Web rings, but I mention only one here–listing your Web site on search engines.
By listing your Web site on a search engine like Google or Yahoo!, you’re making sure that people who are looking for information have a way of finding your site. Here’s how to list your site on the major search engines:
Google: You don’t need to do anything to submit your site to Google, since they use software “spiders” to “crawl” the Web, find new Web sites, and then index the sites by words and phrases used on the site pages. Google suggests that you increase the chance of your site being crawled by making sure that other locations link to your site. For more information, visit http://www.google.com/support/bin/answer.py?answer=745&topic=356.
Yahoo!: Use the form at http://submit.search.yahoo.com/free/request to submit the URL to your home page and the rest of your site will be added by the Yahoo! crawler. You can also include a spot for adding the RSS feed to your blog or podcast.
MSN Search: Show your support for Apple and the Mac platform by submitting your iWeb site to Microsoft’s search engine. at http://search.msn.com/docs/submit.aspx?FORM=WSDD2.
Ask.com: Ask uses a similar method to Google for adding Web sites to its index, so you don’t need to submit your URL to them.
You can increase the chances that Google and Ask.com will crawl your Web site by submitting your URL to Yahoo! and MSN Search. If another Webmaster finds your site through one of these two search engines and likes it, chances are good that they’ll link to your site, which will increase your visibility to the spiders and crawlers.