
Getting your work environment configured to use Electron is fairly straightforward, but there are a couple of items required to get you started. If you are an experienced developer, you probably already have Node and Git installed. If so, feel free to skip to the Install Electron section of this chapter. If not, let’s get started by installing Node.
Before Installing
These days, people install new programs on their computers and devices every day without thinking about it. While all of the programs you need to install to work with Electron are safe, any time you wish to install programs on your computer, you should always ensure that you have completed a backup of your computer. Better safe than sorry.
Installing Node
Node is the biggest thing to happen to JavaScript this century. Node is a runtime built with JavaScript that is being used by everyone from hobbyists to Enterprise developers to program anything from Internet of Things (IoT) devices to servers. JavaScript developers use Node daily to assist in the automation of their daily work. Electron uses Node to create cross platform desktop applications.
To install Node, you need to head over to http://nodejs.org and download Node using the easily identifiable download buttons on their site (Figure 2-1).

Figure 2-1. The Node.js Website
As you can see in this screenshot, there are two buttons available: one for the “LTS” version and another for the “Current” version. “LTS” stands for Long Term Support, meaning that the maintainers of Node decided that version 6 had reached a point of stability that everyone could rely upon; and no more development updates, beyond critical bug fixes and security updates, would be added. They did this so that development on the newer version, the one labeled “Current” could begin in earnest. While the current version can work for you, we are using the LTS version at the time of writing this book. Regardless of that, you need to be aware of your choices in this regard.
Please note: We are also citing version numbers in this chapter at the time of our writing this book. The software you need to install, specifically Node and Electron, are fast-moving projects that are updated regularly. The version numbers cited here may not match the available version numbers at the time of your reading.
Currently, Electron version 1.6.6 ships a version of Node, version 7.4.0, which is slightly behind the currently available version 7.10.0. So what does this mean to you? If there are features of Node 7.4.0 that you would like to use with your Electron app, you should download and install the current version of Node, and be aware that there may be features of 7.10.0 that will not be available in your application when you distribute it.
As mentioned before, for the purposes of this book we will be installing the LTS version of Node.
Installing Node for macOS
Download the LTS version of Node from the Node Website ( http://nodejs.org ), locate the downloaded file, and double-click it. This is a fairly simple installer. Follow the instructions provided and you will install Node (Figure 2-2).
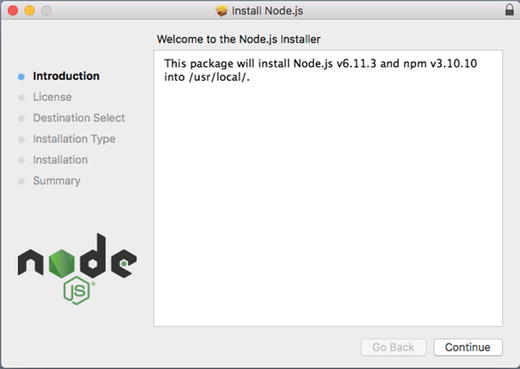
Figure 2-2. First screen of the Node installer
Every software that you install these days has to have a Software License Agreement (Figure 2-3). Read it (or not, we won’t tell) and hit “Continue,” and then click the “Agree” button of the overlaying window that appears.
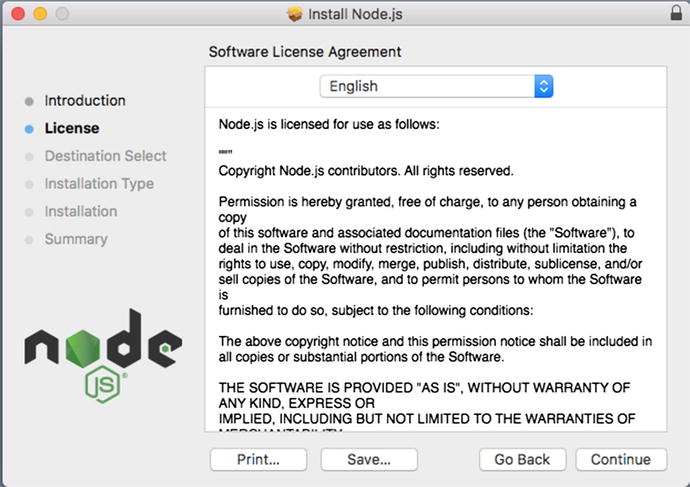
Figure 2-3. The Software License Agreement
Select “Install for all users of this computer,” and then click “Continue” here (Figure 2-4) as we need to install Node for all users.
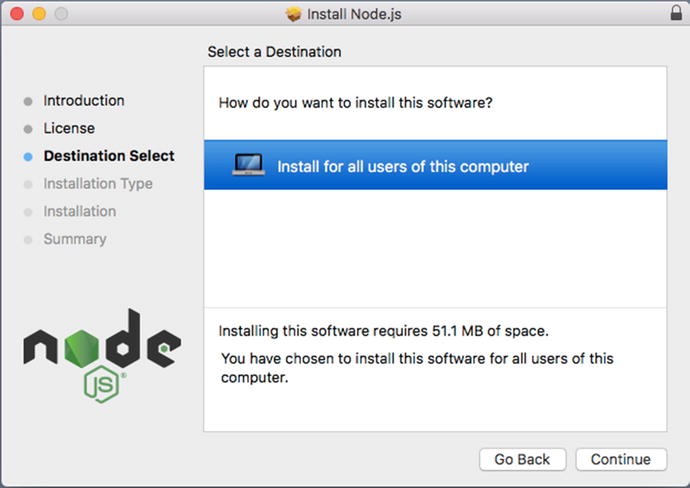
Figure 2-4. Select where to install Node
Finally, we are ready to install (Figure 2-5). At this point, when you click “Install” you will be asked for your system’s admin password.
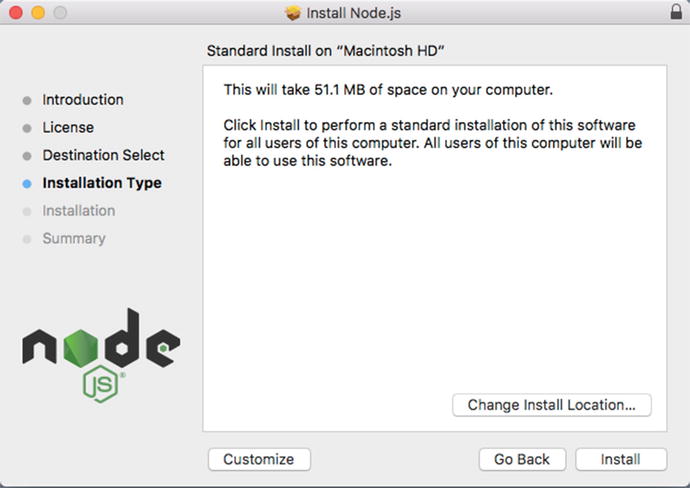
Figure 2-5. Selecting your installation type
The installer needs this so that it can install Node into a protected area of your operating system. Once the password is entered, you are off to the races.
Figure 2-6 shows the final screen. You’ve done it! To test this out, let’s open up the terminal application and test the version using the node –version command. You should see the version number you installed.
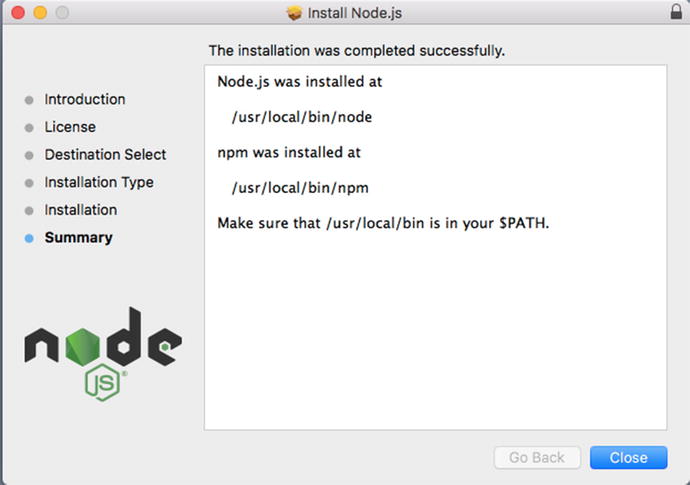
Figure 2-6. Installation is complete
Installing Node on Windows
The installation process for Node on Windows is very similar to the process for macOS.
From the Node Website ( http://nodejs.org ), download the LTS version of Node for Windows. Once the file is downloaded, find the downloaded file and double-click it to get the install process started (Figure 2-7).
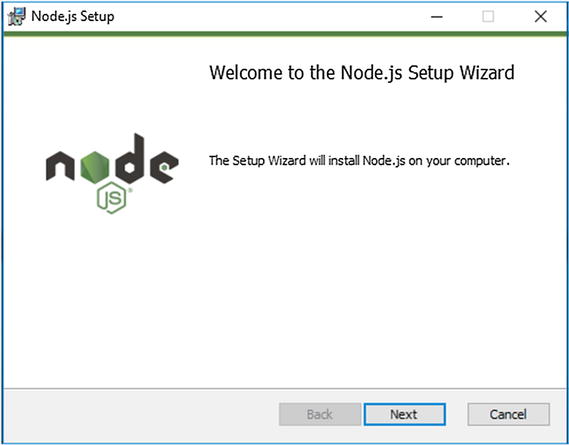
Figure 2-7. The first screen of the Node for Windows installer
When you click the Next button, you will see the Software License Agreement (Figure 2-8). Click the check box next to the text “I accept the terms in the License Agreement” and click the Next button to continue.
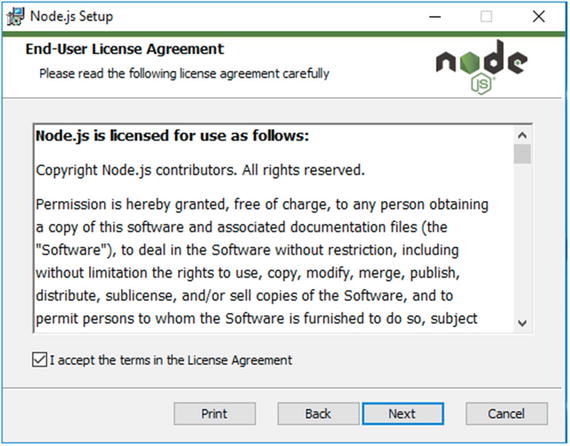
Figure 2-8. The End-User License Agreement for Windows
The next screen is the Destination Folder screen (Figure 2-9) where you may choose to customize where Node will be installed. For our purposes, there is no reason to override the default path of "C:Program Files odejs", but if you wish to change this for your system, this is where you would do that. When you have decided upon a path, click the Next button.
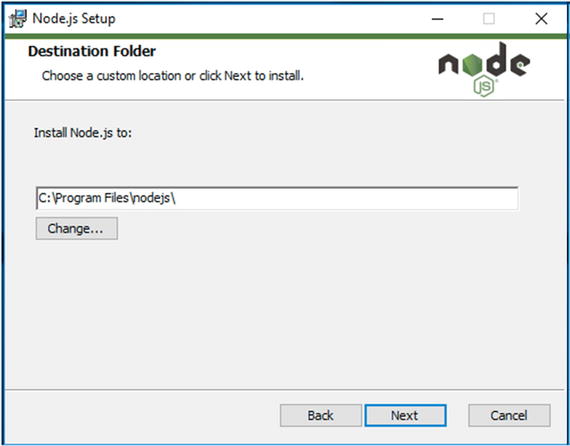
Figure 2-9. The Destination Folder screen
The next screen in the Node installer’s process is the Custom Setup (Figure 2-10) screen. Again, we recommend accepting the default settings for your Node install.
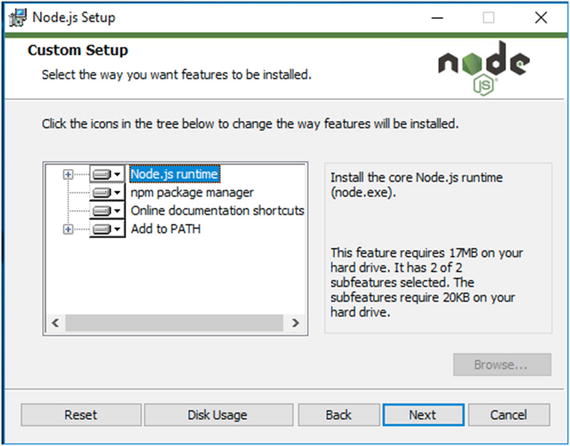
Figure 2-10. The Custom Setup screen
The next screen you will be presented is the Ready to install screen (Figure 2-11). Click the Install button.
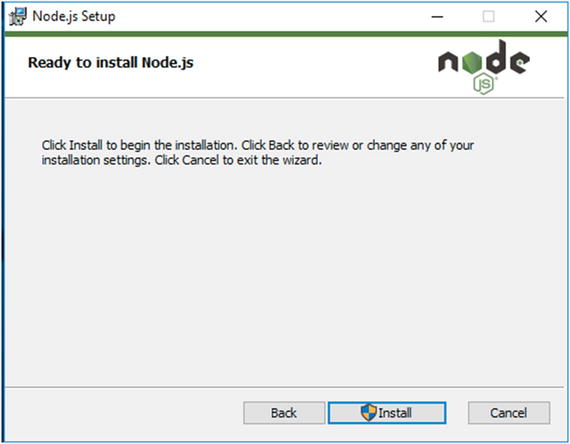
Figure 2-11. The Ready to install Node.js screen
After a minute of two, you should be presented with the final screen, the Completed screen (Figure 2-12). Click the Finish button. Open a new Command Prompt window and run the node –version command to assure your installation is working.
Installing Git on macOS
Now that we have Node installed, we need to install a version control system so we can use the starter code and other code repositories that appear in this book. Git, a very popular open source version control system, is what we are using and will install. Git is popular because of its size and ease of use. Older version control systems were often clunky, huge, and inflexible.
To get started, head over to https://git-scm.com to find the download link on their site. As you can see in Figure 2-12, you find the link to download the latest version of Git inside the image of the computer.
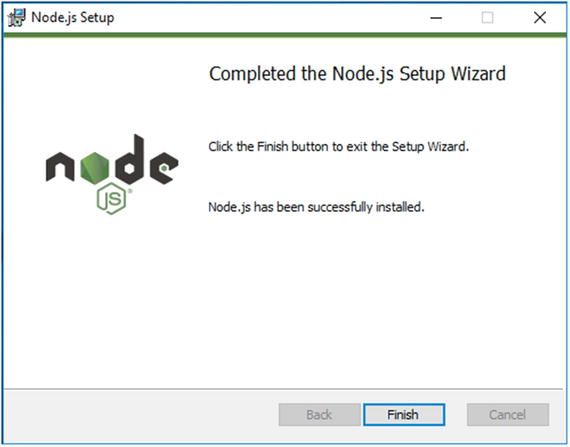
Figure 2-12. The Git website ( https://git-scm.com/ )
Installing Node on Windows
The installation process for Node on Windows is very similar to the process for macOS.
Clicking that link will take you to the download page (Figure 2-13).
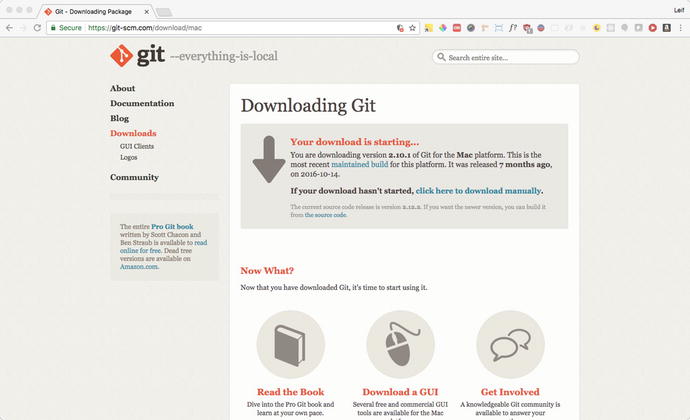
Figure 2-13. The Git website download page
Download the file, locate the downloaded file on your system, and double-click the file to mount the installer. You should see a folder like that in Figure 2-14.
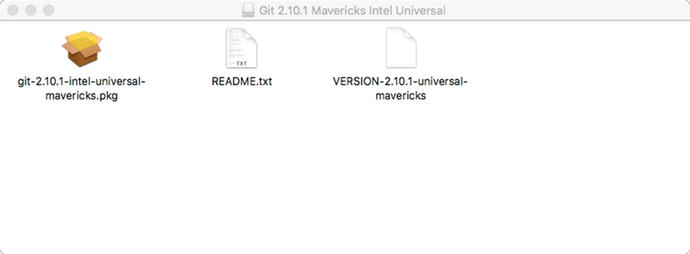
Figure 2-14. The downloaded Git install file opened
Double-click the installer .pkg file, and you may see a security warning from macOS that will not allow you to install Git.
If you see the screen shown in Figure 2-15, it’s ok. This is macOS’s way to protect your system from installers from unknown sources. To get around this, you will need to open up System Preferences ➤ Security & Privacy and go to the General tab. There you will find a notification that looks like this.
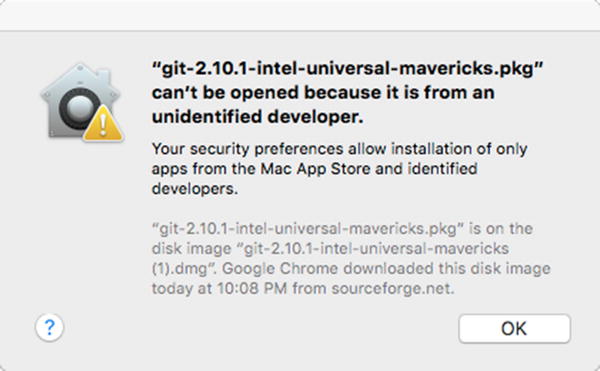
Figure 2-15. macOS warning message for Git installer
Click the “Open Anyway” button (Figure 2-16) to allow the installer to run, and you should see the installer UI load.
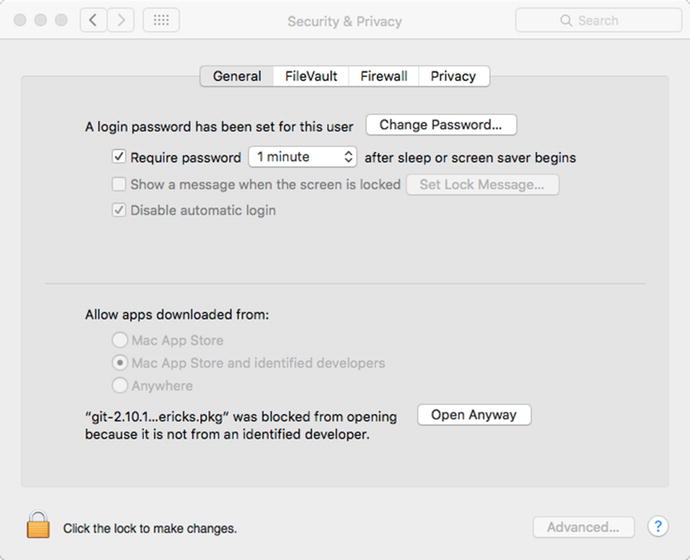
Figure 2-16. macOS Security & Privacy control panel. Note the “Open Anyway” button
Continue through the steps of the installer (Figures 2-17 through 2-19) to complete the installation.
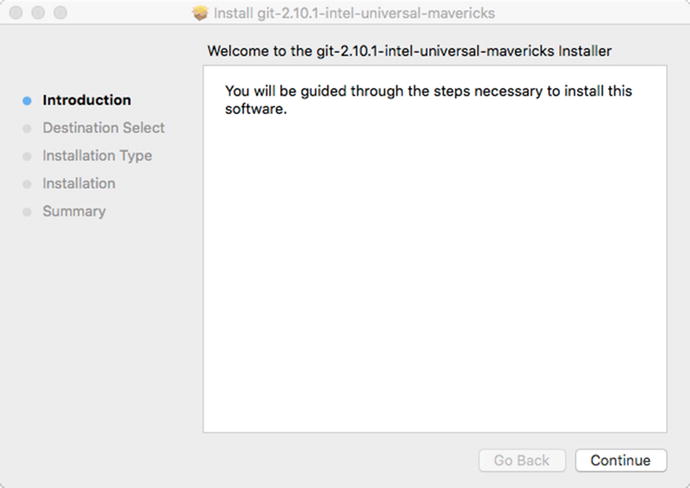
Figure 2-17. The Git installer’s introduction screen
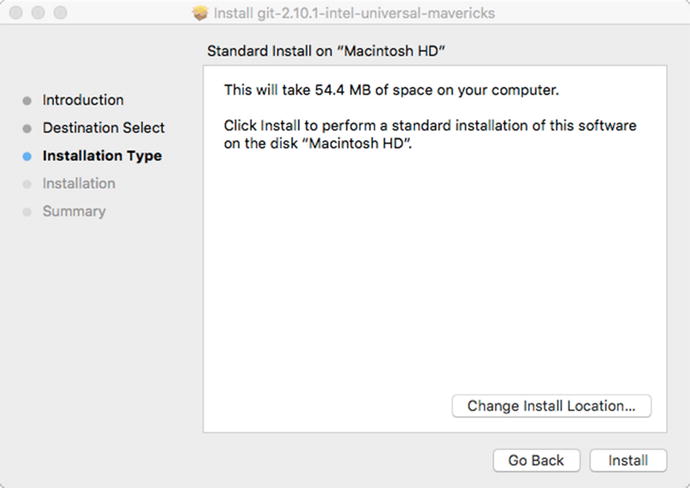
Figure 2-18. The Git installer’s Installation Type screen
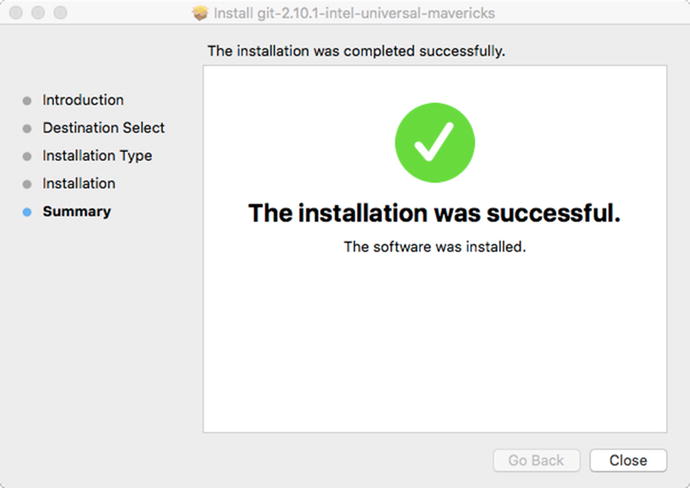
Figure 2-19. The Git installer Summary screen
Once you have Git installed, let’s test the results. Open up a Terminal window and type the following command:
git --versionYay! You have Git installed! You should see something like the results in Figure 2-20.
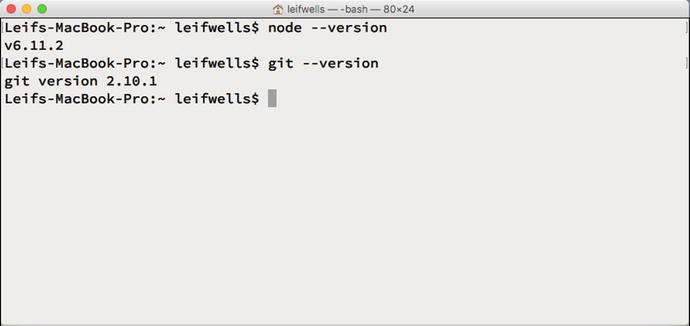
Figure 2-20. Displaying the installed version number of git in the Terminal window
Please note that if you are a Homebrew user, installing Git is really simple. Open up a Terminal window and type the following command and follow the screen guidance (the default settings should work for most developers):
brew install gitInstalling Git on Windows
Installing Git on Windows is a very similar process as on macOS. When you arrive at the Git Website ( http://git-scm.com ) on a Windows system, you are presented with the latest version of Git for Windows (Figure 2-21). In our case, the version 2.14.3, but by the time you read this book that version may have changed.
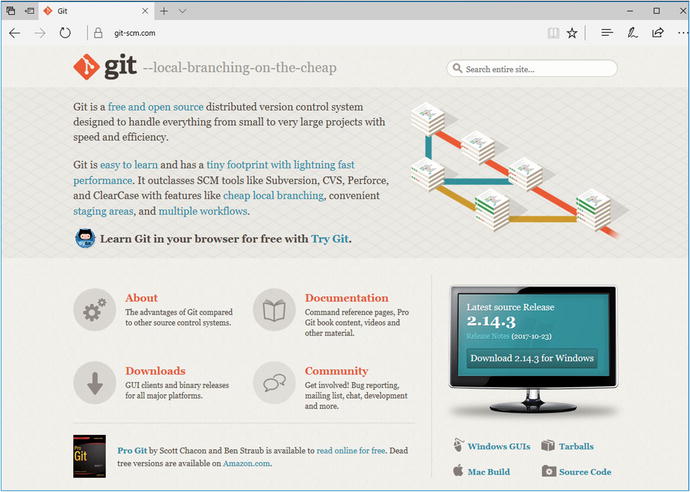
Figure 2-21. The Git Website as it appears on a Windows system
Select the link to download Git for Windows to begin the download process. Once the file is downloaded, find and doubleclick the file to get the installation process started.
The first screen you are presented by the Git installer is the Information screen (Figure 2-22). This screen displays the GNU General Public License for your review. Click the Next button to continue the process.

Figure 2-22. The Information Screen
The next screen displayed is the Select Components screen (Figure 2-23) where you may choose which of the Git components you wish to install. For our purposes, the default settings are what we suggest you use, so click Next for the next screen.
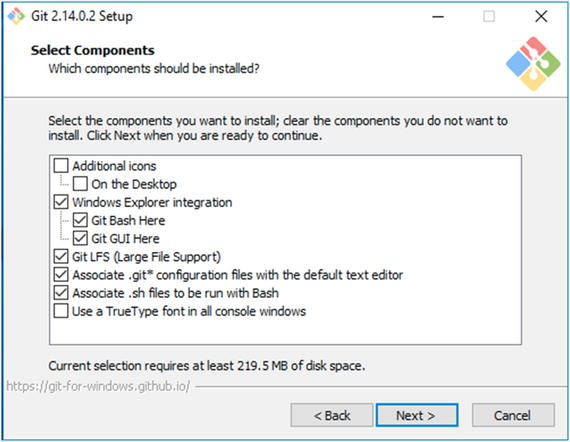
Figure 2-23. The Select Components screen
The next screen is the Adjusting your PATH environment screen (Figure 2-24) where you choose how you want to use Git on the command line, setting the PATH for your application for your system. The second option “Use Git from the Windows Command Prompt” is the choice we made because it gave us the flexibility to use either the Git Bash application or the Windows Command Prompt. Click Next to continue.
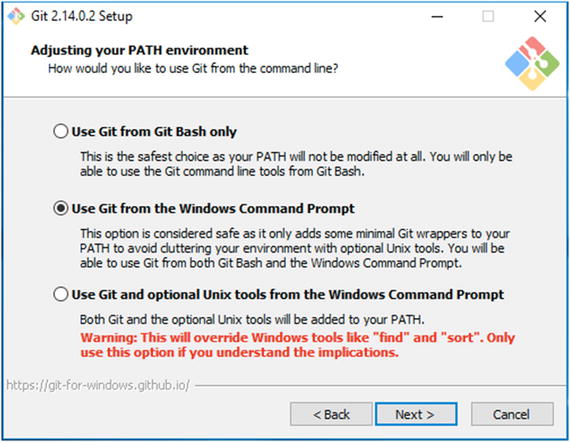
Figure 2-24. The Adjusting your PATH environment screen
The next screen presented by the Git installer is the Choosing HTTPS transport backend (Figure 2-25) screen. This screen allows you to choose how to communicate over a secure connection while using Git. Our suggestion is to choose the default “Use the OpenSSL library” option which should work for most developers. If you work on a system in a more strict corporate environment, you may need to select the “Use the native Windows Secure Channel library.” Check with your System Administrator if you have any doubts about which option is best for you. Make your choice, then click the Next button.
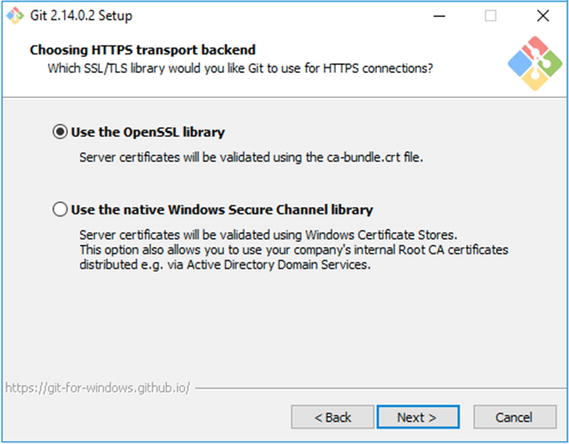
Figure 2-25. The Choosing HTTPS transport backend screen
The next screen is the Configuring the line ending conversions screen (Figure 2-26) where you need to decide how Git will handle line endings for files downloaded and uploaded by Git. Windows systems handle line endings differently than Unix systems, and Git accounts for those differences by changing the line endings at download to a Windows-friendly type and changes them to a Unix-friendly type upon committing to the repository. The “Checkout Windows-style, commit Unix-style line endings” is the option we are recommending, but we are making the assumption that you will be working alone. If you plan on using Git in a team environment, you may wish to choose one of the other options, though the default option will most likely be the one your team has chosen. Before making your choice, you should check with a team leader to make sure you conform to team requirements otherwise you may create problems when committing new code to the team repository. Make your selection and click the Next button.

Figure 2-26. The Configuring the line ending conversions screen
The Configuring the terminal emulator to use with Git Bash screen (Figure 2-27) is the next screen and, again, we recommend using the default setting which is “Use MinTTY.” The “Use Windows’ default console window” option can be limiting. This will only effect developers who choose to use the Git Bash application.
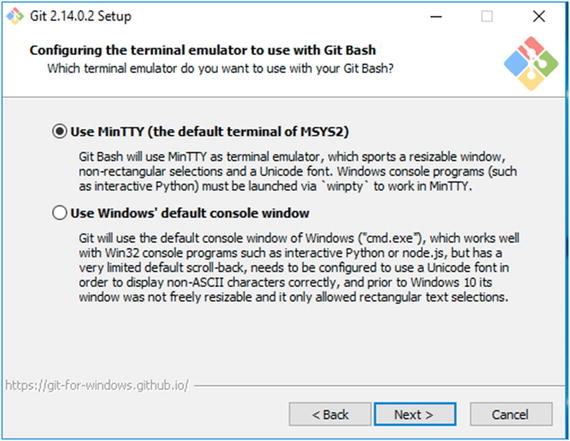
Figure 2-27. Configuring the terminal emulator to use with Git Bash screen
The next screen in the Git installation process is the Configuring extra options screen (Figure 2-28). The first item, Enable file system caching, is recommended as the description states it provides significant performance. The second option, Enable Git Credential Manager, also recommended, will assist you with accessing your repositories securely. Finally, we can click the Install button to continue.
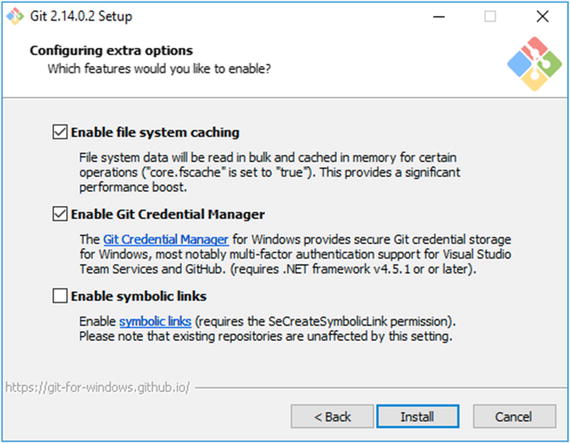
Figure 2-28. The Configuring extra options screen
The Git installer will run for a few moments and then present you with the Completing the Git Setup Wizard screen (Figure 2-29). On this screen you see two check boxes. We recommend selecting the Launch Git Bash check box, and deselecting the View Release Notes check box (unless you wish to view the notes). Once you click the Finish button, you will be presented with the Git Bash application. Verify out your installation by entering the git –version command as seen in Figure 2-30.

Figure 2-29. Completing the Git Setup Wizard screen
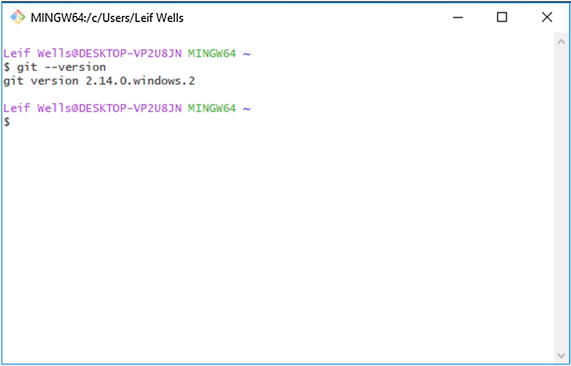
Figure 2-30. Terminal showing the results of running the git –version command
Installing Electron
One of the best features of Node is NPM, the Node Package Manager. Node Package Manager is how thousands of code libraries are distributed across the Internet. Need to add a feature or API to your project? Fire up a terminal window and use NPM to install it. With NPM, Node has truly standardized code distribution.
So, of course, we need to use NPM to install Electron. When installing a package like Electron, we have two options: (1) to install Electron locally, on a per project basis; or (2) globally so that any project can use it. Since you will be using Electron with each code sample in this book, we suggest installing Electron globally. Open a Terminal window and enter the following command:
npm install –g electronLater, if you need to install Electron in a project, you should use this command:
npm install --save-dev electronThis is a commonly used command so let’s break it down so that you understand how it works. First, npm is the utility we are using to install Electron. Second, install is the command. Third, the –g is shorthand for global, meaning our intention is to install Electron globally, making it accessible from anywhere on our computer. Finally, electron, obviously, is the name of the package we are installing. Note that the name is lowercase.
Once you hit enter, the command kicks in and messages should begin filling your screen. Don’t freak out. This is expected. At the end of the process, you should be seeing something like Figure 2-31.
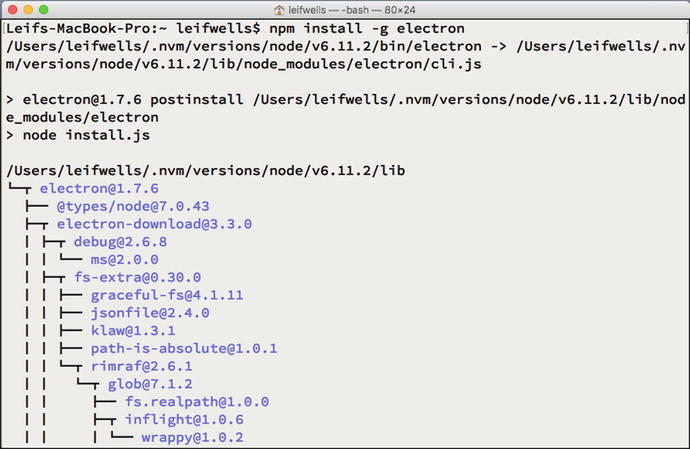
Figure 2-31. Installing Electron globally
To test your install, enter the following command:
electron –versionYou should see the installed version number appear in the Terminal window (Figure 2-32).
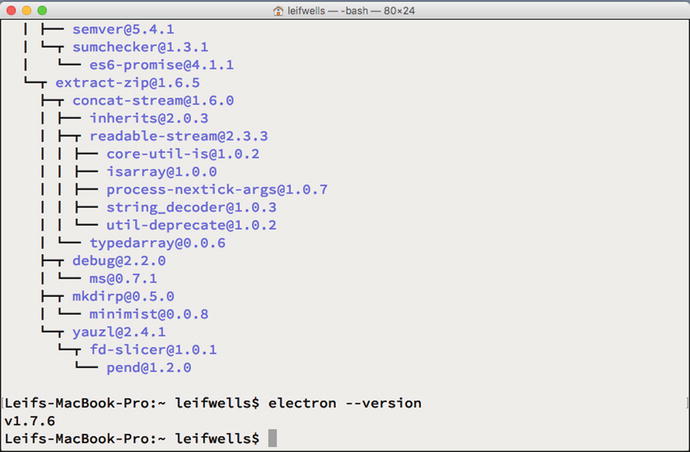
Figure 2-32. Checking the installed version of Electron
You can also enter electron to see an Electron application that allows you to drag and drop a Web application into the window to see it run.
Summary
You now have everything you need to work with Electron, as well as being able to participate with the samples used in this book. Good luck and enjoy coding with Electron.