
6
THE ART OF BROODING:
PREPARING THE NURSERY FOR YOUR NEW ARRIVALS
If chicks are in your future, regardless of whether you hatch them using an incubator, order them from a hatchery, or buy them from a feed store, you will need a brooder for your new arrivals.
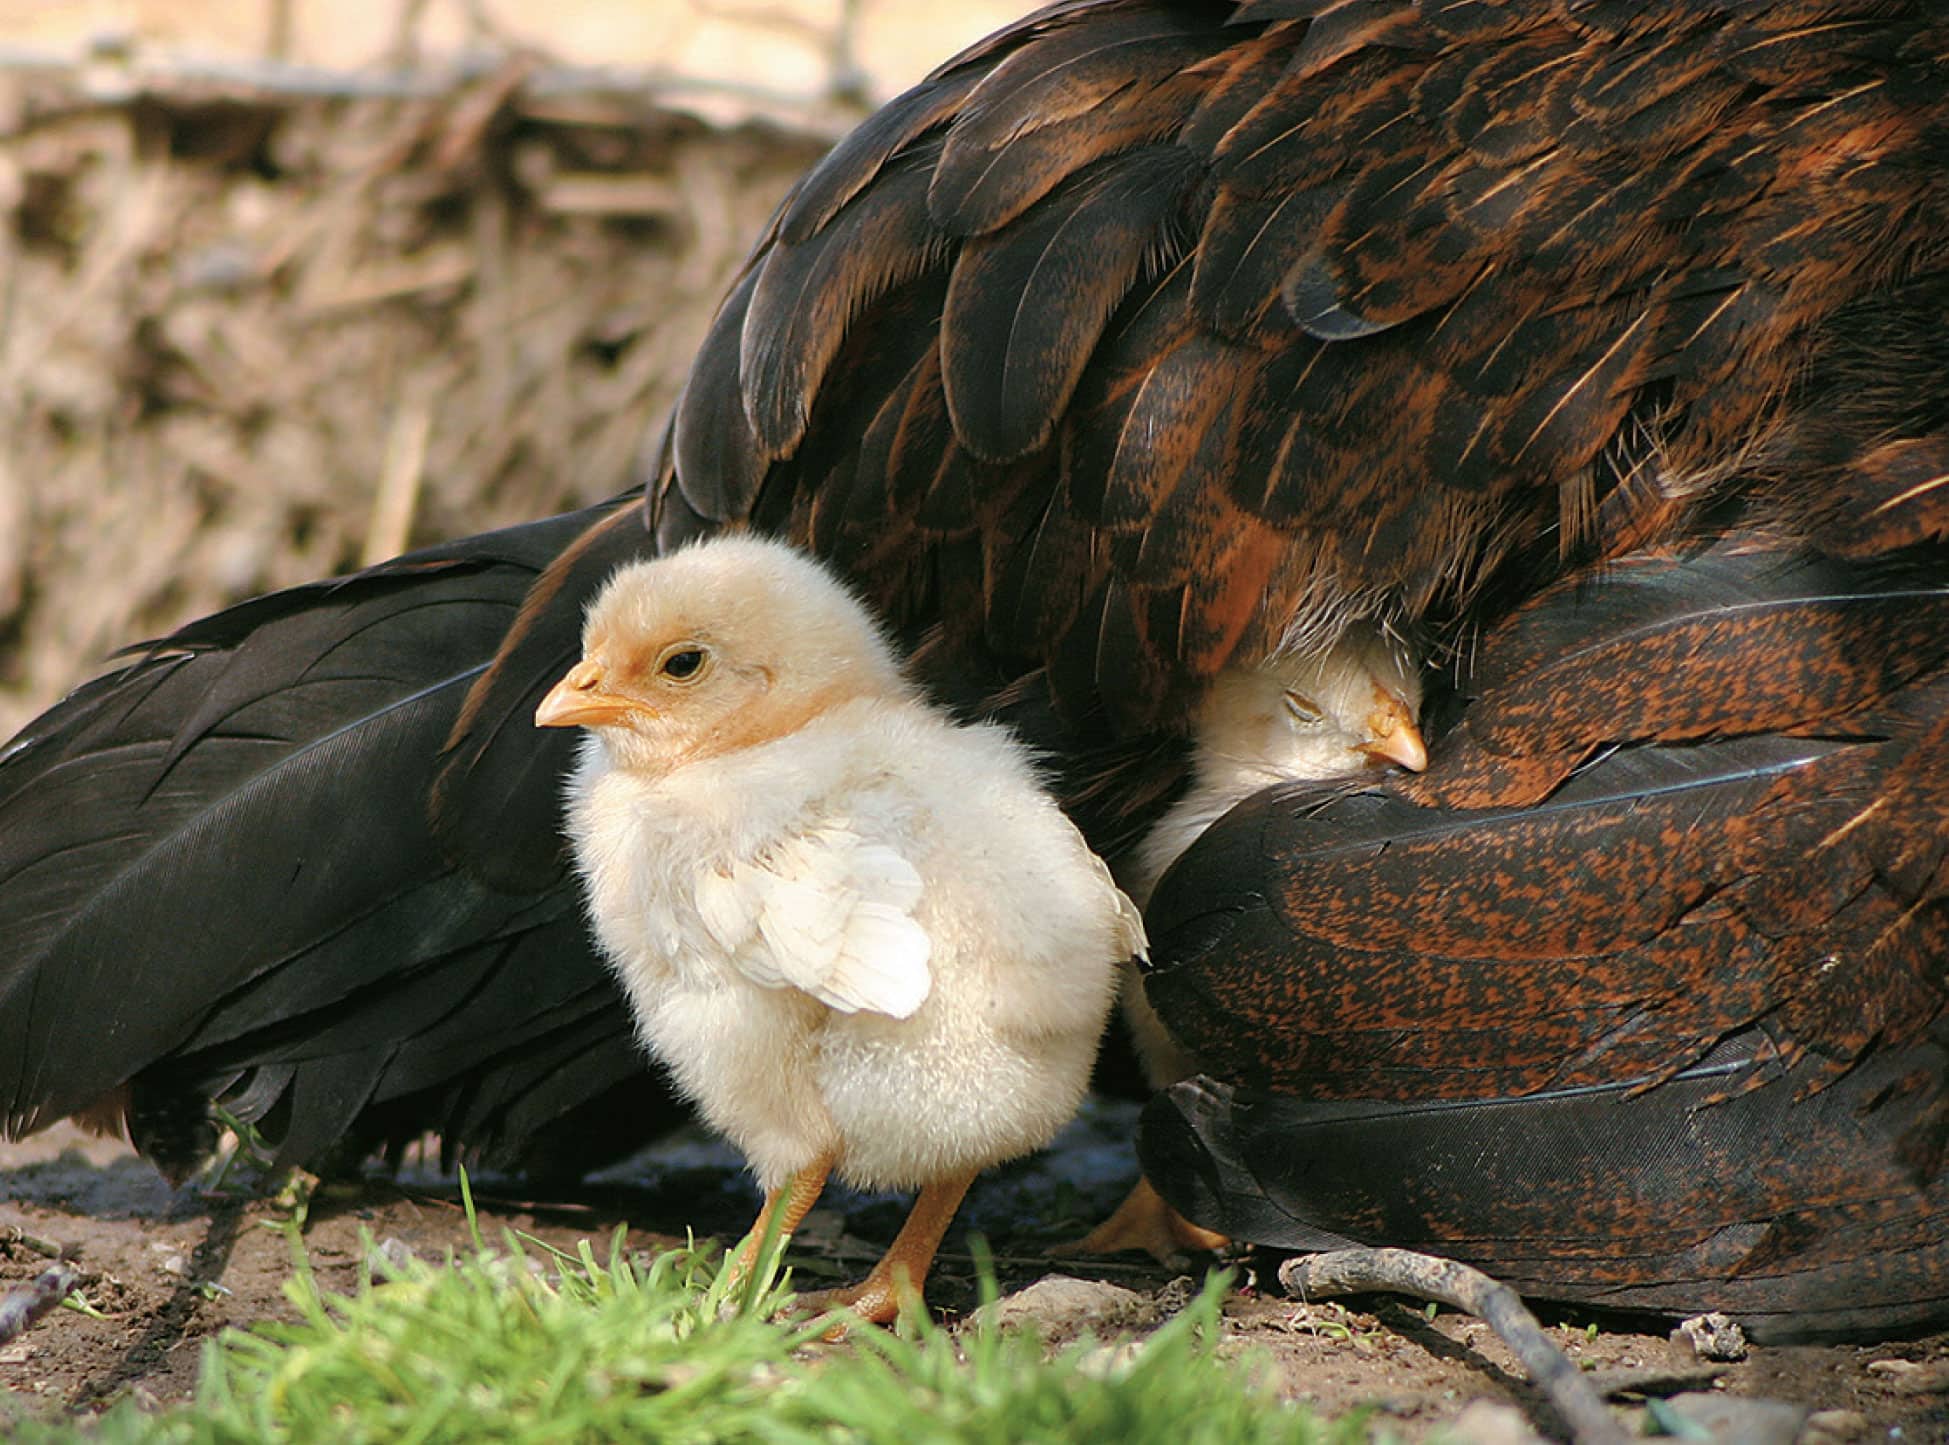
A brooder, your new chicks’ home for their first few weeks of life, is a box or pen that provides them a warm and dry place to live, a fresh and continuous supply of food and water, and protection from predators and a potentially harsh outside environment. It does what a mother hen would do in nature.
Your chicks live in the brooder—which is frequently indoors but always somewhere temperature-controlled—until they fully feather, usually between six and eight weeks of life. Actual length of time, however, depends on outside temperatures and the season; in January, they may need up to twelve weeks, but during summertime, they may need just four.
A brooder consists of several parts:
![]() Container
Container
![]() Heat source
Heat source
![]() Waterer
Waterer
![]() Feeder
Feeder
![]() Bedding
Bedding
![]() Thermometer
Thermometer
A brooder box does not have to be fancy. You have three options for obtaining a brooder: Purchase a commercial one; buy a kit that includes some brooder parts and requires you to provide some; or make your own homemade brooder out of wood, a kiddie pool, a plastic or rubber storage bin, a cardboard box, and so on.

A baby chick taking a drink from a commercial brooder trough.
SELECTING A BROODER
Because we all have different expectations and preconceptions for brooders, different types work for different people. When picking out your brooder, consider one that works well for you, your schedule, and your chicks.
ESSENTIALS: THE CONTAINER
Many household items can pass for a brooder: an old bathtub, an out-of-use child’s playpen, or an old animal water trough. A favorite homemade brooder, with which we’ve started countless new chicken owners, is a simple 45-gallon (170 L) storage bin purchased from any big-box store or major retailer. It has many qualities that suit it for the task:
![]() Tall sides make chick escapes unlikely.
Tall sides make chick escapes unlikely.
![]() An elongated shape allows plenty of room for growing chicks to move toward and away from the heat source.
An elongated shape allows plenty of room for growing chicks to move toward and away from the heat source.
![]() Sturdy sides and handles offer a perfect place to support a heat source.
Sturdy sides and handles offer a perfect place to support a heat source.
![]() Plastic or rubber material makes it easy to clean and disinfect.
Plastic or rubber material makes it easy to clean and disinfect.
![]() Wheels, found on some models, make it easily moveable.
Wheels, found on some models, make it easily moveable.
Commercial brooder boxes are fantastic if you have the budget to purchase one. With water troughs, feed troughs, built-in heaters, and removable floors for cleaning, they make for an easy and pleasant brooding experience.

A commercial brooder

A completely functioning homemade brooder made from a rubber/plastic bin
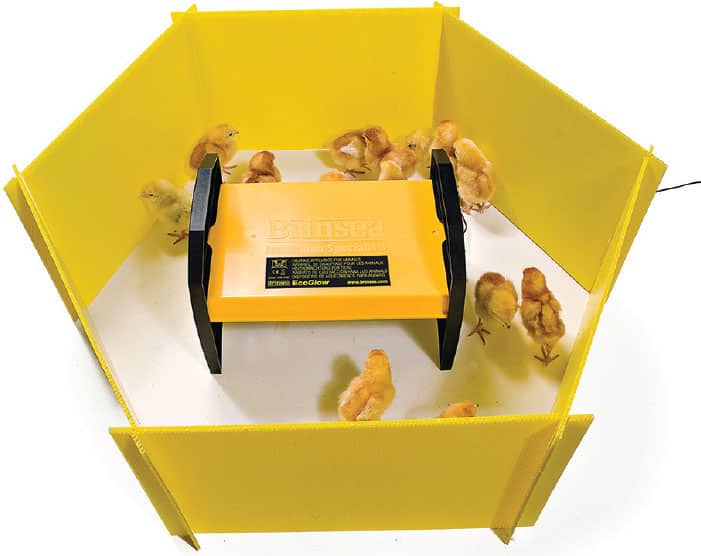
Brinsea EcoGlow 20 brooder heater and brooder corral
ESSENTIALS: THE HEAT SOURCE
Now that you’ve selected your brooder, you need its corresponding pieces. First, the heat source.
Chicks get cold quickly because they haven’t yet feathered out (they have only down) and therefore haven’t bulked up their internal heat source. There’s no mother hen to keep them warm, so, as chicken owner, that’s your job. To be clear, every heat source can be a fire hazard, but some are much safer than others.
Every year, homes burn to the ground because the heat source in a brooder failed. In early 2016, a woman was killed in a house fire that directly resulted from a brooder heat source, in this case, a heat lamp. The good old-fashioned heat lamp is the most used brooder heater in America. Why? It only costs about $12 and is readily available.
While I have used heat lamps many times without incident, I no longer use them due to the fire risk. If you do choose to use one as a heat source for your brooder, you must implement several levels of attachment to make sure the heat lamp does not fall into the brooder shavings below.
However, even if you do your part to secure the heat lamp correctly, there is still another risk we have seen increasing in recent years. The bulbs that are most common for use in these lamps all seem to be coming from China. Apparently, the adhesive they use to keep the glass globe in the socket part of the bulb is failing due to the incredible heat created by the bulb. The bulb then falls out of the socket into the shavings below and either causes a fire or breaks into thousands of pieces, which your chicks will then eat. So, to try and prevent these mishaps, you now need to wrap either hardware cloth or chicken wire around the heat lamp guard to prevent the bulb from falling out. Again, these heat lamps are widely used because of the low price and availability. However, if you decide to use one, I suggest you call your homeowners insurance company to find out what your deductible is if your home catches fire.
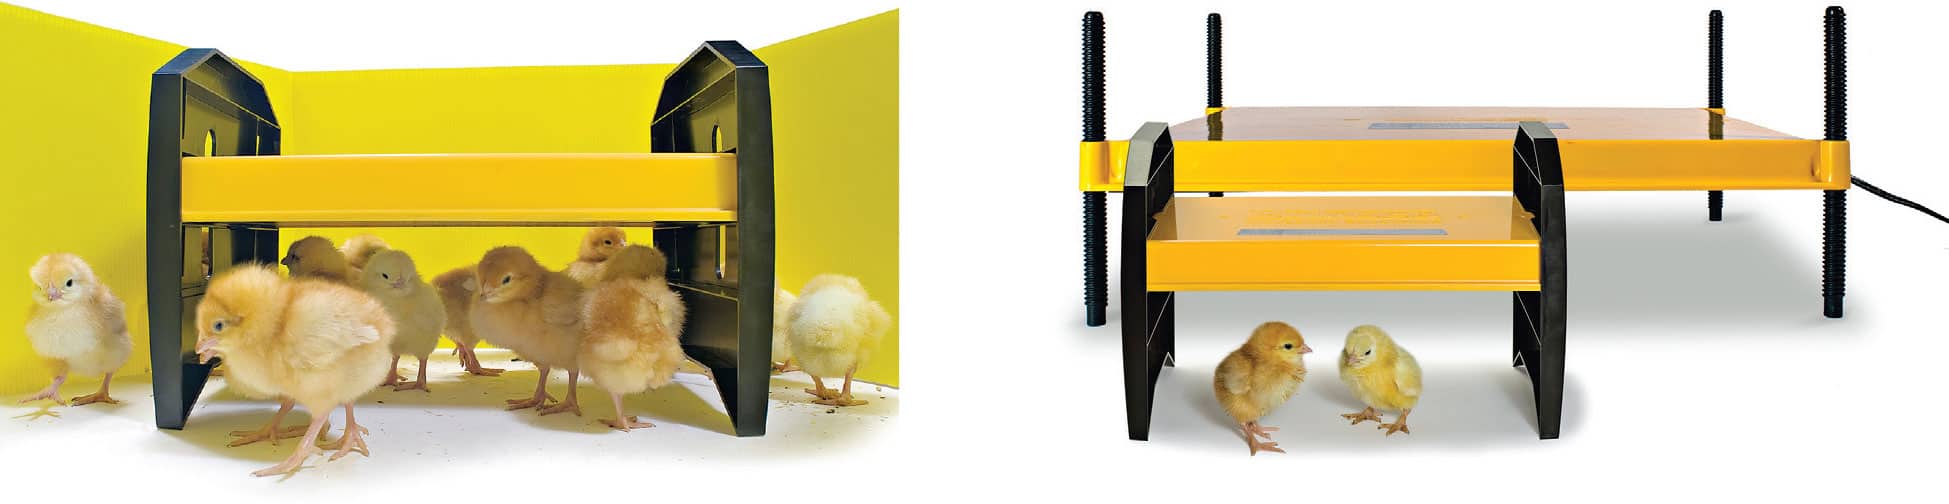
The Brinsea EcoGlow 50 and 20
There are much safer brooder heaters available. Why are they not used as much as the previously mentioned heat lamps? They range in price from $75 to $150—but that’s much less than the average insurance deductible if your house burns to the ground! For brooder use, I prefer the Brinsea EcoGlow 20 or 50. They each provide enough heat for your chicks and are much safer. Another favorite of mine is the Sweeter Heater. It, too, can be used in a brooder, but in my opinion, it’s best suited if you choose to heat your coop in the winter, even though that is not necessary in most cases.
There are two basic lamp types. One has a direct wire from the outlet to a ceramic base where the bulb is inserted. The connection of the plug to electricity alone turns this lamp on and off. The second lamp has a wire that connects from the outlet to a plastic base, which also has an on/off switch. For safety reasons, we discourage using cheaper plastic lamps. We’ve seen them melt due to high heat from constant bulb use in the brooder.
Brooder Temperature
All chicks need access to a spot within the brooder that is 95°F (35°C) for the first week and 5°F (about 3°C) less each week thereafter until the brooder temperature gets down to no lower than 70°F (21°C). Attach a thermometer to the section of the brooder at the chicks’ height level to confirm that it’s at the appropriate temperature. If it hangs on the side of the brooder, it may be too close to the heat source to provide an accurate reading.
It’s important to note that you do not want your entire brooder to be 95°F (35°C). Chicks need access to cooler areas, as mentioned next.
If you pay close attention to your chicks, however, you do not truly need a thermometer in your brooder. If there is a draft in the brooder, your chicks will chirp loudly as they huddle in the corner that provides them the greatest protection. Through their actions and their peeps, the chicks will let you know whether to increase or reduce the temperature. Try this: After adding heat to the brooder, watch how the chicks react. If all the chicks are loud, huddled close to the heat source, or lethargic, they are too cold. Up the temperature either by lowering the heat source or increasing the wattage of the bulb. If this does not solve the problem, consider the fact that you may have a draft. If the chicks stay far away from the light, chirp loudly, or pant, they are most likely too hot. A reaction to a heat source that’s too hot may take time. After you increase the temperature, check the chicks every fifteen minutes to be sure they do not overheat. If the brooder’s too hot, correct this problem by lifting the heat source above the chicks or by putting in a lower-wattage bulb.
The chicks do not need a uniform temperature throughout the entire brooder. It is best to keep one area of the brooder warm, but not too hot, and keep other areas cooler so the chicks can regulate their own comfort levels. We have seen more chicks die from overheating than from being too cold because chicken owners put the chicks in a small box with a heat source that’s too close. This is why the brooder needs to have an oblong shape or wide base that allows the chicks to get away from the heat source.
Whether you choose to clamp, hang, or set the heat lamp on the brooder, make sure it is secure with no chance of falling from its berth. Remember, all heat sources are fire hazards and should be treated with caution.
Light Bulbs
There are two widely used types of bulbs—red and white light bulbs. Both give off the same wattage of heat. The only difference (literally) is what color light they emit.
Several factors determine the wattage appropriate for the bulb. A 125-watt bulb usually works for chicks in a brooder housed in a controlled-temperature environment such as a basement. Consider a 250-watt bulb if the environment outside the brooder is cool, such as a garage during wintertime. And know that you can always change the bulb. We recommend swapping bulbs as the temperature changes with each season.

A direct wire brooder heat lamp with ceramic base

A red heat lamp bulb for use with the brooder heat lamp
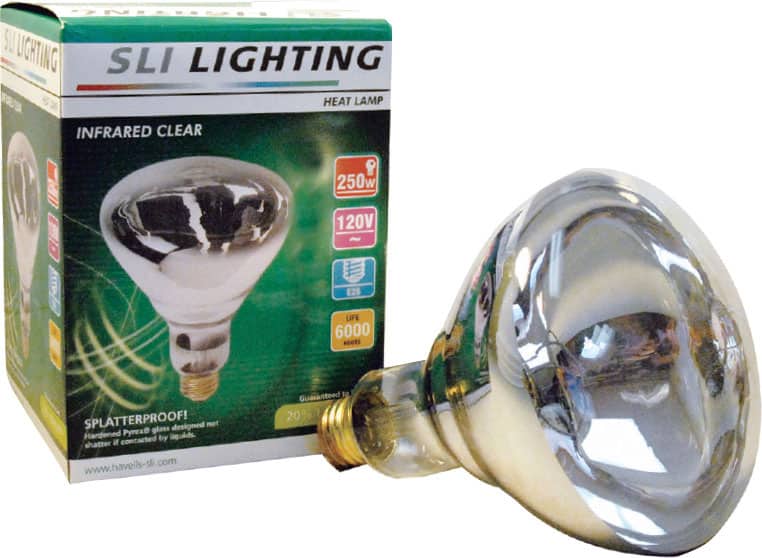
A clear heat lamp bulb for use with the brooder heat lamp
ESSENTIALS: FEEDERS AND WATERERS
Feeders and waterers come in all different sizes. The number of chicks you need to feed and provide water for and the size of your brooder box will determine your choice. Most commercial brooders come with their own feeding and watering systems, like the model in the photo shown here, which shows trays on the brooder’s outside. There are also plastic or metal feeders and waterers in a range of sizes that you can purchase from your local feed-and-seed store for your homemade brooder. Provide 1 inch (2.5 cm) of feeder space per chick during the first week and 2 inches (5 cm) of feeder space until the end of brooding at six weeks old.
You can make homemade feeders out of bowls or even egg cartons and homemade waterers out of plastic bowls, plastic bottle bottoms, or Mason jar lids. The drawbacks to homemade feeders and waterers are that chicks will climb into the feed and water, excrete into them, sleep in them, and ultimately knock them over, spilling the contents. You can certainly hot glue the homemade feeder or waterer to some cardboard so the chicks can’t turn it over, but it is best to use the feeders and waterers specifically designed for chicks found at a feed-and-seed store or online.
Base the size of your feeder and waterer on the number of chicks you have and brooder box size. Those too large for the brooder take away space from the chicks or make it difficult for them to move around. Those too small will need to be refilled frequently. Chicks need fresh feed and clean water at all times. Place the feeder and waterer apart from each other in the brooder box. As the chicks eat, they scratch through their food and toss it with their beaks. If the waterer is next to the feeder, some of this scattered food may end up in the water. Spoilage from this situation creates an unpleasant smell.
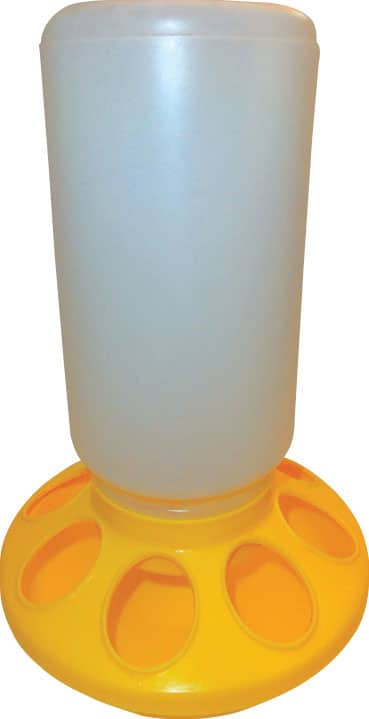
A plastic 1-quart (1 L) feeder with plastic base for use inside the brooder

A plastic 1-gallon (4 L) waterer for use inside the brooder
For young chicks, place the feeder and waterer directly on the brooder floor. As the chicks grow, raise the two to the level of their backs (but never any higher). Feed will always be spread about the brooder floor, but increasing the height of the feeder and waterer—by pulling hanging versions higher or adding small blocks or bricks to those on the ground—reduces the amount of feed they waste. Do not place the water directly beneath the heat source. Chicks need access to cool water, and the heat source may also heat the water.
ESSENTIALS: BEDDING
Depending on the brooder, you may need to add bedding material to its bottom to help with cleaning. Its purpose is to reduce mess and (possibly) odor. There are several bedding options, some of which work better than others.
A good surface on which to stand will help strengthen chicks’ legs and toes early in brooding. During the first day or two, fold up and place an old, nubby kitchen towel into the brooder box bottom. The nubby surface gives chicks a roughness to grab onto during the first few days after hatching and prevents spraddle leg, a condition in which a chick’s legs spread out from walking on a slick surface on which it cannot gain traction. Remove and discard the towel after it is soiled. After that, cover the brooder bottom with shavings in place of the towel.
Many people choose a wire floor for the brooder bottom. We recommend using 1/4-inch (6 mm) hardware cloth instead. This allows you to place a pan or a piece of cardboard under the wire to catch any wasted food, spilled water, and feces. The only disadvantage to this is that it does not allow the chicks to effectively use their natural instinct of scratching for food.
There are several types of shavings from which to choose. Some studies have shown negative side effects of cedar shavings on mice and small rodents—though not on chicks—but as a precaution, we discourage their use. Straw can carry a fungus that your chicks can pick up, possibly resulting in a respiratory infection. Try pine shavings, which are usually readily found and aren’t expensive. Aspen shavings are said to be the safest; they release the least toxic gasses of any wood shaving but are also more expensive.
Some people use shredded paper or newspaper as brooder bedding. Yes, newspaper is cheap, but it can harm the leg health of your chicks. When wet, these materials become slick and turn to mush, making cleaning difficult. Also, they can cause spraddle leg.
EVERYTHING (ELSE) YOU SHOULD KNOW ABOUT BROODERS
You may have additional questions before making a brooder decision. In spite of any advice given here or elsewhere, always evaluate all available options to make the decision that’s best for you. Here are the answers to a few frequently asked questions:
How Many Chicks (From 0–6 Weeks) Will a Brooder Hold?
While chicks start out egg-size, large fowl breeds quickly grow to softball-size around six to eight weeks old. What seems like plenty of room for a week-old chick will be quite tight for a six-week-old chick. Also, consider the space bulky items such as a feeder and waterer take up in the brooder. Chicks need plenty of space to move toward or away from a heat source, at least 6 square inches (15 sq cm) per day-old chick, with 12 inches (30 cm) even more preferable.
How Frequently Will I Need to Clean the Brooder?
The amount of space and number of birds in the brooder determine how frequently you need to clean it. Larger brooders require fewer cleanings than those with less space. Your nose and eyes easily let you know when it is time to clean out the brooder. We recommend doing it at least every other day. If you begin to smell ammonia, the level of gas is already too high for the birds’ comfort. With the appropriate maintenance, you can keep odors low and reduce the chance for disease in your birds. If the brooder smells of ammonia and you only have time to clean weekly, then consider spreading an ammonia-control product in the brooder. These products are safe to use around chicks but be sure to spot clean any wet bedding first.
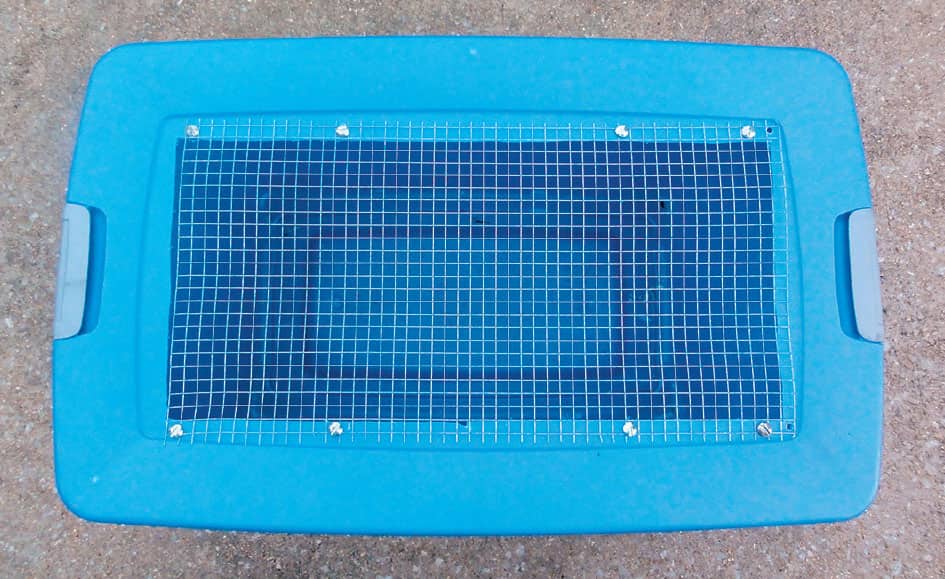
A rubber/plastic homemade brooder box with a wire lid
Will the Chicks Be Able To Fly Out After a Few Weeks? How Can I Keep Them From Getting Out?
If you choose a brooder with low sides (such as the kiddie pool described shown here), after the first week, chicks will flutter right over the edges. Just because they can get out doesn’t mean they can always get back in—necessary to reach their food and water and for warmth.
Even storage bins with tall sides may not prevent chicks from getting out. We have found that they flutter to the top of their feeder or waterer, which puts them at a height to then flutter out of the bin. Attaching upside-down cones to the tops of the feeders and waterers keeps the chicks from flying on top of them. Netting or a wire lid also may be a solution. Something as simple as a window screen will keep chicks inside the brooder and will allow for good airflow.

Be sure to supervise children at the brooder. Their curiosity could cause harm to your young brood.
Do I Need To Protect My Chicks From a Household Pet?
When you choose a brooder and its placement, keep in mind your pets—indoor cats, dogs, snakes, other household pets—and your young children. To protect the birds and keep unwanted intruders out of the brooder, clamp it down or lock it with a wire lid, shaped chicken wire, or netting.
Should I Store My Brooder For Reuse After My Chicks Outgrow It?
If there is one confession chicken keepers make to each other, it’s that chickens are addictive. Even if you think you won’t add to your flock, you may change your mind. Think about where and how safely you can store the brooder and brooder items for future use; do not discard your brooder just because your first chicks grow up.

How Expensive is a Brooder?
Brooders can be as cheap or expensive as you choose. Some people use a bathtub or a large cardboard box at little to no cost. Others build a brooder using recycled materials, new materials, or a mixture of both. And still others purchase commercial brooders. There are options for everyone.
PLACING YOUR BROODER
Once you decide on the materials for your brooder, you need to figure out where to put it. Chicks must stay warm, dry, and away from drafts. You can raise chicks in your bathroom or in your garage, but a sunroom, spare bedroom, or other interior space is ideal. These latter options likely include a heating unit and an air-conditioning unit that will help you keep the chicks comfortable no matter the season.

INTRODUCING YOUR CHICKS TO THE BROODER
The brooder is finally set up and your chicks are ready to move in. What’s next?
1. Remove the chicks from the transport box (either from bringing them home or moving them from the incubator) one at a time and gently place them in the brooder. As you transfer them, examine each chick for any deformities, lethargy, or feces around their vent area.
2. Once each healthy chick is inside the brooder, gently dip its beak in water. Allow it to throw its head back to swallow and then dip its beak in the feed.
3. Repeat this process with every chick.
This is an important time with your chicks because not only are you showing them where to find their feed and water—what a mother hen would do—but you also are looking for any weakness that may cause problems for the chicks in the future.
BROODER MAINTENANCE
Feeders and waterers always need a fresh and constant supply of food or water. Depending on their size and the number of chicks, you may need to refill them as frequently as every two to three hours (especially homemade feeders or waterers), daily, or every couple of days. Constant monitoring of feed and water levels is essential.
It is also important to keep these essentials clean from feces, which can contaminate a food and water supply. To reduce this problem, keep them raised to the chicks’ chest level. Brood bantam and large fowl breeds separately; the height requirements for food and water equipment differ greatly.
When raising chicks at home, there is no mother hen to take care of them, so as their owner, it’s your job.
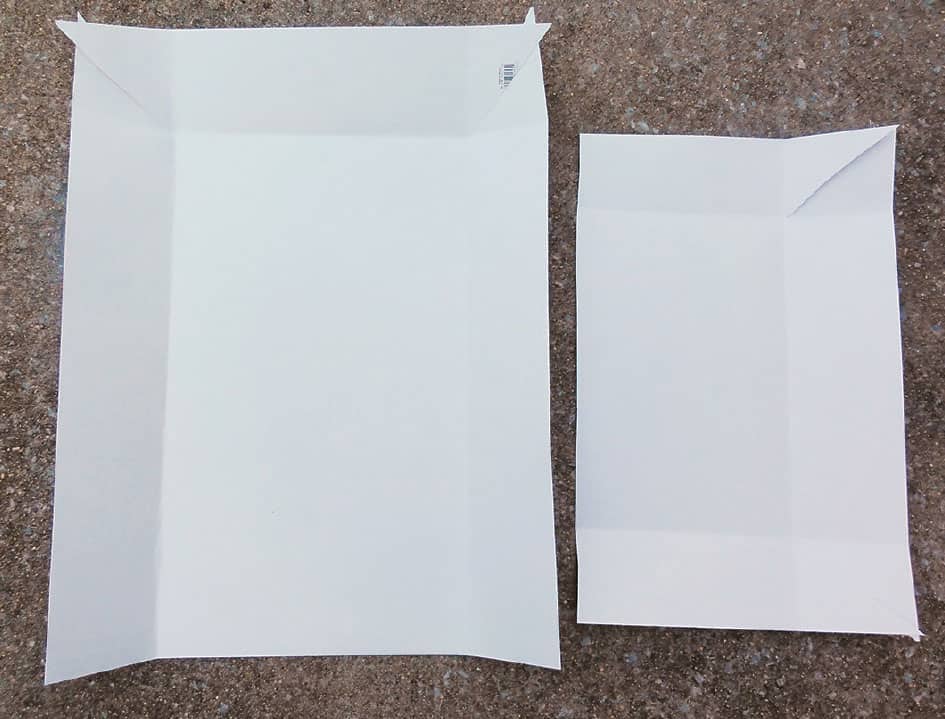
Poster board is an efficient disposable liner for your brooder.
The brooder will need regular cleaning, the timing of which will again depend on the brooder size, the number of chicks you have, and the size and age of your chicks. Here are some general guidelines: Spot clean daily (or at least every other day), and a full cleanout should be done weekly. Clean as necessary in the instance of a major water spill. Your nose and eyes will also let you know when you need to clean. As the chicks get bigger, you will probably find it necessary to clean the brooder daily.
Cleaning includes the following:
![]() Replacing the bedding
Replacing the bedding
![]() Washing down the sides with soapy water
Washing down the sides with soapy water
![]() Taking apart and cleaning the feeders and waterers with soapy water and a sponge
Taking apart and cleaning the feeders and waterers with soapy water and a sponge
![]() Rinsing down the brooder with a hose
Rinsing down the brooder with a hose
This may sound like common sense, but make sure to remove the chicks before you clean out the brooder. Place them in a box in a warm area.
When the chicks are ready to move outside to their new home, the chicken coop, you need to clean the brooder one final time. We recommend 1/4 cup (60 ml) bleach to 17 cups (4 L) of water. Use this bleach solution to scrub down the brooder, feeders, and waterers. Rinse these items thoroughly with water and let them dry. Store them safely for their next use.