
Setting up a server
Changing the project type
Connecting to data services
Binding data to a component
Your design comp likely contained a representation of data. In your Catalyst project, you converted that representation into a data list and, with the help of the Design-time Data panel, displayed sample data. Now, you will be able to connect the project to live data, generated by the server.
Flex projects run entirely on the client's side; that is, they run in Flash Player through a Web browser or on a user's desktop via AIR. As they do not run on the server, they have no direct access to server-side resources such as databases.
In order for your application to display live data, you need a script running on the server that can communicate with the database, retrieve the desired data, format it appropriately, and send it to Flex.
You can write this script in any one of a number of languages and rely on varying technologies. Whether you or your developer is proficient in Adobe ColdFusion, PHP, Microsoft ASP.NET, Ruby on Rails, or almost any other server-side technology, you will be able to leverage it to get data into your Flex application.
A local testing server is a Web server installed on your personal computer that you can use to simulate live connections with the database. While there are quite a few steps involved with downloading, installing and configuring the server, the process is fairly simple and will enable you to test your pages and further develop your applications as needed.
Adobe ColdFusion provides a set of powerful, easy-to-learn and easy-to-use tools for developing data-driven Web applications. As a commercial product, it does need to be purchased by your company or Web host in order for it to be deployed on a live, production Web server. However, Adobe makes a Developer Edition available, free of charge, to be installed and used in testing environments.
Using a Web browser, go to
www.adobe.com/products/coldfusion.Click Get the Free Trial (see Figure 26.1). A login screen appears.
Note
The most recent release of ColdFusion as of this writing is version 9, released in October of 2009. The process shown in these steps will work with ColdFusion MX7, ColdFusion 8, or ColdFusion 9, so if you have already installed one of those earlier versions, you need not re-download and reinstall ColdFusion 9.
Log into Adobe's Web site in order to download software. If you have an Adobe account, type your username and password. If you do not have an account, you can click the link on the page and create a free account, and then return to this page and log in (see Figure 26.2).
Select the version of ColdFusion that is appropriate for your operating system and click Download (see Figure 26.3). The File Download dialog box appears.
Click Save (see Figure 26.4).
Navigate to a directory on your computer into which you want to download the file and click Save.
When the download completes, navigate to the directory into which you downloaded the file and double-click it to launch the installer. The first step of the installer informs you that ColdFusion is going to be installed.
Click Next (see Figure 26.5).
After reviewing the license agreement, click Next (see Figure 26.6).
Click the option to install the Developer Edition.
Click Next (see Figure 26.7).
Select a configuration for ColdFusion. For a local testing server, Server configuration option, which is the default option, works best.
Click Next (see Figure 26.8). The next screen displays a list of subcomponents to install with ColdFusion.
Leave the default selections and click Next (see Figure 26.9).
Select the directory into which you want to install ColdFusion. Unless you have a particular reason to choose something else, leave it at the default.
Click Next (see Figure 26.10). The next screen allows you to specify that you will be using the stand-alone version of ColdFusion.
Select the Built-in web server (Development use only) option.
Click Next (see Figure 26.11).
Enter a password and type it again to confirm. This password will be used by you when you need to log into the ColdFusion administrator to configure your server, so be sure to use a password that you will remember (see Figure 26.12).
ColdFusion uses the Remote Development Service to allow external editors such as Adobe Dreamweaver and Adobe ColdFusion Builder to have access to the server to simplify development. On a development or testing machine such as the one you are setting up, you should enable RDS and set up a password to control access. You should not enable RDS on a live production server.
In this case, select the Enable RDS option and type, then confirm, a password (see Figure 26.13). The installation wizard offers a summary of the settings.
When you are ready, click Install (see Figure 26.14). The installer will likely take several minutes.
Once the installation is complete, launch the ColdFusion administrator to complete the configuration (see Figure 26.15).
Click the link provided to launch your Web browser. After a few minutes, the installer will complete and display the ColdFusion administrator login screen (see Figure 26.16).
Log in and explore the administrator if you wish, using the password you created during the installation process (see Figure 26.17).
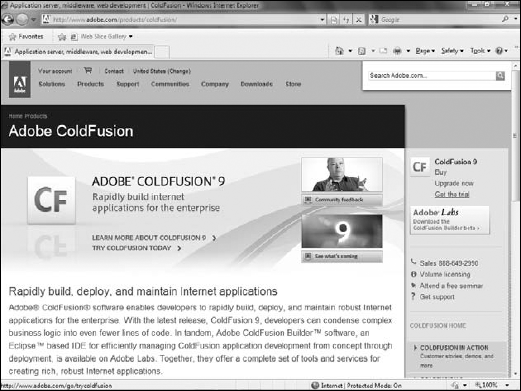

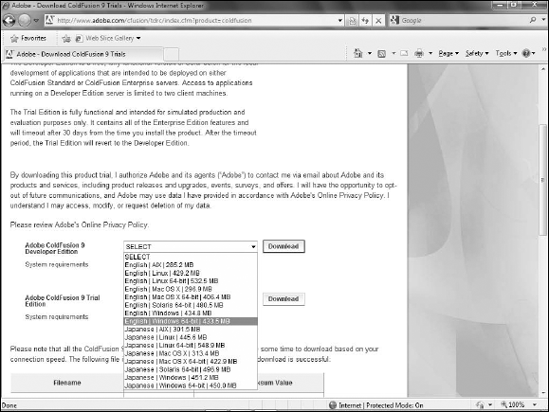
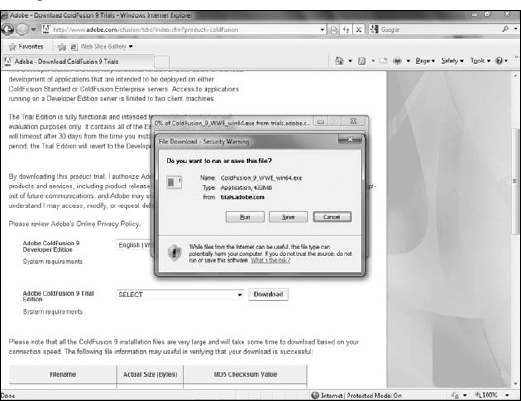
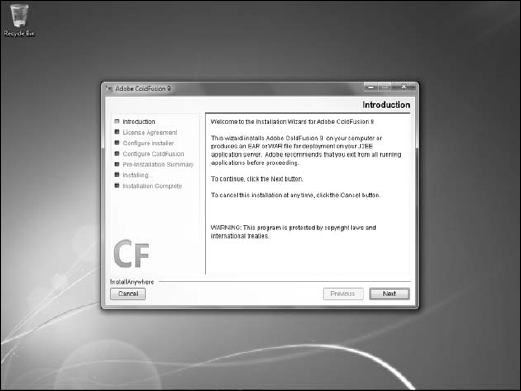
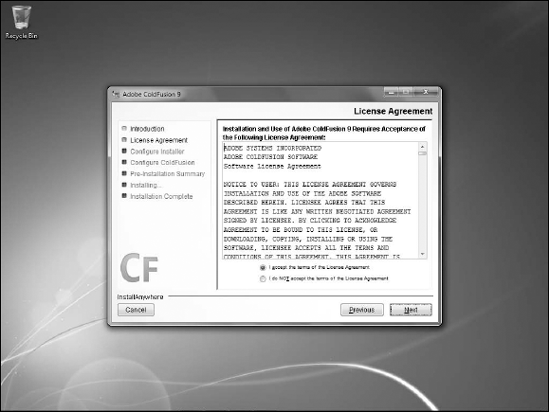
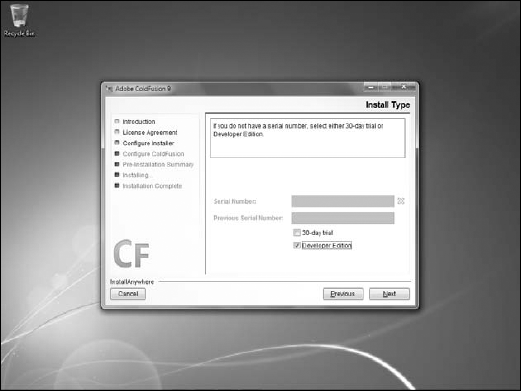
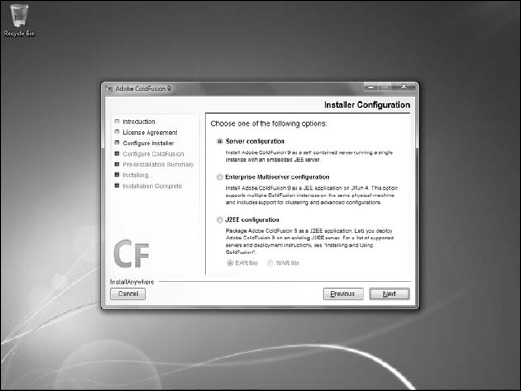

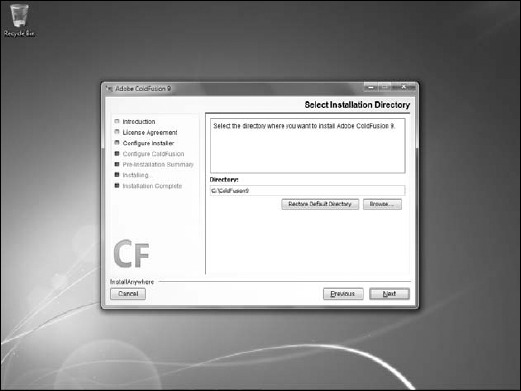
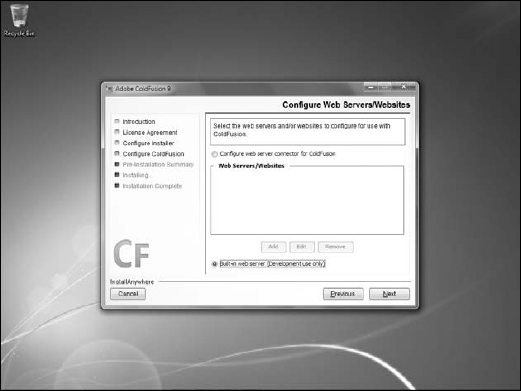

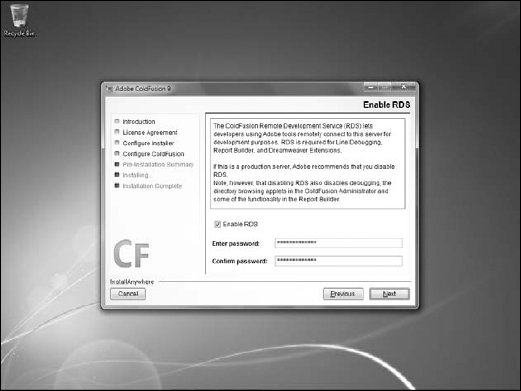
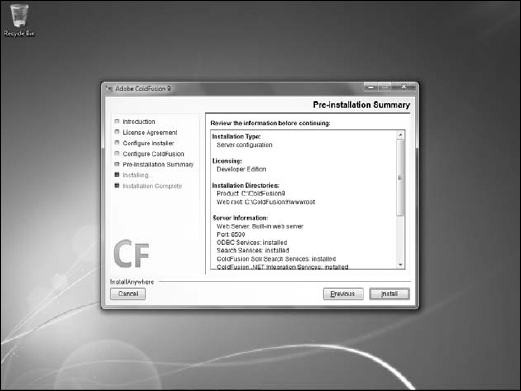
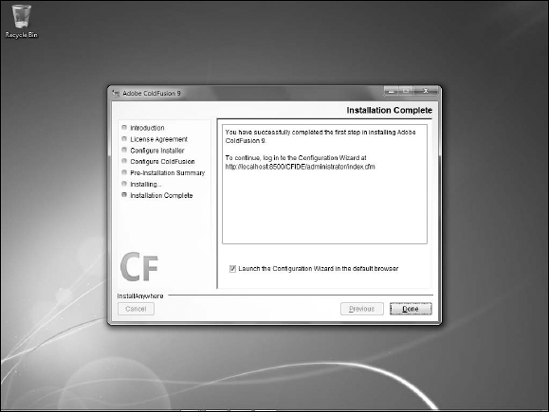

Figure 26.16. The ColdFusion administrator login screen, which displays when the installation and configuration are complete

You have now installed ColdFusion on your computer, and are ready to begin using it as a back-end resource to connect your project to live data.
After ColdFusion is installed, you need to set up and configure a database to use for your application. Many relational database systems exist, from desktop applications such as Microsoft Access to enterprise-level solutions offered by Oracle. One of ColdFusion's strengths is its ability to work with almost any database system.
Learning to effectively create, use and administer a relational database is a complicated task that is well beyond the scope of this book. Fortunately, ColdFusion includes a powerful database system, Apache Derby.
Derby offers many of the features found in expensive, enterprise-grade systems such as Microsoft SQL Server, but as an open-source solution, it is available free of charge. However, it does entirely lack a user interface. Therefore, it is necessary to create your own front end to the database. In this case, you can use ColdFusion to create that front end.
Note
You can download the ColdFusion files for configuring the database from the book's Web site (www.wiley.com/go/flashcatalystbible).
Download the ColdFusion database configuration files from the book's Web site (
www.wiley.com/go/flashcatalystbible).Once the files are downloaded, unzip them into the ColdFusion Web root. If you used a default installation on Windows, the root will be at
c:ColdFusion9wwwroot, while on the Mac it will be atApplications/ColdFusion9/wwwroot.Open a Web browser and type
http://localhost:8500/catalystbibledbconfig.cfmin the browser's address bar.Press enter.
Enter the ColdFusion administrator password you set up while installing ColdFusion.
Click Set Up Database. The ColdFusion page will create the necessary settings to configure the database, as well as creating the tables needed for the remainder of the examples here and populate the database with sample data.
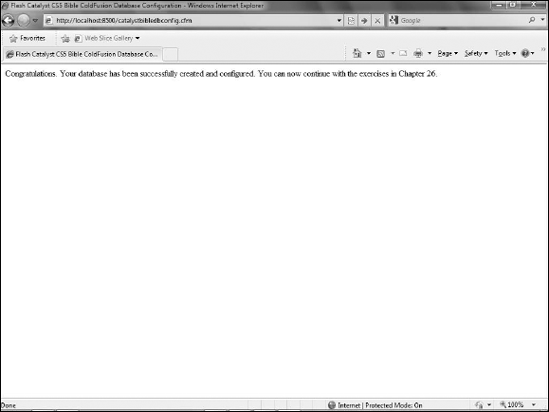
Once complete, a confirmation page will be displayed.
When you get the confirmation page, you can close the browser (see Figure 26.18).
When you create a project in Flash Builder, you must choose when you initially set up the project whether it will be static or use server-side resources.
Catalyst provides no such choice: All projects are assumed to be static.
When you import a Catalyst project that will need server-side resources into Flash Builder, you need to first convert the project to the appropriate type.
Open Flash Builder. If necessary, open a project created in Catalyst or import a new Catalyst project (see Figure 26.19).
Note
See Chapter 25 for details on importing Catalyst projects into Flash Builder.
Note
The following exercises assume that you have completed the steps in Chapter 25 to import the project. If you did not do those exercises, you can download a version of the project for this chapter from the book's Web site (
www.wiley.com/go/flashcatalystbible).Click the Data/Services view, located by default at the bottom of the Flash Builder interface.
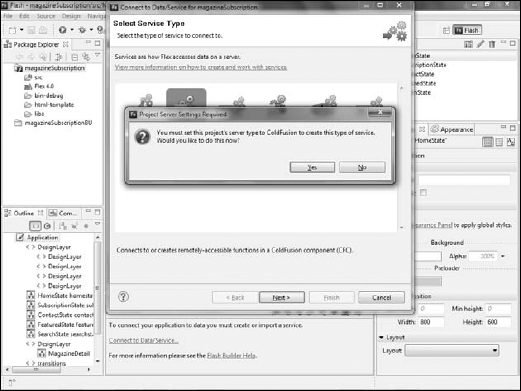
Click the Connect to Data/Service link (see Figure 26.20) to launch the Flash Builder Wizard that will step you through the process of connecting to a server-side resource. The first step of the wizard allows you to choose the type of service to which you want to connect (see Figure 26.21).
Click ColdFusion.
Click Next. You will be alerted to the fact that your project is not configured properly (see Figure 26.22).
Click Yes to open the settings dialog box to change the configuration. The Project Properties dialog box opens, with the Flex Server screen selected.
From the Application server type drop-down list, select ColdFusion.
If necessary, select the Use remote object access service option.
Select ColdFusion Flash Remoting.
Set the ColdFusion installation type to Standalone.
Select the Use built-in ColdFusion web server checkbox. Assuming that you installed ColdFusion using the defaults, the Web root and Root URL text boxes should have the correct paths pre-configured.
In the Compiled Flex application location, type the location where you want the file to be deployed. It must be within the Web root.
Click OK (see Figure 26.23). Flash Builder displays the New Flex Service dialog box.
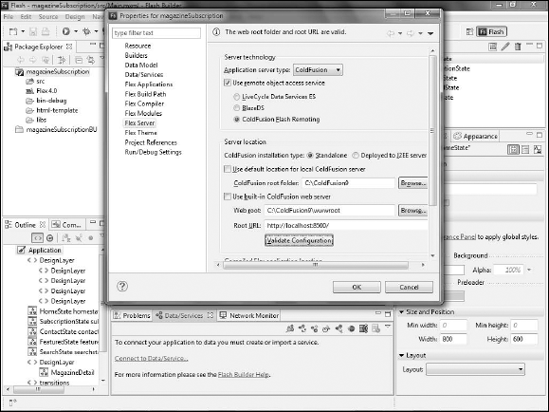
Figure 26.23. The Flex Server configuration dialog box showing the settings necessary to set up a ColdFusion server resource.
Note
The Flex 4 Bible contains more details on setting up the server configuration. You can also look in the Flash Builder help files for more information.
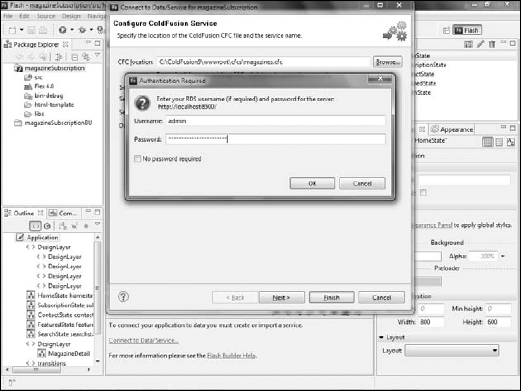
To specify the location of the ColdFusion Component (CFC), which will be responsible for retrieving the database information, click Browse and navigate to the directory that contains the CFC you downloaded from the book's Web site (
www.wiley.com/go/flashcatalystbible).Type magazineList as the Service name (see Figure 26.24). Flash Builder should automatically enter services.magazines as the Service package and valueObjects as the Data type package.
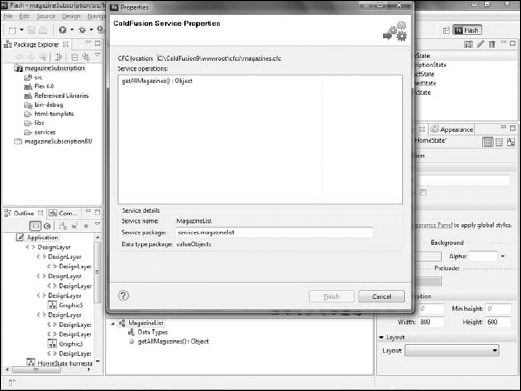
If you are prompted for an RDS username and password, type admin as the username and the RDS password you created when you installed ColdFusion (see Figure 26.25). Flash Builder examines the CFC and returns a list of the operations, or methods, available in it. In this example, there is only one such method.
Select the method (see Figure 26.26).
Click Finish. Flash Builder creates a series of ActionScript classes to process the data returned from the CFC.
In the Package Explorer, expand the services package, then the services.magazineList package to see the ActionScript files created by the wizard (see Figure 29.27).


Your project is now properly set up, and the necessary ActionScript files have been created.
You need to configure the type of data that the service will return so that Flex can properly process it. Once you have completed the steps in the previous section, the Data/Services view will display the getAllMagazines operation.
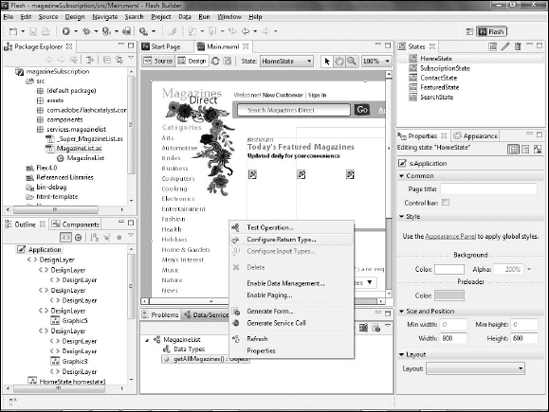
Select the getAllMagazines operation.
Right-click (

In the Configure Return Type dialog box, ensure that the option Auto-detect return type from sample data is selected (see Figure 26.29).
Click Next. Flash Builder needs to call, or invoke, the service to determine what kind of data will be returned. Some services will require that a parameter be sent to them; for example, a search operation would need a search string. The service used in these examples, however, simply returns all data, so you do not need to provide a parameter.
Flash Builder will therefore invoke the service and return a list of the data being returned.
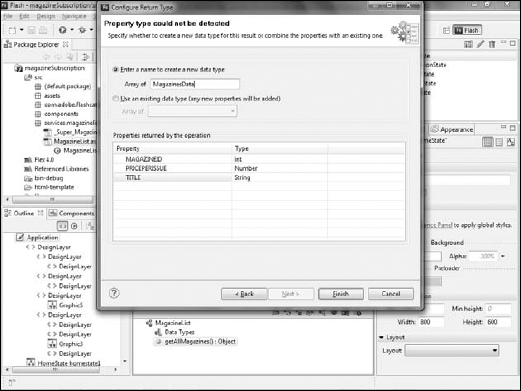
In this example, the service returns a list of magazines and information about them. ActionScript can store multiple values in a single variable, as is needed in this case, in an array. Flash Builder will display a dialog box stating that it cannot automatically determine the property type.
Enter a name for the array, such as MagazinesData (see Figure 26.30).

The final step in getting the data into the component is binding the data returned from the service to the component that will display it.
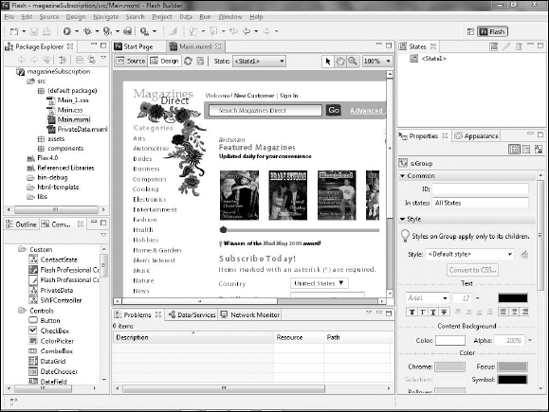
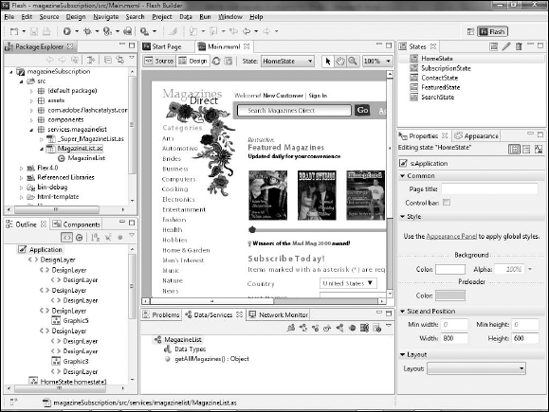
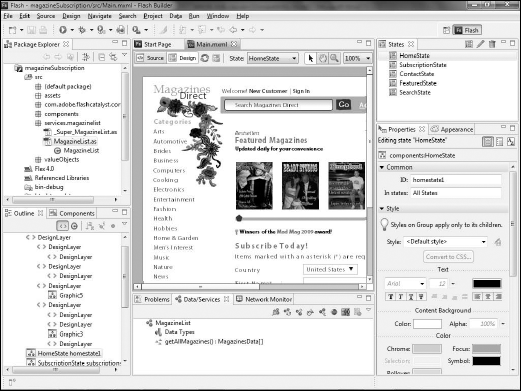
If necessary, open
Main.mxmlby double-clicking it in the Package Explorer in Flash Builder.If necessary, click Design to view the file in Design mode (see Figure 26.31).
Check the States view in the top-right corner of the screen to ensure that you are in the HomeState.
Click on the data list component created in Catalyst.
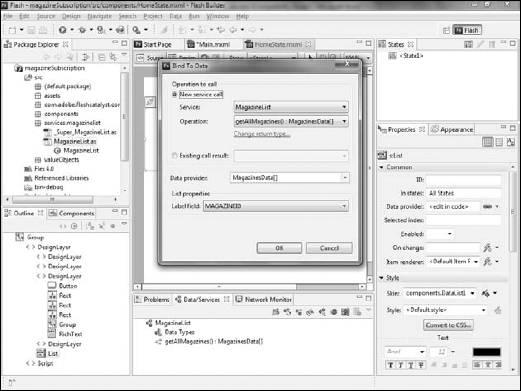
In the Data/Services view, click the Bind to Data button (see Figure 26.32). You can also drag the getAllMagazines operation from the Data/Services view and drop it on the list.
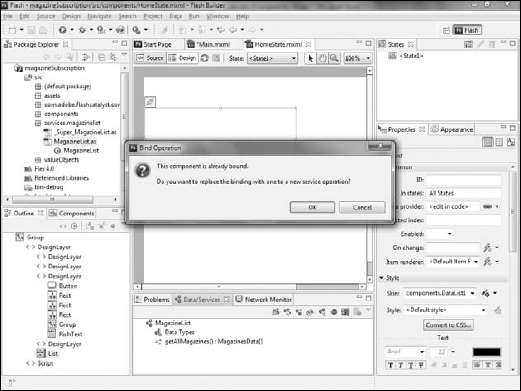
In Catalyst, you assigned sample data to the control. Flash Builder now needs to replace that dummy data with the real information from the service, so it will display a warning message confirming that you want to perform this operation.
Click OK. A dialog box appears (see Figure 26.33).
Confirm that the correct operation is being used. The dialog box should already be filled out correctly, but if necessary, you can select the MagazineList service and getAllMagazines operation (see Figure 26.34).
Flash Builder will want to automatically assign the data to a label, but click in the drop-down and select the empty option. This enables you to use a custom component to display the data.
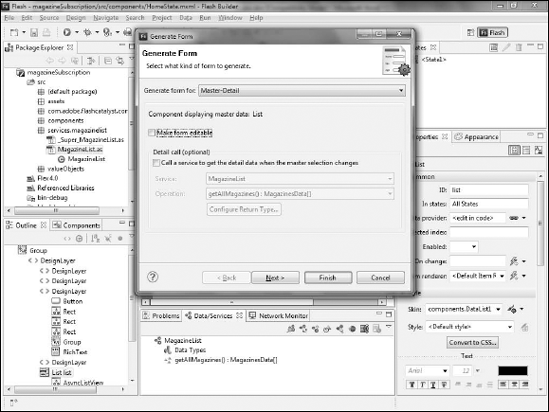
Right-click (
Ensure that the Magazines data type is selected, and that the Make form editable option is not (see Figure 26.35).
Click Next. The wizard displays the data being returned by the service.
Remove the checkmark in the box next to magazineID, as you do not want to display this.
Ensure that magazine_title and price are set to Text controls, while cover_picture is set to Image (see Figure 26.36).
Click Finish. The form generated by the wizard is placed in the list.
Click each text control and use the Properties view to adjust the font settings as desired.


This chapter took you through the process of setting up a testing server on your computer and configuring your Catalyst project to display live data from the server. You learned:
How to download and install ColdFusion
Change the project type in Flash Builder to use server-side resources
Set up the project to call a service
Bind the data returned from the server to a component