
In our app, there will be several animations. The first one we will create is to simulate the dice "rolling". We won't create a 3D animation as this goes far beyond the scope of this project, so we'll just change the numbers that are shown to the user, from 1 to 6. We'll reach this result by changing the Fill Opacity of each of the circles that we have placed on the surface of our Rectangle. Perform the following steps:
- Create a new animation by clicking the + button in the animations pane, and call it Roll.
- Set the duration of the animation to 1 second.
- Select all the circles on the dice surface except the central one, by pressing the Ctrl button (cmd on a Mac) on your keyboard and clicking on each circle except CenterCenter.
- Set the Fill Opacity to be 0, and press the Key button near the Fill Opacity value.
- Change the KEY INTERPOLATION value to Hold.
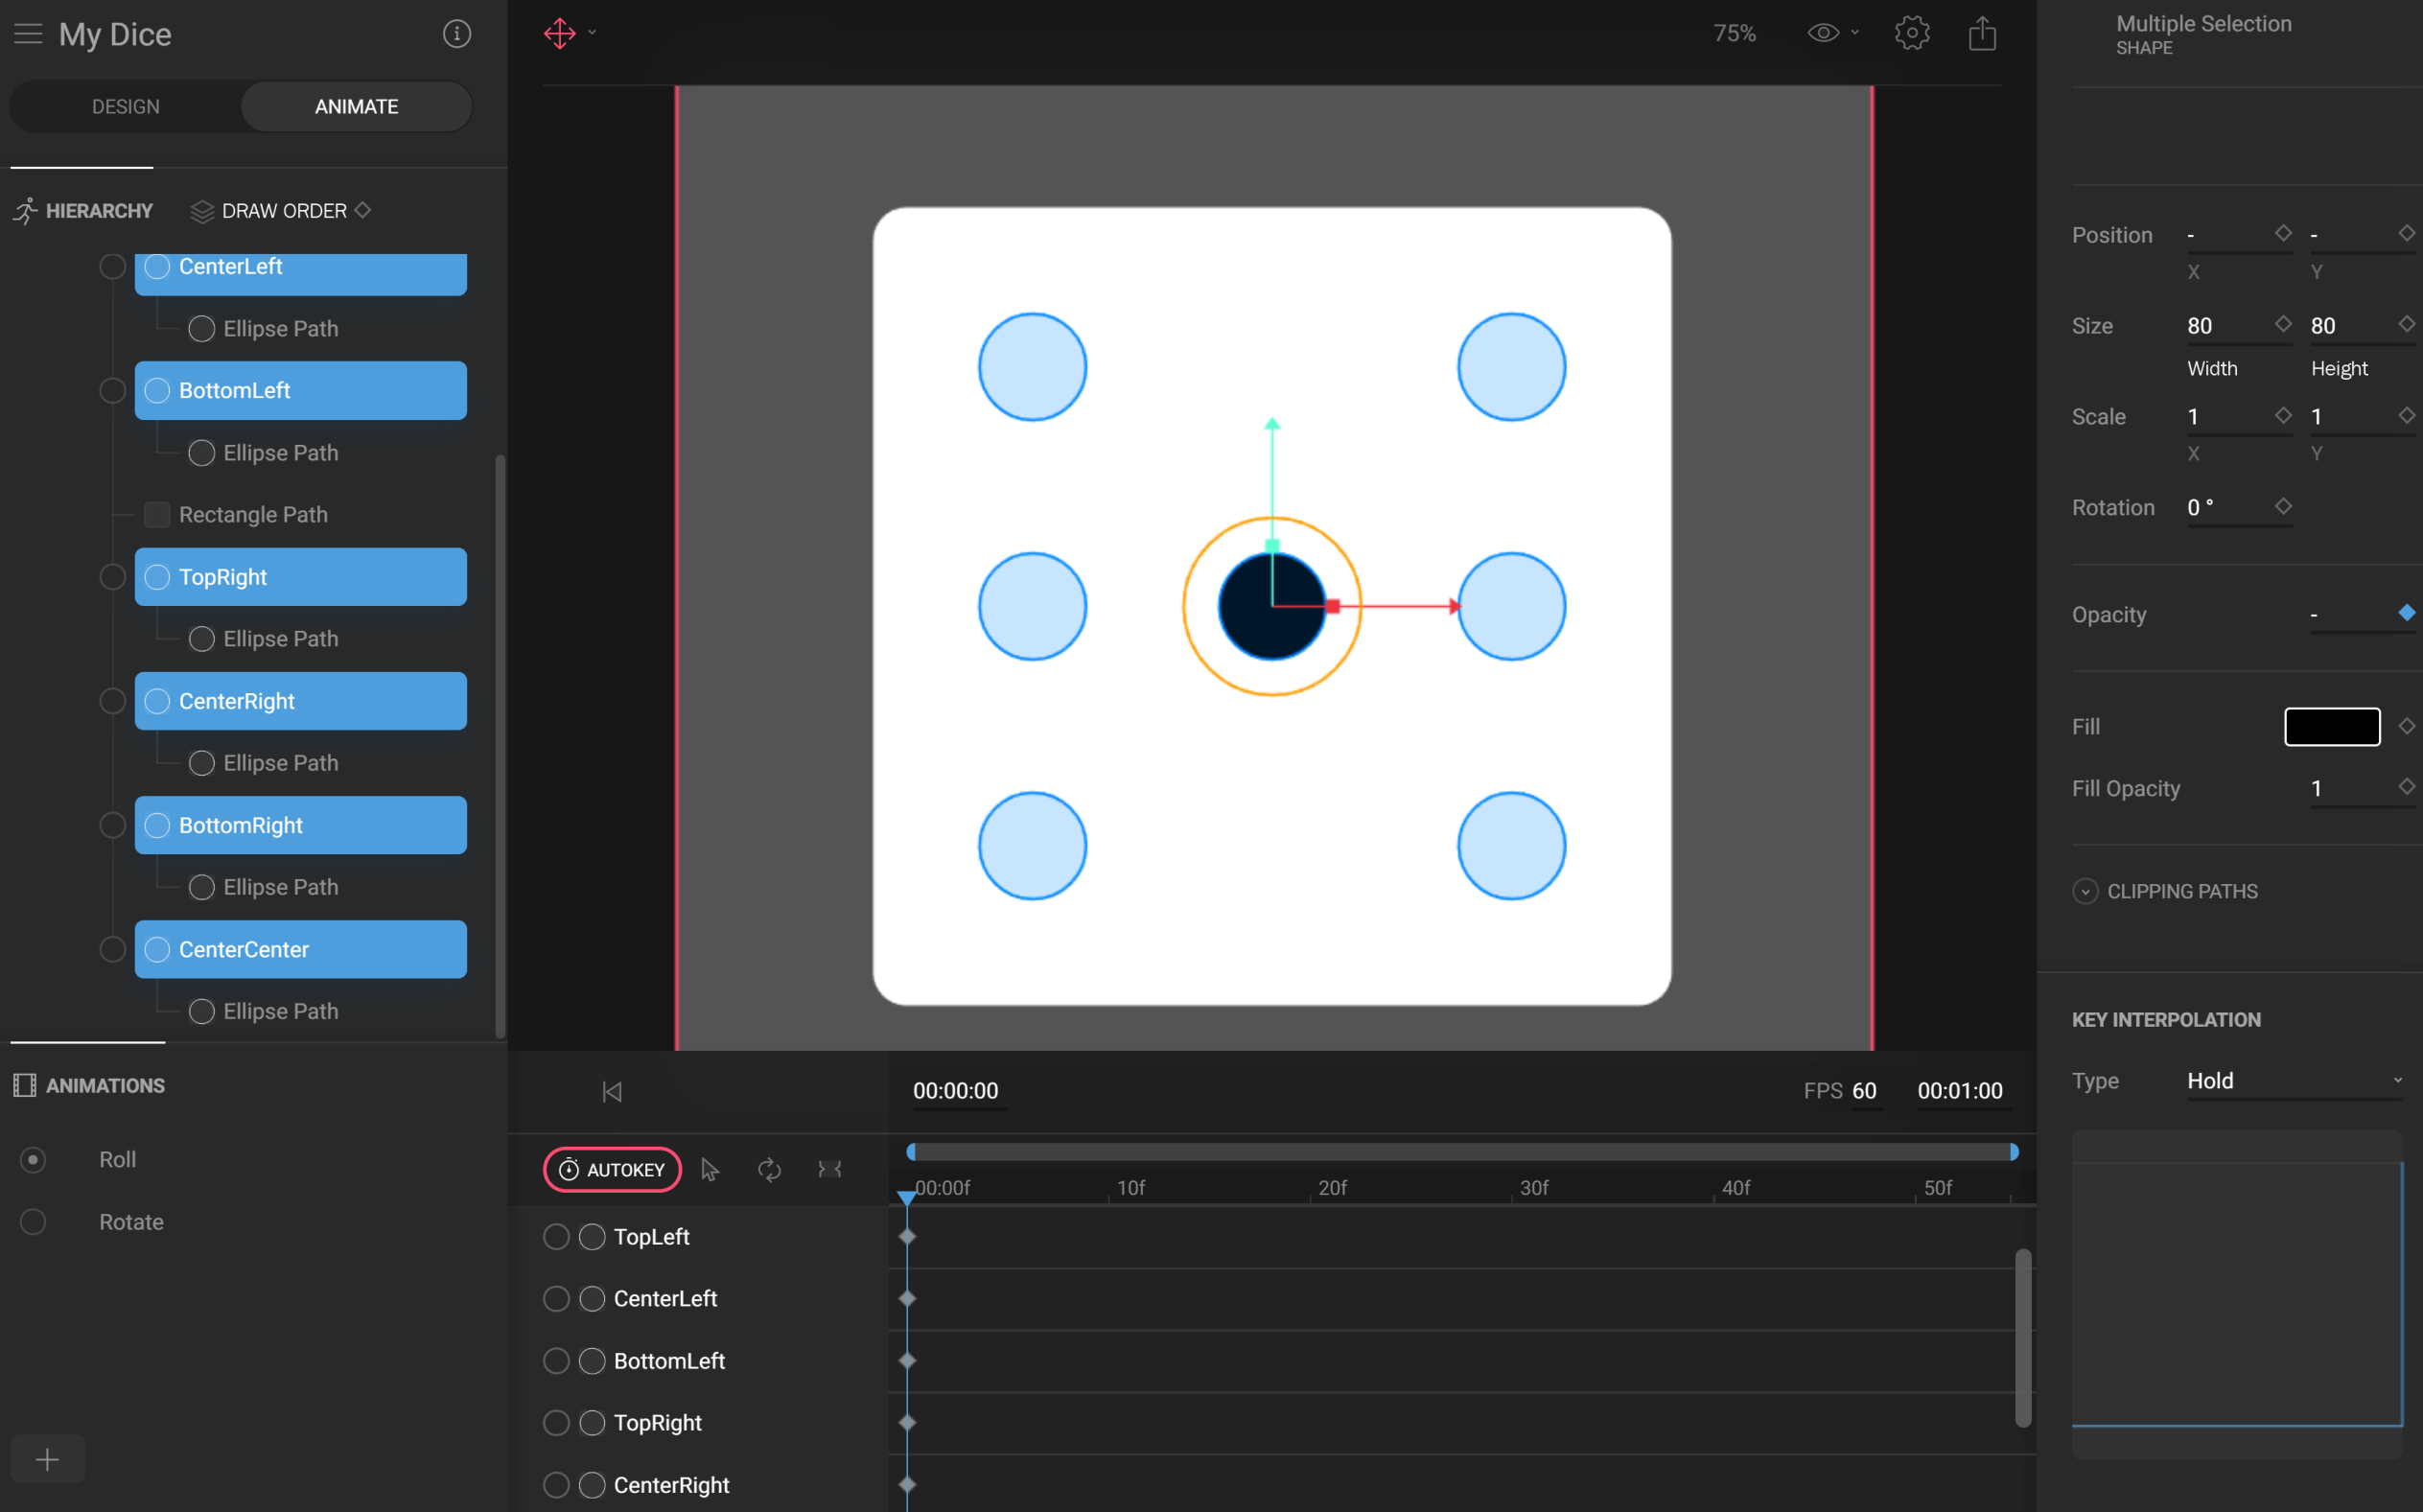
- Select the CenterCenter circle while pressing the Ctrl/cmd key, then set the Fill Opacity value to 1, the KEY INTERPOLATION type value to Hold, and key the object.
The result of this task should look like the following screenshot:
- Move the playhead in the timeline to 00.00.10 seconds.
- Select the central circle, called CenterCenter in the hierarchy pane; set the Fill Opacity value to 0, the KEY INTERPOLATION value to Hold, and key the object.
- Select the TopLeft and BottomRight circles, and set the Fill Opacity value to 1, the KEY INTERPOLATION value to Hold, and key the object. We have now completed the animation to circle 2.
- Move the playhead in the timeline to 00.00.20 seconds.
- Select the CentralCentral circle in the hierarchy pane, set the Fill Opacity value to 1, the KEY INTERPOLATION value to Hold, and key the object. We have now completed the animation to circle 3.
- Move the playhead in the timeline to 00.00.30 seconds.
- Select the CentralCentral circle in the hierarchy pane, set the Fill Opacity value to 0, the KEY INTERPOLATION value to Hold, and key the object.
- Select the TopRight and BottomLeft circles, and set the Fill Opacity value to 1, the KEY INTERPOLATION value to Hold, and key the object. We have now completed the animation to circle 4.
- Move the playhead in the timeline to 00.00.40 seconds.
- Select the CentralCentral circle in the hierarchy pane, set the Fill Opacity value to 1, the KEY INTERPOLATION value to Hold, and key the object. We have now completed the animation to circle 5.
- Move the playhead in the timeline to 00.00.50 seconds.
- Select the CentralCentral circle in the hierarchy pane, set the Fill Opacity value to 0, the KEY INTERPOLATION value to Hold, and key the object.
- Select the CenterLeft and CenterRight circles, and set the Fill Opacity value to 1, the KEY INTERPOLATION value to Hold, and key the object. We have now completed the animation to circle 6 and have thus completed this animation.
- Press the Loop button, so that the animation will loop whenever it completes.
Try the animation by pressing the spacebar on your keyboard. You should see the dice changing its values from 1 to 6 in a single second, as shown in the following screenshot:

Now, the Roll animation is complete. This animation will be called from the app whenever the user plays and throws the dice. After rolling, the result of any of the numbers will be between 1 and 6. Therefore, we now need to create an animation for each of the possible results.
We'll keep things simple here: we'll just rotate the dice surface left and right, and show the number of the result. Let's begin with 1, then we'll repeat from 2 to 6, as follows:
- Create a new animation by clicking the + button in the animations pane, and call it Set1.
- Set the duration of the animation to 1 second.
- Set the Fill Opacity property of the CenterCenter circle to 1, and all the other circles to 0, and key the objects.
- Move the playhead to 00:00:06.
- Select the surface of the dice.
- Set the Rotation property to 5° and key the object. The result is shown in the following screenshot:

- Move the playhead to 00:00:11.
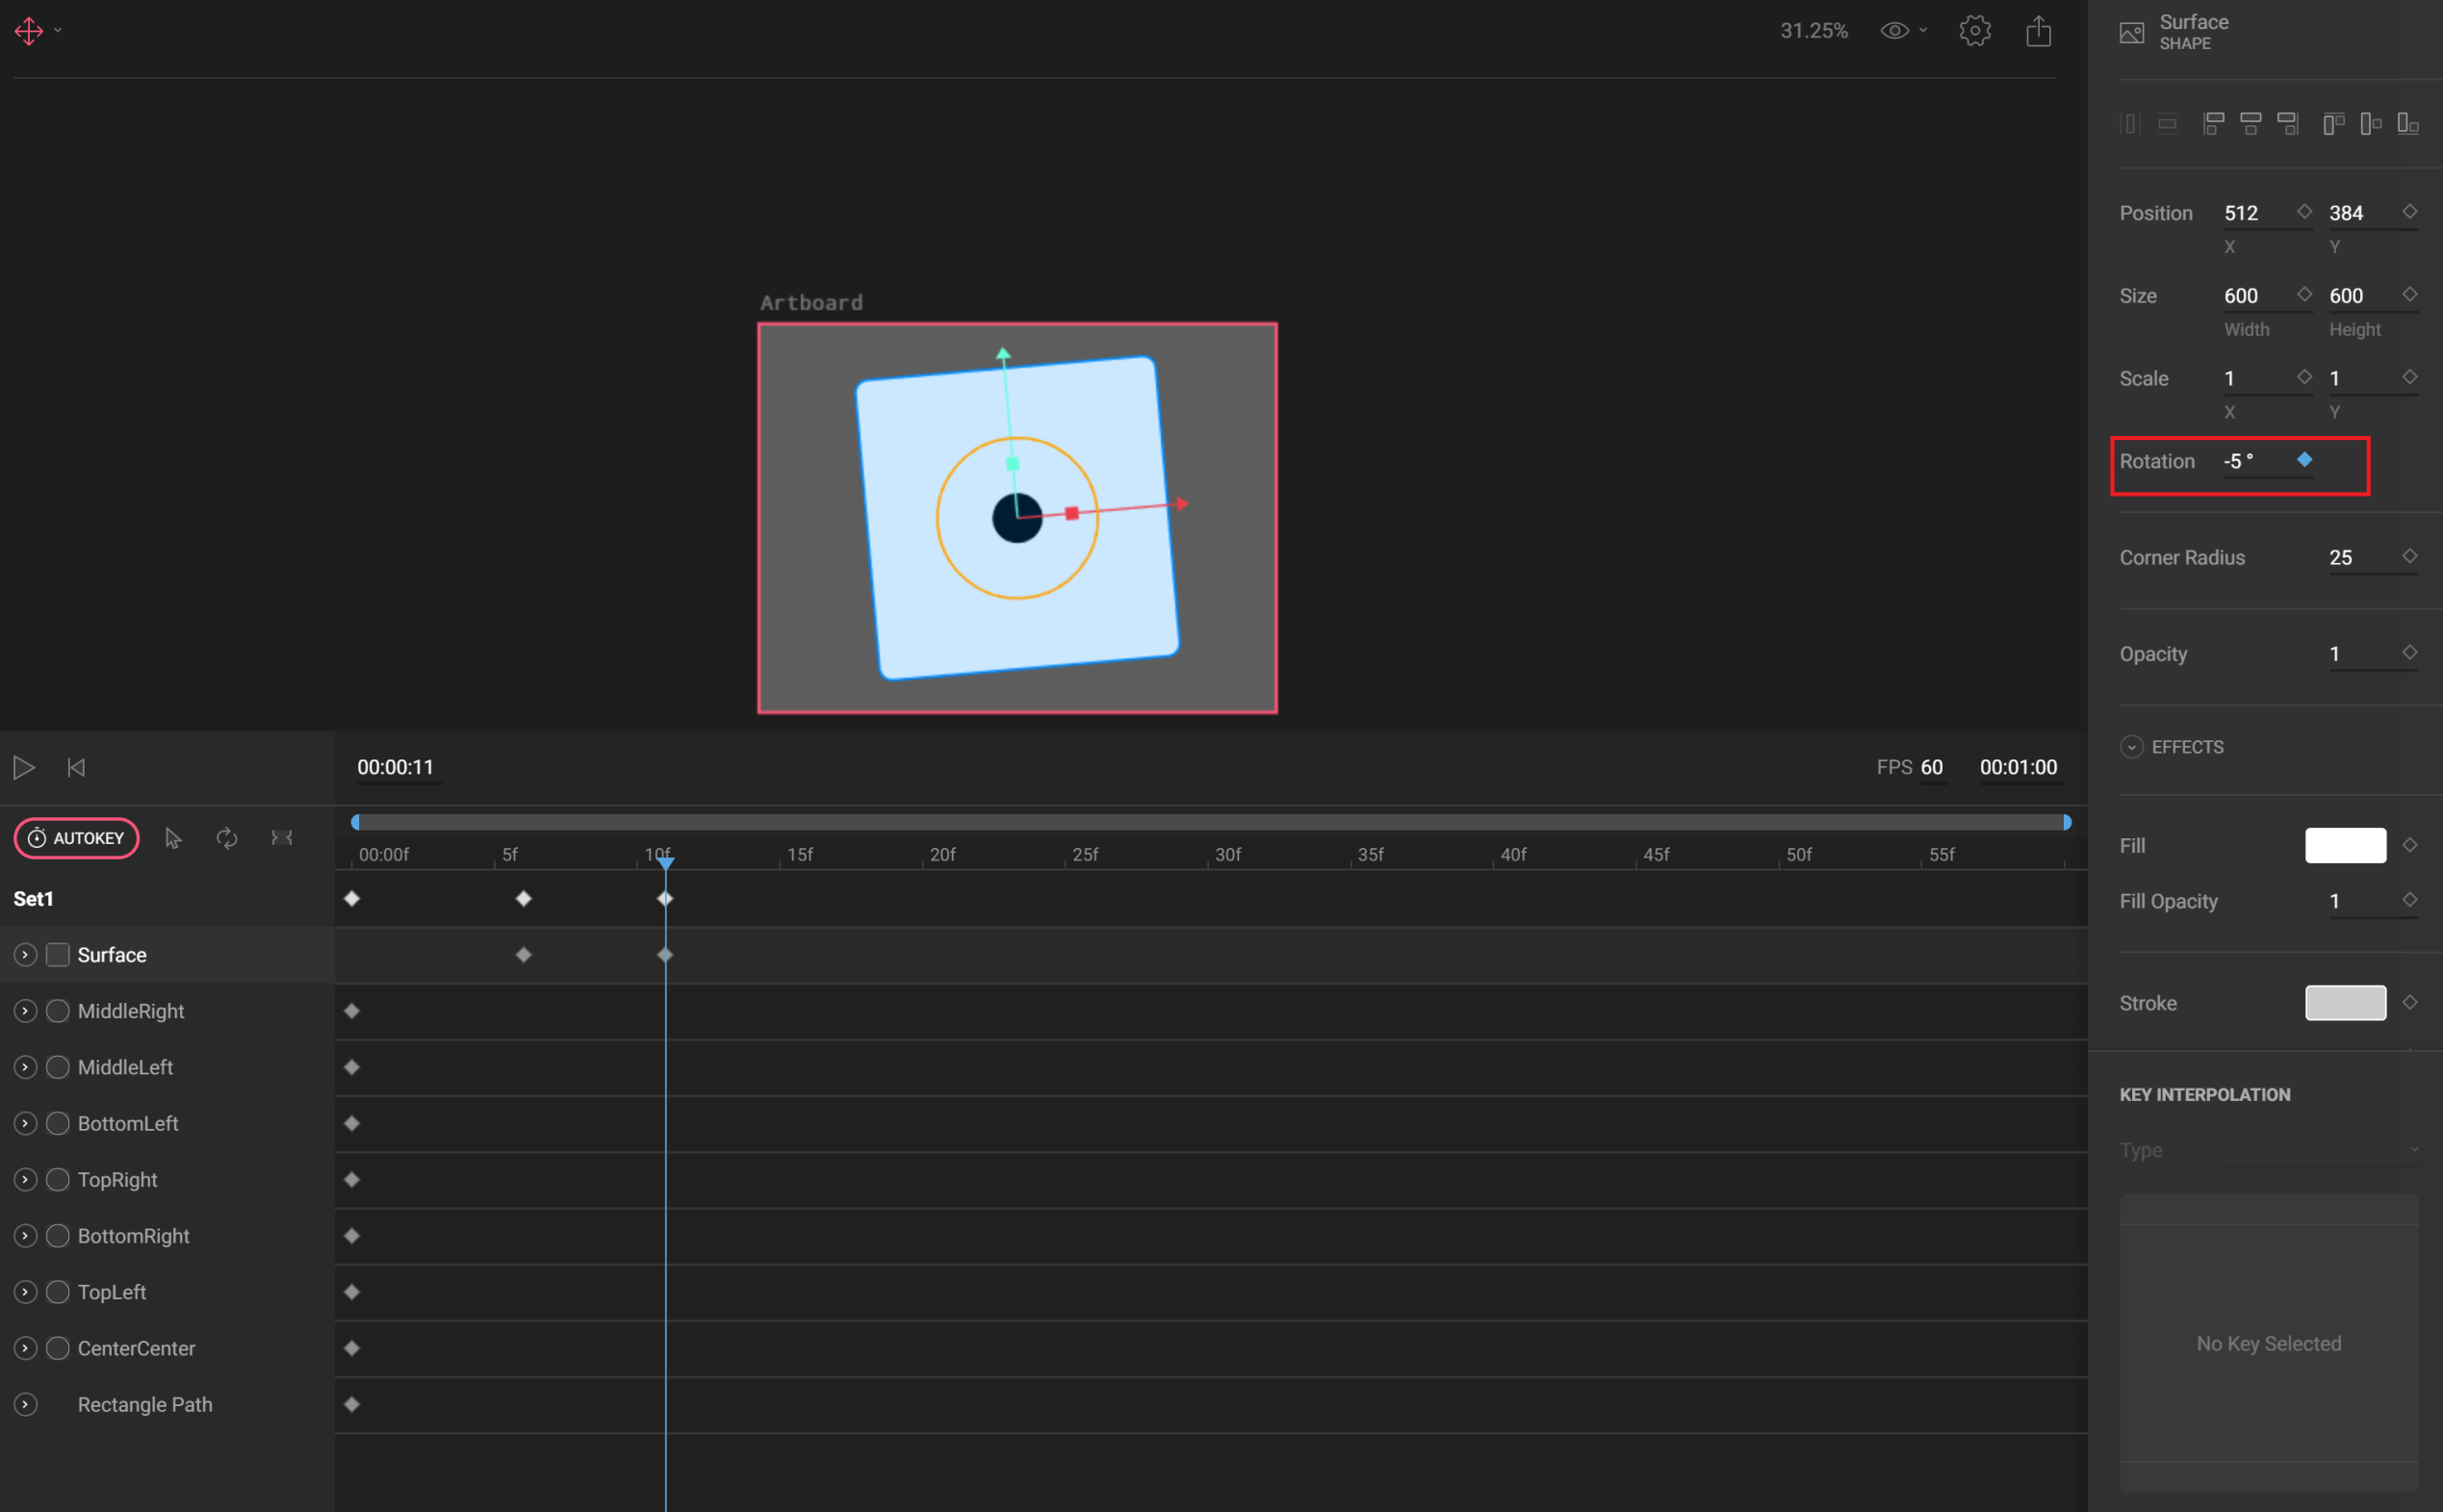
- Set the Rotation property to -5° and key the object, as shown in the following screenshot:
- Move the playhead to 00:00:15.
- Set the Rotation property to 0° and key the object, as shown in the following screenshot:

Try the animation—you should see the surface of the dice going left and right very quickly, and then stopping and showing 1 as a result.
Now, repeat the preceding steps for the remaining possible results, calling the animations Set2, Set3, up to Set6.
There is only one small animation we have to create before getting to Flutter: the animation that will be shown at the beginning before the user plays. Actually, it won't even be an animation, but just a static image of number 6 on the surface of the dice. To do this, perform the following steps:
- Create a new animation by clicking the + button in the animations pane, and call it Start.
- Set the duration of the animation to 1 second.
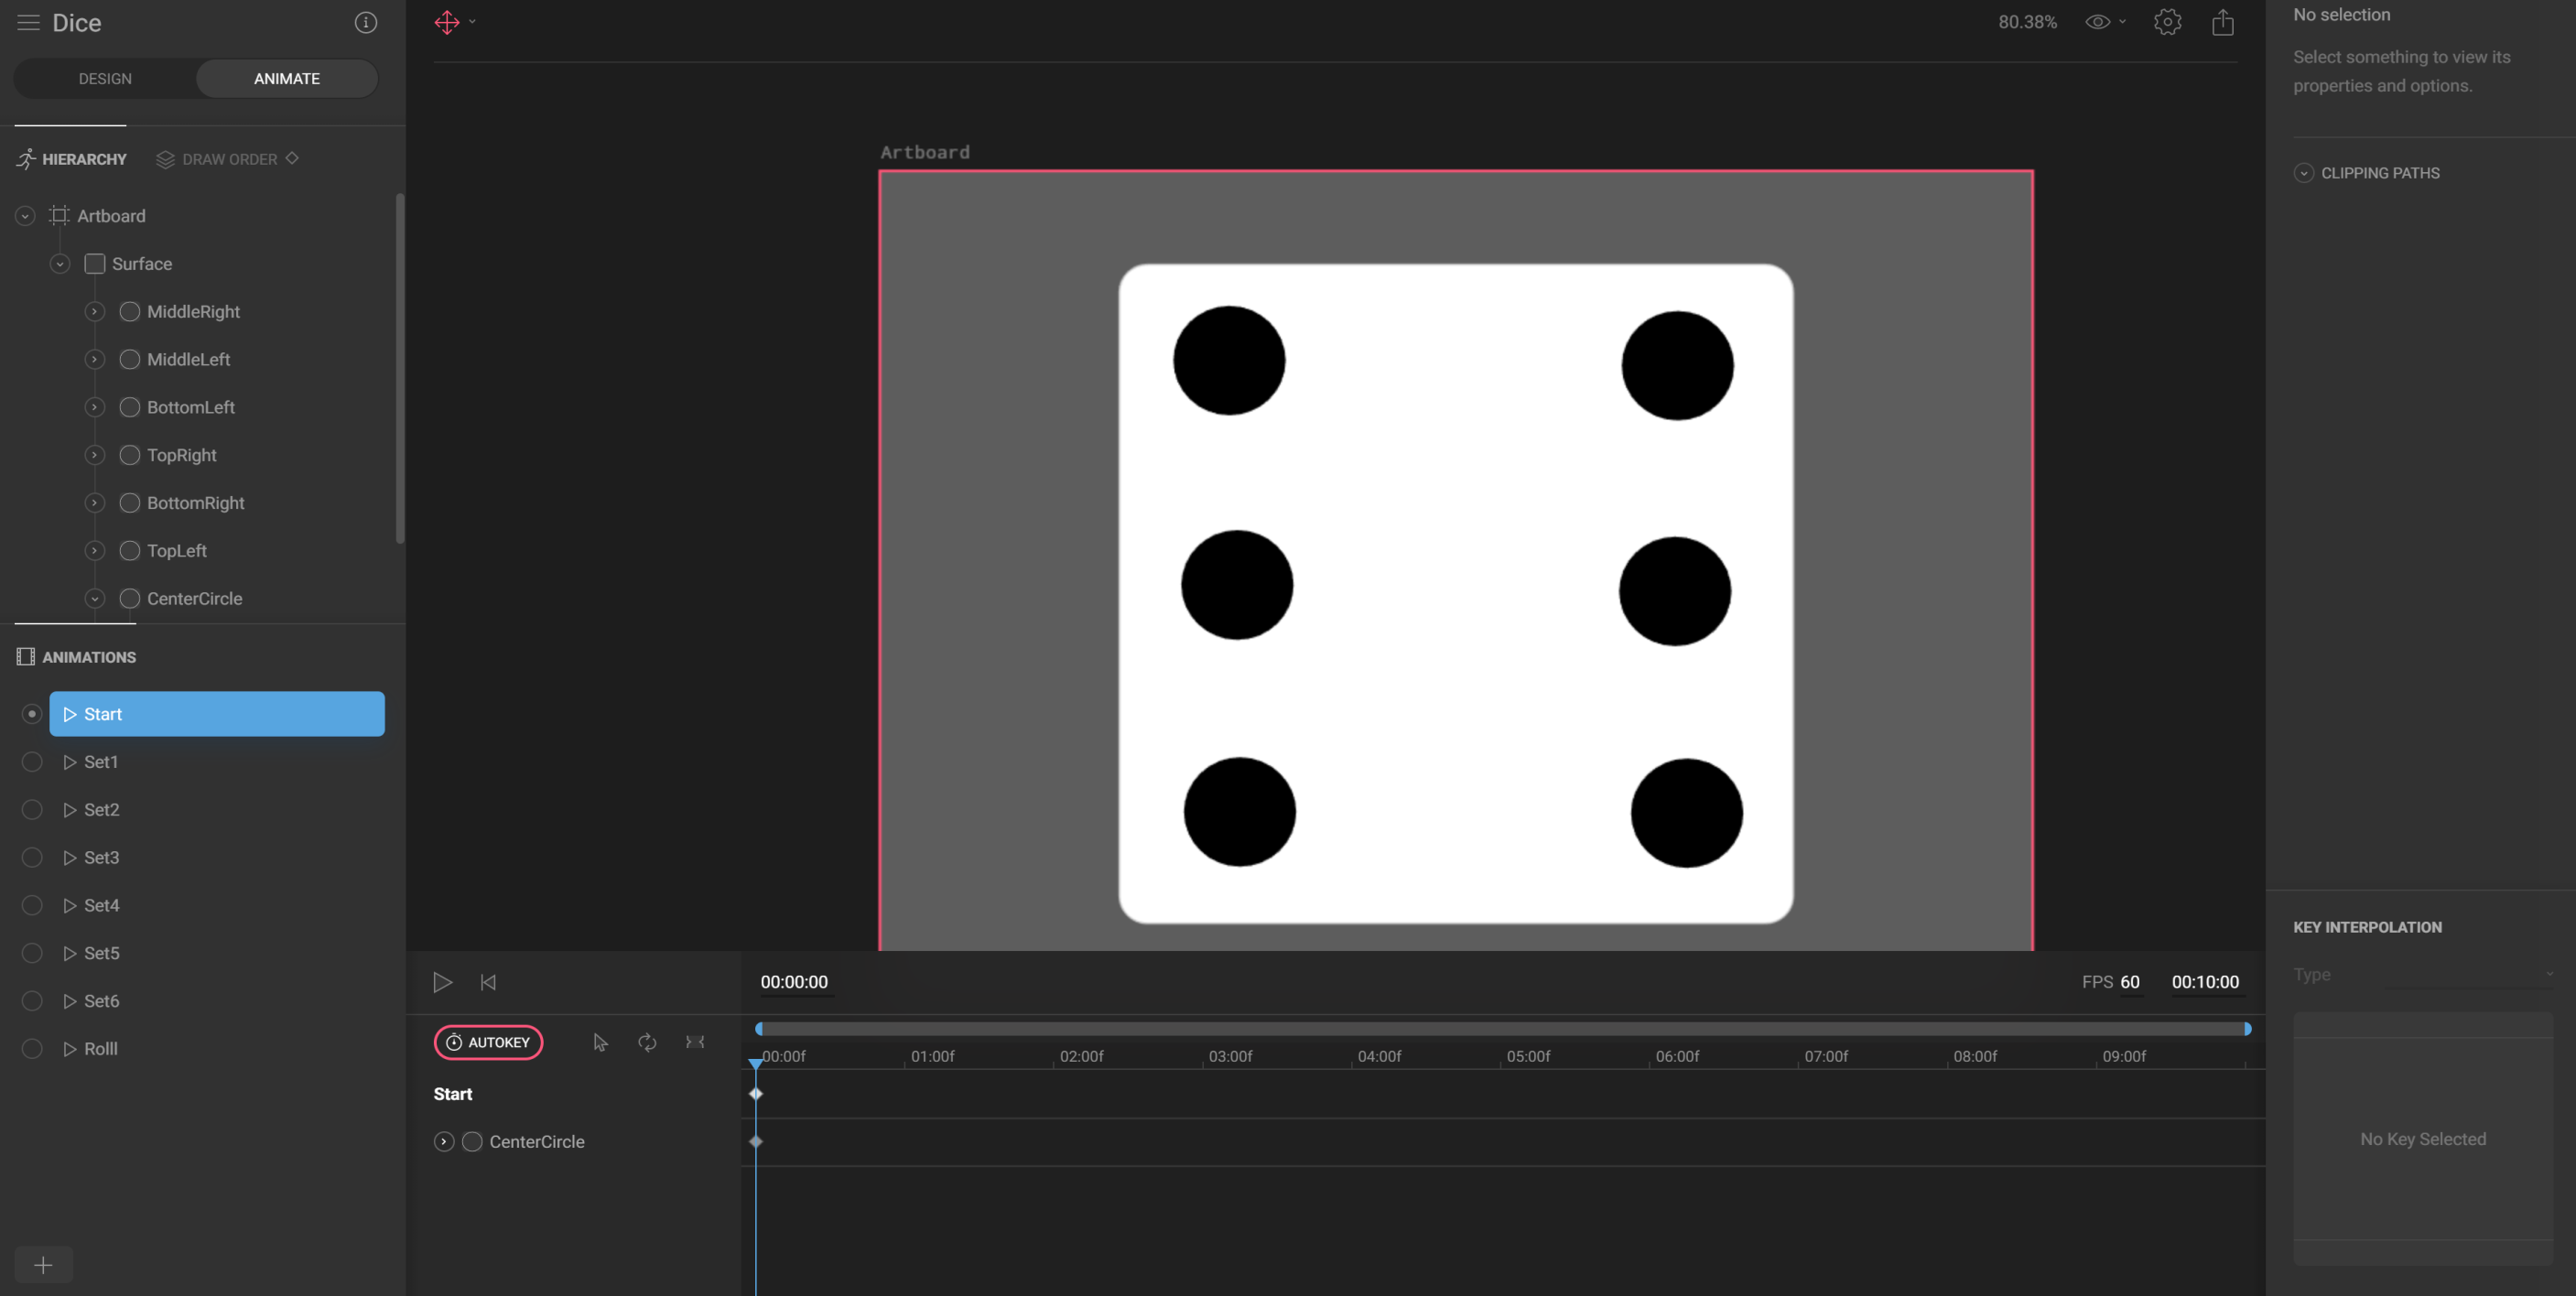
- Set the Fill Opacity property of the CenterCenter circle to 0, and all the other circles to 1, and key the objects.
The result of these tasks is shown in the following screenshot:
That's it. We have completed everything we need for the app in Flare. Feel free to experiment with some animations if you want to move the dice when the screen of the app is built.
Just to recap, in Flare, you should have built the following animations that we'll call from our app:
- Start
- Roll
- Set1
- Set2
- Set3
- Set4
- Set5
- Set6
Next, we'll create the app and see how to integrate Flare animations in Flutter.