
Let's create a new file for the game: we can call this pong.dart. This time, we'll need to create a Stateful widget, as there will be several values that will change during this class life cycle:
- Using the stful shortcut, let's create a new stateful widget called Pong:
import 'package:flutter/material.dart';
import './ball.dart';
import './bat.dart';

class Pong extends StatefulWidget {
  @override
  _PongState createState() => _PongState();
}

class _PongState extends State<Pong> {
  @override
  Widget build(BuildContext context) {
    return Container();
 }}
- Instead of returning a Container, let's return a LayoutBuilder. This is a useful widget when you want to measure the space available in the context, including the parent constraints. We'll use this to make sure that the ball will not go out of the visible space in the app.
A LayoutBuilder widget requires a builder in its constructor. This takes a function with the context and the constraints. Inside this function, we'll return a Stack:
return LayoutBuilder(
       builder: (BuildContext context, BoxConstraints constraints) {
         return Stack();
});
As both the ball and the bat will need to move during the lifetime of our game, we'll be able to change their position by changing their distance from the borders of the Stack.
A Stack widget has a children property where we can place all the elements contained in the Stack itself. One way to position the elements inside it is by using the Positioned widget. Here, you can specify top, left, bottom, or right properties.
Positioned is a widget that controls where a child of a stack is positioned.
Let's add the Ball and the Bat to the Stack. For now, we'll just put the ball at position top:0, which means at the top of the available space, and the bat at position bottom:0, which means at the bottom of the available space. The size of the bat will be an arbitrary 200 width and 50 height, but we'll change that shortly:
return Stack(
           children: <Widget>[
             Positioned(
               child: Ball(),
               top: 0
              ),
              Positioned(
                bottom: 0,
                child: Bat(200,25),)
           ], );
In order to be able to try out the layout so far, we only need to call the Pong() widget from the MyApp class in the main.dart file. First, we'll need to import at the top of the MyApp class:
import './pong.dart';
This is followed by importing the body of the scaffold:
body: SafeArea(
    child: Pong()
)
A SafeArea is a widget that automatically adds some padding to its child in order to avoid intrusions by the operating system, such as the status bar at the top of the screen or the notch on a newer iPhone.
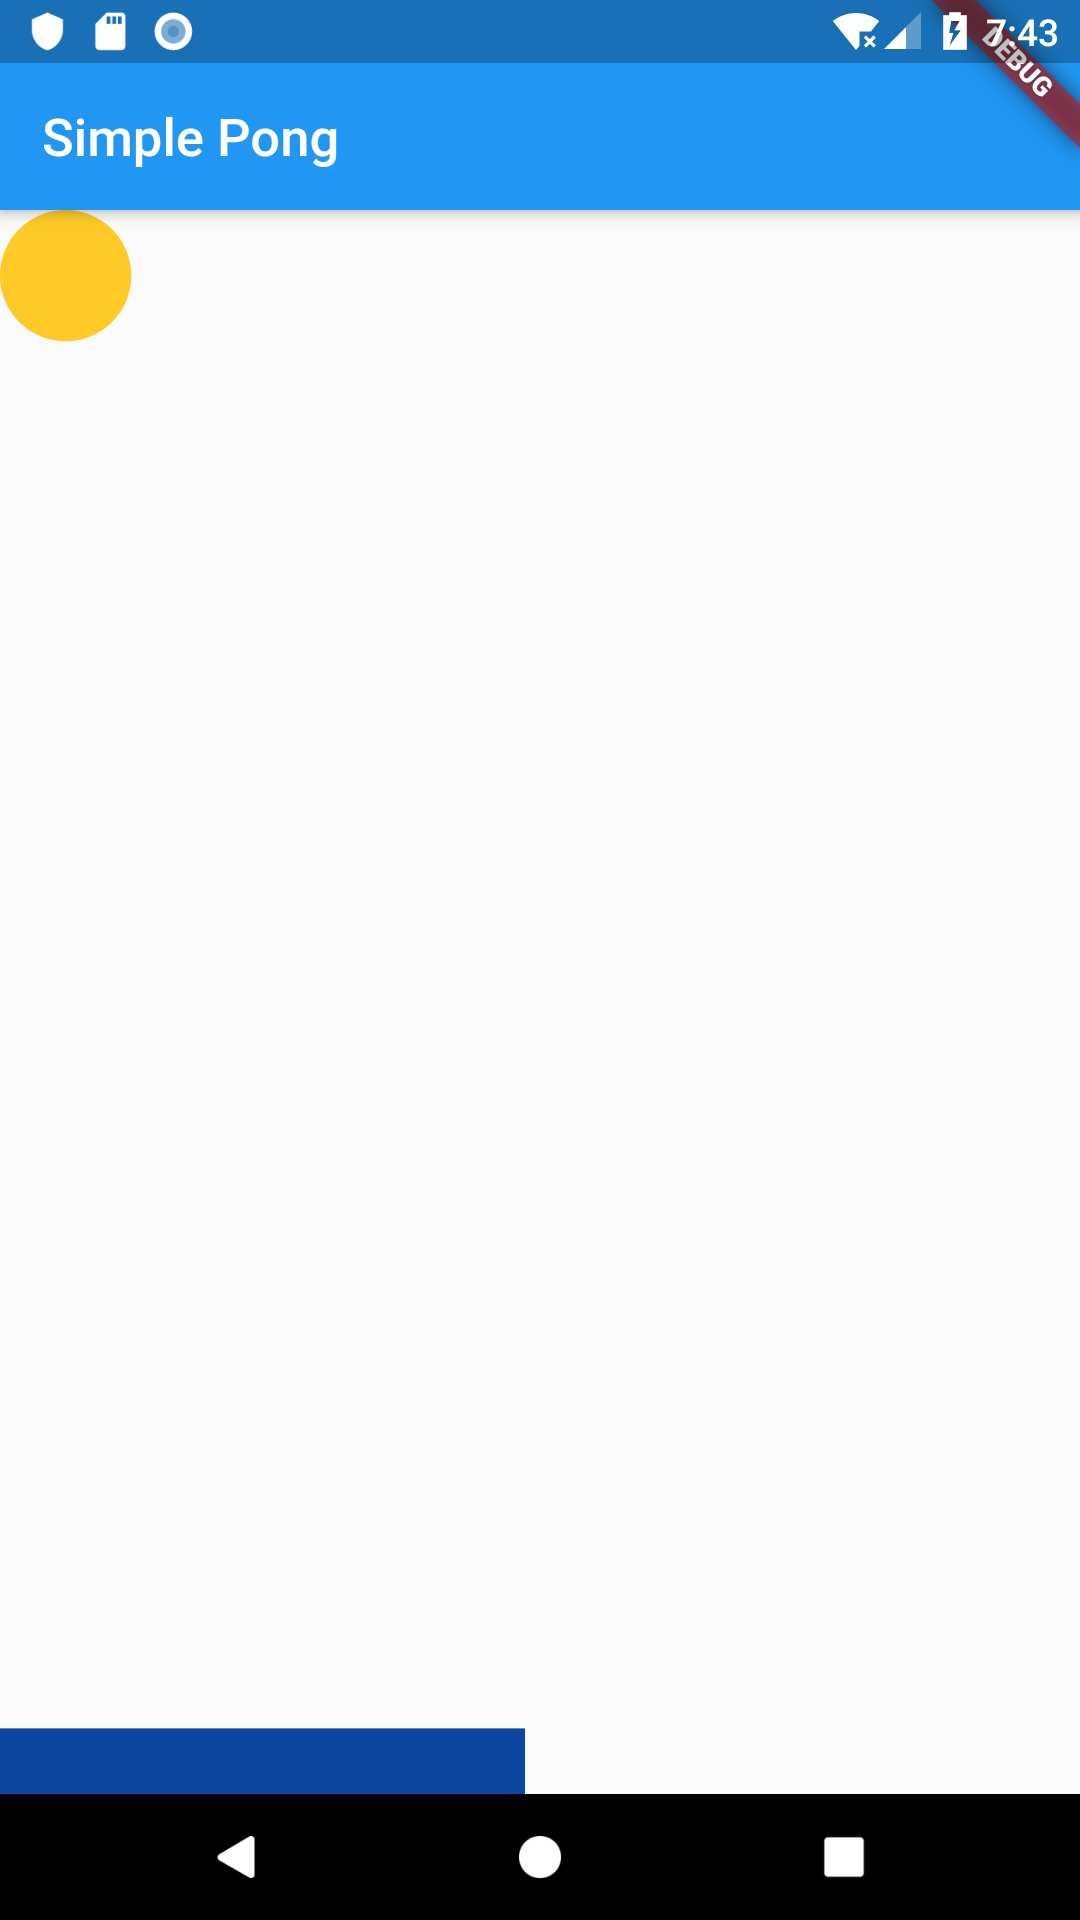
And if you try the app right now, you'll be able to see the ball and the bat in the top-left corner and bottom-left corner of the screen, respectively, as follows:
Before dealing with the animation, let's prepare this layout to be able to deal with changes in size and positions.
At the top of the _PongState class, let's create a few variables that will deal with the available space, the size of the bat, and the position of the bat and ball:
double width;
double height;
double posX = 0;
double posY = 0;
double batWidth = 0;
double batHeight = 0;
double batPosition = 0;
width and height represent the available space on the screen, posX and posY are the horizontal and vertical position of the ball, batWidth and batHeight represent the size of the bat, and batPosition is the horizontal position of the bat. The bat won't be able to move vertically, as it will remain at the bottom of the screen.
Inside LayoutBuilder, let's first set the variables that contain the height and width of the layout, and the size of the bat. These values are contained in the BoxConstraints instance that's passed as a parameter to the builder method in LayoutBuilder.
We will make the bat size relative to the dimensions of the screen. Hence, the width will be 20% of the screen (width/5), and the height 5% of the available space (height/20).
In the build() method of the _PongState class, and in the builder method of LayoutBuilder, add the following code:
builder: (BuildContext context, BoxConstraints constraints) {
    height = constraints.maxHeight;
    width = constraints.maxWidth;
    batWidth = width / 5;
    batHeight = height / 20;
    return Stack(
        ...
Next, in the Stack returned by the builder, let's use these values when we build the bat:
return Stack(
    children: <Widget>[
        Positioned(child: Ball(), top: 0),
        Positioned(
            bottom: 0,
            child: Bat(batWidth, batHeight),
         )
    ],
);
With the main elements of the layout complete, we are now ready to start building the animation.