
Crumpling is an exercise in controlled anarchy and an antidote to the geometry of the preceding chapters. It has a distinctive organic aesthetic that appeals to people who have a natural aversion to measured, geometric folding. It is also a technique much used by nature – think of flower petals that uncrumple as they open, our crumpled brains, crumpled rock strata and so on. What may at first seem to be a somewhat jokey folding technique could perhaps be the most profound. It is also the least explored and the least understood.
The essence of the technique is to carefully crumple a sheet to reduce its apparent size, then to expand it along certain lines or in certain areas by selectively opening the crumpled surface. It could be described as the simplest of all techniques – what could be simpler than crumpling paper? – but it is also the most difficult to do well. It requires just the right material and, as it is the most tactile and least mechanical of all folding techniques, a special sensitivity of touch.
If you are planning to crumple for an extended period of time, it is advisable to wear thin cotton medical gloves to prevent your hands getting sore.
Selecting Papers
Whereas most of the examples in this book can be made with almost any paper that will retain a fold, crumpling can be done successfully only with specific papers, or your results will be very poor.
The key factors in choosing a paper are weight and foldability. Papers below 60gsm are best. The thinner they are, the better they will be for crumpling. This is because thinner papers hold more folds, so the apparent shrinkage of the sheet when it is crumpled will be greater. However, not all thin papers crumple well. It is essential to use only ones that retain a fold, so papers such as tissue paper, although easy to find, are usually of little use. To find out whether a paper will retain a fold, crumple it tightly into as small a ball as possible, using quite some force. If it stays tight shut and opens only when pulled hard, it should be good for crumpling. Another way to test for a good paper is to hold a corner of the sheet and let it hang down vertically. Shake the sheet vigorously. If it rattles loudly, it will probably retain a fold well; if it is quiet, it will probably not.
Here is a partial list of suitable papers and sources:
Papers
- Onion-skin paper
- Bible paper
- Bank paper
- Gift-wrap paper
- Thin Kraft paper (brown wrapping paper)
Sources
- Paper merchants (for the papers listed above)
- Clothes shops (for the paper that wraps newly bought clothes)
- Wine merchants (for the paper that wraps bottles of wine)
- Florists (for the paper that wraps bunches of flowers)
If you are unable to find a good paper or have a spur-of-themoment urge to crumple, regular 80gsm copier paper will suffice, though because the paper is a little too thick, the results will be relatively unimpressive. Use A3 paper in preference to A4. The examples that follow were made with 45gsm onion-skin paper.
8.1.1. The Basic Method
This is the basic method for reducing paper to its crumpled state, ready to be stretched open.
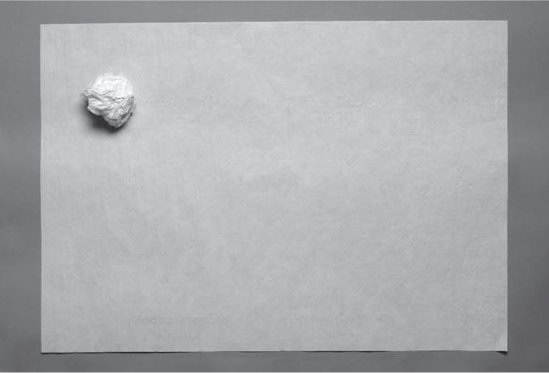
8.1.1 _ 1
Crumple the paper into as tight a ball as you can. Use as much pressure as possible! The photograph shows the size of the crumpled ball in relation to the size of the uncrumpled sheet.

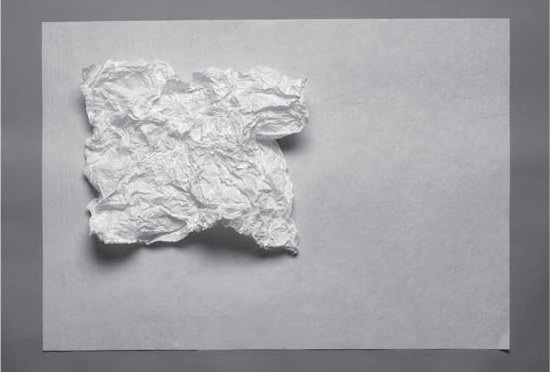
8.1.1 _ 2
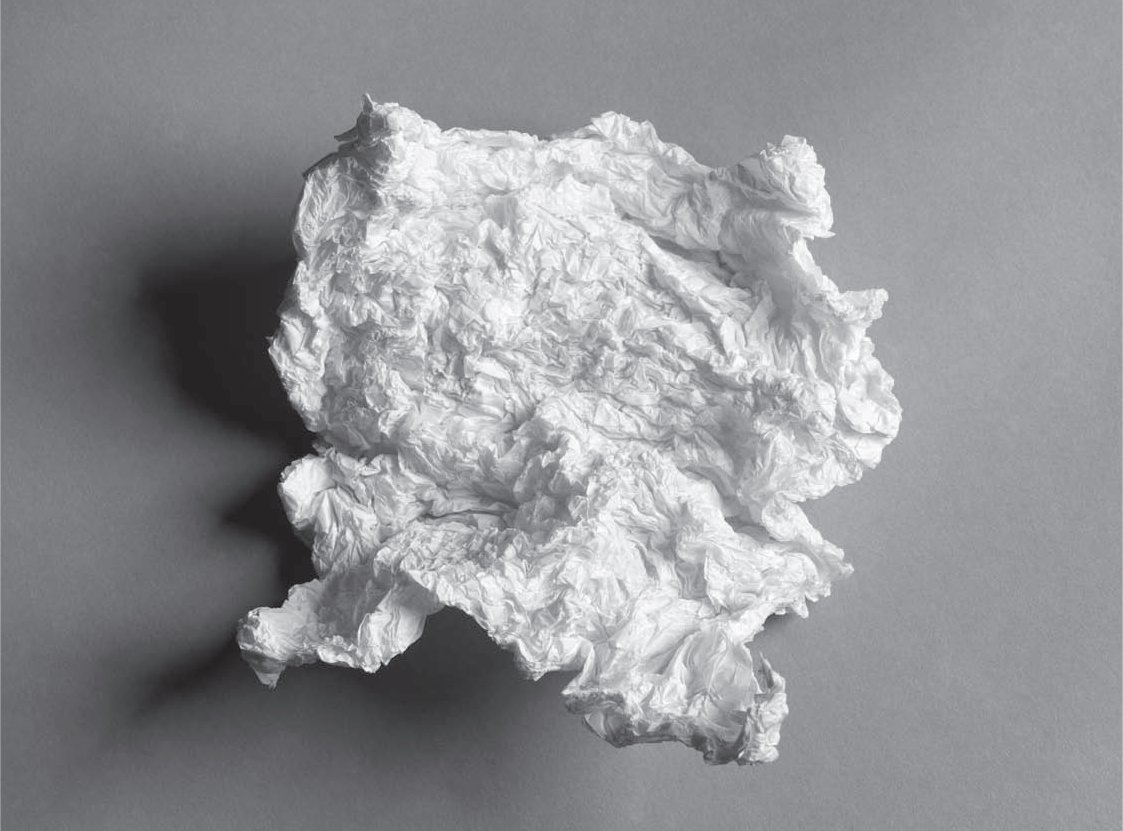
Carefully pick open the ball until it is half open and no more. Try to open it evenly, all over. Note the size of the half-open sheet relative to the uncrumpled sheet – it is about half the area of the original.
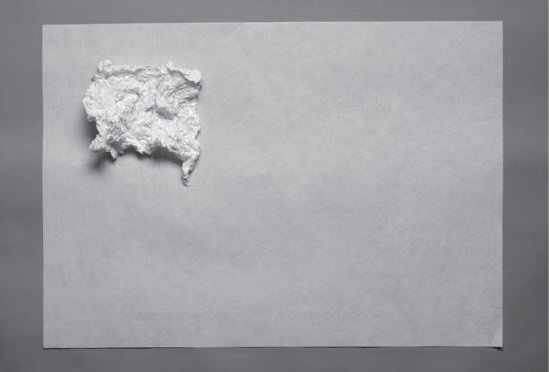
8.1.1 _ 3
Crumple the sheet again into another tight ball, using as much pressure as possible. Again, half open the sheet. The sheet will be about half the area of its previous crumpled size.

8.1.1 _ 4
Repeat the process once again, crushing and half opening the sheet. The sheet will be about half the area of its previous crumpled size.
8.1.1 _ 5
Repeat the process once again, and perhaps again and again, depending on several factors such as the weight of the paper, its size and how tightly you crush the paper into a ball.
8.1.1 _ 6
The final crumpled sheet. The smaller it becomes, the more dramatic will be the stretching, so it is important to reduce the size of the crumpled sheet as much as possible. However, the aim is to crumple it only until it stops reducing in size. If the sheet is crumpled and half opened too many times, it will become soft, the creases will lose their elasticity and the stretching will not work.
The crumpled surface can now be stretched open in two distinct ways. The first way – to make ribs – is explained below.

8.1.2 _ 1
This is the basic rib. It is made by opening the crumpled surface a centimetre at a time, then creasing the paper as you go, creating a sharp, knife-like ridge. The effect will be more dramatic if as little paper as possible is opened (that is, uncrumpled) below the knife ridge, and if the ridge is creased with some force, to make it as sharp as possible. The ridge will not be straight and flat like a conventional origami fold, but will create an arch. The arch will curl more and more as the sheet increases in size and as it becomes more tightly crumpled.
8.1.2 _ 2
When the technique is mastered, try making a number of ribs in parallel.
8.1.2 _ 3
Ribs can also be made to meet at the centre of the sheet, much like an umbrella.

8.1.2 _ 4
Here, the ribs have been formed to isolate an uncrumpled square. There are a great many ways to organize a number of ribs to create 2-D surfaces and 3-D forms. With just a minimal amount of experimentation, a surprising variety of surfaces and forms can be developed, from the small to the monumental.
The other stretching technique that can be used with a crumpled sheet is to make a mould that follows the contours of an object placed underneath the sheet. With the right paper and good crumpling, a surprising level of detail can be achieved.
8.1.3 _ 1
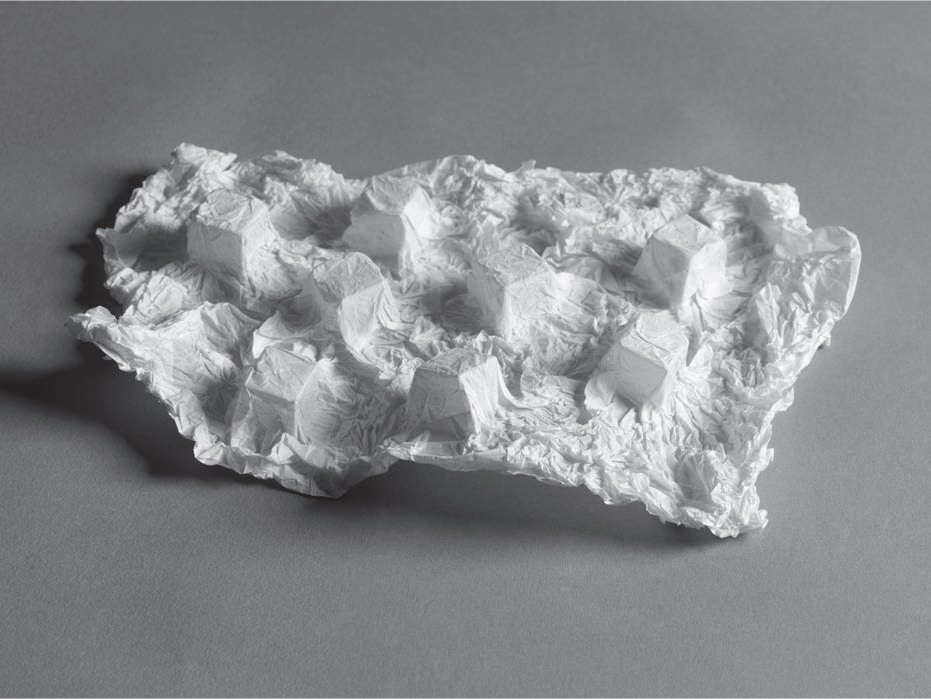
Here, wooden cubes were placed under the crumpled sheet and the sheet stretched around them. Depending on the shape of the object underneath, a huge variety of abstract relief surfaces can be created.

8.1.3 _ 2
Moulds of recognizable objects can also be made. Look around the room to see what you can use! It is even possible to make moulds of a face or a whole body.
The Basic crumpling method described on the previous pages reduces a sheet equally in every direction, so that it can then be stretched open equally in every direction. By contrast, the Linear method described here crumples the sheet in one direction, so that it can be stretched open primarily only in one direction. This means that the Mould technique described earlier cannot be used, though the Rib technique works particularly well.
8.2.1. The Basic Linear Method

8.2.1 _ 1
Roll the sheet into a cylinder with a diameter of approximately 3–4cm. Hold it tightly in your left hand just left of centre, then pull the right-hand half of the cylinder through your tightly clenched right hand. Repeat, but with your hands swapped. The result will be a narrow stick with many parallel crumples. The photograph shows the relative narrowness of the stick against the size of the uncrumpled sheet.
8.2.1 _ 2
Open the crumpled stick carefully. It will be about three-quarters the width of the original sheet.
8.2.1 _ 3
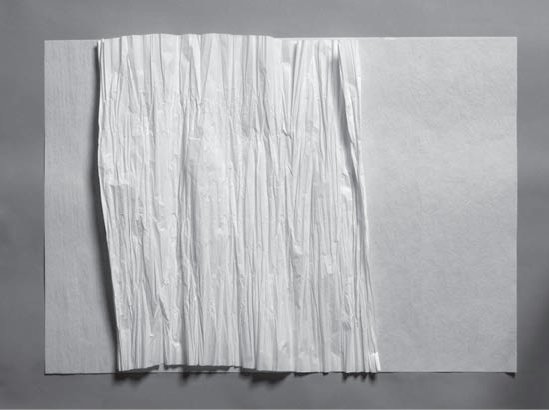
Repeat Steps 1 and 2, being careful to press the folds very tightly as the stick runs through first one hand and then the other, and to only half open the stick. The stick will open to be about half the width of the original sheet. Repeat the process several more times, until the sheet is full of parallel folds and will not absorb any more.

8.2.1 _ 4
This is the result. Be careful not to open and crumple the stick too many times. Stop when you see the stick is full of crumples and cannot absorb any more. This will maintain the freshness and elasticity of all the creases.
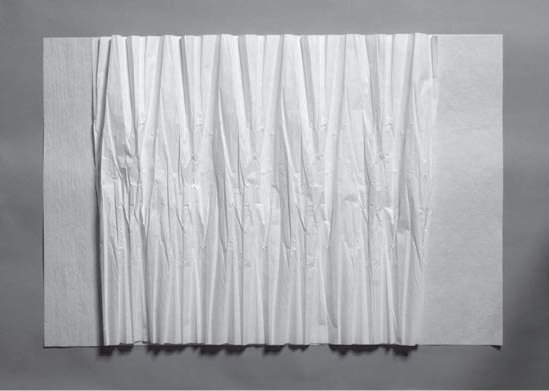
As an alternative to the basic Ribs method described in 8.1.2, ribs can also be added to a sheet filled with parallel crumples. They are best added perpendicular to the direction of the crumples, because they become increasingly invisible as they rotate towards the direction of the crumples.
8.2.2 _ 1
Ribs placed perpendicular to the direction of the parallel crumples create dramatic forms. Mountain and valley ribs may be placed together in combination.

8.2.2 _ 2 Short ribs, or ribs of various lengths, can be placed on a 2-D surface. Again, mountain and valley ribs may be used in combination.
After the Basic and Linear crumpling methods described on previous pages, Rotational crumpling completes the trio of basic crumpling techniques.
8.3.1. The Basic Rotational Method

8.3.1 _ 1
Hold the sheet at the centre point, allowing it to drape downwards. On smaller sheets, you might want to measure the exact centre, to ensure that the rotational effect is distributed equally within a relatively confined area.

8.3.1 _ 2
Hold the apex tightly. Pull the draped sheet firmly through the tightly clenched fist of your other hand. If the drape snags when it is pulled, straighten out the paper so that the crumples radiate neatly from the apex.

8.3.1 _ 3
Half open the paper, allowing the crumples to ‘breathe’ open.

8.3.1 _ 4
Repeat Steps 2 and 3 three or four times until the paper is full of as many crumples as it can hold.
8.3.1 _ 5
This is the finished result. It is sometimes possible to add more crumples if the paper is ‘popped’ inside out between each repeat of the crumpling.
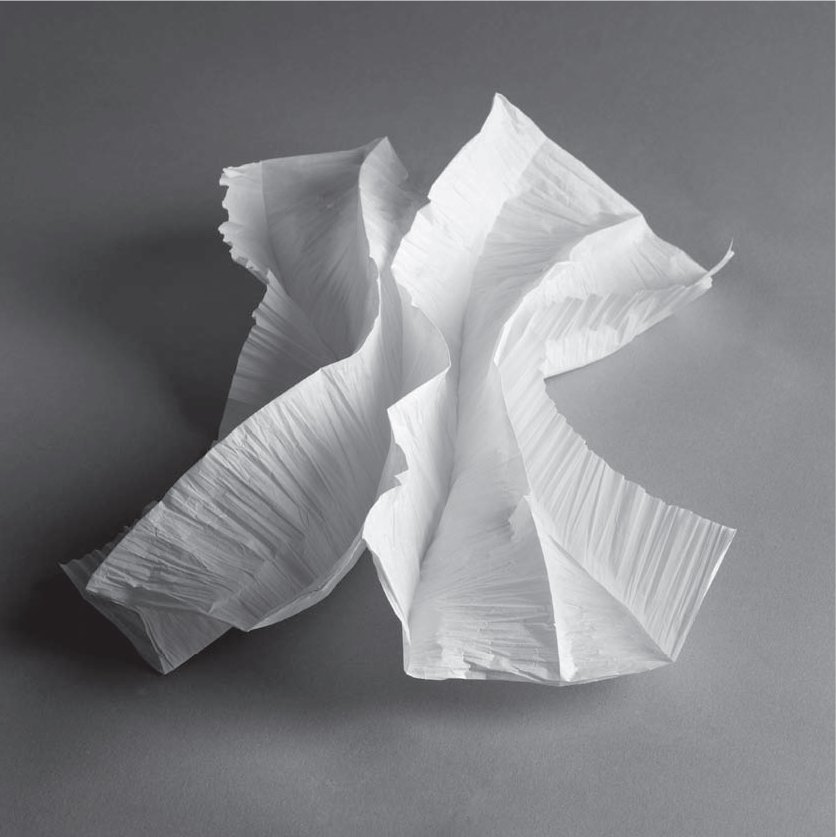
A Rotational crumple differs from the Basic and Linear crumples in that it makes a 3-D form, not a 2-D surface. This means the vocabulary of possible forms and surfaces differs greatly from that of the other two techniques.

8.3.2 _ 1
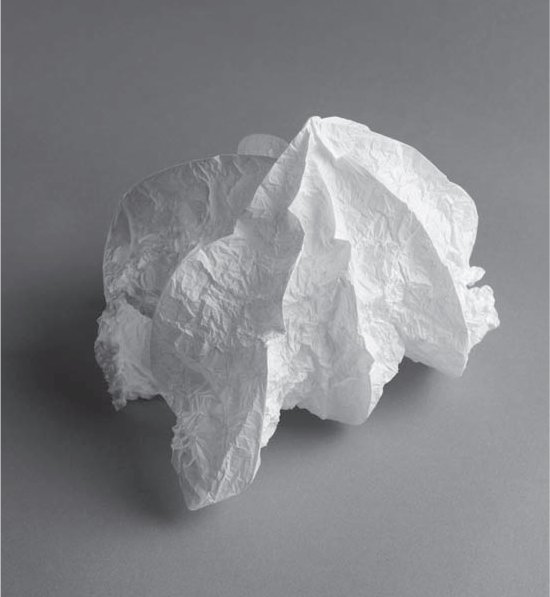
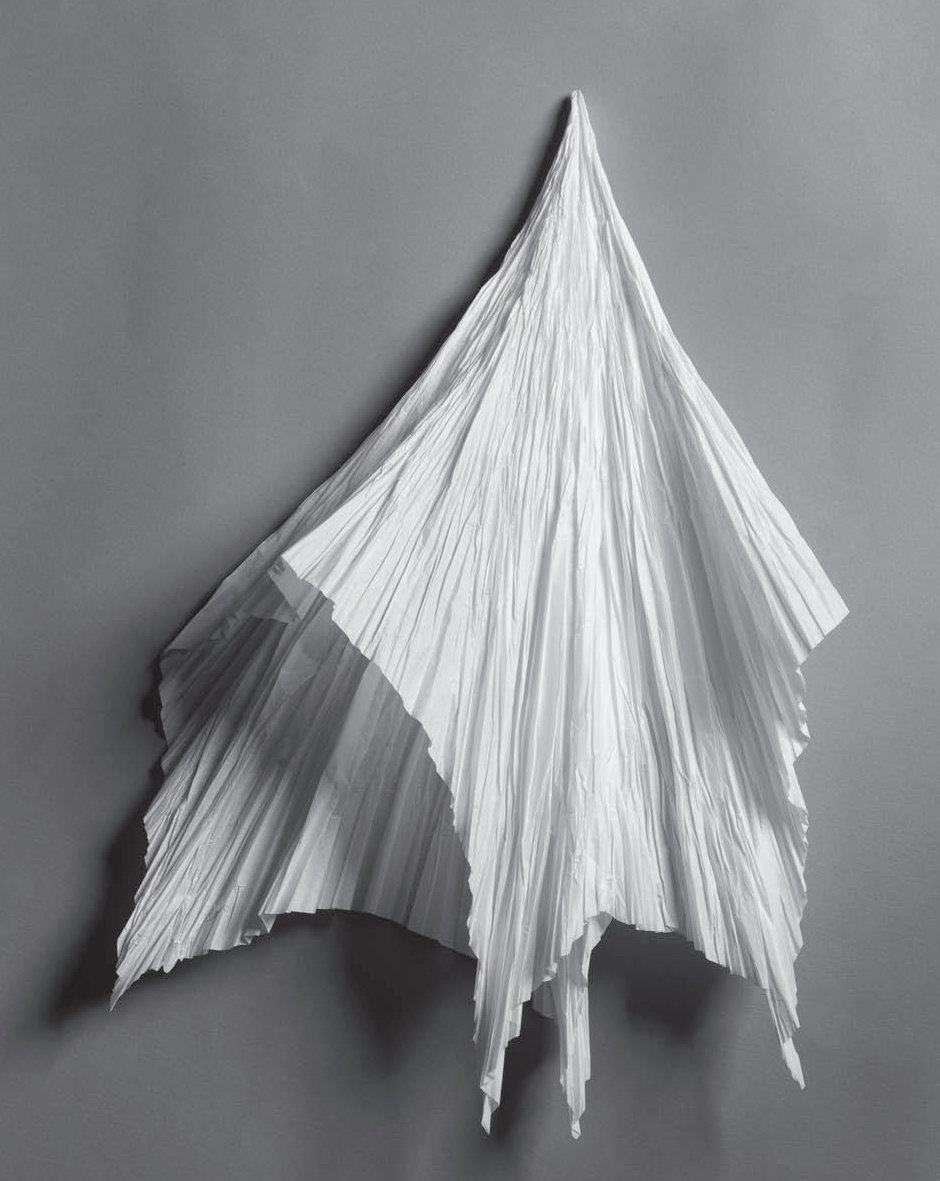
A spike can be created by holding the apex and splaying the paper out beneath until a flat surface is created.

8.3.2 _ 2
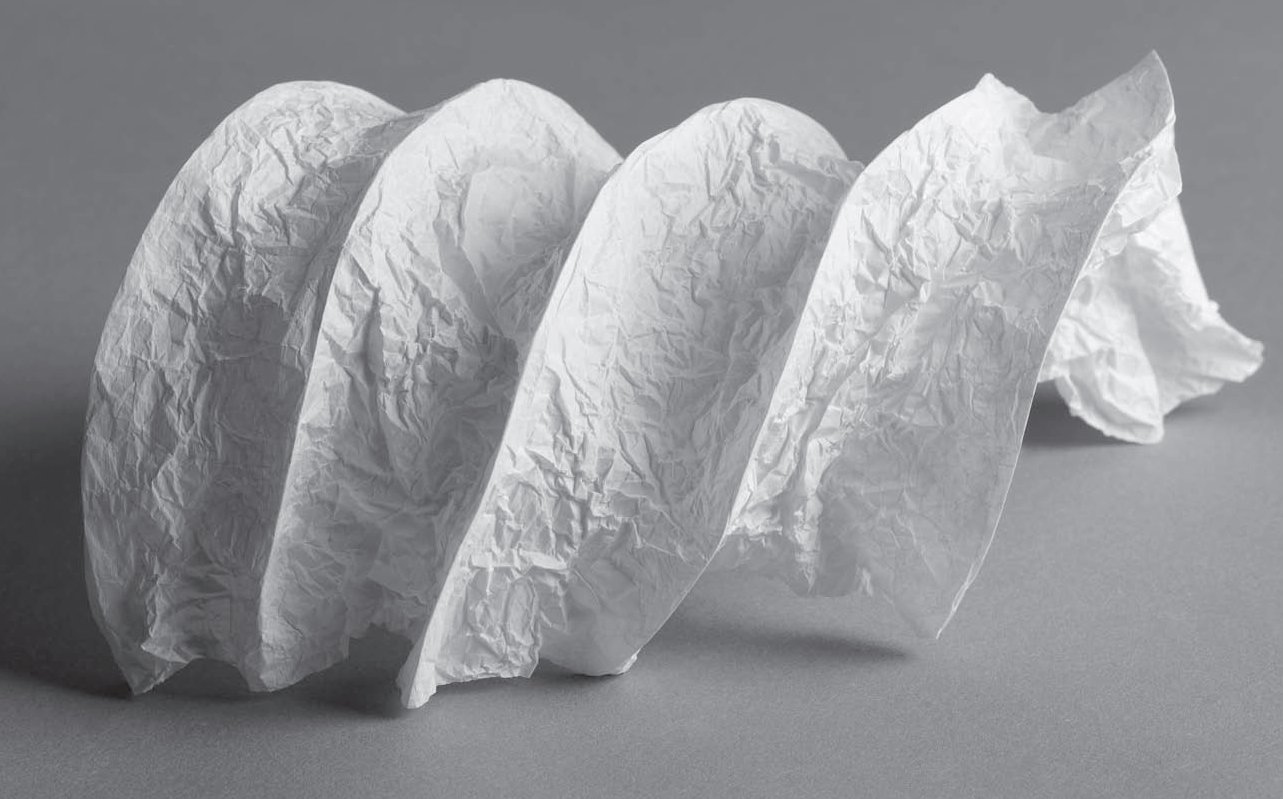
The rotational pattern of the creases means that it is difficult to create straight ribs. Instead, circular or spiral ribs should be made.

8.3.2 _ 3
If the apex of the spike is inverted into itself and then opened, the spike form becomes more button-like, as seen here. If the paper below the button is gathered up into a stick, the form becomes remarkably like a mushroom.
8.4.1. 3-D Forms
Flat sheets were used for all the basic crumpling methods on the previous pages. However, crumpling can also be applied to sheets prepared as 3-D forms.
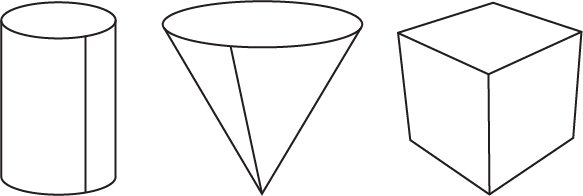
The easiest ones to prepare are simple geometric forms such as cylinders, cones or cubes. Use strong, liquid paper glue to hold the seams together and allow it to dry thoroughly before attempting to crumple the form. An overlap of 2cm is sufficient to create a strong seam. Prepare several simple, identical 3-D forms and crumple them using different techniques to see how they compare.
8.4 _ 1
8.4.2. Super-sizing
Crumpling need not be limited by the size of a single sheet. It is quite possible to glue many sheets together to create a surface or form of giant proportions. It is crucial to join the sheets together before they are crumpled, not afterwards. Curiously, the overlapped seams become almost invisible after the sheet has been crumpled, so super-sizing does not diminish the aesthetics of what is made.
Crumpling large sheets can be physically tiring and time-consuming, and is best undertaken by a small team of people. The results though, can be remarkable.

8.4 _ 2
If you intend to create something of a specific size and proportion – for example, a crumpled medium-sized T-shirt – you cannot simply crumple a T-shirt from a medium-sized sheet. The result will be a much-reduced crumpled shirt, which would fit only a small infant!
The sheet needs to be much larger than the finished T-shirt, so that it becomes the required size when crumpled. Its size and proportion will depend on which crumpling technique is used (Basic, Linear or Rotational) and by what percentage it reduces in size when crumpled. To an extent, these calculations are best resolved by trial and error, though a ballpark estimation will provide an initial guideline.
The basic T-shirt shape will have to enlarge equally in every direction if the Basic crumpling method is used. However, if the Linear method is used, the T-shirt shape will have to enlarge and morph horizontally or vertically, depending on the direction of the parallel crumples.

8.4 _ 3
Instead of crumpling one layer, or perhaps a double layer if a 3-D form is prepared (see page 218), it is possible to crumple through a multi-layered sheet. First, fold the sheet into a simple 2-D geometric shape, then crumple it using one of the methods described in this chapter. When opened, a complex pattern of crumples will be seen, divided into areas bounded by straight origami-like folds. Here is an example which creates a crumpled version of the Basic Parabola (see pages 145–147).

8.4.4 _ 1
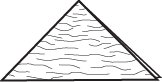
Fold a square of paper in half along a diagonal.

8.4.4 _ 2
Fold the triangle in half again, to create a smaller triangle.
8.4.4 _ 3
Now crumple the four layers as one, using the Linear crumpling method (see pages 210–211). Note that the crumples are parallel to the long edge of the triangle.

8.4.4 _ 4
Open the triangle back out to the original square.

8.4.4 _ 5
When opened, three of the four folds that radiate from the centre point will be valleys and one will be a mountain.

8.4.4 _ 6
Carefully refold one of the radiating valley folds as a mountain, so that one full diagonal is a mountain and the other is a valley.
Now follow the technique used for the Basic Parabola, which collapses a geometrically creased square into an X-shaped stick. Of course, the crumpled square will not divide equally and evenly into concentric mountain or valley squares like the geometric version, but you can nevertheless lightly gather up the crumples as you go, working from the perimeter to the centre point. Be sure to create the buckled shape seen in 5.3.1 _ 7 (see page 146), making use of the mountain and valley diagonals. Eventually, the X-shaped stick will be made. Only then should you crease the crumples very firmly, strengthening all the folds.

8.4.4 _ 7
This is the result. Interestingly, it may take a novice an hour to make the geometrically creased parabola, whereas this crumpled version should take only ten minutes. In many ways, complex geometric folding - especially folding which creates many free points, such as some styles of complex origami - can be considered a form of controlled crumpling. ‘Geometric folding as controlled crumpling’ is a concept rich in creative possibilities.