
In this chapter you're going to explore some of the more advanced functionality that canvas provides. You'll be looking at ways to save time if you want to use lots of different drawing styles, as well as how to transform and manipulate your drawings so they look more exciting. Toward the middle of the chapter you'll learn how to create shadows and gradients to make your shapes more realistic and interesting. The chapter ends with a look at creating exotic shapes using advanced paths, followed by finding out how to export the canvas as an image so you can store it or use it at a later date.
This is an exciting chapter that I hope will really open your eyes to some of the cooler things that canvas can do.
In Chapter 3 we switched between styles a lot, sometimes even going from one color to another, then back to the first color again. This repetition can get pretty tedious, and it means that you have to duplicate a lot of code if you want to revert back to a set of styles that you've already used before. The good news is that canvas has functionality baked in that allows you to remember styles and other attributes so you can use them again in the future (yay). This is known as saving and restoring the drawing state of the canvas. However, the bad news is that it can be a little confusing if you want to remember more than one state, so you'll have to have your head screwed on to keep track of what's happening (boo). But have no fear; once I';m done explaining it you'll wonder what all the fuss was about.
If I walked up to you and said, "Look at the state of you!", not only would I have potentially offended you, but I'd have also directly referred to the way that you look (although, I';m confident you look lovely). The term "state," in both the offline world and the canvas world, is used to describe the condition of something at a particular point in time. It's important to grasp that the state of an object is directly connected to the time that it was described. For example, if I described the state of you yesterday and again today, I'd be talking about two completely different states — you might look worse today (although, I';m sure you don't). In short, state can change.
In canvas, the drawing state refers to a whole range of properties that describe the look and feel of the 2d rendering context at that point in time, from simple color values all the way to complex transformation matrices and other fun stuff. We'll get to transformation matrices later on in this chapter, so don't worry if I just spewed a load of gobbledygook.
The full list of properties that are referred to as the canvas drawing state are: the transformation matrix, the clipping region, globalAlpha, globalCompositeOperation, strokeStyle, fillStyle, lineWidth, lineCap, lineJoin, miterLimit, shadowOffsetX, shadowOffsetY, shadowBlur, shadowColor, font, textAlign, and textBaseline. In this chapter, you'll learn about most of the properties that we haven't covered yet.
It's important to be aware that the current path and the current bitmap of the canvas (what's being displayed) aren't part of the state. It might help to look at the state as a description of the 2d rendering context properties, rather than a copy of everything that you can see on the canvas.
Before we begin, make sure you've got a fresh HTML web page set up as described at the start of Chapter 3. Don't let me stop you if you want to use your own HTML, or you just want to look at the examples and not type them out just yet.
Now, the great thing about saving the state of the canvas is that it's dead easy to perform. All you need to call is the save method of the 2d rendering context. That's it. There are no arguments or anything else, just plain and simple save:
var canvas = $("#myCanvas");
var context = canvas.get(0).getContext("2d");

context.fillStyle = "rgb(255, 0, 0)";
context.save(); // Save the canvas state
context.fillRect(50, 50, 100, 100); // Red square
So what actually happens when you save the drawing state? Surely it must be stored somewhere, right? Correct. The 2d rendering context holds a stack of drawing states, basically a list of previously saved states with the most recently saved state at the top — just like a stack of paper. The default stack of drawing states is empty, and a new state is only pushed (added) to the stack if you call the save method. This means that there is absolutely nothing stopping you from calling the save method multiple times and pushing multiple drawing states onto the stack one after another, with the oldest state on the bottom. However, this is where things can get a little confusing as you can't pull any drawing state back out of the stack, there is a strict order to the process. But don't worry about that just now — we'll cover multiple states shortly. In the meantime, let's have a look at how to access the state that you've just saved.
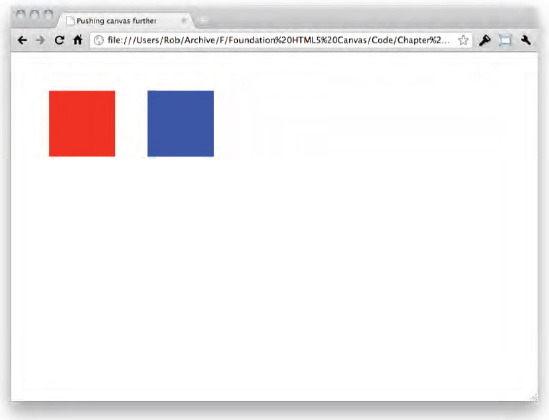
Getting access to an existing drawing state is just as easy as saving it; the only difference being that this time you call the restore method. Now, if you draw another square, this time using blue as the fillStyle, you'll soon see the benefit behind canvas drawing states:
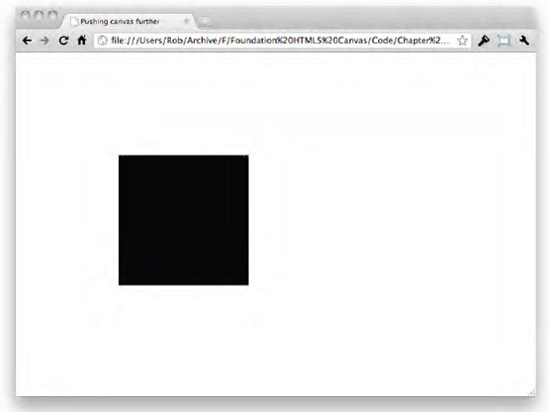
context.fillStyle = "rgb(0, 0, 255)";
context.fillRect(200, 50, 100, 100); // Blue square
This doesn't do anything special just yet; you've only changed the fill color (see Figure 4-1).
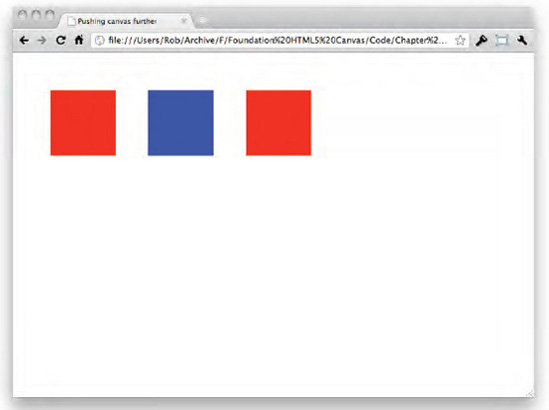
But what if you want to revert back to the red fill color we used earlier? I hope you aren't thinking about rewriting the fillStyle property again and setting it to red! Oh, you're not? Phew. No, fortunately you saved the drawing state after setting the color to red, so it's happily sitting in the stack waiting for you to grab it back out again by adding a call to restore after the existing code:
context.restore(); // Restore the canvas state
context.fillRect(350, 50, 100, 100); // Red square
By calling the restore method you automatically pull out the last drawing state that was added to the stack and apply it to the 2d rendering context, overwriting all existing styles with those from the saved state. This means that, although you don't change it directly in the code, the fillStyle property will take the value of the saved drawing state — it will turn red (see Figure 4-2). This might not look much when just changing color, but the same concept works for all the canvas properties that are saved into the drawing state.
At the beginning of this section I told you that dealing with more than one state at a time is a little confusing. My hope is that by now, after your sterling work up to this point, you're ready to handle it. Really, in all honestly, it's not that confusing if you understand the concept of the stack and how new items are added on top, with items being removed from the stack from the top as well. The stack is basically a last in, first out system; the most recent drawing state that was saved to the stack will be the first state that is restored later on.
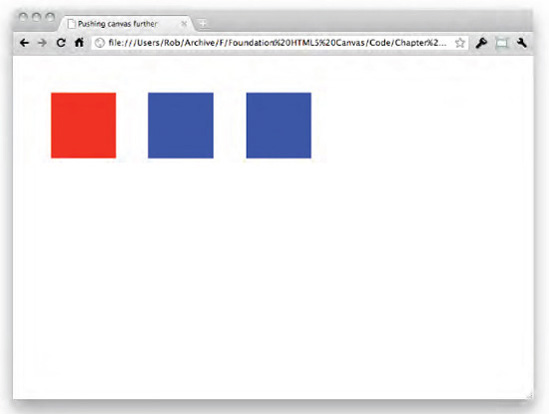
If you update the previous example to save the state after setting the blue fillStyle then you'll see what I mean:
context.fillStyle = "rgb(255, 0, 0)";
context.save();
context.fillRect(50, 50, 100, 100); // Red square

context.fillStyle = "rgb(0, 0, 255)";
context.save();
context.fillRect(200, 50, 100, 100); // Blue square

context.restore();
context.fillRect(350, 50, 100, 100); // Blue square
The third square is now blue instead of red. This is because the last drawing state that was saved to the stack was the blue fillStyle, so it's the first to be restored (see Figure 4-3).
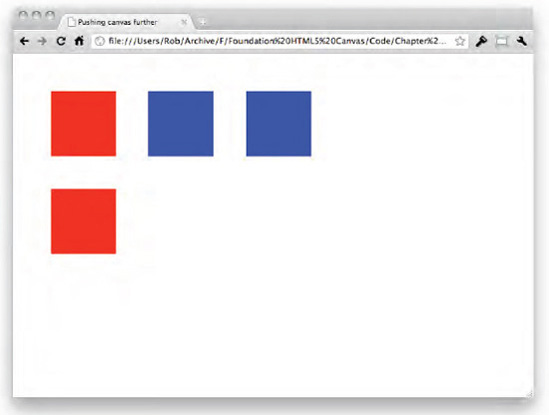
The other state with the red fillStyle is still waiting in the stack; you just need to call restore again to access it:
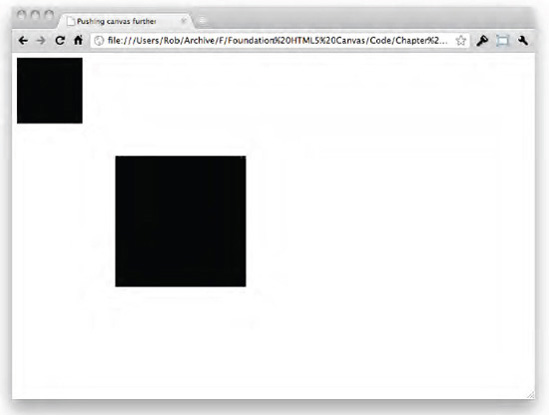
context.restore();
context.fillRect(50, 200, 100, 100); // Red square
This will return and remove the final state from the stack, leaving it empty (see Figure 4-4).
Now, there's much more to saving and restoring drawing states, but the purpose of this section is to give you the basics. From now on you'll be able to understand the use of the drawing state in future sections to save time and do some pretty cool things.
So far, all the elements you've drawn on to the canvas have been left as they were intended to be drawn. For example, a rectangle is drawn at the position and in the dimensions that you define in the fillRect method, and it is drawn with horizontal and vertical lines; nothing out of the ordinary there. But what if you wanted to draw something unique? What if you wanted to rotate a rectangle? What if you wanted to scale it? What's great is that the transformation functionalities of the 2d rendering context allow you to do all of these tasks and more. The stuff they allow you to do is pretty amazing.
At the most basic level you have translation, which is the act of moving the origin of the 2d rendering context from one location to another. In the case of canvas you use the translate method, which actually moves the coordinate origin of the 2d rendering context, rather than moving the objects that you're trying to draw (see Figure 4-5).
This is how to call the translate method:
context.translate(150, 150);
The two arguments are the (x, y) coordinate values that dictate how far to move the origin of the 2d rendering context. It's important to understand that the (x, y) coordinate values that you provide are added on to the existing translation of the origin, which is (0, 0) by default. For example, if you performed two translations exactly like above, you'd actually have moved the origin 300 units (0+150+150) in the x direction, and 300 units (0+150+150) in the y direction.
By moving the origin of the 2d rendering context, all objects drawn to the canvas will now appear to be moved by the same amount:
context.fillRect(150, 150, 100, 100);

context.translate(150, 150);

context.fillStyle = "rgb(255, 0, 0)";
context.fillRect(150, 150, 100, 100);
Normally the second call to fillRect would draw a square with an origin point at the coordinate (150, 150), but by performing a translation the square will now appear to have an origin of (300, 300) (see Figure 4-6).
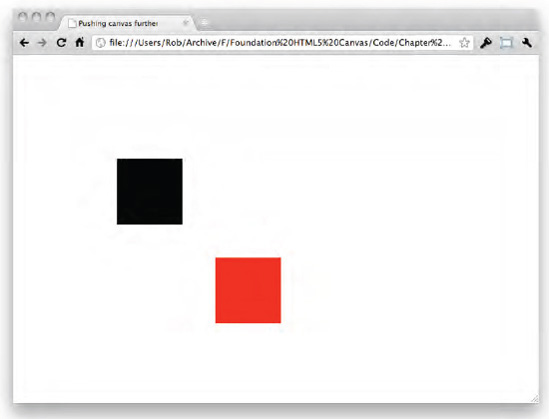
It's important to understand exactly what has gone on here. The red square still has an origin of (150, 150), it just appears to have shifted over another 150 pixels because the origin of the 2d rendering context has moved 150 pixels as well since drawing the black square. If you wanted the red square to appear where the point (150, 150) used to be (where the black square is), you'd simply set its origin as (0, 0):
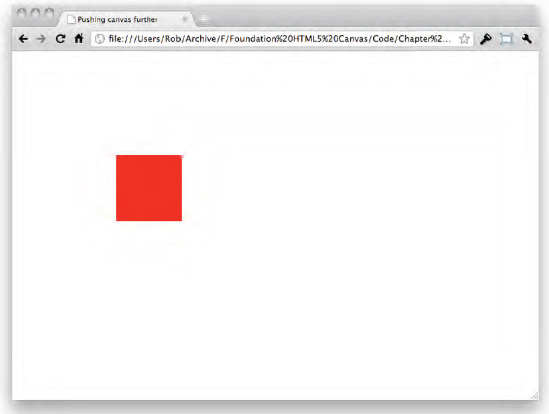
context.translate(150, 150);
context.fillStyle = "rgb(255, 0, 0)";
context.fillRect(0, 0, 100, 100);
This works because you've already translated the 2d rendering context to the position (150, 150), so anything drawn from now on at the point (0, 0) will actually appear to be at the point (150, 150) (see Figure 4-7).
Note
Every transformation method, including translate, affects all elements drawn after it has been called. This is because they all act directly on the 2d rendering context, not on the shape you're drawing. Think of it like what happens when you change something like the fillStyle property; the new color affects every element drawn from there on.
Another transformation method is scale which, as the as the name suggests, scales the 2d rendering context in size. It works in a slightly different way to translate in that the (x, y) arguments are multipliers rather than pixel values.
context.scale(2, 2);
context.fillRect(150, 150, 100, 100);
This example is set to scale the 2d rendering context by a multiple of two in both the x and y directions. In layman's terms, the 2d rendering context and all objects drawn onto it are now twice as big (see Figure 4-8).
Using scale on its own is going to result in absolutely everything being made bigger, and it will also cause objects to be drawn in positions you wouldn't expect. For example, a scale of 2 will effectively mean that 1 pixel now equals 2 pixels; so if you draw something at an x of 150, it will now end up looking like it's at an x of 300. If this is not what you want, or if you want to only scale a single shape, you can combine the scale method with translate.
context.save();
context.translate(150, 150);
context.scale(2, 2);
context.fillRect(0, 0, 100, 100);
In this example you're first saving the state of the canvas, before translating the origin point to (150, 150). You then scale the canvas by two and draw a square at the position (0, 0). Because you've translated the origin of the 2d rendering context to (150, 150), the square will be drawn in the correct position whilst still being scaled. Job done! (See Figure 4-9.)
The problem is that anything else you draw from now on will be translated by 150 pixels and scaled by 2 in both directions. Fortunately you've already implemented the first half of the solution; saving the drawing state before performing the transformations. The second half of the solution is to restore the drawing state as it was previously.
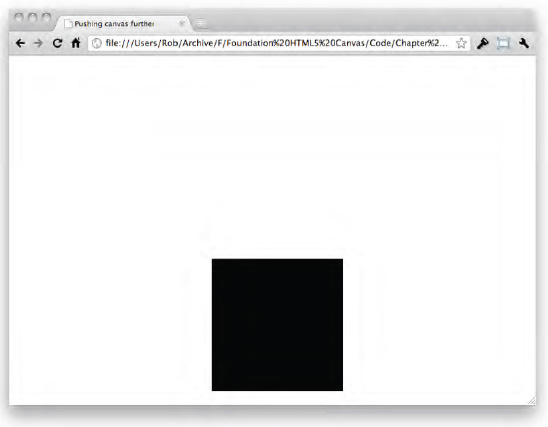
context.restore();
context.fillRect(0, 0, 100, 100);
By restoring the drawing state, anything you draw from then on will appear as if the transformations never happened (see Figure 4-10). Cool, eh? I told you that saving and restoring the drawing state allowed you to do some pretty nifty stuff.
If I had to choose a favorite transformation, the rotate method would definitely be the one. It always seems amazing when you can break the concept of square pixels by twisting something at an angle, but perhaps that's just me. Simple pleasures!
The common theme with all the transformations thus far is that they're easy to call. The rotate method is no different, you just pass in the angle in radians that you want to rotate the 2d rendering context by:
context.rotate(0.7854); // Rotate 45 degrees (Math.PI/4)
context.fillRect(150, 150, 100, 100);
However, the result of this rotation might not be what you expected. Why is the square trying to escape out the side of the browser? (See Figure 4-11).
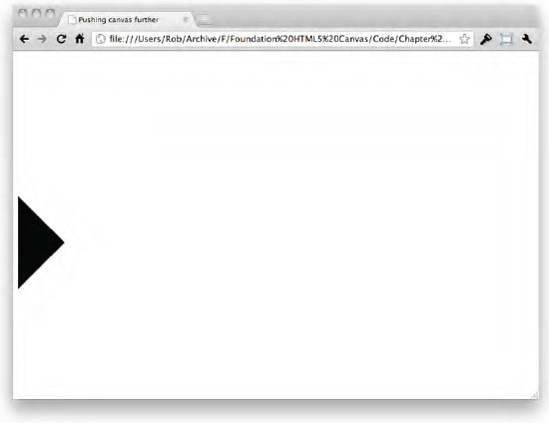
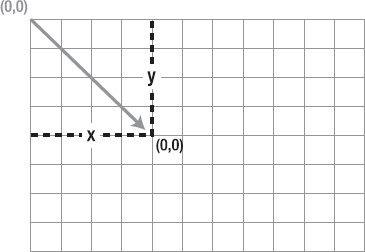
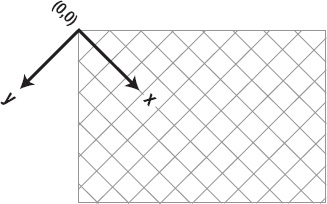
The reason for this odd behavior is that the rotate method rotates the 2d rendering context around its (0, 0) point of origin, which in this above is at the top left hand corner of the screen. Because of this the square you've drawn is not being rotated itself; it's actually being drawn onto a canvas that is now at a 45-degree angle. Figure 4-12 should help shed some light on the matter.
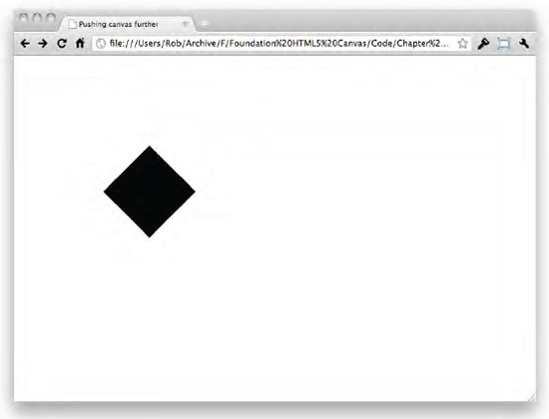
Of course, this isn't ideal if you want to only rotate the shape that you're drawing. This is where your friend translate comes in to save the day, again. To get this effect you need to translate the origin of the 2d rendering context to the centre of the shape that you're drawing. From here you can perform a rotation on the canvas and then draw your shape at the current position. It's a little overwhelming in text, so let me show you in an example in code:
context.translate(200, 200); // Translate to centre of square
context.rotate(0.7854); // Rotate 45 degrees
context.fillRect(−50, −50, 100, 100); // Draw a square with the centre at the pointof rotation
Which will give you a lovely square drawn at a 45-degree angle, in exactly the position you're after (see Figure 4-13).

Note
The order that you perform transformations is incredibly important. For example, if you rotated the canvas 45 degrees before performing a translation then you'd be translating at an angle of 45 degrees. An example from the WHATWG specification points out that a scale transformation that doubles the width of anything drawn, followed by a rotation of 90 degrees, and then drawing a rectangle that is twice as wide as it is tall, will result in a square. It makes sense when you think about it, but it highlights the need to think about the order of your transformations. If something doesn't look right, check the order!
All of the transformation methods you've used up to this point affect something called the transformation matrix. Without going into unnecessary detail (they aren't the most exciting things in the world), a transformation matrix is an array of numbers, each of which describes a particular kind of transformation that I'll explain shortly. A matrix is split into a number of columns and rows; in the case of canvas you're using a 3×3 matrix — three columns and three rows (see Figure 4-14).
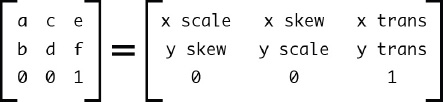
For our purposes you can ignore the bottom row as you'll never have to or be able to change its values. The rows that are important are the first and second, which contain number values that you'll later refer to in canvas as a to f. You can see in the illustration that each number value corresponds to a particular transformation. For example, a refers to the scale multiplier in the x direction, while f refers to the translation in the y direction.
Now, before we learn how to manipulate the transformation matrix manually, I should highlight what the matrix looks like by default. A new 2d rendering context will contain a fresh transformation matrix, called an identity matrix (see Figure 4-15).
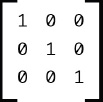
This special matrix has every value set to 0, apart from the ones on the main diagonal, the line from top left to bottom right. The full reasoning behind this is better suited to a book on mathematics, but it's safe to say that an identity matrix means that absolutely no transformation is performed. Fully understanding an identity matrix isn't important; what is important is knowing what the default values are in a transformation matrix.
The final two methods that we're going to look at in this section are transform and setTransform. These both help us manipulate the transformation matrix of the 2d rendering context. I've done enough explaining for the time being, so let's jump in and perform a translation and scale using transform, then draw a square to show it all working:
context.transform(2, 0, 0, 2, 150, 150);
context.fillRect(0, 0, 100, 100);
The transform method takes six arguments, one for each value of the transformation matrix; the first representing a, through to the last representing f. In this example you want to scale the canvas so it's double the size; so to do that you set the first and fourth arguments to 2, which are a and d — the x scale and the y scale. Makes sense. And to translate the canvas origin? That's right: you set the fifth and sixth arguments, which are e and f — the x translation and the y translation (see Figure 4-16).
As I hope you can see by now, it's really not that scary to manipulate the transformation matrix manually. So long as you are aware of what each value does, you'll be fine. On that note, let's do something a little more advanced with the transformation matrix — let's rotate it!
Performing a rotation transformation without using the rotate method may look tricky from the outside, but if you bear with me it'll all make sense soon enough:
context.setTransform(1, 0, 0, 1, 0, 0); // Identity matrix
var xScale = Math.cos(0.7854);
var ySkew = -Math.sin(0.7854);
var xSkew = Math.sin(0.7854);
var yScale = Math.cos(0.7854);
var xTrans = 200;
var yTrans = 200;

context.transform(xScale, ySkew, xSkew, yScale, xTrans, yTrans);
context.fillRect(−50, −50, 100, 100);
The first thing you're doing here is calling the setTransform method. This is the second method that manipulates the transformation matrix. Its job is to reset the matrix to the identity matrix and then apply the transformation as described in the six arguments. In this example you're using it to reset the transformation matrix so you can be sure you're working with a clean slate. The second thing you're doing is assigning values to the variables that you're going to use as arguments in the call to transform. By creating variables to use in the arguments you can keep things looking cleaner and making a little more sense.
It's important to point out that transform actually multiplies the existing transformation matrix by the values that you supply; it's not simply setting the values of the transformation matrix. What this means is that there is a cumulative effect. If you called transform multiple times, you'd be applying each transformation to the transformation matrix that results from the last transformation. I appreciate that it's a little confusing, but I hope that it helps shed some light on the way that transformations work.
You'll have noticed that the Math object has shown its face again. You're using it in this example to return the necessary values for the scale and skew transformations to produce the effect of rotation. I'll repeat that because it's important to grasp; rotation using the transformation matrix is the result of a combination of skewing and scaling. To do this you pass in the angle in radians to the cos (cosine) and sin (sine) trigonometric functions.
Note
We'll be using trigonometric functions like cosine and sine later on in this book. I strongly advise you to read up on them elsewhere if you want to learn more about how they work and why we're using them. Unfortunately I don't have the luxury of explaining absolutely everything we use in minute detail. The Wikipedia page on transformation matrices is a great resource for finding out more: http://en.wikipedia.org/wiki/Transformation_matrix.
If you put this all together and cross your fingers you should come up with the following; a lovely rotated square (see Figure 4-17).
Looks nice, doesn't it? And to think that you rotated that with your own bare hands; none of that cheating rotate malarkey! In all seriousness, most times the three core transformation methods will do you just fine, but for those times that they don't, an understanding of transformation matrices will get you far.
The last section was definitely a lot of hard work, so well done for getting through it. I';m going to give you a breather this section as we'll be taking a look at something a little less mental and a little more fun; compositing! In short, compositing is the act of combining multiple visual elements together into a single visual element. It's used in all walks of life, from graphic design all the way to Hollywood film production (scenes shot with a green screen are composited — combined with another image — at a later date).
Everything you draw in canvas is already being composited; meaning everything you draw is combined with the existing elements that have been drawn already. This is really basic compositing, simply adding something on top of another thing. I'll touch on these aspects of compositing shortly, but for now let's look at the easiest compositing method in canvas, the globalAlpha property.
Note
Both of the global compositing properties that we're covering in this section affect everything that is drawn to the 2d rendering context. It's important to be aware that changing a global compositing property will affect everything that is drawn from that point onwards.
Before any object is drawn to the canvas, an alpha value is applied to it that matches that of the globalAlpha property. The value assigned to globalAlpha must range between 0.0 (transparent) and 1.0 (opaque); the default value is 1.0. If it isn't already obvious, the globalAlpha property will affect how transparent the objects that you're drawing will be. For example, you could draw a half transparent square like so:
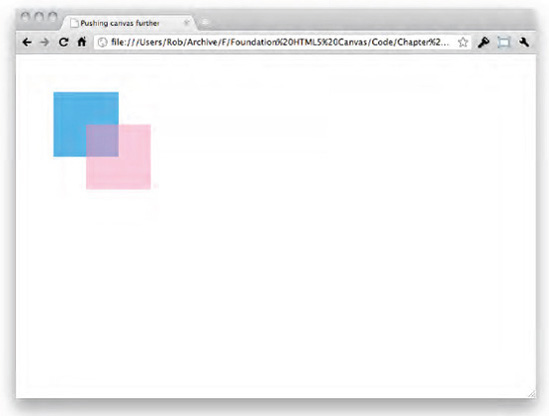
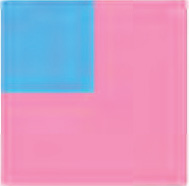
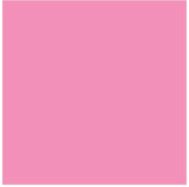
context.fillStyle = "rgb(63, 169, 245)";
context.fillRect(50, 50, 100, 100);
context.globalAlpha = 0.5;
context.fillStyle = "rgb(255, 123, 172)";
context.fillRect(100, 100, 100, 100);
Because you set the globalAlpha property after drawing the blue square, only the pink square will be affected by the alpha value. The result will be a pink square with the blue square slightly showing through behind it (see Figure 4-18).
Now, you could also produce the same effect by setting the fillStyle to an rgba value that includes an alpha value less than 1. The difference with globalAlpha is that it sets the global alpha value that is then referenced when applying an alpha using something like an rgba color. For example, if the globalAlpha is 0.5 and you then apply a fillStyle with an rgba of alpha 0.5, the resulting alpha will actually be 0.25. The global alpha value of the 2d rendering context (0.5) acts as the baseline for calculating other alpha values (0.5 * 0.5 = 0.25).
As I mentioned at the beginning of this section, even a brand-new 2d rendering context uses compositing from the get go. You probably wouldn't notice it because it uses a type of compositing that results in shapes being drawn exactly as you'd expect; one on top of the other. This type of compositing is called source over destination; the source being the new shape that you're drawing, and the destination being the 2d rendering context that may have already been drawn on to. We know this because the globalCompositeOperation property of the 2d rendering context has a default value of "source-over," and this property defines the type of compositing that is performed on everything drawn to the 2d rendering context (out of 11 possible choices). I should probably point out that all the values for the globalCompositeOperation that depend on order will mention either the source or destination, never both. For example, "source-over" is short for "source over destination;" the destination is implied because it is not named in the value (the source has to be drawn over something).
Let's take a look at each of the 11 possible options available for the globalCompositeOperation. You'll be using the following code as a template to study each of the composite operations; the blue square being the destination and the pink square being the source. The only reason we're using blue and pink instead of other colors is that they will better show the effect of the composite operations:
context.fillStyle = "rgb(63, 169, 245)";
context.fillRect(50, 50, 100, 100);
context.globalCompositeOperation = "source-over";
context.fillStyle = "rgb(255, 123, 172)";
context.fillRect(100, 100, 100, 100);
Note
Some browsers don't support the full range of globalCompositeOperation values, so for the sake of clarity I'll be using illustrations instead of in-browser screenshots to show you how they should look. I';m using the WHATWG specification as the basis for how each operation should look.
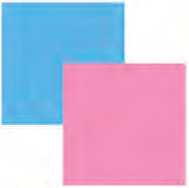
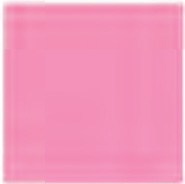
This is the default value and it means that the shape that you're drawing (the source) will be drawn on top of the existing canvas (the destination):
context.globalCompositeOperation = "source-over";
Which looks exactly like everything you've drawn so far (see Figure 4-19).
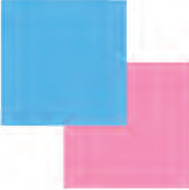
This is the opposite of the previous value, so the destination is now drawn on top of the source:
context.globalCompositeOperation = "destination-over";
Which looks like the reverse of the first operation (see Figure 4-20).
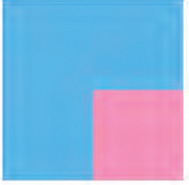
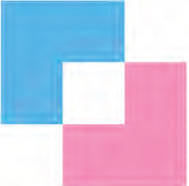
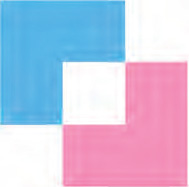
This draws the source on top of the destination, but only where both are opaque (not transparent). The destination is drawn everywhere else where it is opaque, but the source is transparent (see Figure 4-21).
This is the reverse of "source-atop;" the destination is drawn on top of the source where both are opaque, with the source drawn everywhere else where it is opaque and the destination is transparent (see Figure 4-22).
The source is drawn where the both the source and destination overlap. Anything that doesn't overlap will be made transparent (see Figure 4-23).
This is the reverse of "source-in;" the destination is kept where both the source and destination overlap. Anything that doesn't overlap will be made transparent (see Figure 4-24).

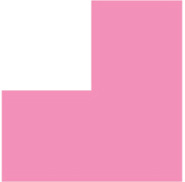
The source will be drawn where there is no overlap with the destination. Everything else will be made transparent (see Figure 4-25).
The destination will be kept where there is no overlap with the source. Everything else will be made transparent (see Figure 4-26).

This value has no order and will add together the color values of the source and destination if they overlap. The resulting color values will be capped at 255, which is white (see Figure 4-27).
This value has no order and will draw the source instead of the destination (see Figure 4-28).
This value has no order and will draw the source and destination where neither overlaps. Anything that does overlap will be made transparent (see Figure 4-29).
Together, these composite operations allow you to perform interesting effects without having to draw complicated shapes. Some operations, like "destination-out," can be useful for erasing areas of the canvas that aren't rectangular; for example, by using a circle as the source.
Everybody loves a good shadow; they're probably the most over-used effect in Adobe Photoshop and can be seen all over the Web and in graphic design. This is for good reason though — if done well, they can really add a sense of realism to an image. Done wrong, however, they can completely ruin an image. However, I';m not here to dictate my opinion on graphic design; I';m here to teach you how to become a master at canvas.
Creating a shadow in canvas is relatively straightforward and can be manipulated using four possible global properties. These properties are shadowBlur, shadowOffsetX, shadowOffsetY, and shadowColor. We'll go over each shortly. By default, the 2d rendering context does not draw shadows because shadowBlur, shadowOffsetX, and shadowOffsetY are set to 0, and shadowColor is set to transparent black. The only way you can make a shadow appear is by changing the opacity of the shadowColor to something non-transparent, while also setting either shadowBlur, shadowOffsetX, or shadowOffsetY to a value that isn't 0:
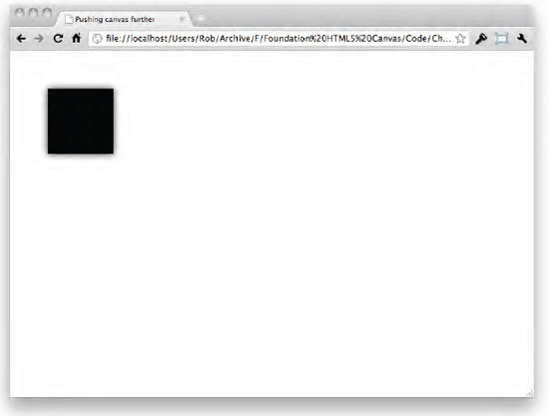
context.shadowBlur = 20;
context.shadowColor = "rgb(0, 0, 0)";
context.fillRect(50, 50, 100, 100);
In this example you've given the shadow a 20 pixel blur and have set its color to a fully opaque black. The offset values for the shadow are kept at their default of 0 pixels in the x direction, and 0 pixels in the y direction. It's probably worth mentioning that, even though its opaque black, the shadow will appear slightly transparent at the edges because of the blur (see Figure 4-30).
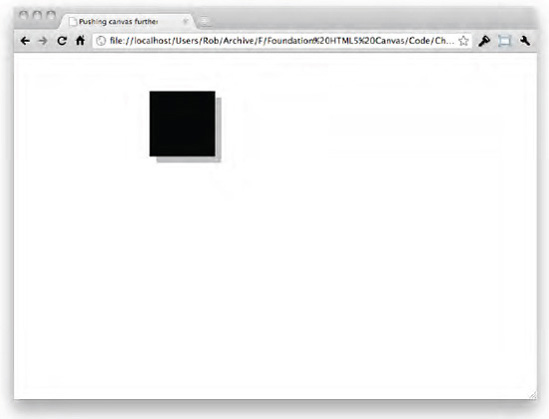
If you change the shadowBlur, shadowOffsetX, and shadowOffsetY properties you'll be able to create a different drop shadow effect:
context.shadowBlur = 0;
context.shadowOffsetX = 10;
context.shadowOffsetY = 10;
context.shadowColor = "rgba(100, 100, 100, 0.5)"; // Transparent grey
context.fillRect(200, 50, 100, 100);
By changing the blur to 0 you create a razor-sharp shadow, and by moving the offset just slightly to the right and downward you end up with a drop shadow variant. The icing on the cake is to set the shadowColor as a slightly transparent mid-gray, using the rgba color type that was mentioned in the section on compositing (see Figure 4-31).
Shadows in canvas work for any shape that you can draw, so there's nothing to stop you using them on circles or anything else that you want. You can even change the color to something a little more exotic, although I'd definitely question your motives before doing so:
context.shadowColor = "rgb(255, 0, 0)"; // Red
context.shadowBlur = 50;
context.shadowOffsetX = 0;
context.shadowOffsetY = 0;
context.beginPath();
context.arc(400, 100, 50, 0, Math.PI*2, false);
context.closePath();
context.fill();
This gives you a rather dashing circle with a horrific red shadow effect behind it (see Figure 4-32).
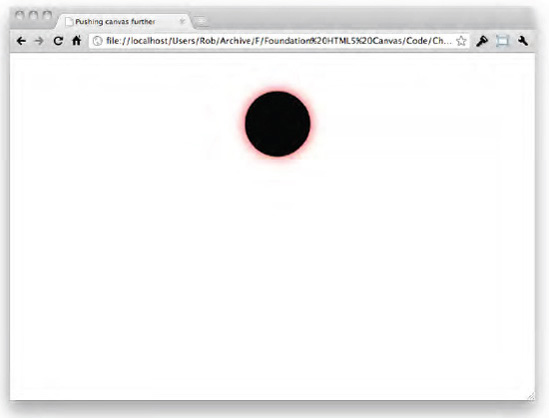
By using a combination of various blur and color values, you can achieve some effects that are completely unrelated to shadows. For example, you could use a blurred yellow shadow to create the effect of a light flare around an object, like a sun or a glowing object perhaps.
Sometimes a plain color just isn't exciting enough, or perhaps you just really need to add an extra element of realism to the color of a shape. Either way, gradient colors in canvas are definitely an option for you to consider; both fillStyle and strokeStyle accept gradient colors in the form of a CanvasGradient object.
There are two types of gradient available to you in canvas: linear and radial. Each type of gradient is created using its own method in the 2d rendering context; for a linear gradient, you use createLinearGradient, and for a radial gradient you use createRadialGradient (five points if you guessed that before you read it). Both of these methods return a CanvasGradient object for you to further manipulate using the addColorStop method of the CanvasGradient object itself. Let's create a basic linear gradient to see how this all fits together.
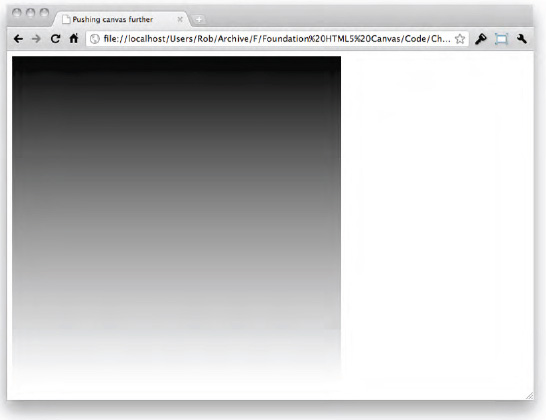
var gradient = context.createLinearGradient(0, 0, 0, canvas.height());
gradient.addColorStop(0, "rgb(0, 0, 0)");
gradient.addColorStop(1, "rgb(255, 255, 255)");

context.fillStyle = gradient;
context.fillRect(0, 0, canvas.width(), canvas.height());
The first thing you're doing here is creating a new CanvasGradient object using createLinearGradient, then assigning it to a variable so you can access it again. There are four arguments in the createLinearGradient method; the (x, y) coordinates for the start point of the gradient, and the (x,) coordinates for the end point of the gradient. The start and end points describe the length, position, and direction that the gradient is drawn. In the example you're drawing a gradient from the canvas origin in the top left, all the way to the bottom left. A linear gradient is drawn perpendicular to the line described by the start and end points, so in the example the gradient will be going from top to bottom.
Defining a CanvasGradient object is not enough; you need to apply some color to it. To do this you use two calls to the addColorStop method of the CanvasGradient object that you saved to a variable. There are two arguments in the addColorStop method; the offset of the color (between 0 for the start, and 1 for the end of the gradient), and a color value for that offset. The color value can be any CSS color value, just like fillStyle. In the example the gradient is going from black at the start (an offset of 0) to white at the end (an offset of 1).
Finally, the gradient is applied as a color value to the fillStyle property, which gives you a gradient from black to white that covers the entire canvas (see Figure 4-33).
Creating a radial gradient is a little different. In fact, creating a radial gradient can be damn confusing if you don't understand exactly how they work, especially because the results aren't the same across browsers (yet). Fortunately for you, my job is to break them down so they make sense to you, so let's give that a go now.
A radial gradient is created using the createRadialGradient method. This method requires six arguments; the first three describe one circle (the start circle), and the last three describe another (the last circle). These two circles themselves describe not only the direction and where the gradient starts and ends, but also the shape of the gradient. The three arguments that describe each circle are the (x, y) coordinate of the circle origin and the radius. The arguments described as strings are:
createRadialGradient(x0, y0, r0, x1, y1, r1);
The actual gradient is drawn as a cone that touches the edges of both circles, with the part of the cone before the start circle displaying in the color at offset 0, while the part of the cone beyond the end circle displaying in the color at offset 1. I appreciate that this is a difficult concept to grasp, so I've put together a diagram that will hopefully clear things up (see Figure 4-34).

Written in canvas code, this would look a little something like this:
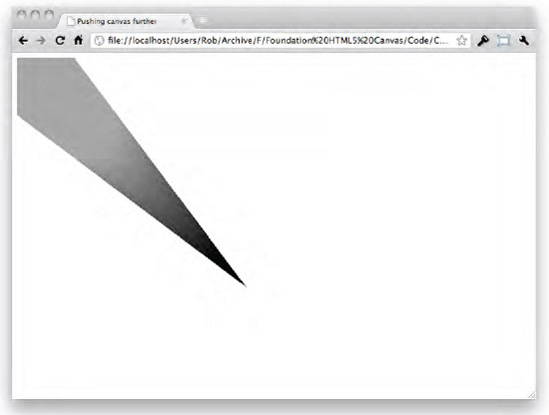
var gradient = context.createRadialGradient(300, 300, 10, 100, 100, 50);
gradient.addColorStop(0, "rgb(0, 0, 0)");
gradient.addColorStop(1, "rgb(150, 150, 150)");

context.fillStyle = gradient;
context.fillRect(0, 0, canvas.width(), canvas.height());
The start circle is at the coordinate position (300, 300) and has a radius of 10, while the end circle has a coordinate position of (100, 100) and a radius of 50. The resulting cone should look roughly like that in Figure 4-34, and will be black from the start circle (offset 0), fading to gray at the end circle (offset 1) (see Figure 4-35).
Now if I';m to be honest, this isn't what I imagined a radial gradient to look like; I imagine one to look like Figure 4-36.
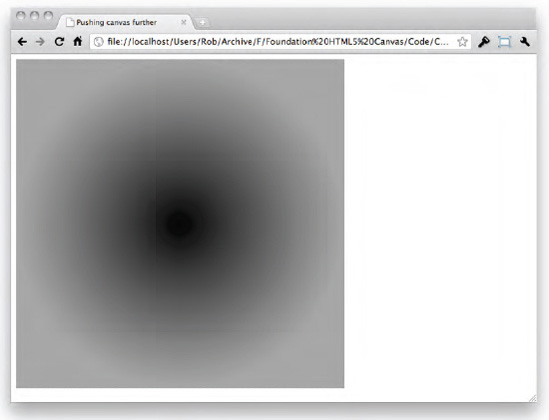
This kind of radial gradient is actually surprisingly simple to achieve; you just place the start and end circles at the same origin. That's it!
var canvasCentreX = canvas.width()/2;
var canvasCentreY = canvas.height()/2;

var gradient = context.createRadialGradient(canvasCentreX, canvasCentreY, 0, canvasCentreX, canvasCentreY, 250);
gradient.addColorStop(0, "rgb(0, 0, 0)");
gradient.addColorStop(1, "rgb(150, 150, 150)");

context.fillStyle = gradient;
context.fillRect(0, 0, canvas.width(), canvas.height());
By placing both circles on top of each other you cause the gradient cone to wrap around in 360 degrees and, so long as one of the circles is larger than the other, the gradient will run from the smaller circle all the way to the boundary of the larger circle.
Note
Although gradients are pretty awesome, it isn't always best to create them using canvas, especially if you're using them for entire backgrounds. It would be worth considering other options, such as CSS3 gradient backgrounds that are designed specifically for this task.
We covered paths briefly in the last chapter by learning how to draw straight lines, and arcs (to create circles). What's great about paths in canvas is that they get much more exciting than lines and simple circles; you can actually create all sorts of weird and wonderful shapes with them.
A solitary straight path is great; it draws a lovely line. What we failed to cover in Chapter 3 was how to draw more than one line at a time and have them combine to make a single shape. In fact, we already know all the code to do this, so I';m going to jump right in and show you how to connect multiple paths together.
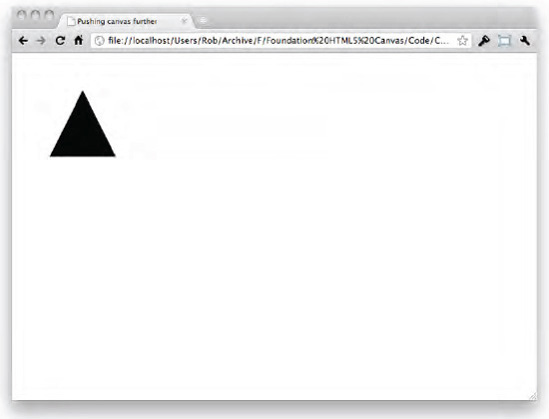
context.beginPath();
context.moveTo(100, 50);
context.lineTo(150, 150);
context.lineTo(50, 150);
context.closePath();
context.stroke();
context.fill();
You should recognize all the code; it begins a path, moves the origin of the current path, draws a line from the current path origin to a particular point, and wait... it draws another line to another point... and then it does it again! What's going on here then? What you've just done is uncover the secret behind connecting multiple paths together; you just keep drawing them. It's really as simple as that; any call to moveTo or lineTo will add the corresponding (x, y) coordinate value to something called a sub path. In fact, moveTo actually creates a whole new sub path, where as lineTo just adds on to an existing sub path. This sub path keeps track of the last coordinate value that was added to it, which is exactly how you can call multiple lineTo methods in a row. Each lineTo you call starts from the last coordinate value in the sub path (left by a moveTo call or a lineTo call), draws a line all the way to the coordinate value defined in the lineTo arguments, and then updates the sub path with that new coordinate value.
The triangle is finished off with a call to the closePath method, which will draw a line from the last point in the sub path to the first point — it closes the path. It also adds the start and end point, which is the same coordinate value now, to the sub path (see Figure 4-37).
To draw a curved line in canvas you could use the arc method or even the arcTo method (which draws an arc from one point to another), but these arcs have only one curved line that has the same radius. To create something a little more exciting you'll need to use one of the Bézier curve methods; either quadraticCurveTo, or bezierCurveTo.
Note
Don't be fooled by the names of the Bézier curve methods; they're both Bézier curves, even if one of them doesn't have Bézier in the name. The reality is that quadraticCurveTo is a quadratic Bézier curve, while bezierCurveTo is a cubic Bézier curve. Now, I dare you to go wow someone with this impressive fact.
Both kinds of Bézier curve use control points to manipulate a straight line into a curve; a quadratic Bézier curve has just one control point, meaning you have only one curve along the line, and a cubic Bézier curve has two controls points, meaning you have two curves along a single line. Figure 4-38 should help you visualize how both of these curves actually work; the quadratic Bézier is on the left, with the cubic Bézier on the right.

Creating either of these curves in canvas is just a case of calling either quadraticCurveTo, or bezierCurveTo. Let's start with quadraticCurveTo and see what happens.
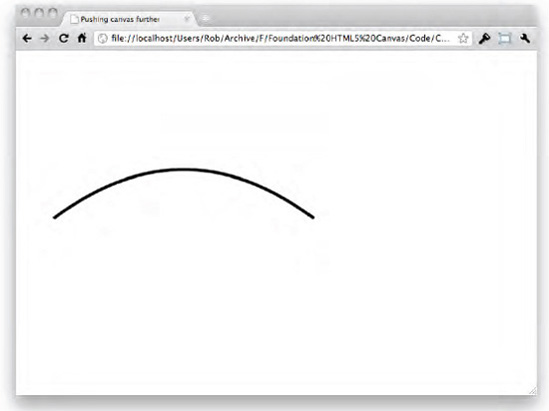
context.lineWidth = 5;
context.beginPath();
context.moveTo(50, 250);
context.quadraticCurveTo(250, 100, 450, 250);
context.stroke();
You know everything in this code apart from the quadraticCurveTo method. This method takes four arguments; the (x, y) coordinate value of the control point (cpx and cpy in Figure 4-38), and the (x, y) coordinate origin of the destination of the path. The control point has been placed at the horizontal (x) centre of the line and slightly above it in the vertical (y) direction (just like in Figure 4-38), which gives you a nice curved line like Figure 4-39.
And, creating cubic Bézier curves is just as easy:
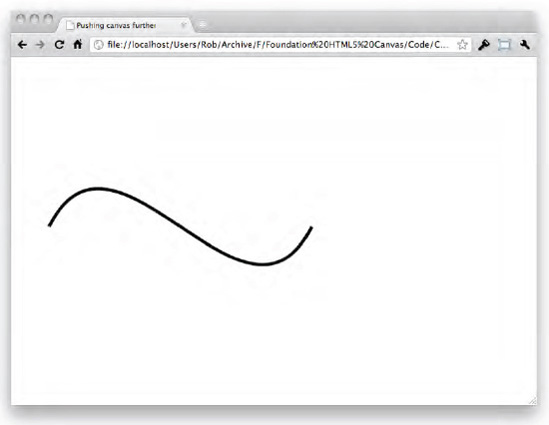
context.lineWidth = 5;
context.beginPath();
context.moveTo(50, 250);
context.bezierCurveTo(150, 50, 350, 450, 450, 250);
context.stroke();
The bezierCurveTo function takes six arguments; the (x, y) coordinate value of the first control point (cp1x and cp1y in Figure 4-38), the (x, y) coordinate value of the second control point (cp2x and cp2y), and the (x, y) coordinate origin of the destination of the path. Both control points are placed in a similar position to those in Figure 4-38, which gives you a funky double curve across your screen (see Figure 4-40). Cool, isn't it?
Now Bézier curves look cool, but they aren't that practical all on their lonesome. The great thing about Bézier curves is that they can be combined and attached to other paths to create some pretty wild and complicated shapes. No longer are you limited by straight lines and boring arcs!
Note
If you're freaking out right now wondering how on earth you're going to work out all the coordinate positions for your complicated shape, don't worry about it. There's a plug-in for Adobe Illustrator, called Ai->Canvas (http://visitmix.com/labs/ai2canvas/), that lets you convert your lovely vector drawings into canvas code; meaning that you don't have to calculate a single thing!
So far, everything you've drawn on to the canvas has remained stuck inside of the canvas, unable to be used anywhere else. This really sucks, especially if you want to export your beautiful canvas drawing and save it. But wait! Haven't I told you about canvas' amazing toDataURL method? I haven't? Darn. Well, this amazing little method turns your canvas drawing into something called a data URL, which you can use later to display it as a proper image in the browser. How cool is that?
Note
The Mozilla Firefox browser has functionality built in that allows you to right-click on a canvas element and save it as an image. The method it uses to do this is exactly the same as what you're doing with code using toDataURL.
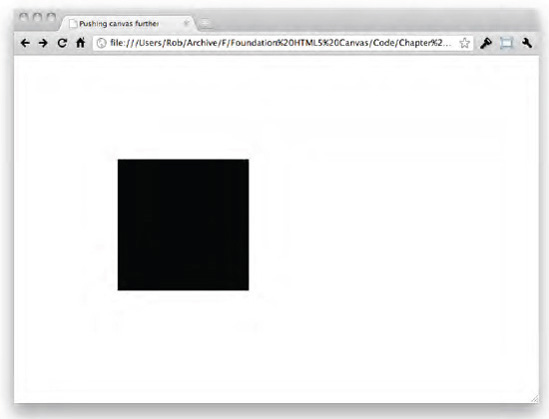
There really isn't much to the method, so let's go straight for it and export a basic drawing. I'll explain how it all works afterward.
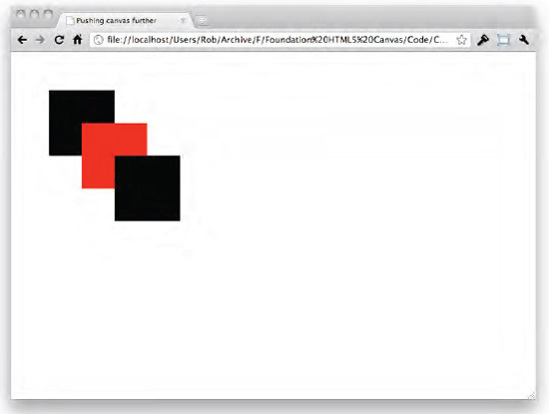
context.save();
context.fillRect(50, 50, 100, 100);

context.fillStyle = "rgb(255, 0, 0)";
context.fillRect(100, 100, 100, 100);

context.restore();
context.fillRect(150, 150, 100, 100);

var dataURL = canvas.get(0).toDataURL();
This will draw a selection of squares one after the other, and then assign the image data URL to the dataURL variable. You'll see the three squares in the browser (see Figure 4-41), but this is still the canvas image from earlier and not the exported image; I'll show you how to display that later.
The interesting thing in this example is the dataURL variable, and this is a snippet from the value that you've just stored in it:
data:image/png;base64,iVBORw0KGgoAAAANSUhEUgAAAfQAAAH0CAYAAADL1t+KAAAXvElEQVR4Ae3XQQ
4dNxYDwPkD3//KPZMDRItA0ovI8tINS81iG8T/fd/3H38IECBAgACBtwX++/bre3sCBAgQIEDgLwGD7jsgQI
AAAQIBAgY9oEQRCBAgQICAQfcNECBAgACBAAGDHlCiCAQIECBAwKD7BggQIECAQICAQQ8oUQQCBAgQIGDQfQ
MECBAgQCBAwKAHlCgCAQIECBAw6L4BAgQIECAQIGDQA0oUgQABAgQIGHTfAAECBAgQCBAw6AElikCAAAECBA
y6b4AAAQIECAQIGPSAEkUgQIAAAQIG3TdAgAABAgQCBAx6QIkiECBAgAABg+4bIECAAAECAQIGPaBEEQgQIE
CAgEH3DRAgQIAAgQABgx5QoggECBAgQMCg...
The actual output is much, much longer than that, but it's really only the first four words that you're interested in right now. Up first are the three words data:image/png; these describe that the text following is going to be a data URL in the format of a PNG image. The fourth word, base64, describes that the data is in the base64 encoding format. This format is common for the transmission of binary data (like images) over a system that uses text as data. All the crazy numbers, letters, and symbols after the base64 are actually the canvas image, as text.
Note
The canvas specification supports other types of images using the toDataURL method. However, PNG support is the default requirement and it's up to the individual browser manufacturers to implement support for anything else.
It's a pretty weird concept, but if you copied the string in the dataURL variable and pasted it into the address bar of a modern browser (so long as it doesn't limit the length of the URL you enter), you'd see an image of what you drew on the canvas. From there you can right click on it and save it to your desktop if you really want. Or, you can replace the canvas element in the example with the generated image:
var dataURL = canvas.get(0).toDataURL();
var img = $("<img></img>");
img.attr("src", dataURL);
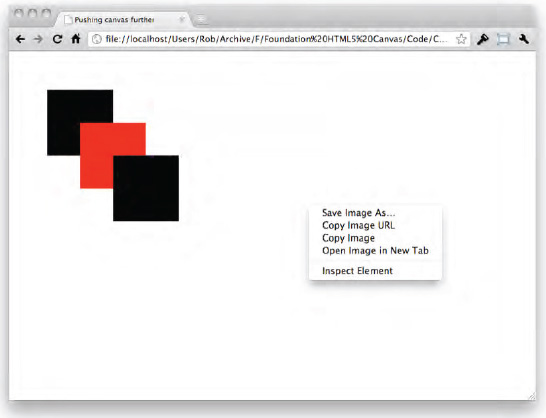
canvas.replaceWith(img);All you're doing here is creating a brand new HTML img element using jQuery, and then assigning the image data to its src attribute. The last thing you do is use the replaceWith method of jQuery to replace the canvas element with the img element that you've just created. What you should get as a result is an image where the canvas was that looks identical to what you drew on the canvas. You'll be able to tell if it's an image by right-clicking on it and seeing if you get an option to "Save Image As...", or similar (see Figure 4-42).
Note
It's worth pointing out that base64 data is about 50 percent larger than the original binary image data that it represents. This might not be an issue if you're only dealing with a small number of low file size images, but it has ramifications if you are dealing with large images, and images in general in a large quantity.
It's really up to you what you do with the image data, but knowing it's there and that you can actually export the canvas is pretty darn cool. You could even take things further and use canvas to draw a wild image and then export it and use it as a CSS background.
This has been a tough chapter, but I hope that you enjoyed it. You've learned about the drawing state and how it can be used to save you a lot of time. You've also learned about transformations and compositing, which allow you to create some pretty awesome shapes. On top of that you've seen how shadows and gradients can be used to help make your drawings slightly more realistic. From there you found out how to break away from simple shapes and create something a little more exotic with advanced paths. The chapter ended with a look at exporting the canvas as an image so you can save it to your computer or use it elsewhere within the browser.