
In this chapter, you're going to learn all about using images in canvas, from loading images to manipulating every single pixel within an image. This functionality of canvas is going to allow you to create some impressive effects, and will teach you a whole bunch about how image manipulation works in general.
The chapter ends with a special look at how to manipulate HTML5 video using canvas — applying amazing effects onto a video, on the fly. It's genuinely exciting stuff!
In the previous chapter you learned how to export canvas as an image, allowing you to save it locally and share it with others. You're now going to learn how to do the complete opposite; loading an image into canvas. The main reason you'd want to do this is that it allows you to perform all of the 2d rendering context methods and transformations on an image that wasn't originally created in canvas. You can also perform a few special pixel manipulation methods that let you do some pretty amazing things with images, which we'll go through after this section.
Note
Pixel manipulation in canvas doesn't actually require you to load in a traditional image, like a photo. Instead, the canvas itself is treated as an image, which means that anything you draw can be manipulated using the methods you'll learn in this chapter.
Loading an image into canvas is effectively as simple as drawing shapes — it's just one method. You need to call the drawImage method with at least three parameters: the image that you're drawing, and the (x, y) coordinate position to draw the image. The method in full, written in notational format, looks like this:
context.drawImage(image, x, y);
The image argument can be a HTML img element, a HTML5 canvas element, or a HTML5 video element. The fact that you're not limited to basic images makes this feature of canvas very interesting. You'll learn how to use and manipulate the HTML5 video element in canvas at the end of this chapter.
Note
There are actually two other ways to call the drawImage method, and each requires a different number of arguments. We'll go through both of these in the next section.
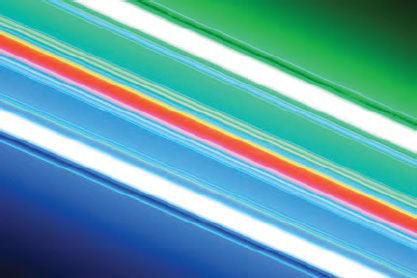
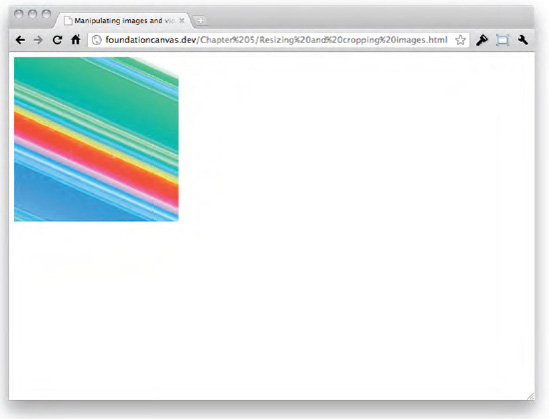
Let's start by drawing an HTML img element to the canvas using an image from the same directory as the HTML file (see Figure 5-1 for what the image looks like).
var image = new Image();
image.src = "example.jpg";
$(image).load(function() {
        context.drawImage(image, 0, 0);
});
The first thing that you're doing here is assigning a blank DOM object for a HTML img element by using the Image class. By then setting the src attribute to the path of a valid image file, you load that image into the image object just as if you set the src attribute of an actual HTML img element. This effectively creates a normal HTML img element, but without displaying it in the browser. You'd want to use this method if you want to pass an image to the canvas without actually putting it into the HTML code. If you still want to see the HTML image, there's nothing to stop you from skipping these steps completely and assigning the value of the image variable to the DOM object of an existing HTML img element.
Note
You're using a locally stored image file in this example, but you can quite easily load an image from another web site if you'd like. However, there are a few limitations to using external images, so I'd urge you to hold off until I explain those limitations in the section on accessing pixel values. For now, just know that canvas locks out certain functionality when external images are used.
Regardless of which method you used, you should now have access to the DOM object of an image. The last thing left to do is to pass that image object into the drawImage method of the 2d rendering context, but before you can do that, you need to make sure that the image has fully loaded. To do this, use the load method in jQuery, which is called when the load event is triggered on an element after it has fully loaded. You might remember this event from Chapter 2 when we discussed the various ways to load JavaScript after the page has loaded. One of those ways involved the load event on the window DOM object, and it's exactly the same event that you're using here. The reason you want to use this now and didn't want to use it before is that the load event is only triggered after everything has finished loading, including images. By assigning the jQuery load method to the image object directly, you can be sure that you're only waiting for the image to load and nothing else.
Now you know when the image has fully loaded; you place the drawImage method inside of the callback event that's run when the load event is triggered. The arguments for the drawImage method are the image object that you've just created, and the (x, y) coordinate values for the origin point of where you want to draw the image.
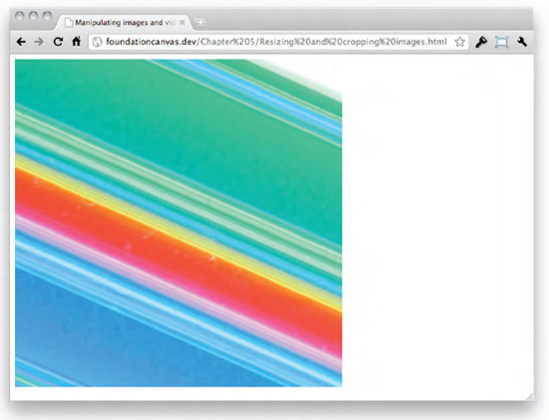
If you cross your fingers, you should get the image drawn onto canvas, albeit a little cropped (see Figure 5-2). However, there's no need to fear, because the cropping is due to the canvas being smaller than the image that you're drawing onto it, as the image is drawn at full size. In this example, the canvas is 500 pixels in width and height, and the example image is 1024 pixels in width, and 683 pixels in height.
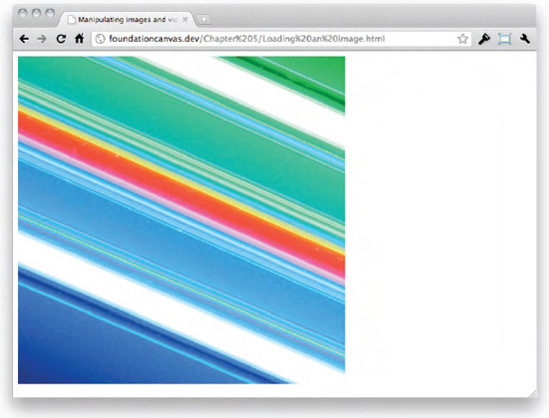
As you can see, loading an image into canvas isn't incredibly hard. However, not being able to see half of the image isn't much fun, so let's take a look at how to fit it correctly.
You already know about the first way of calling the drawImage method, which draws an image onto the canvas at its full size with the chance of being cropped at the edges. To overcome the cropping problem, you need to either resize the image or control the way that it is cropped. Perhaps unsurprisingly, there is a means to perform both of those tasks using the final two ways of calling the drawImage method; the first can resize the image, and the second can both resize and crop the image. The only difference between all of the ways to call drawImage is the amount and type of arguments used.
Just like drawing one at full size, resizing an image is really easy to understand; you literally just pass the width and height at which you want the image to be drawn. In notational form, the drawImage method with the arguments for resizing looks like this:
context.drawImage(image, x, y, width, height);
It's pretty straightforward really.
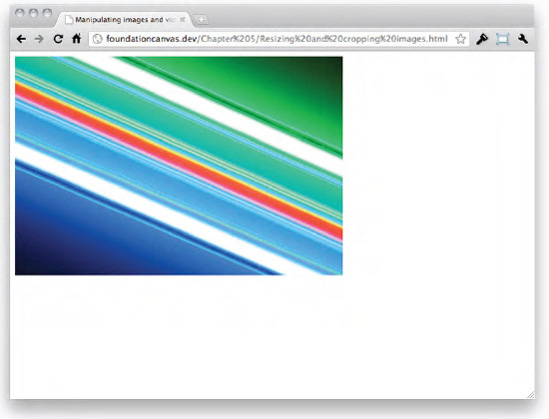
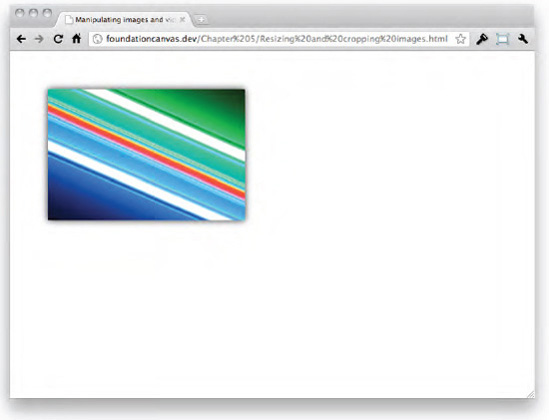
By changing the drawImage method in the previous example to the following, the image will be resized to fit within the canvas (see Figure 5-3).
context.drawImage(image, 0, 0, 500, 333);
You've used 500 pixels for the width, as that is the width of the canvas. The 333 pixels for the height were calculated from the aspect ratio of the original image (the ratio of the width to the height). To calculate the aspect ratio, you just divide the height by the width, which for the original image (1024 pixels wide and 683 pixels tall) results in an aspect ratio of 0.666992188 (683 % 1024). You can then use that ratio to work out the height of the resized image by multiplying the width by the ratio. For example, you know that the resized width is 500 pixels, so the height would be 500 × 0.666992188, which equals 333. You could also work the other way and calculate the width of the resized image if you already know the height. To do that you just divide the resized height by the aspect ratio, which, when using the numbers from the example, would result in 500 (333 % 0.666992188).
Resizing is great if you want to draw the entire image, but it doesn't give you enough options for those times where you want a little more control over the part of the image to draw. This is where cropping comes in.
The purpose of cropping is to cut something to a smaller size, usually because you only care about a particular part of the object that you're cropping. It's a technique that is commonly used in photography to focus on a particular area of a photograph. Cropping in canvas works in exactly the same way as it does in popular photo-editing applications, like Adobe Photoshop: you define a rectangle that represents the area that you want to keep, and everything outside of the rectangle will be removed.
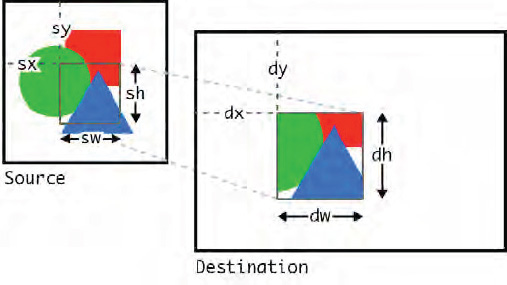
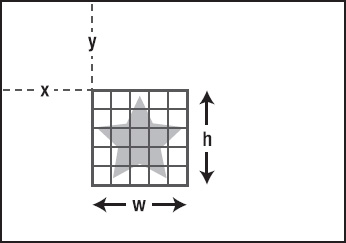
Cropping is the final way of using the drawImage method, and it uses a total of nine arguments: the source image, the (x, y) coordinate origin of the crop on the source image, the width and height of the crop on the source image, the (x, y) coordinate origin to draw the image on the canvas (the destination), and the width and height to draw the image on the canvas. In notational format, the arguments look like this (w stands for width, and h stands for height):
context.drawImage(image, sx, sy, sw, sh, dx, dy, dw, dh);
Trying to visualize exactly what all those arguments do can be quite hard, so Figure 5-4 should help clear things up.
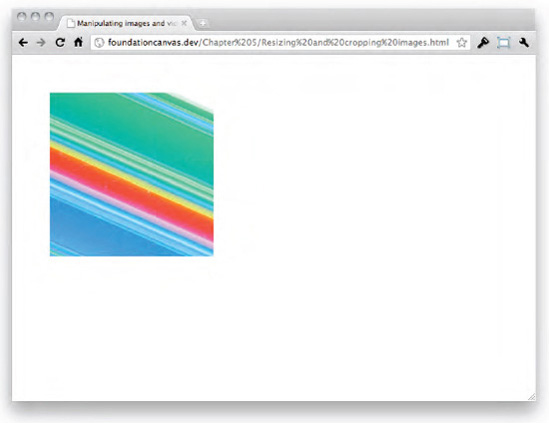
By putting this into practice you can crop out a small area of the image you used earlier and draw it onto the canvas:
context.drawImage(image, 0, 0, 250, 250, 0, 0, 250, 250);
In this example, you're cropping a 250 pixel square from the top left corner (0, 0) of the source image, then drawing it at the top left corner of the canvas with the same width and height (see Figure 5-5).
You can also resize the cropped image as you draw in onto the canvas, like so:
context.drawImage(image, 0, 0, 250, 250, 0, 0, 500, 500);
This does exactly the same as the last example, but instead of drawing the image at the same size as the cropped section, you're drawing it twice as large (see Figure 5-6).
It's important to briefly highlight an issue with the way shadows work on images when you crop them. In short, shadows work fine when you resize an image (see Figure 5-7).
context.shadowBlur = 20;
context.shadowColor = "rgb(0, 0, 0)";

var image = new Image();
image.src = "example.jpg";
$(image).load(function() {
        context.drawImage(image, 50, 50, 300, 200);
});
In some browsers, however, the shadows seem to disappear completely when you crop the image (see Figure 5-8).
context.shadowBlur = 20;
context.shadowColor = "rgb(0, 0, 0)";

var image = new Image();
image.src = "example.jpg";
$(image).load(function() {
        context.drawImage(image, 0, 0, 250, 250, 50, 50, 250, 250);
});
This only happens in the current release of WebKit browsers, like Safari and Chrome. The official specification states that images should be affected by shadows when drawn onto the canvas; it just seems like some browsers are yet to fully take on this approach.
And that is really all there is to resizing and cropping images in canvas. If you want to do more you can always use the transformation functionality of the 2d rendering context, as you're about to see.
As I mentioned in the first section of this chapter, drawing an image into canvas allows you to perform all of the 2d rendering context methods on it. Transformations are a set of methods that allow you to do some pretty cool things with images, as you learned in Chapter 4. You already know how transformations work, so let's jump right in and look at how they can be used with images.
This is by far the easiest transformation to perform on images.
context.translate(100, 100);
var image = new Image();
image.src = "example.jpg";
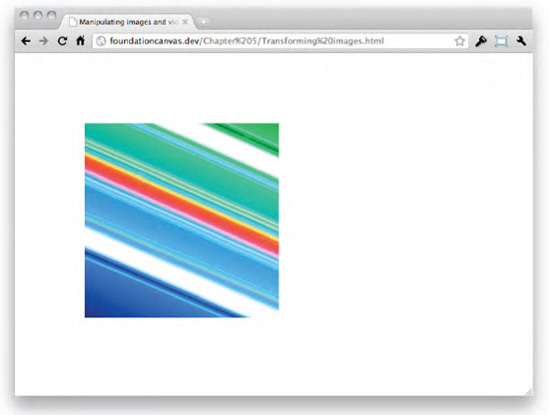
$(image).load(function() {context.drawImage(image, 0, 0, 500, 500, 0, 0, 300, 300); });
It will translate the canvas before drawing the image onto it; nothing that amazing (see Figure 5-9).
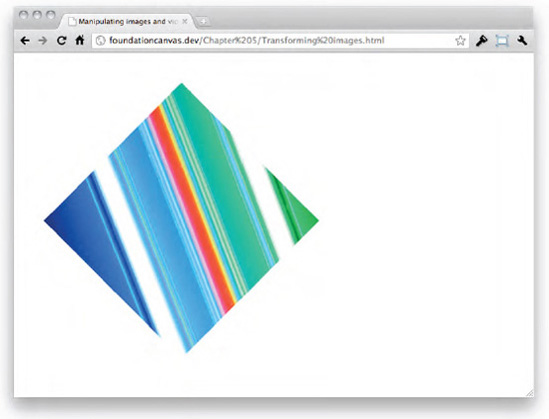
Rotating an image has previously been hard to achieve within the browser, but with canvas it's simple (see Figure 5-10).
context.translate(250, 250);
context.rotate(0.7854); // Rotate 45 degrees

var image = new Image();
image.src = "example.jpg";
$(image).load(function() {
        context.drawImage(image, 0, 0, 500, 500, −150, −150, 300, 300);
});
Again, this is nothing new in terms of code. What's interesting is that these methods can be used on previously static and boring images.
One of the most random uses of transformations is to completely flip the image. For example, you can create a kind of kaleidoscope effect by flipping the same image in various ways (see Figure 5-11).
var image = new Image();
image.src = "example.jpg";
$(image).load(function() {
        // Top left
        context.translate(50, 50);
        context.drawImage(image, 0, 0, 500, 500, 0, 0, 200, 200);

        // Bottom left
        context.setTransform(1, 0, 0, 1, 0, 0); // Reset the transformation matrix
        context.translate(50, 450);
        context.scale(1, −1);

        context.drawImage(image, 0, 0, 500, 500, 0, 0, 200, 200);

        // Bottom right
        context.setTransform(1, 0, 0, 1, 0, 0);
        context.translate(450, 450);
        context.scale(−1, −1);

        context.drawImage(image, 0, 0, 500, 500, 0, 0, 200, 200);
// Top right
context.setTransform(1, 0, 0, 1, 0, 0);
context.translate(450, 50);
context.scale(−1, 1);
context.drawImage(image, 0, 0, 500, 500, 0, 0, 200, 200);
});This is quite a lot to take in, but the process is actually very simple. All you're doing is drawing the same image in four different locations, each with a different scale factor. By using a negative scale factor, you're able to cause the image to flip over. Bear in mind that when the image flips over, the origin will be on the right of the image, so you have to shift the origin over a bit to compensate for it being drawn from right to left. For example, the top right image is drawn at the position (450, 50) because it has been flipped in the x direction, meaning that it will now be drawn from an x of 450 to an x of 250 (right to left).

It's all a little bit counter-intuitive, but it's a really simple way to create some pretty interesting effects. For example, this is exactly how you could create faux reflections in canvas.
While resizing, cropping, and transforming can be used to create interesting effects with images, there is yet another feature of canvas that lets you do even more: pixel manipulation. By accessing the individual pixels of the 2d rendering context, you're able to get information such as the color and alpha value of each pixel. You're also able to rewrite each pixel with a different color value so they look entirely different, but we'll get on to that in the following few sections.
The method that allows you to access pixels in canvas is getImageData. This method takes four arguments; the (x, y) coordinate origin of the pixel area you want to access, the width of the pixel area, and the height of the pixel area (see Figure 5-12). It looks like this in notational format:
context.getImageData(x, y, width, height);
Nothing visual will happen when you call getImageData, but you will get a 2d rendering context ImageData object returned. This ImageData object contains three attributes; width, the width of the pixel area you're accessing, height, the height of the pixel area, and data, a CanvasPixelArray that contains information about all the pixels in the area that you're accessing.
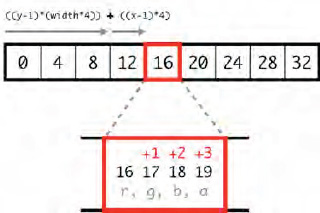
My hope is that the width and height attributes are self-explanatory; what we're really interested in is the data attribute. Stored within the data attribute is a CanvasPixelArray, a one-dimensional JavaScript array; each pixel represented by four integer values ranging from 0 to 255 that refer to the red (r), green (g), blue (b), and alpha (a) values (see Figure 5-13). So, the first four entries in the array (0-3) are the color values for the first pixel; the next four entries (4-7) are the color values for the second pixel, and so on. The CanvasPixelArray is where all the fun stuff happens, so it's important to get an understanding about exactly how it works.
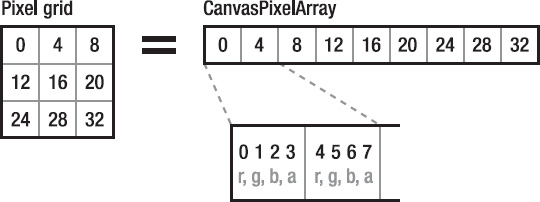
As a brief example before I explain everything, this is how you would access the RGBA values for the first pixel in the CanvasPixelArray, using the index numbers defined in Figure 5-13.
var imageData = context.getImageData(0, 0, 3, 3); // 3x3 grid
var pixel = imageData.data; // CanvasPixelArray

var red = pixel[0];
var green = pixel[1];
var blue = pixel[2];
var alpha = pixel[3];
A CanvasPixelArray has absolutely no knowledge of the dimensions of the pixel area that you're accessing. Instead, the array that gets returned is effectively just one long set of RGBA color values, equal to the number of pixels in the area that you're accessing multiplied by four (four color values for each pixel). For example, if you accessed a pixel grid with a width and height of three pixels, the CanvasPixelArray would have a length of 36 (3 × 3 × 4); a width and height of 200 would mean a length of 160,000 (200 × 200 × 4), and so on.
The order of pixels within a CanvasPixelArray is straightforward: the top left pixel is at the start of the array (from positions 0, red, to 3, alpha), and the bottom right pixel is at the end of the array. This means that in the area that you're accessing, the pixels go in a left to right direction until they reach the end of a row, then return to the beginning of the next row and go from left to right again (see the grid in Figure 5-13).
So, if a CanvasPixelArray is just one long string of color values that has no knowledge of the dimensions of the pixel area, how do you access a specific pixel from the array? In the example in Figure 5-13, how would you access the central pixel in the grid at (x, y) position (2, 2)? By looking at the diagram you can obviously see that it starts at index 16 in the array, but how would you know that without drawing it out? I wouldn't worry if you have absolutely no idea, as this is where I became completely and utterly confused when I was learning canvas. It messes with your head! Fortunately, some people who are cleverer than I have come up with a formula that allows you to get exactly the right pixel that you want from a CanvasPixelArray, and it's surprisingly easy to understand:
var imageData = context.getImageData(0, 0, 3, 3); // 3x3 grid

var width = imageData.width;
var x = 2;
var y = 2;

var pixelRed = ((y-1)*(width*4))+((x-1)*4);
var pixelGreen = pixelRed+1;
var pixelBlue = pixelRed+2;
var pixelAlpha = pixelRed+3;
The part of this that you're most interested in right now is the formula to work out the index for the red value of the pixel. Let's run through the formula piece by piece to see what's going on:
(y-1)
Because you're using non-zero coordinate values to define the (x, y) coordinate position of the pixel, you need to subtract the coordinate by one. This just converts the coordinate system that you're used to from the canvas to a zero-starting coordinate system for referencing the array.
(width*4)
This gives you the number of color values per row in the image. By multiplying the result of (y-1) with this number, you get the array index number at the beginning of the row that you're accessing (the y position). In the case of this example the index returned is 12, which matches with the second row in Figure 5-13.
(x-1)*4
Here you're first repeating the same thing that you did with the y position — converting to a zero-starting coordinate system. You then multiply the column that you're after (the x position) by four to get the number of color values in a row that exist before the column that you're accessing.
By adding the column index number to the row index number, you get a final number that gives you the index of the first color (red) for the pixel that you're after; which should be 16 for this example (see Figure 5-14).
Once you have the index of the red pixel, the rest is trivial. To get the remaining three color values — green, blue, and alpha — you simply add one, two, or three to the red index, respectively.
I appreciate that this isn't an easy concept to grasp, but I hope that I've explained it enough for you to understand the how and why behind accessing pixel values in canvas.
Before you move on, let's have a bit of fun by creating a simple color picker.
var image = new Image();
image.src = "example.jpg";
$(image).load(function() {
        context.drawImage(image, 0, 0, 500, 333);
});

canvas.click(function(e) {
var canvasOffset = canvas.offset();
var canvasX = Math.floor(e.pageX-canvasOffset.left);
var canvasY = Math.floor(e.pageY-canvasOffset.top);
var imageData = context.getImageData(canvasX, canvasY, 1, 1);
var pixel = imageData.data;
var pixelColor = "rgba("+pixel[0]+", "+pixel[1]+", "+pixel[2]+",
"+pixel[3]+")";
$("body").css("backgroundColor", pixelColor);
});I';m going to skip over the first few lines, as you already know what they do. The part that is interesting to you is the jQuery click method, which is called when a mouse click event is fired on the attached element; in your case, the canvas. The callback function in the click method passes an argument to you that contains information about the event, which you've referred to as e. This argument contains the mouse (x, y) coordinates of the click in relation to the whole browser window, which you're going to use to work out where a click has happened on the actual canvas.
By using the jQuery offset method, you're able to find out how many pixels are between the canvas and the top and the left sides of the browser window. You can then work out the x position on the canvas by subtracting the left offset of the canvas from the mouse x (pageX). If you repeat the same for the mouse y and top offset, you'll end up with the (x, y) coordinate position of the mouse click in relation to the origin of the canvas (see Figure 5-15).

Now you know the (x, y) position of the click on the canvas, the next step is retrieving the pixel color values at that point. To do that you pass the canvasX and canvasY values into a call to getImageData. You're only after the data for a single pixel, so that's why you've set the width and height of the call to getImageData to one; it just keeps the data as small as possible.
Once you have the ImageData object, it's just a case of storing it somewhere and accessing the CanvasPixelArray in the data attribute. As you only got the data of a single pixel, retrieving the color values is as simple as accessing the first four indexes in the CanvasPixelArray. You're going to change the CSS background of the whole Web page, so you use those values to construct a string representation of a CSS RGBA color value.
The final step is to pass that CSS color value to the jQuery css method, which allows you to change the background-color CSS property of the HTML body element. If all went well, this will set the background color of the Web page to the pixel that you clicked on the canvas (see Figure 5-16).
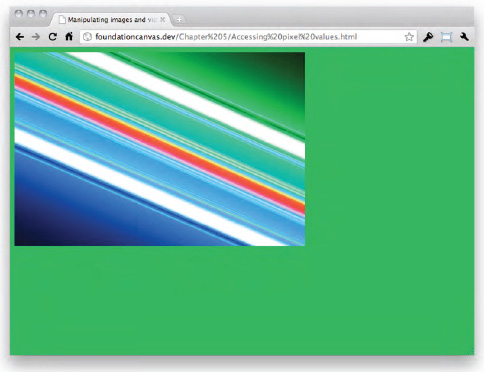
If you're working through these examples on your own computer, without uploading them to a web server, you might have noticed that either nothing happens or you get a security error. The reason for this is that canvas is pretty strict about accessing pixel-level data from images that aren't from the same place as the JavaScript that is controlling the canvas. The easy way to fix this problem is to run these examples on a web server, or a local development environment, like MAMP on the Mac, or WAMP on Windows. The important part of the solution is that both the JavaScript and image that you're accessing need to be accessed by the same domain name (such as rawkes.com). You might have noticed from the screenshots that I';m running the examples on a local development environment with the foundationcanvas.dev domain name.
As a rule of thumb, check that you're running everything off the same domain name if you run into issues with pixel manipulation.
The last section was pretty dense, but it will be worth it as you can now move onto the really cool stuff, like creating pixels from thin air to make your very own images.
To create pixels you need to call the createImageData method of the 2d rendering context. By passing the method a width and height, you'll get returned an ImageData object with all the usual attributes: width, height, and most important, data. The CanvasPixelArray contained in the data attribute holds your new pixels, which are invisible at the moment as they're all set to a transparent black color.
In the next example, you're going to create an ImageData object with an area of 200 × 200 transparent pixels, and then change them all to red.
var imageData = context.createImageData(200, 200);
var pixels = imageData.data;
The pixels variable is just used as a quick and easy way to the access the CanvasPixelArray for the pixels.
Changing the color values of a pixel is just as simple as retrieving the color value: you read or write the color value in the CanvasPixelArray. You want to change every pixel to red, so a for loop is needed that cycles through every single pixel.
var numPixels = imageData.width*imageData.height;

for (var i = 0; i < numPixels; i++) {
        pixels[i*4] = 255; // Red
        pixels[i*4+1] = 0; // Green
        pixels[i*4+2] = 0; // Blue
        pixels[i*4+3] = 255; // Alpha
};
The numPixels variable holds the number of pixels in the ImageData object, giving you the number of times needed to run the for loop. Within each loop you assign the color values for each pixel using a simple algorithm. You know each pixel has four color values, so by multiplying the pixel number by four you get the index of the red color value for that pixel in the CanvasPixelArray. You're then able to set the red color value to 255 (full color), green and blue to 0, and the alpha to 255 so it's opaque. Simple!
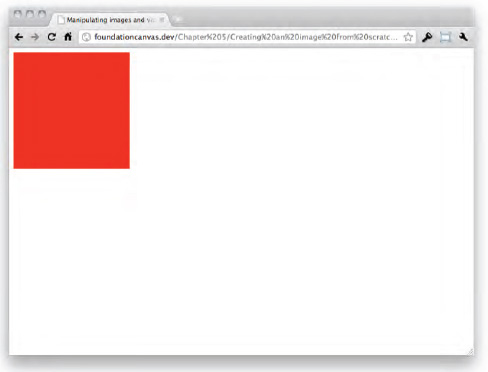
As it stands, all you've done is create an ImageData object and change the pixels to red. You won't be able to see anything on the canvas because you haven't drawn the new pixels onto it yet. To do this you need to call the putImageData method of the 2d rendering context. This method takes three or seven arguments: an ImageData object, the (x, y) coordinate origin to draw the pixel data, the (x, y) coordinate origin of something called a dirty rectangle, the width of the dirty rectangle, and its height. You can forget about the dirty rectangle for the purposes of this example; all it does is define which pixels to draw from the ImageData object.
context.putImageData(imageData, 0, 0);
This will draw your new red pixels at the canvas origin (see Figure 5-17).
A red set of pixels is great and all, but let's take things one step further and completely randomize the colors. It's really easy.
for (var i = 0; i < numPixels; i++) {
pixels[i*4] = Math.floor(Math.random()*255); // Red
pixels[i*4+1] = Math.floor(Math.random()*255); // Green
pixels[i*4+2] = Math.floor(Math.random()*255); // Blue
pixels[i*4+3] = 255; // Alpha
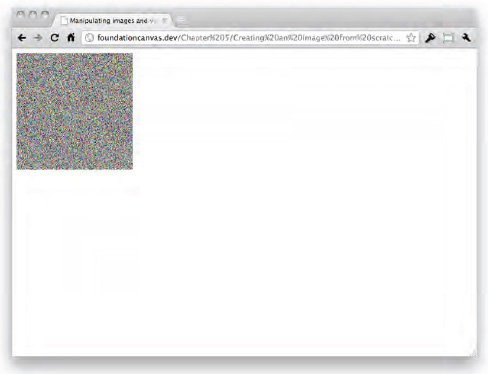
};By changing the section of the previous example that deals with setting color values, you're able to insert a random number between 0 and 255. You want to keep the alpha value as 255, otherwise some of your pixels will be slightly transparent. Note how you're using Math.floor to round down the resulting random number (eg. 150.456 would become 150).
The result of this is a slightly sickening mess of pixels (see Figure 5-18).
So, a mess of pixels isn't the best use of canvas. How about creating a nice mosaic effect? That's definitely a little more interesting. You'll do this is by creating an area of new pixels, then splitting it up into a grid and setting each segment of the grid to a random color. The complicated part is trying to work out what segment each pixel falls into, so you can set the same color for the pixels that are in the same segment. If you look at Figure 5-19 you'll see how each segment would actually be made up of many pixels.
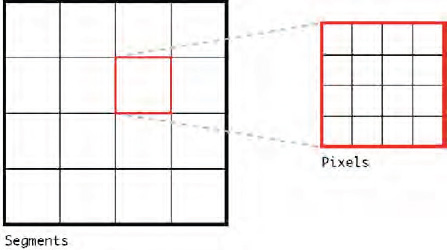
I'll go through how to work out the pixels within each segment shortly. For now, let's set up the groundwork for the mosaic.
var imageData = context.createImageData(500, 500);
var pixels = imageData.data;

// Number of mosaic tiles
var numTileRows = 4;
var numTileCols = 4;

// Dimensions of each tile
var tileWidth = imageData.width/numTileCols;
var tileHeight = imageData.height/numTileRows;
The first two lines should be second nature to you by now; they set up an ImageData object of 500 × 500 pixels, and store the CanvasPixelArray in a variable. Following those lines are two variables that are being used to declare the number of segments that you want to break the area of pixels into; the amount per row, and the amount per column. From now on we'll refer to segments as tiles, as it's a better description of what they actually are. The last two lines calculate the width and height of each tile in pixels, based on the dimensions of the ImageData object, and the number of tiles per row and column.
You now have enough information to start looping through the tiles and changing the pixel color values.
for (var r = 0; r < numTileRows; r++) {
for (var c = 0; c < numTileCols; c++) {
// Set the pixel values for each tile
var red = Math.floor(Math.random()*255);
var green = Math.floor(Math.random()*255);
var blue = Math.floor(Math.random()*255);
};
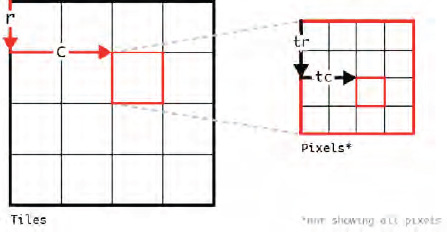
};This is a nested loop; the first looping through each row of tiles, the second looping through each column of tiles within the current row (see the left grid in Figure 5-20). Each tile has a new set of color values assigned, based on random numbers between 0 and 255. It's all pretty basic stuff so far.
Now, within the column loop and underneath the color values, you want to declare two more loops:
for (var tr = 0; tr < tileHeight; tr++) {
        for (var tc = 0; tc < tileWidth; tc++) {

        };
};
These loops cycle the same number of times as the pixels within each tile, based on the tile dimensions that you calculated previously. The tr and tc variables represent the pixel row (based on the tile height) and pixel column (based on the tile width) that you're accessing for the current tile (see the right grid in Figure 5-20). In this example, each tile is 125 pixels wide and 125 pixels tall, so tr will loop 125 times, and within each of those loops, tc will loop a further 125 times.
However, this still doesn't give you access to the actual pixels within each tile. All you know right now is the row and column of the tile that you're on (the r and c variables), and the row and column of the pixel that you're on within that tile (the tr and tc variables). On their own, these variables aren't enough to access a pixel from the CanvasPixelArray. To do that you need to convert them into a zero-starting (x, y) position of the pixel, as it would be if there were no tiles. It sounds a bit crazy, but bear with me.
Add the following within the second loop, and I'll explain what's going on; it's really simple:
var trueX = (c*tileWidth)+tc;
var trueY = (r*tileHeight)+tr;
These two variables calculate the true position of the pixel. For example, to calculate the x position you first multiply the current tile column (2) by the width of a single tile (125), which gives you the x position at the left hand edge of the tile that you're on (2 × 125 = 250). From there you add the column number of the pixel that you're accessing within that tile (e.g. 10), which will give you the exact x position as if there were no tiles (250 + 10 = 260). By repeating the same process for y, you get the (x, y) coordinates that you need to start changing pixels color values.
Add the following after assigning values to trueX and trueY:
var pos = (trueY*(imageData.width*4))+(trueX*4);

pixels[pos] = red;
pixels[pos+1] = green;
pixels[pos+2] = blue;
pixels[pos+3] = 255;
There is nothing new here; all you're doing is accessing the red color value for the pixel that you're after, and then assigning the color values that you set earlier. Because you're using zero-based counting here, you don't have to subtract trueX and trueY by 1, like you did when you originally saw this formula.
The final step is to draw your pixels onto the canvas, so add the following call to putImageData outside and underneath of the four loops:
context.putImageData(imageData, 0, 0);
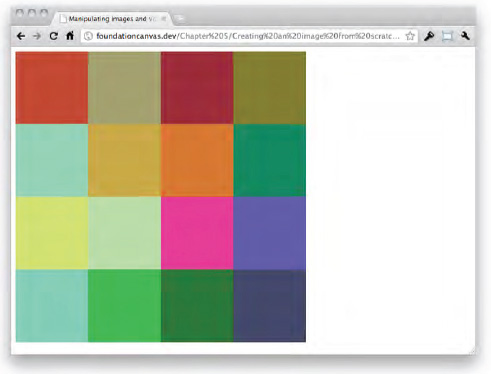
If all went well, you should get a lovely mosaic effect on the canvas (see Figure 5-21).
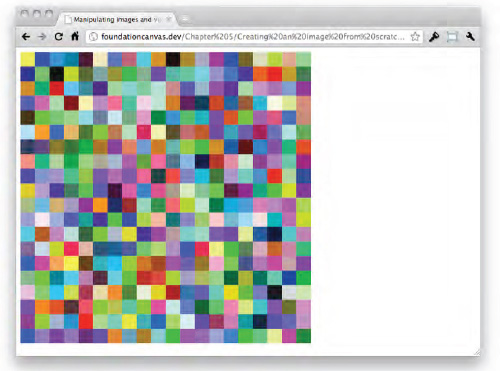
You can even change the number of tiles per row and column to create a much more interesting effect (see Figure 5-22).
I think you should sit back and take a nice deep breath — you've achieved an incredible amount in this section!
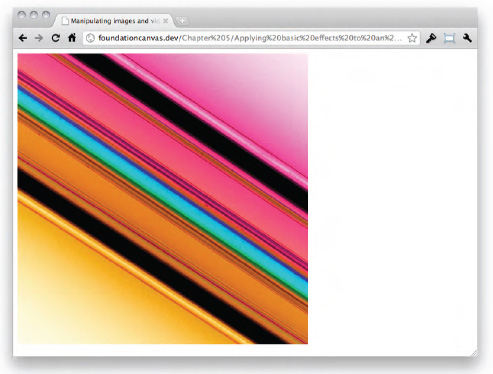
Changing color values of pixels doesn't mean that you have to create an entire image from scratch; you could always just change the look of something that already exists. One example of this would be basic photo manipulation — the modification of pixels within an image to change the way that it looks. These kinds of effects are trivial to implement in canvas, especially now that you're an expert in pixel manipulation.
This effect reverses the color values of an image and causes it to look, for lack of a better word, a bit weird. The basic premise is that you subtract the existing color value of a pixel (150), from 255 to reverse, or invert, the color (255-150=105). Let's try something a bit different and go through the code in one go; there's nothing new.
var image = new Image();
image.src = "example.jpg";
$(image).load(function() {
        context.drawImage(image, 0, 0, 1024, 683, 0, 0, 500, 500);

        var imageData = context.getImageData(0, 0, canvas.width(), canvas.height());
var pixels = imageData.data;
var numPixels = pixels.length;
context.clearRect(0, 0, canvas.width(), canvas.height());
for (var i = 0; i < numPixels; i++) {
pixels[i*4] = 255-pixels[i*4]; // Red
pixels[i*4+1] = 255-pixels[i*4+1]; // Green
pixels[i*4+2] = 255-pixels[i*4+2]; // Blue
};
context.putImageData(imageData, 0, 0);
});The first few lines create a new Image object and load in the example image that you used in previous sections. After waiting for the image to load, you draw the image to the canvas and store the ImageData object containing all the pixels in a variable. Once you've got the pixels stored, you clear the canvas and start a loop that runs for as many times as there are pixels in the original image.
Within the loop you use the same approach as the first example in the previous section (the red square) to access the pixels and subtract the current values from 255. You don't need to do anything with the alpha value, as you want to keep the value that was used in the original image.
The last thing to do is draw the pixels back onto the canvas, which should leave you with an inverted image (see Figure 5-23). Weird!
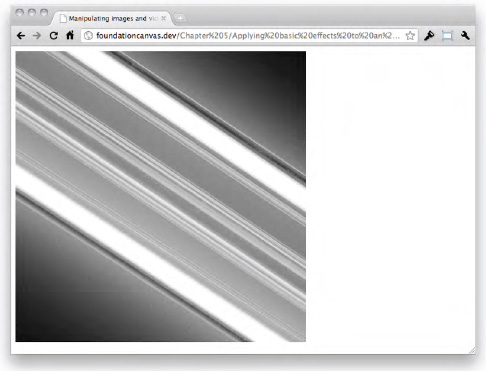
Another cool effect, and perhaps a slightly more useful one, is grayscale. This is the conversion of a color image into one that uses shades of gray; sometimes referred to as black and white, although that's not an accurate description. The code is identical to the inversion example, apart from the part that accesses and changes the color values.
for (var i = 0; i < numPixels; i++) {
        var average = (pixels[i*4]+pixels[i*4+1]+pixels[i*4+2])/3;
        pixels[i*4] = average; // Red
        pixels[i*4+1] = average; // Green
        pixels[i*4+2] = average; // Blue
};
Converting colors into grayscale requires you to find the average of the existing color values, by adding them all together and dividing by the number of colors. You use the averaged color as the value for all three colors; red, green, and blue. The result will be a shade of gray for each color (see Figure 5-24).
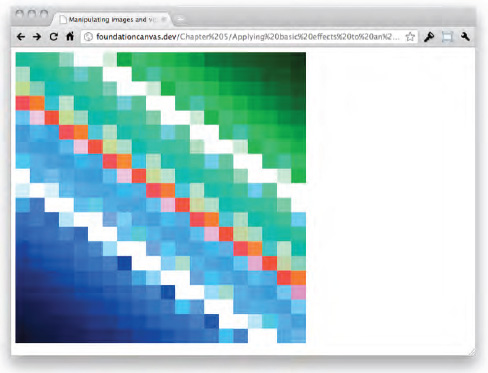
Have you ever watched the news or a documentary and seen a person with a pixelated face? It's a great effect that allows you to make part of an image unrecognizable, without literally removing an entire section. It's actually relatively easy to recreate in canvas; you just split an image into a grid and either average the colors within each segment, or pick a color within each segment. The code that you're going to use is very similar to that of the mosaic example in the last section.
var image = new Image();
image.src = "example.jpg";
$(image).load(function() {
        context.drawImage(image, 0, 0, 1024, 683, 0, 0, 500, 500);

        var imageData = context.getImageData(0, 0, canvas.width(), canvas.height());
        var pixels = imageData.data;

        context.clearRect(0, 0, canvas.width(), canvas.height());

        var numTileRows = 20;
        var numTileCols = 20;

        var tileWidth = imageData.width/numTileCols;
        var tileHeight = imageData.height/numTileRows;

        for (var r = 0; r < numTileRows; r++) {
                for (var c = 0; c < numTileCols; c++) {

                };
        };
});
You already know everything up to the loops. You're accessing the image, waiting for it to load, drawing it to the canvas, storing the ImageData object, clearing the image from the canvas, and assigning values that define the quantity and dimensions of the tiles (segments) into which you're splitting the image.
The two loops work in the same way at the mosaic example: the first loops through each row of tiles, while the second loops through each tile within the current row. The juicy new stuff is within the loops; this is where you're accessing the color values and creating the pixelated effect.
You're going to use the second method to grab a color for the pixelated effect, picking a single color within each tile. The simplest way to do this is to use the pixel at the centre of the tile, which you can work out by adding the following code inside the second loop.
var x = (c*tileWidth)+(tileWidth/2);
var y = (r*tileHeight)+(tileHeight/2);

var pos = (Math.floor(y)*(imageData.width*4))+(Math.floor(x)*4);
The first two lines give you the zero-starting (x, y) coordinate of the central pixel within the current tile. The calculations work in a very similar way to the mosaic example, in that you find the (x, y) coordinate position at the edge of the tile, and then add half the width or height to find the centre. This (x, y) coordinate position is then plugged into the standard formula that gives you the index number of the pixel in the CanvasPixelArray. Although you'll notice that you're wrapping the (x, y) values in the floor method of the Math object. The reason for this is that the returned index will be wrong unless the (x, y) values are integers, so you use floor to round the value to the next lowest integer (e.g., 3.567 would become 3).
Finally, you now have everything you need to access the color values and draw the pixelated effect. Insert the following code after declaring the pos variable.
var red = pixels[pos];
var green = pixels[pos+1];
var blue = pixels[pos+2];

context.fillStyle = "rgb("+red+", "+green+", "+blue+")";
context.fillRect(x-(tileWidth/2), y-(tileHeight/2), tileWidth, tileHeight);
None of this should be new to you; all you're doing is accessing the red, green, and blue color values and using them to set the fillStyle. The final step is to draw a square in the place of the tile, which is filled using the color that you just accessed. The result is a pretty impressive looking pixelated version of the example image (see Figure 5-25).
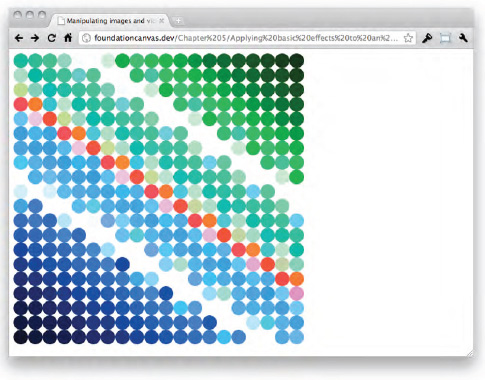
You could even take this a step further and change the squares to circles (see Figure 5-26).
context.beginPath();
context.arc(x, y, tileWidth/2, 0, Math.PI*2, false);
context.closePath();
context.fill();
Back in the first section of this chapter, I mentioned how the drawImage method can accept a HTML5 video element as input. It's now time to explore this interesting and exciting area of image manipulation in canvas, by pixelating a video. Now, if you're expecting video manipulation to be difficult, then I';m afraid you're going to be severely disappointed; it's hardly any different to manipulating images! However, it's definitely much cooler.
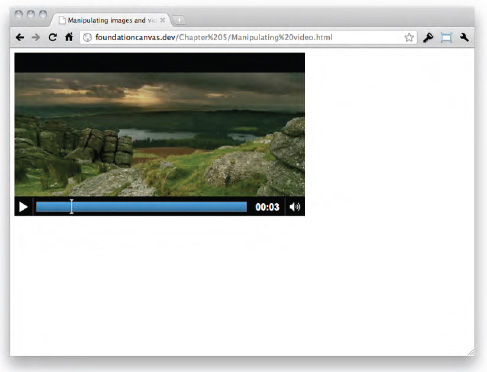
Before you can start doing the cool stuff, you need to set up the HTML5 video element. Insert the following inside of the body element of the HTML page.
<video id="myVideo" width="500" height="281" controls>
        <source src="example.mp4" type="video/mp4"></source>
        <source src="example.ogg" type="video/ogg"></source>
</video>
You're using an example video that has been provided with the code (thanks to James Watson), but feel free to use your own video if you'd like. If you do use your own video, then remember to change the width and height of the video element, and encode it in both MPEG-4 and OGG format if you want it accessible on the majority of browsers.
As it stands, the only code in your Web page should be the basic template that was provided when you learned about the 2d rendering context in Chapter 3, with the video element as the only code within the body element. If all went well you should have something that looks like Figure 5-27. You should be able to play the video, as you used the controls attribute when defining the video element.
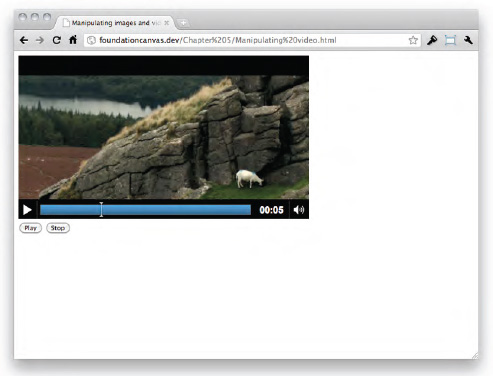
Although this is undoubtedly cool (HTML5 video just is), it's nothing compared to what you're about to do. The next step is to create a couple of HTML button elements that you're going to use to control the video using JavaScript. Insert the following code below the video element.
<div>
        <button id="play">Play</button>
        <button id="stop">Stop</button>
</div>
Linking these buttons up with the video is a relatively straightforward task in JavaScript; you just access the HTML5 video element API. To do this you'll need to put the following code inside the document ready function in the script element.
var video = $("#myVideo");

$("#play").click(function() {
        video.get(0).play();
});
$("#stop").click(function() {
video.get(0).pause();
});The first line assigns the jQuery object for the video element to the video variable. Following that are two calls to the jQuery click method; each with a callback function. Within each callback function is a call to a HTML5 video element API method; one calling play, and the other calling pause. Both of these methods are part of the video DOM object; so you'll need to call the jQuery get method beforehand, just like you do when accessing the 2d rendering context with the canvas element. Calling play and pause is all you need to do to start and stop the video from JavaScript (see Figure 5-28); it really is that simple!
Seeing as you're going to be using a near identical pixelation effect as in the previous section, you won't actually need to see the original video. So, let's kill two birds with one stone and put the video element inside of a canvas element that is the same dimensions as the original video.
<canvas id="myCanvas" width="500" height="281">
        <video id="myVideo" width="500" height="281" controls="true">
                <source src="example.mp4" type="video/mp4"></source>
                <source src="example.ogg" type="video/ogg"></source>
        </video>
</canvas>
It's also worth setting up the trusty JavaScript variables to store the canvas objects.
var canvas = $("#myCanvas");
var context = canvas.get(0).getContext("2d");
Anyone who uses a browser that supports HTML5 canvas will see nothing, while anyone using a browser that doesn't support HTML5 canvas, but that supports HTML5 video, will see the video. For now, you want to be able to see nothing; that's a good thing (see Figure 5-29).
There are a few things you need to do in preparation for manipulating the video. Insert the following code below the context variable:
video.bind("play", function() {
        drawCanvas();
});

function drawCanvas() {
        if (video.get(0).paused || video.get(0).ended)
                return false;

};
The first thing that you're doing is using the jQuery bind method to create a callback function that is run whenever the video starts playing; you do this by listening for the play event. Within the callback function, you're calling a custom function that you're about to create. This function will hold all the functionality that creates the pixelated effect and draws everything to the canvas.
Creating the drawCanvas function is the second thing that you're doing. By using a conditional statement, you're able to check whether the video is paused or stopped and, if so, stop the function from running by issuing a call to return. You can find out the status of the video by checking the values of the paused and ended attributes of the HTML5 video API. It's good practice to perform checks like this so you don't run things unnecessarily, like trying to pixelate the video if it's not actually playing any longer.
Now it's time to get creative and pixelate the video. This is the fun part! Insert the following code below the conditional statement.
context.drawImage(video.get(0), 0, 0, 500, 281);

var imageData = context.getImageData(0, 0, canvas.width(), canvas.height());
var pixels = imageData.data;

context.clearRect(0, 0, canvas.width(), canvas.height());

var numTileRows = 36;
var numTileCols = 64;

var tileWidth = imageData.width/numTileCols;
var tileHeight = imageData.height/numTileRows;

for (var r = 0; r < numTileRows; r++) {
        for (var c = 0; c < numTileCols; c++) {
                var x = (c*tileWidth)+(tileWidth/2);
                var y = (r*tileHeight)+(tileHeight/2);

                var pos = (Math.floor(y)*(imageData.width*4))+(Math.floor(x)*4);

                var red = pixels[pos];
                var green = pixels[pos+1];
                var blue = pixels[pos+2];

                context.fillStyle = "rgb("+red+", "+green+", "+blue+")";
                context.fillRect(x-(tileWidth/2), y-(tileHeight/2), tileWidth,
tileHeight);
        };
};
Everything in this code is the same as the pixelation code you used in the previous section, apart from the first line and the number of tiles per row and column. The first line, the call to drawImage, is different because it now takes the HTML5 video element as the first argument. This works because drawImage uses the current frame of a HTML5 video element to draw onto the canvas, which is useless if you only call it once (it would be a static image), but amazing if you call it at the same speed as the video. You'll see how to do that bit in a moment.
Calculating the number of tiles per row and column is done by first working out the ratio of the video (281%500=0.562); then deciding on an arbitrary number of tiles per row (e.g., 64), and using the ratio to calculate the tiles per column (64×0.562=35.968=36). This will give you tiles that are, for all intents and purposes, square. Simple!
The final nail in the coffin for this effect is to add a timer to the end of the drawCanvas() method that calls the method again at roughly the same speed as the frame-rate of the video. You can do this by adding a setTimeout call after the two loops in the drawCanvas function.
setTimeout(drawCanvas, 30);
This timer will run very, very fast, but because of the check at the top of drawCanvas, it will only run if the video is actually playing.
If all went well, and I';m sure it did, you should get a pixelated video showing on the canvas when you click the play button (see Figure 5-30).

Clicking the stop button will pause the video and the pixelation effect, and clicking play again will continue from wherever you paused it. You could even change the rectangles for circles like in the pixelation example in the last section (see Figure 5-31)!

Some congratulations are in order I reckon; you've achieved something pretty amazing in this section. You'd definitely find it incredibly difficult to find someone who doesn't drool at the awesomeness of this video manipulation.
On a scale of one to complex, this chapter was well up there on the old complexity. You should definitely be proud about what you've achieved in the space of a few pages. Actually, it was more than a few pages, but you get the idea.
You've learned how to load an image into the canvas, and you've learned about resizing and cropping of images to get them to display how you want. You even learned how to transform images to create some pretty wild effects. You've taken things to a higher level and discovered the world of pixel manipulation, something that is genuinely pretty hard to grasp on the first sitting. I'd definitely encourage you to go back and look at pixel manipulation again if you're still a little unsure about it.
The climax of the chapter was looking at how to use pixel manipulation to create your own images, as well as using it to perform modifications on existing images. The final project you created showed you how to modify HTML5 video; a feature of canvas that is pretty darn inspiring.
This has been a wild chapter, but the techniques that you've learn here will probably prove to be some of the most visually stunning out of everything that you'll learn in this book. From here on we're going to look at how to inject some motion into your static canvas drawings; learning everything that you'll need to create some amazing games.